Posted on

How to formulate custom t-shirts: Printing methods, costs, and design tips

generate a custom shirt with Klothing
Get started Making custom t-shirts isn’t that challenging. Some methods involve professional equipment and bulk production, while others are as simple as uploading a design and ordering in a few clicks.This guide breaks down how to formulate custom t-shirts in eight different ways – from budget-amiable DIY to Print on Demand – so you can pick the method that fits your goals, budget, and skill level.
Key takeaways DIY t-shirt printing techniques like iron-on transfers and heat transfer vinyl are best for hands-on experimentation at home. Digital printing methods like direct-to-garment and dye sublimation deliver detailed, professional-quality results.Screen printing is best for bulk custom shirt orders with simple, bold designs. Print on Demand is a low-hazard way to design and market custom shirts with no upfront costs, order minimums, or equipment.How to formulate custom shirts: 8 Methods for printing teesIf you’re exploring how to formulate custom t-shirts, the first step is choosing the right printing method. The best option depends on your budget, design, fabric choice, and quantity of shirts.Here are eight ways to formulate custom t-shirts at home and through professional services.1. Print on DemandBest for: Starting a brand from scratch and selling your own designs without managing equipment or fulfillment.Difficulty: effortless.Tools and materials: A computer and internet access.Upfront cost: No fees and no minimum order requirements. Your custom t-shirt cost covers the base garment and print, and you only pay when a sale happens. Design flexibility: Ideal for detailed artwork, photos, gradients, and multi-color t-shirt designs.Durability: Varies depending on the decoration method and fabric, but most professional digital printing methods are designed for lengthy-term wear.Print on Demand (POD) is one of the easiest ways to formulate custom t-shirts without buying equipment or storing inventory. Instead of printing the shirt yourself, you generate the design, and a POD partner handles the production and shipping.There are no order minimums, so you can order one custom-printed t-shirt for yourself or market them around the world as demand grows.While the overall process is similar across platforms, choosing the right POD company makes a large difference in quality, cost, and flexibility. With Klothing, you get competitive pricing, multiple print methods, and access to one of the largest Product Catalogs in the industry – over 1,300 products.Here’s how it works:generate your artwork using an online design tool, draw it by hand and scan it, or utilize your own photo. formulate sure the final file is high resolution for keen details and powerful print quality.Sign up for a free Klothing account and opt for a shirt from our Catalog based on fabric, fit, and available print areas – whether you desire just the front print or multiple placements on the same garment. initiate designing by uploading your artwork, logo, or photos to the Product Creator, then adjust their placement. If you’re still on the fence about your design, you can always preserve your t-shirt design template for later.Order print samples to verify quality, or link your online store and initiate selling immediately.Once customers order t-shirts, our Print Providers handle production, packaging, and shipping, while you focus on designing and building your brand.
Unisex Garment-Dyed T-shirt
By Comfort Colors® ·
1717
From $12.41
From $10.72 with Klothing Premium 7 sizes61 colors12 print providers
Unisex Softstyle T-Shirt
By Gildan ·
64000
From $7.95
From $5.99 with Klothing Premium 9 sizes66 colors20 print providers
Unisex Heavy Cotton Tee
By Gildan ·
5000
From $8.80
From $5.92 with Klothing Premium 8 sizes70 colors22 print providers
Unisex Creator 2.0 T-shirt
By Stanley Stella ·
STTU169
From $14.64
From $10.82 with Klothing Premium 10 sizes37 colors5 print providers
Unisex Tie-Dye Tank Top
By Port & Company® ·
PC147TT
From $17.44
From $12.87 with Klothing Premium 7 sizes6 colorsFulfill Engine
Unisex Jersey T-Shirt
By Prime Essentials
From $10.69
From $7.74 with Klothing Premium 8 sizes18 colors4 print providersMake a custom t-shirt today
initiate selling 2. Iron-on transfer paperBest for: Beginners learning how to formulate shirts at home in tiny batches.Difficulty: effortless.Tools and materials: Inkjet printer, transfer paper, iron, scissors, and a cotton t-shirt.Upfront cost: $20-$300 for the equipment.Design flexibility: Works best for simple graphics and medium-sized prints.Durability: Moderate. Designs can last through multiple wash cycles, but are generally less durable than screen- or digitally-printed artwork. That’s because the transfer layer sits on top of the fabric rather than bonding with the fibers.Iron-on transfer paper is one of the most accessible ways to print custom t-shirts at home. The process is beginner-amiable as lengthy as you pursue instructions and pay attention to heat and pressure.How iron-on transfers labor:Print your custom t-shirt design or logo onto transfer paper using an inkjet printer.Trim the design close to the edges to reduce excess film around the artwork.Place the transfer onto your cotton shirt and press with a hot iron, applying firm, even pressure for 30-60 seconds per section.Let it cool, then carefully peel away the backing sheet.To safeguard the design for longer, turn the shirt inside out when washing it.3. Direct-to-garment (DTG) printingBest for: tiny businesses printing custom t-shirts regularly.Difficulty: Advanced. Tools and materials: DTG printer, pre-treatment solution or machine, heat press, inks, and blank garments.Upfront cost: $3,000–$15,000 for the equipment, depending on print quality and speed. Design flexibility: Excellent for detailed artwork, photos, and gradients. Durability: lengthy-lasting when heat-cured correctly and washed in cold water.DTG is a t-shirt printing method where a specialized printer applies ink directly to the custom t-shirt, allowing the design to soak into the fabric for a soft feel and detailed complete.  While the printer is usable at home, it’s not very practical for most hobbyists because it’s expensive and requires regular maintenance.Here’s how DTG works:Apply a pre-treatment solution to the blank shirt so the ink bonds properly to the fabric.Place the shirt onto the printer and upload your design file to print.Let the printer spray ink directly onto the shirt. utilize a heat press to cure the ink and lock the design into the fabric.  For selling custom t-shirts, DTG can deliver professional-quality tees that customers will feel confident wearing. 
Read more Print on Demand vs do-it-yourself: What to comprehend before launching4. Heat transfer vinyl (HTV)Best for: Bold graphics and logos on tiny batches of custom t-shirts.Difficulty: effortless to moderate. Compared to iron-on transfer paper, HTV has a slightly steeper learning curve because you require to cut and weed the design correctly. Tools and materials: Cutting machine, heat transfer vinyl sheets, cutting mat, weeding tools, heat press or household iron, and blank shirts.Upfront cost:$250–$400 for the equipment.Design flexibility: Best for bold text, logos, and clean shapes. HTV can handle full-color prints, but standard vinyl is single-color per layer.Durability: powerful. The vinyl uses heat-activated adhesive to bond to the fabric, creating a more resilient layer than standard iron-on transfer paper.HTV is a popular way to print your own custom t-shirts at home using pre-colored vinyl sheets.How HTV works:generate your custom t-shirt design in compatible software and send it to a cutting machine such as a Cricut or Silhouette.Let the machine cut your graphic design from a sheet of vinyl.Weed away the excess vinyl using a tiny hook tool, leaving only the final design.Place the vinyl onto the shirt and apply heat with a press or firm, even pressure from a household iron.5. Dye sublimationBest for: luminous custom t-shirt designs on a polyester garment like fitness clothing.Difficulty: Moderate.Tools and materials: Sublimation printer, ink and paper, heat press, polyester garments, and pressing accessories. Upfront cost: $500-$2,000, depending on the printer and heat press quality.Design flexibility: Excellent for vibrant colors, gradients, and detailed artwork on light-colored polyester fabric. Sublimation doesn’t labor on cotton because the dye can’t bond with natural fibers.Durability: powerful, since the dye bonds directly with the fibers and won’t crack or peel.Sublimation is a printing method that uses heat to turn dye-based ink into gas, allowing it to be absorbed by the polyester fabric. The finished observe feels smooth to the touch – there’s no raised layer as you’d get with vinyl or screen ink. Sublimation requires specialized equipment and only works on polyester materials, making it less beginner-amiable than iron-on transfer paper or heat transfer vinyl.How to formulate shirts with dye sublimation:generate your design and mirror the image before printing.Print it onto sublimation paper using a specialized printer.Position the printed sheet onto a sublimation-ready shirt. Press it at high heat so the ink vaporizes and embeds in the fabric.Sublimation is also used for all-over print shirts, where designs cover the entire garment from edge to edge before the pieces are sewn together.
fast tip Explore our full Catalog of all-over print options to generate your own custom t-shirts without managing production yourself.6. EmbroideryBest for: Premium-looking custom t-shirts with a textured complete.Difficulty: Moderate. Tools and materials: Machine – An embroidery machine, stabilizers, threads, and digitizing software.Hand – Hoop, needles, embroidery thread, water-soluble stabilizer, and scissors.Upfront cost: Under $20 for basic hand setup. $500–$1,500+ for machine embroidery.Design flexibility: Best for tiny logos, monograms, and simple shirt design details like chest or sleeve placements.Durability: Very high, since stitched threads hold up well through common wear and wash cycles.Embroidery stitches thread directly into the fabric. The result feels raised and textured, giving custom t-shirts a more premium, lengthy-lasting complete.You can generate embroidered designs by hand or with a digital machine. Hand stitching is affordable and a great starting point for tiny chest or sleeve details.Machine embroidery automates the process and lets you upload digital files for consistent results. It requires a higher upfront investment but makes sense if you plan to market custom embroidered shirts regularly.
fast tip Browse our full Catalog of embroidery-ready products and initiate designing without any stitching skills.7. Screen printingBest for: Printing custom t-shirt designs in bulk. Difficulty: Advanced.Tools and materials: Screens, squeegee, emulsion, exposure light source, inks, curing setup, and workspace for washing and drying.Upfront cost: $250–$1,000 for a minimal home setup.Design flexibility: Ideal for artwork with up to four solid colors.Durability: powerful, thanks to thick, heat-cured ink layers that withstand common washing.Screen printing is one of the oldest and most reliable methods for making custom t-shirts. This technique pushes ink through a mesh screen onto a shirt using a stencil. Each color requires a separate screen, making setup more involved than other DIY techniques. How screen printing works:Coat the screen with emulsion and let it dry.Expose your design onto the screen using light to generate a stencil.Wash out the unexposed areas.Place the t-shirt under the screen and pull ink across it with a squeegee.Cure the ink with heat to lock in the custom t-shirt design. Because screen printing requires preparation for each design and color, it’s not ideal for tiny runs. However, once the screens are ready, you can print dozens or hundreds of custom t-shirts efficiently. 
Read more Screen print vs digital print: Which method is best for you?8. Fabric paintBest for: Artsy, handmade-looking custom t-shirts. Difficulty: effortless.Tools and materials: Fabric paint, brushes or sponges, cardboard insert, optional stencils or masking tape, and a blank shirt.Upfront cost: $10–$30 for basic supplies.Design flexibility: Great for freehand artwork, abstract patterns, and expressive designs.Durability: Moderate when properly heat-set, but less durable than other t-shirt printing techniques on the list. Fabric painting is one of the simplest and cheapest ways to generate custom shirts, and it works on any fabric type. You don’t require machines, software, or special equipment – just textile paint and a steady hand.How to formulate custom t-shirts at home with fabric paints:Pre-wash your shirt to remove any coating or residue, then let it dry.Insert a piece of cardboard inside the shirt to avert paint from bleeding through.Sketch your custom t-shirt design lightly with a pencil. Apply fabric paint using brushes, sponges, or stencils.Let the paint dry completely, then heat-set it with an iron to formulate it washable.Choosing your t-shirt printing method: A comparative guideHere’s a side-by-side comparison of t-shirt printing techniques to aid you determine.MethodDifficultyUpfront costType of designDurabilityBest forPrint on DemandEasy$0 – you’ll pay for the base t-shirt cost and shipping when orderingDetailed artwork, photos, gradients, and multi-color designsVaries by print method and fabricSelling custom t-shirts without managing productionIron-on transfer paperEasy$20–$300+Simple graphics and medium-sized printsModerateBeginners making tiny batches at homeDirect-to-garment (DTG)Advanced$3,000–$15,000+Photo-quality and complex designsStrongSmall businesses printing regularlyHeat transfer vinyl (HTV)effortless to moderate$250–$400Bold text, logos, and clean shapesStrongPersonalized shirts and tiny runsDye sublimationModerate$500–$2,000+Vibrant polyester prints and gradientsStrongSportswear and all-over print designsEmbroideryModerate$20 by hand or $500–$1,500with a machineSmall logos and simple stitched elementsStrongPremium logos and branded apparelScreen printingAdvanced$250–$1,000Bold designs with up to four solid colorsStrongBulk orders and event merchandiseFabric paintEasy$10–$30Freehand and artistic designsModerateOne-off handmade shirtsWhat are the latest custom t-shirt design trends?Here are five major trends shaping t-shirt design right now – and how to apply them to your tees.Minimalist typography and clean graphicsMinimalist t-shirt designs focus on readable fonts and simple graphics, often placed on just the front, left chest, or sleeves. This style is excellent for brand-driven custom shirts that still feel versatile and effortless to wear on any occasion.To generate this observe: opt for one or twoclean, effortless-to-read fonts.Limit your color paletteto one or two shades. utilize grid and alignment guides to place your design elements proportionally. DTG printing handles thin strokes and tiny details well, making it ideal for minimalist custom-printed t-shirts.Retro and nostalgia revivalVintage-inspired shirt design still dominates custom tees. consider faded colors, distressed artwork, chunky fonts, and graphics inspired by past decades, from retro surf culture to elderly-school sports logos. To customize a retro t-shirt design:utilize textured overlays to mimic worn-in prints.Lower the saturation slightly and add a subtle grain effect.observe for inspiration in elderly concert tees, vintage travel shirts, thrifted sports merch, or classic soda and automotive logos.Heavyweight cotton tees and mineral wash t-shirts enhance the vintage feel. The slightly faded fabric complements distressed artwork and holds up well through repeated washes.AI-generated and futuristic artFrom surreal landscapes to hyper-detailed portraits, creators are using AI art prompts and tools to generate original illustrations. When working with AI-generated images:formulate sure you have the right to print the AI artwork, especially if you plan to market your own custom t-shirts. Review the artwork for common AI artifacts – distorted hands, uneven edges, or unnatural textures. Clean these up in your t-shirt design software.Always export in high resolution, ideally 300 DPI at full print size.For this trend, DTG is usually the best fit because it reproduces gradients, shadows, and complex color blends accurately on cotton fabric. Screen printing can labor if you simplify the artwork into solid color layers. Dye sublimation is also great for all-over coverage.Hand-drawn printsWhether you sketch by hand or draw digitally, this style adds a human touch to your custom t-shirt design. To formulate hand-drawn t-shirt designs print-ready:Scan or export your artwork at 300 DPI or higher.amplify contrast and remove stray marks to clean up the final design.Convert your drawing into a vector file if you plan to resize it for different shirt placements.This style pairs well with relaxed-fit cotton tees, oversized streetwear shirts, and tiny-batch releases. Sustainable and eco-amiable messagingWhen you generate custom t-shirts aligned with sustainability values, you attract customers who care about quality, materials, and lengthy-term wear – not just a fast trend. Reflect this movement by:Choosing organic cotton or recycled fabric options with earthy tones that reinforce a sustainable aesthetic. Designing around environmental themes such as nature illustrations, minimal logos, or brief sustainability-focused statements.Creating embroidered designs because they’re durable, premium-looking, and often last longer than surface-level print.formulate sure to highlight durability and eco-friendliness in your product descriptions so customers comprehend the value behind the shirt.How to formulate your own t-shirts with KlothingReady to skip the equipment and initiate designing and selling t-shirts? With Klothing, you can turn your concept into a product people can purchase instantly.initiate designing1. generate a free Klothing accountSign up for a Klothing account in a few clicks. There are no upfront costs and no minimum order requirements – making it effortless to market custom t-shirt designs without financial hazard. 2. opt for a t-shirt from the CatalogGo to our Catalog and select the T-shirts category. To narrow down the full catalog of tees, filter your options by fabric, thickness, color, decoration method, price, and more. When selecting a shirt, review:Fabric compositionAvailable print areasBase costShipping optionsPrint Provider locationChoosing the right garment affects your final product and the custom t-shirt cost.3. initiate designing in the Product CreatorOpen the Product Creator and upload your own photos, logo, or artwork. utilize the built-in t-shirt design template to position your design exactly where you desire it. You can also:Add ready-made graphics from the library.Write catchy slogans using our built-in fonts.generate novel images from scratch with our AI Image Generator.Design repeating patterns in one click.Preview realistic mockups of your custom t-shirt.4. Set up your product listingNext, finalize your t-shirt listing. Klothing provides an AI-generated product description you can edit to match your brand voice. If you desire to let customers personalize the design, enable the personalization feature in one click. Then set your retail price based on your target profit margin. Klothing shows you the base cost upfront and provides pricing insights so you can view what similar products typically market for.
Read more T-shirt pricing calculator and strategies5. link your store and initiate sellingFinally, integrate Klothing with Shopify, Etsy, TikTok Shop, WooCommerce, or other online selling platforms. When customers order t-shirts, our global Print Providers handle printing and shipping anywhere in the world, while you focus on growing your brand and creating novel designs. FAQ: How to formulate a custom t-shirt
What is needed to formulate custom t-shirts? What you require depends on the method you opt for. For example, an iron-on transfer requires an inkjet printer, transfer paper, and a heat press. Screen printing requires screens, ink, a squeegee, and curing space.With Print on Demand, you only require a digital design and internet access since Klothing handles the production and shipping.
How can I formulate my own t-shirt designs? formulate your own t-shirt designs using graphic design tools, drawing by hand and scanning your artwork, generating images with AI, or hiring a designer to bring your concept to life.
Is making custom t-shirts profitable? Yes, making custom t-shirts can be profitable. T-shirts are suitable for various occasions and aesthetics, making them an evergreen product with consistent demand.Your earning potential depends on your print method, design quality, and marketing effort. For example, with Print on Demand, novel sellers can expect to earn up to $100 per month while testing designs and validating their niche. Established brands with powerful customer loyalty can generate $10,000–$80,000+ per month.For a deeper breakdown, verify out our guide on how profitable Print on Demand is.
How much does it cost to formulate a custom t-shirt? With Print on Demand, the t-shirt printing cost breakdown can be as little as $9-$14 per shirt, including printing, fulfillment, and packaging, with $0 setup costs and no minimum order.Screen printing in bulk can reduce the base cost to $4-$7 per shirt, but typically requires an upfront investment of $500-$1,000 or more and minimum quantities of 25-100 units. Read our guide for more information on how much it costs to formulate shirts.
What is the easiest way to print t-shirts at home? The easiest way to print t-shirts at home is with iron-on transfer paper, which requires minimal equipment and works well for tiny batches. Fabric paint is another beginner-amiable option if you desire a handmade observe.If you desire professional-quality results without buying tools, digital printing with Print on Demand is the simplest way to generate custom t-shirts online.
How lengthy do custom t-shirt prints last? How lengthy custom t-shirt prints last depends on the method and care. The most durable options are direct-to-garment printing and dye-sublimation, as they bond the ink with the fabric fibers rather than layering it on the surface.DIY methods like iron-on transfer paper, basic heat transfer vinyl, and fabric paint are more likely to fade or crack over time because the design forms a surface layer rather than bonding with the fibers.What are the best fabrics for custom t-shirts?Cotton is one of the best fabrics for custom t-shirts because it works well with direct-to-garment, heat transfer vinyl, and screen printing, which produce vibrant, durable results.Cotton blends add stretch and wrinkle resistance and are a go-to for comfortable, effortless-care tees. Polyester is best for dye-sublimation and activewear shirts that require moisture-wicking.To summarizeIf you’re figuring out how to formulate custom t-shirts, initiate by matching the printing method to your goals, budget, and how much time you desire to invest. DIY techniques like iron-on transfers, HTV, and fabric paint are great if you delight in getting hands-on. Meanwhile, screen printing, DTG, sublimation, and embroidery offer higher durability and professional-quality results.Print on Demand lets you launch with professional printing quality from day one – and it scales as your demand grows. Sign up for Klothing today to design, market, and expand your custom t-shirt brand.The post How to formulate custom t-shirts: Printing methods, costs, and design tips appeared first on Klothing.

Posted on

How to make custom t-shirts: Printing methods, costs, and design tips

Create a custom shirt with Klothing
Get started Making custom t-shirts isn’t that hard. Some methods involve professional equipment and bulk production, while others are as simple as uploading a design and ordering in a few clicks.This guide breaks down how to make custom t-shirts in eight different ways – from budget-friendly DIY to Print on Demand – so you can pick the method that fits your goals, budget, and skill level.
Key takeaways DIY t-shirt printing techniques like iron-on transfers and heat transfer vinyl are best for hands-on experimentation at home. Digital printing methods like direct-to-garment and dye sublimation deliver detailed, professional-quality results.Screen printing is best for bulk custom shirt orders with simple, bold designs. Print on Demand is a low-risk way to design and sell custom shirts with no upfront costs, order minimums, or equipment.How to make custom shirts: 8 Methods for printing teesIf you’re exploring how to make custom t-shirts, the first step is choosing the right printing method. The best option depends on your budget, design, fabric choice, and quantity of shirts.Here are eight ways to make custom t-shirts at home and through professional services.1. Print on DemandBest for: Starting a brand from scratch and selling your own designs without managing equipment or fulfillment.Difficulty: Easy.Tools and materials: A computer and internet access.Upfront cost: No fees and no minimum order requirements. Your custom t-shirt cost covers the base garment and print, and you only pay when a sale happens. Design flexibility: Ideal for detailed artwork, photos, gradients, and multi-color t-shirt designs.Durability: Varies depending on the decoration method and fabric, but most professional digital printing methods are designed for long-term wear.Print on Demand (POD) is one of the easiest ways to make custom t-shirts without buying equipment or storing inventory. Instead of printing the shirt yourself, you create the design, and a POD partner handles the production and shipping.There are no order minimums, so you can order one custom-printed t-shirt for yourself or sell them around the world as demand grows.While the overall process is similar across platforms, choosing the right POD company makes a big difference in quality, cost, and flexibility. With Klothing, you get competitive pricing, multiple print methods, and access to one of the largest Product Catalogs in the industry – over 1,300 products.Here’s how it works:Create your artwork using an online design tool, draw it by hand and scan it, or use your own photo. Make sure the final file is high resolution for sharp details and strong print quality.Sign up for a free Klothing account and choose a shirt from our Catalog based on fabric, fit, and available print areas – whether you want just the front print or multiple placements on the same garment. Start designing by uploading your artwork, logo, or photos to the Product Creator, then adjust their placement. If you’re still on the fence about your design, you can always save your t-shirt design template for later.Order print samples to check quality, or connect your online store and start selling immediately.Once customers order t-shirts, our Print Providers handle production, packaging, and shipping, while you focus on designing and building your brand.
Unisex Garment-Dyed T-shirt
By Comfort Colors® ·
1717
From $12.41
From $10.72 with Klothing Premium 7 sizes61 colors12 print providers
Unisex Softstyle T-Shirt
By Gildan ·
64000
From $7.95
From $5.99 with Klothing Premium 9 sizes66 colors20 print providers
Unisex Heavy Cotton Tee
By Gildan ·
5000
From $8.80
From $5.92 with Klothing Premium 8 sizes70 colors22 print providers
Unisex Creator 2.0 T-shirt
By Stanley Stella ·
STTU169
From $14.64
From $10.82 with Klothing Premium 10 sizes37 colors5 print providers
Unisex Tie-Dye Tank Top
By Port & Company® ·
PC147TT
From $17.44
From $12.87 with Klothing Premium 7 sizes6 colorsFulfill Engine
Unisex Jersey T-Shirt
By Prime Essentials
From $10.69
From $7.74 with Klothing Premium 8 sizes18 colors4 print providersMake a custom t-shirt today
Start selling 2. Iron-on transfer paperBest for: Beginners learning how to make shirts at home in small batches.Difficulty: Easy.Tools and materials: Inkjet printer, transfer paper, iron, scissors, and a cotton t-shirt.Upfront cost: $20-$300 for the equipment.Design flexibility: Works best for simple graphics and medium-sized prints.Durability: Moderate. Designs can last through multiple wash cycles, but are generally less durable than screen- or digitally-printed artwork. That’s because the transfer layer sits on top of the fabric rather than bonding with the fibers.Iron-on transfer paper is one of the most accessible ways to print custom t-shirts at home. The process is beginner-friendly as long as you follow instructions and pay attention to heat and pressure.How iron-on transfers work:Print your custom t-shirt design or logo onto transfer paper using an inkjet printer.Trim the design close to the edges to reduce excess film around the artwork.Place the transfer onto your cotton shirt and press with a hot iron, applying firm, even pressure for 30-60 seconds per section.Let it cool, then carefully peel away the backing sheet.To protect the design for longer, turn the shirt inside out when washing it.3. Direct-to-garment (DTG) printingBest for: Small businesses printing custom t-shirts regularly.Difficulty: Advanced. Tools and materials: DTG printer, pre-treatment solution or machine, heat press, inks, and blank garments.Upfront cost: $3,000–$15,000 for the equipment, depending on print quality and speed. Design flexibility: Excellent for detailed artwork, photos, and gradients. Durability: Long-lasting when heat-cured correctly and washed in cold water.DTG is a t-shirt printing method where a specialized printer applies ink directly to the custom t-shirt, allowing the design to soak into the fabric for a soft feel and detailed finish.  While the printer is usable at home, it’s not very practical for most hobbyists because it’s expensive and requires regular maintenance.Here’s how DTG works:Apply a pre-treatment solution to the blank shirt so the ink bonds properly to the fabric.Place the shirt onto the printer and upload your design file to print.Let the printer spray ink directly onto the shirt. Use a heat press to cure the ink and lock the design into the fabric.  For selling custom t-shirts, DTG can deliver professional-quality tees that customers will feel confident wearing. 
Read more Print on Demand vs do-it-yourself: What to know before launching4. Heat transfer vinyl (HTV)Best for: Bold graphics and logos on small batches of custom t-shirts.Difficulty: Easy to moderate. Compared to iron-on transfer paper, HTV has a slightly steeper learning curve because you need to cut and weed the design correctly. Tools and materials: Cutting machine, heat transfer vinyl sheets, cutting mat, weeding tools, heat press or household iron, and blank shirts.Upfront cost:$250–$400 for the equipment.Design flexibility: Best for bold text, logos, and clean shapes. HTV can handle full-color prints, but standard vinyl is single-color per layer.Durability: Strong. The vinyl uses heat-activated adhesive to bond to the fabric, creating a more resilient layer than standard iron-on transfer paper.HTV is a popular way to print your own custom t-shirts at home using pre-colored vinyl sheets.How HTV works:Create your custom t-shirt design in compatible software and send it to a cutting machine such as a Cricut or Silhouette.Let the machine cut your graphic design from a sheet of vinyl.Weed away the excess vinyl using a small hook tool, leaving only the final design.Place the vinyl onto the shirt and apply heat with a press or firm, even pressure from a household iron.5. Dye sublimationBest for: Bright custom t-shirt designs on a polyester garment like fitness clothing.Difficulty: Moderate.Tools and materials: Sublimation printer, ink and paper, heat press, polyester garments, and pressing accessories. Upfront cost: $500-$2,000, depending on the printer and heat press quality.Design flexibility: Excellent for vibrant colors, gradients, and detailed artwork on light-colored polyester fabric. Sublimation doesn’t work on cotton because the dye can’t bond with natural fibers.Durability: Strong, since the dye bonds directly with the fibers and won’t crack or peel.Sublimation is a printing method that uses heat to turn dye-based ink into gas, allowing it to be absorbed by the polyester fabric. The finished look feels smooth to the touch – there’s no raised layer as you’d get with vinyl or screen ink. Sublimation requires specialized equipment and only works on polyester materials, making it less beginner-friendly than iron-on transfer paper or heat transfer vinyl.How to make shirts with dye sublimation:Create your design and mirror the image before printing.Print it onto sublimation paper using a specialized printer.Position the printed sheet onto a sublimation-ready shirt. Press it at high heat so the ink vaporizes and embeds in the fabric.Sublimation is also used for all-over print shirts, where designs cover the entire garment from edge to edge before the pieces are sewn together.
Quick tip Explore our full Catalog of all-over print options to create your own custom t-shirts without managing production yourself.6. EmbroideryBest for: Premium-looking custom t-shirts with a textured finish.Difficulty: Moderate. Tools and materials: Machine – An embroidery machine, stabilizers, threads, and digitizing software.Hand – Hoop, needles, embroidery thread, water-soluble stabilizer, and scissors.Upfront cost: Under $20 for basic hand setup. $500–$1,500+ for machine embroidery.Design flexibility: Best for small logos, monograms, and simple shirt design details like chest or sleeve placements.Durability: Very high, since stitched threads hold up well through frequent wear and wash cycles.Embroidery stitches thread directly into the fabric. The result feels raised and textured, giving custom t-shirts a more premium, long-lasting finish.You can create embroidered designs by hand or with a digital machine. Hand stitching is affordable and a great starting point for small chest or sleeve details.Machine embroidery automates the process and lets you upload digital files for consistent results. It requires a higher upfront investment but makes sense if you plan to sell custom embroidered shirts regularly.
Quick tip Browse our full Catalog of embroidery-ready products and start designing without any stitching skills.7. Screen printingBest for: Printing custom t-shirt designs in bulk. Difficulty: Advanced.Tools and materials: Screens, squeegee, emulsion, exposure light source, inks, curing setup, and workspace for washing and drying.Upfront cost: $250–$1,000 for a minimal home setup.Design flexibility: Ideal for artwork with up to four solid colors.Durability: Strong, thanks to thick, heat-cured ink layers that withstand frequent washing.Screen printing is one of the oldest and most reliable methods for making custom t-shirts. This technique pushes ink through a mesh screen onto a shirt using a stencil. Each color requires a separate screen, making setup more involved than other DIY techniques. How screen printing works:Coat the screen with emulsion and let it dry.Expose your design onto the screen using light to create a stencil.Wash out the unexposed areas.Place the t-shirt under the screen and pull ink across it with a squeegee.Cure the ink with heat to lock in the custom t-shirt design. Because screen printing requires preparation for each design and color, it’s not ideal for small runs. However, once the screens are ready, you can print dozens or hundreds of custom t-shirts efficiently. 
Read more Screen print vs digital print: Which method is best for you?8. Fabric paintBest for: Artsy, handmade-looking custom t-shirts. Difficulty: Easy.Tools and materials: Fabric paint, brushes or sponges, cardboard insert, optional stencils or masking tape, and a blank shirt.Upfront cost: $10–$30 for basic supplies.Design flexibility: Great for freehand artwork, abstract patterns, and expressive designs.Durability: Moderate when properly heat-set, but less durable than other t-shirt printing techniques on the list. Fabric painting is one of the simplest and cheapest ways to create custom shirts, and it works on any fabric type. You don’t need machines, software, or special equipment – just textile paint and a steady hand.How to make custom t-shirts at home with fabric paints:Pre-wash your shirt to remove any coating or residue, then let it dry.Insert a piece of cardboard inside the shirt to prevent paint from bleeding through.Sketch your custom t-shirt design lightly with a pencil. Apply fabric paint using brushes, sponges, or stencils.Let the paint dry completely, then heat-set it with an iron to make it washable.Choosing your t-shirt printing method: A comparative guideHere’s a side-by-side comparison of t-shirt printing techniques to help you decide.MethodDifficultyUpfront costType of designDurabilityBest forPrint on DemandEasy$0 – you’ll pay for the base t-shirt cost and shipping when orderingDetailed artwork, photos, gradients, and multi-color designsVaries by print method and fabricSelling custom t-shirts without managing productionIron-on transfer paperEasy$20–$300+Simple graphics and medium-sized printsModerateBeginners making small batches at homeDirect-to-garment (DTG)Advanced$3,000–$15,000+Photo-quality and complex designsStrongSmall businesses printing regularlyHeat transfer vinyl (HTV)Easy to moderate$250–$400Bold text, logos, and clean shapesStrongPersonalized shirts and small runsDye sublimationModerate$500–$2,000+Vibrant polyester prints and gradientsStrongSportswear and all-over print designsEmbroideryModerate$20 by hand or $500–$1,500with a machineSmall logos and simple stitched elementsStrongPremium logos and branded apparelScreen printingAdvanced$250–$1,000Bold designs with up to four solid colorsStrongBulk orders and event merchandiseFabric paintEasy$10–$30Freehand and artistic designsModerateOne-off handmade shirtsWhat are the latest custom t-shirt design trends?Here are five major trends shaping t-shirt design right now – and how to apply them to your tees.Minimalist typography and clean graphicsMinimalist t-shirt designs focus on readable fonts and simple graphics, often placed on just the front, left chest, or sleeves. This style is excellent for brand-driven custom shirts that still feel versatile and easy to wear on any occasion.To create this look: Choose one or twoclean, easy-to-read fonts.Limit your color paletteto one or two shades. Use grid and alignment guides to place your design elements proportionally. DTG printing handles thin strokes and small details well, making it ideal for minimalist custom-printed t-shirts.Retro and nostalgia revivalVintage-inspired shirt design still dominates custom tees. Think faded colors, distressed artwork, chunky fonts, and graphics inspired by past decades, from retro surf culture to old-school sports logos. To customize a retro t-shirt design:Use textured overlays to mimic worn-in prints.Lower the saturation slightly and add a subtle grain effect.Look for inspiration in old concert tees, vintage travel shirts, thrifted sports merch, or classic soda and automotive logos.Heavyweight cotton tees and mineral wash t-shirts enhance the vintage feel. The slightly faded fabric complements distressed artwork and holds up well through repeated washes.AI-generated and futuristic artFrom surreal landscapes to hyper-detailed portraits, creators are using AI art prompts and tools to generate original illustrations. When working with AI-generated images:Make sure you have the right to print the AI artwork, especially if you plan to sell your own custom t-shirts. Review the artwork for common AI artifacts – distorted hands, uneven edges, or unnatural textures. Clean these up in your t-shirt design software.Always export in high resolution, ideally 300 DPI at full print size.For this trend, DTG is usually the best fit because it reproduces gradients, shadows, and complex color blends accurately on cotton fabric. Screen printing can work if you simplify the artwork into solid color layers. Dye sublimation is also great for all-over coverage.Hand-drawn printsWhether you sketch by hand or draw digitally, this style adds a human touch to your custom t-shirt design. To make hand-drawn t-shirt designs print-ready:Scan or export your artwork at 300 DPI or higher.Increase contrast and remove stray marks to clean up the final design.Convert your drawing into a vector file if you plan to resize it for different shirt placements.This style pairs well with relaxed-fit cotton tees, oversized streetwear shirts, and small-batch releases. Sustainable and eco-friendly messagingWhen you create custom t-shirts aligned with sustainability values, you attract customers who care about quality, materials, and long-term wear – not just a quick trend. Reflect this movement by:Choosing organic cotton or recycled fabric options with earthy tones that reinforce a sustainable aesthetic. Designing around environmental themes such as nature illustrations, minimal logos, or short sustainability-focused statements.Creating embroidered designs because they’re durable, premium-looking, and often last longer than surface-level print.Make sure to highlight durability and eco-friendliness in your product descriptions so customers understand the value behind the shirt.How to make your own t-shirts with KlothingReady to skip the equipment and start designing and selling t-shirts? With Klothing, you can turn your idea into a product people can buy instantly.Start designing1. Create a free Klothing accountSign up for a Klothing account in a few clicks. There are no upfront costs and no minimum order requirements – making it easy to sell custom t-shirt designs without financial risk. 2. Choose a t-shirt from the CatalogGo to our Catalog and select the T-shirts category. To narrow down the full catalog of tees, filter your options by fabric, thickness, color, decoration method, price, and more. When selecting a shirt, review:Fabric compositionAvailable print areasBase costShipping optionsPrint Provider locationChoosing the right garment affects your final product and the custom t-shirt cost.3. Start designing in the Product CreatorOpen the Product Creator and upload your own photos, logo, or artwork. Use the built-in t-shirt design template to position your design exactly where you want it. You can also:Add ready-made graphics from the library.Write catchy slogans using our built-in fonts.Create new images from scratch with our AI Image Generator.Design repeating patterns in one click.Preview realistic mockups of your custom t-shirt.4. Set up your product listingNext, finalize your t-shirt listing. Klothing provides an AI-generated product description you can edit to match your brand voice. If you want to let customers personalize the design, enable the personalization feature in one click. Then set your retail price based on your target profit margin. Klothing shows you the base cost upfront and provides pricing insights so you can see what similar products typically sell for.
Read more T-shirt pricing calculator and strategies5. Connect your store and start sellingFinally, integrate Klothing with Shopify, Etsy, TikTok Shop, WooCommerce, or other online selling platforms. When customers order t-shirts, our global Print Providers handle printing and shipping anywhere in the world, while you focus on growing your brand and creating new designs. FAQ: How to make a custom t-shirt
What is needed to make custom t-shirts? What you need depends on the method you choose. For example, an iron-on transfer requires an inkjet printer, transfer paper, and a heat press. Screen printing requires screens, ink, a squeegee, and curing space.With Print on Demand, you only need a digital design and internet access since Klothing handles the production and shipping.
How can I make my own t-shirt designs? Make your own t-shirt designs using graphic design tools, drawing by hand and scanning your artwork, generating images with AI, or hiring a designer to bring your idea to life.
Is making custom t-shirts profitable? Yes, making custom t-shirts can be profitable. T-shirts are suitable for various occasions and aesthetics, making them an evergreen product with consistent demand.Your earning potential depends on your print method, design quality, and marketing effort. For example, with Print on Demand, new sellers can expect to earn up to $100 per month while testing designs and validating their niche. Established brands with strong customer loyalty can generate $10,000–$80,000+ per month.For a deeper breakdown, check out our guide on how profitable Print on Demand is.
How much does it cost to make a custom t-shirt? With Print on Demand, the t-shirt printing cost breakdown can be as little as $9-$14 per shirt, including printing, fulfillment, and packaging, with $0 setup costs and no minimum order.Screen printing in bulk can reduce the base cost to $4-$7 per shirt, but typically requires an upfront investment of $500-$1,000 or more and minimum quantities of 25-100 units. Read our guide for more information on how much it costs to make shirts.
What is the easiest way to print t-shirts at home? The easiest way to print t-shirts at home is with iron-on transfer paper, which requires minimal equipment and works well for small batches. Fabric paint is another beginner-friendly option if you want a handmade look.If you want professional-quality results without buying tools, digital printing with Print on Demand is the simplest way to create custom t-shirts online.
How long do custom t-shirt prints last? How long custom t-shirt prints last depends on the method and care. The most durable options are direct-to-garment printing and dye-sublimation, as they bond the ink with the fabric fibers rather than layering it on the surface.DIY methods like iron-on transfer paper, basic heat transfer vinyl, and fabric paint are more likely to fade or crack over time because the design forms a surface layer rather than bonding with the fibers.What are the best fabrics for custom t-shirts?Cotton is one of the best fabrics for custom t-shirts because it works well with direct-to-garment, heat transfer vinyl, and screen printing, which produce vibrant, durable results.Cotton blends add stretch and wrinkle resistance and are a go-to for comfortable, easy-care tees. Polyester is best for dye-sublimation and activewear shirts that require moisture-wicking.To summarizeIf you’re figuring out how to make custom t-shirts, start by matching the printing method to your goals, budget, and how much time you want to invest. DIY techniques like iron-on transfers, HTV, and fabric paint are great if you enjoy getting hands-on. Meanwhile, screen printing, DTG, sublimation, and embroidery offer higher durability and professional-quality results.Print on Demand lets you launch with professional printing quality from day one – and it scales as your demand grows. Sign up for Klothing today to design, sell, and grow your custom t-shirt brand.The post How to make custom t-shirts: Printing methods, costs, and design tips appeared first on Klothing.

Posted on

How to design clothes: Your ultimate guide for 2026

generate custom designs that market
initiate now Designing your own clothing line used to mean fashion school, expensive pattern-making skills, and thousands of dollars tied up in inventory. In 2026, that’s no longer the case. Whether you desire to express your unique style or construct a profitable clothing brand, the tools to design clothes online are more accessible – and fun – than ever.This comprehensive guide walks you through the entire process of creating clothing designs from scratch. You’ll study how to design clothes, discover your aesthetic, and launch a cohesive collection using modern fashion design tools and the power of Print on Demand (POD). 1. Finding inspiration and defining a unique styleEvery great garment begins with an concept. However, moving from a vague concept to a finished design takes a process. The fashion industry moves fast, with fashion trends evolving through social media and real life faster than ever. To keep up, you require a solid foundation.initiate with a mood boardA mood board is a visual anchor for your collection. It defines the aesthetic, color palette, and “vibe” of your brand. utilize digital platforms like Pinterest or specialized apparel design software to collect images of textures, color swatches, and accessories that inspire you.consider of it as a fashion design filter: if a novel design concept doesn’t fit the board, it probably doesn’t fit the collection.Observe the marketStudy what’s working for successful fashion designers, but don’t just copy them. Identify gaps in the market. Are people looking for more sustainable materials? Is there a lack of custom clothing for a specific niche, like pet owners or extreme sports enthusiasts? Understanding your customers is the first step toward designs people actually desire to wear.Research fashion trendsStay ahead by checking trend forecasting sites likeWGSN or following real-life street style. In 2026, trends relocate fast, but quality clothing design remains rooted in a solid design process.2. The essential tools for modern custom clothing designsYou don’t require a studio with a dress form or rolls of pattern paper to get started. Digital design tools have replaced most of the traditional setup, making fashion design for beginners faster and more accessible.Graphic design softwareAdobe Illustrator: The industry standard for creating flat sketches and vector graphics. Because vectors can be scaled without losing quality, they’re perfect for everything from a tiny logo to a full-back print.Canva: If you are looking for websites to design clothes for free, Canva offers a massive library of templates and design elements. It’s ideal for anyone looking to design clothes online rapidly.CLO 3D: For designers who desire to go deeper into the technical side. 3D garment visualization lets you view how a digital pattern behaves on a virtual body before anything gets printed.Klothing Product CreatorFor most print-on-demand sellers, Klothing’s Product Creator is the most crucial tool in their design process. It’s free to utilize, requires no software downloads, and works directly in your browser.Here’s what you can do inside it:Drag and drop your designs onto 1,300+ apparel mockups with precise placement controlsBuild seamless repeat patterns with the built-in pattern toolAdd and style text with the built-in typography editorGenerate original graphics with the AI Image Generator – just type in a promptPreview exactly how your final design will observe before placing a single order3. Developing your design: From sketch to finished artworkOnce you have your inspiration and tools lined up, initiate designing clothing. This is where your clothing design ideas become actual print files.Fashion sketches and flat sketchesStart with rough fashion sketches – loose drawings that capture the movement, shape, and mood of the garment. Once the concept feels right, translate it into flat sketches. A flat sketch is a clean, two-dimensional drawing of the garment laid out flat. It includes all the key elements, such as seam lines, pocket placements, and stitching details.
Pro tip Not a sketcher? Skip this part. The Klothing Product Creator lets you design directly on the product – no sketchpad required.Understanding pattern makingPattern making is how a flat design becomes a 3D garment. For most POD sellers, this step is already handled – Klothing’s Catalog templates are built to spec, so your design drops into a print-ready format automatically.If you are creating your own clothes from scratch, you’ll require to develop a “tech pack” – a document that tells a manufacturer every detail they require to produce the item correctly.4. Selecting materials and fabric typesThe fabric you opt for is just as crucial as the design itself. The material dictates the drape, the durability, and how well it takes to various print methods.Common fabrics for custom apparelCotton: The most popular choice for t-shirts and hoodies. It’s soft, breathable, and ideal for DTG (Direct-to-Garment) printing.Polyester: Durable and moisture-wicking – the standard for athletic wear.Blends: Many modern garments utilize cotton-polyester blends to combine comfort with contract resistance.When choosing, consider about who’s buying and what they’re doing in it. A heavyweight cotton reads as premium streetwear; a lightweight blend works better for warm-weather styles.5. Designing for Print on DemandPrint on Demand (POD) is the ultimate way to design your own clothing line without the hazard of holding unsold stock. It allows for total flexibility and independence.Creating effective t-shirt designsT-shirts are the backbone of most online stores. To generate a professional t-shirt design, focus on:Resolution: Always utilize high-resolution images (at least 300 DPI) to ensure a crisp print.Color choice: utilize colors that contrast well with the garment color. dim design on a dim shirt? It’ll disappear.Placement: Standard chest prints are popular, but it’s worth experimenting with sleeve prints or nape-of-the-neck logos.Selecting the most suitable Print ProvidersOne of the biggest advantages of Klothing is access to a global Print Provider network. This allows you to scale your business internationally without worrying about shipping logistics.opt for providers based on their location, price, or the specific apparel brands they offer, such as Bella+Canvas or Gildan.6. Building your business and launching your storeDesigning the clothes is the creative half. The other half is getting your brand in front of customers – and Klothing makes the operational side straightforward.Setting up your online presenceTo market your designs, you require a storefront. Klothing integrates seamlessly with platforms like Shopify, Etsy, and WooCommerce. Once you link your account, everything runs automatically. When a customer orders, the information goes directly to the Print Provider, who then ships the garment to the customer’s door.Marketing your collectionMarketing is how a design turns into a sale. utilize social media to post updates about your design process. People adore to view the labor that goes into creating a cohesive collection.Share mood boards, early sketches, and your final apparel mockups to construct a community around your brand.7. Overcoming common challenges for freelance designersEven for experienced fashion designers, the path to a successful clothing brand has hurdles. Here’s how to navigate them:Design burnout: If you sprint out of clothing design ideas, go back to your roots. observe at art, architecture, or nature for novel inspiration.Technical errors: Always order samples. The way a design looks on a screen can differ from how it looks on actual fabric. Checking the final observe in person ensures quality control.Pricing too low: Before you set a price, comprehend your numbers. verify the base cost in Klothing, factor in platform fees, and determine what your designs are worth. You’re not selling a blank tee – you’re selling a observe. Price it like one.8. The future of fashion: Designing in 2026Microtrends in the fashion industry now reside and die in under a month. On TikTok, an aesthetic can blow up, peak, and burn out within a week. Traditional brands can’t relocate that fast – they’re locked into production cycles and inventory commitments. With POD custom clothing, you’re not. If a trend breaks on Monday, you can have a design reside by Tuesday. No minimums, no dead stock, no hazard.Ready to bring your design vision to life?initiate your clothing brand with Klothing today and turn your creative ideas into a global brand.
initiate designing Frequently asked questions (FAQs)
How to design your own clothes if you can’t draw? You don’t require to be an artist to design clothes. Many successful designers utilize digital design tools like the Klothing Product Creator, which allows you to upload high-quality images, logos, or typography directly onto apparel.You can also hire freelance designers on platforms like Upwork or Fiverr to turn your design ideas into professional fashion sketches or flat sketches.
What are the basic steps to designing clothes? The core steps are: define your concept, construct a mood board, and generate or source your design file. Once you have the file, upload it to Klothing’s Product Creator, select your garment and Print Provider, order a sample, then publish and market.With Print on Demand, you skip pattern making, manufacturing, and inventory entirely.
What are the best websites to design clothes for free? If you’re on a budget, the best websites to design clothes for free are Canva and the Klothing Product Creator. Canva offers a wide array of templates for t-shirts and hoodies, while Klothing lets you visualize your designs on actual product mockups. These tools are perfect for beginners who desire to explore how to design clothing without any upfront costs.
How do I initiate a clothing brand with no money? The most effective way to initiate a clothing brand with no money is through a print-on-demand model. By partnering with Klothing, you can generate custom apparel, list it in your online store, and only pay for the product once a customer buys it. This eliminates the require for expensive materials, manufacturing, or inventory, making it a low-hazard way to turn ideas into income.
How to design your own clothing line and ensure it’s cohesive? To design your own clothing line that feels professional, first generate a mood board. This helps you maintain a consistent color palette and unique style across all items. When developing designs, utilize similar fonts, graphic styles, or themes to ensure the entire collection looks cohesive. Consistency is key to building a recognizable brand.
How to design clothes online for specific print methods? When you design clothes online, you must consider the printing method. For example, direct-to-garment (DTG) printing is great for detailed images with many colors, while embroidery is better for simple logos on hats or hoodies.In the Klothing Catalog, each product listing specifies the recommended print methods and provides a template to aid you position your art perfectly.The post How to design clothes: Your ultimate guide for 2026 appeared first on Klothing.

Posted on

Why your Etsy shop needs “Texture of the Year”

Custom products, global reach
initiate selling Searching for that one strategic relocate to scale your sales? Adding Etsy’s Texture of the Year to your store could be the reply. For 2026, Etsy has officially crowned washed linen as the must-have material. By aligning your product catalog with this tactile trend, you’re not just selling a product – you’re selling a lifestyle shoppers are already hunting for.Keep reading to discover out why your Etsy shop needs “Texture of the Year” and how to utilize it to expand your business.
Disclaimer This post may contain affiliate links, which means we may earn a commission if you formulate a purchase through those links. This comes at no additional cost to you.Understanding Etsy’s Texture of the Year and its importance for sellersEvery year, the online marketplace Etsy analyzes massive amounts of search data to foresee what will dominate the consumer consciousness. These trends aren’t just suggestions; they’re a roadmap for where the money is moving. When Etsy highlights a specific material, it influences everything from the site’s curated gift guides to its primary search algorithm.What is Etsy’s first-ever Texture of the Year 2026? Washed linen!For 2026, the spotlight is on washed linen. This choice marks a significant shift in consumer behavior. After years of sleek, minimalist surfaces, buyers are craving something more organic. Traditionally, linen was seen as a formal or stiff fabric used for heirloom items. However, the modern 2026 version is all about the super-soft, lived-in feel.The vibe for this year is a departure from polished perfection toward a nostalgic style that feels authentic and storied. Linen represents lethargic living and sustainability, making it the perfect medium for creating homely spaces. There’s been a massive 1,200% surgein searches related to linen and textured fabrics. For online sellers, this means that ignoring linen is essentially losing a massive, high-intent audience.Driving Etsy shop growth by incorporating the Texture of the YearIntroducing novel textures is one of the fastest ways to revitalize a stagnant shop. It allows you to tap into novel search terms and reach a demographic that prioritizes tactile quality over generic designs.Raising visibility with Etsy Shop Trends and search dataWhen you align your shop with Etsy’s predictions, you trigger the algorithm’s Trending Now signals. Etsy loves to promote shops that aid it observe current. By adding linen-based items, you amplify the likelihood of being featured in seasonal lookbooks.To maximize visibility, utilize search data to validate your inventory. For example, linen clothing and napkins are projected to be top-tier 2026 essentials. If you’re a seller, don’t just guess – observe at the rising demand for breathable fabrics or natural fibers in Etsy’s search bar.Implementing these trends early positions you as an authority before the market becomes oversaturated. This is one of the best-selling on Etsy tips: be the first to provide what the trend reports are already promising.Increasing desirability: From “product” to “silent luxury”Texture directly affects perceived value. A standard cotton tee is a commodity, but linen clothing signals silent luxury. It’s perceived as artisanal, premium, and intentional. This shift in perception lets you justify higher price points – something you can easily manage using an Etsy calculator to keep your margins healthy.This trend is especially powerful for vintage sellers and brands targeting customers who value character-affluent home interiors. Linen has a unique ability to observe better with age, embracing wear as a design feature rather than a flaw. By marketing your products as heirlooms in the making, you attract high-intent buyers who prioritize quality over fast fashion.Pairing linen with Patina Blue (Etsy’s Color of the Year)Texture doesn’t exist in a vacuum – it needs the right color to truly pop. The gorgeous color of the year for 2026 is Patina Blue. This teal tone is inspired by natural oxidation – the way copper turns green over time. When you incorporate Patina Blue into your linen designs, you generate a mellow and calming atmosphere that shoppers discover irresistible.To really nail the aesthetic, attempt to blend deep ocean hues, powerful green undertones, and even a bronzy orange for contrast. This antique twist incorporates a sense of history into novel products. Whether it’s a blue-green layer in a floral print or a teal backsplash design for a kitchen accessory, combining both its color and the linen texture creates a subtle touch of sophistication that fits various interiors.What are the best linen-inspired products for 2026?Soft furnishings and table settings for the modern homeThe dining room is the heart of the lethargic living movement. Merchants should focus on:Linen napkins and runners: Perfect for the “tablescaping” trend that’s currently blowing up on social media.Throw pillows: These are low-hazard, high-reward items that allow shoppers to update different interior styles without a full renovation.Ultra-soft velvet quilt: While linen is the star, pairing it with an ultra-soft velvet quilt provides the textural contrast that creates homely spaces.Custom apparel trendsLinen clothing is the cornerstone of the Nonna Chic movement – a nostalgic style defined by relaxed, lived-in garments that transition seamlessly from a seaside morning to a backyard dinner party.While vintage sellers often hunt for authentic flax pieces, print-on-demand success can be found by offering modern interpretations like the Men’s Hawaiian Camp Shirt (AOP). This specific piece mimics the airy, high-complete aesthetic of traditional linen while providing a canvas for full-scale creativity. Beyond shirts, Etsy merchants should consider expanding into linen-blend tunics, oversized drawstring trousers, and even structured sun hats. These items appeal to the silent luxury shopper who prioritizes comfort without sacrificing a perfectionist observe.Seasonal wins: Linen Christmas stockingsDon’t overlook shifts during seasonal Etsy sales. Holidays are seeing a massive departure from traditional shiny synthetics in favor of organic, textured materials.Integrating items like linen Christmas stockings into your Etsy shop lets you tap into this demand for natural fibers. These products offer a tactile warmth that standard polyester simply cannot replicate. To round out a holiday collection, sellers might also observe into linen tree skirts or personalized wine bags. Transitioning to these natural materials ensures your seasonal decor feels curated and high-complete rather than mass-produced.Identifying and analyzing texture, design, and print-on-demand trendsWhere can you discover official Etsy predictions and trend reports?The most reliable resource for data-backed forecasting and Etsy trend predictions is the Seller Handbook. This is where they publish their Marketplace Insights reports twice a year.To utilize these effectively, don’t just read the headlines; observe for the Year-over-Year (YoY) search percentage increases. Any term showing a triple-digit spike is an immediate candidate for your tags and titles.Beyond the handbook, monitor the Etsy Picks badges and the specific categories featured on the main landing page. These are curated by human editors who signal what the platform is currently putting marketing spend behind. For real-time execution, pursue the Etsy Success Instagram account and participate in their Trend Tool webinars. These sessions often provide the exact Etsy design trends before they hit the mainstream, giving you a window to design, upload, and optimize your listings before the competition catches up.How do you differentiate between fleeting fads and sustainable trends?A fleeting fad is typically a micro-trend triggered by a viral social media moment or a specific meme – consider of these as three-month spikes that drop to zero rapidly. A sustainable trend, like Etsy’s Texture of the Year, is anchored in larger cultural shifts. Washed linen is tied to the lethargic Living and sustainability movements, which have shown consistent growth for over five years.To validate a trend, utilize a cross-platform verify:Google Trends: Search for the term (like linen bedding) and set the filter to the last five years. If the line shows a steady upward slope rather than a vertical spike and crash, it’s a sustainable trend.Pinterest Predicts: verify whether the texture appears in their annual forecast, which often predicts home decor shifts a year in advance.Search volume vs competition: utilize an SEO tool like eRank or Everbee to view if a buzz has high search volume but manageable competition.If a trend influences how people fundamentally decorate their homely spaces or modify their lifestyle habits, it’s a protected bet for a lengthy-term investment in your Etsy shop.Integrating texture in design with Klothing Product CreatorDesign unique Etsy products with Klothing’s free Product Creator. This tool is essential for mastering texture in design, allowing you to blend tones and generate a deep connection with the 2026 linen aesthetic. utilize the AI image generator to describe complex fabric grains or the pattern tool to transform a single swatch into a seamless, repeating texture across all-over-print items.The text editor lets you layer typography over organic backgrounds, while the free graphics library provides elements that add depth to creative Etsy shop ideas. With realistic mockups and effortless-to-utilize layering, you can construct personalized print-on-demand listings that observe like high-complete, tactile pieces.
fast tip verify out Klothing’s blog to stay ahead of design trends for POD and eCommerce.Designing effectively with Etsy’s Texture of the YearDesign tips for linenDesigning for linen is different from designing for cotton or polyester. Since linen has an antique tone, avoid neon colors. Instead:utilize earth tones and powerful green undertones to complement the natural fabric.Embrace imperfection in your graphics. Hand-drawn illustrations or watercolor effects fit beautifully with the fabric’s personality.Avoid large blocks of solid, plastic-looking ink. Instead, utilize distressed textures in your designs that embrace wear.Choosing the best printing technique for linenDirect-to-garment (DTG) and all-over print (AOP) are the winners here. DTG allows the ink to sink into the fibers, maintaining the fabric’s breathability and softer side. AOP ensures the design flows seamlessly across the seams, maintaining that polished perfection while keeping the lived-in comfort.Marketing texture-inspired products on EtsyEtsy SEO tips for texture trendsTo rank, you require the right keywords. Uselong-tail phrases like washed linen, antique twist, and characterful home interiors. Don’t overlook the sustainability attribute in your listing – shoppers in 2026 are filtering for eco-amiable materials more than ever. Mentioning Etsy’s Texture of the Year in your first two sentences of the description helps AI Overviews (AIOs) pick up your listing for conversational queries. study more about Etsy SEO and keep continually embracing things like trends, textures, and styles from a practical perspective.How can product photography highlight the textured elements?Photography is where you market thefeel. utilize these tactics by showcasing your products and incorporating trends – Etsy search results will thank you for it.The macro plan: utilize close-up shots to demonstrate the slubs and how the light texture makes the product unique.Lighting the imperfect: utilize natural, side-lit photography. This creates shadows that reveal the depth of the material.Contextual staging: Place your linen Christmas stockings next to a fireplace or demonstrate the camp shirt in a sun-drenched garden to emphasize its cozy feel.Social storytelling using “B-Roll” and faceless ReelsLeverage lethargic Living on TikTok. generate faceless reels that focus purely on the fabric’s movement – dropping a linen napkin on a wooden table or a hand brushing over a soft stocking. On Pinterest, generate Vibe Boards that mix your products with deep ocean hues and natural oxidation textures to drive high-intent traffic to your Etsy print-on-demand store.FAQ
What is the texture of the year for 2026? The official texture is washed linen. Unlike standard linen, this version is pre-treated to be super-soft and pliable, removing the stiff, formal feel of the past. It signals a relocate toward lived-in aesthetics and sustainability, satisfying a growing buyer demand for materials that feel organic and storied.
What popular trends are there with the Texture of the Year in 2026? Dominant trends include Nonna Holiday, which uses napkins and kitchen textiles to evoke a sense of heritage, and Island Luxe, which features breezy linen clothing. Many sellers are also using washed linen to generate a mellow, calming atmosphere in home decor, pairing it with soft, weathered blues.
What if I’m not a graphic designer? Can I still utilize textured trends? Yes. Leverage Klothing’s Product Creator to apply simple, high-resolution textures or minimalist line art to linen products. Because washed linen has such a distinct visual grain, even a solid color or a basic monogram feels premium. Focus on Etsy product ideas that let the material’s quality do the heavy lifting.
Which Klothing products are best for showcasing textured designs? For designs that feature visual textures – like brushstrokes, 3D effects, or distressing – opt for products with a flat, smooth surface to ensure the detail isn’t lost. Canvas prints, posters, and ceramic mugs are ideal options. If you desire a physical, tactile texture, embroidered hats and heavyweight sweatshirts add actual 3D depth that customers can feel. attempt experimental materials like blends and more by filtering them in our Catalog.
How do I comprehend if a texture trend is right for my brand? Review your Marketplace Insights and shop analytics – if your customers frequently search for terms like natural, breathable, or artisan, washed linen is a protected bet. This trend suits any interior brand or shop whose style leans toward authenticity, providing a practical way to offer luxury without looking overly industrial.
What is Etsy’s Color of the Year 2026? The chosen color is Patina Blue, a weathered teal inspired by the chemical process of copper oxidation. It features deeper undertones and intense green colors, making it a perfect match for the earth tones of linen. It represents a connection to history and the beauty of materials that modify over time.ConclusionAdapting to why your Etsy shop needs Texture of the Year isn’t just about following a fad – it’s about speaking the language of the 2026 consumer. opt for washed linen and incorporate Patina Blue into your catalog to position your shop at the intersection of quality and trend.Ready to initiate building? Get inspired by the first-ever texture set and popular colors from Etsy’s predictions and utilize Klothing to bring your ideas to life.formulate it your way!
initiate designing The post Why your Etsy shop needs “Texture of the Year” appeared first on Klothing.

Posted on

How to design custom jewelry with Printify: Turn your ideas into wearable pieces

market custom products with Klothing

Get started

Designing custom jewelry no longer requires professional jeweler training, expensive tools, or upfront inventory. With Print on Demand, anyone can generate personalized pieces for themselves, as gifts, or to market online.   

In this guide, we’ll demonstrate you how to design custom jewelry – from concept to finished piece. You’ll study how to opt for products, generate designs, and prepare your jewelry for sale using Klothing’s effortless-to-utilize tools.

What is custom jewelry design?

Custom jewelry design is all about creating a piece of jewelry that feels personal to you. Instead of choosing something mass-produced, you formulate and order jewelry that reflects your vision, style, and narrative.

The process can be as simple as picking a favorite gemstone or as detailed as designing a custom piece that marks a special moment in your life.

What are the benefits of designing your own jewelry?

Many people study how to design a custom jewelry piece for:

Personal utilize – Designing your own jewelry lets you opt for every detail, from the gemstone to the precious metal and complete. This level of control lets you generate heirloom pieces that hold meaning beyond trends or seasons.

Gifting – Say a specific ring design your partner, friend, or family member is looking for doesn’t exist in stores. You can generate a personalized gift that suits their taste and will be cherished for years. 

Starting a jewelry business – Many creators take the next step by launching their own custom-designed jewelry shop. Some even enable personalization so their customers can add names, dates, or meaningful details to formulate each piece unique. 

Why utilize Print on Demand to generate custom jewelry?

Traditionally, the jewelry design process meant working directly with a jeweler or manufacturer and covering production costs before making any sale.

Print-on-demand services like Klothing remove those barriers, making jewelry-making accessible to those without specialized skills or experience. 

With Klothing, you can generate custom jewelry with no order minimums. Simply opt for from a wide range of customizable jewelry, design each piece using beginner-amiable online tools, and let our global Print Providers handle production and shipping.

Tip

study how to initiate a print-on-demand business.

How to design custom jewelry in 5 effortless steps

Let’s take a closer observe at how to design your own jewelry with Klothing.

1. opt for your target audience

Successful custom jewelry design starts with knowing who you’re designing for. Without a obvious audience, it’s harder to generate pieces people actually desire to purchase.

As a jewelry designer, understanding your target audience can guide your creativity. It helps you formulate intentional choices about aesthetics, materials, and pricing, so your designs feel purposeful.

utilize these guiding questions to define your audience before launching your print-on-demand jewelry business:

How would your audience describe their everyday style?

What are their interests – like travel, fitness, or pets?

What do they value most – sustainability, family, or social impact?

What types of jewelry do they wear most often – necklaces, bracelets, rings, or earrings?

Where do they usually purchase jewelry – Etsy, TikTok Shop, boutique sites, or local shops?

Read also

Top print-on-demand niches to construct a profitable business

2. Sign up and opt for a jewelry piece

With your target audience in mind, it’s time to opt for the jewelry you desire to design. 

initiate by creating a free Klothing account. Then, explore the Product Catalog and navigate to the Jewelry category under Accessories. 

This is where you’ll discover a wide selection of customizable products in different shapes and finishes, including yellow gold, rose gold, and classic stainless steel silver. 

Many pieces are designed for text or symbol engraving, while others, like the oval necklace, allow you to print a design directly onto the pendant.

Explore all custom jewelry products

Oval Necklace

By Generic brand

From $12.25

From $9.16 with Klothing Premium

1 sizes
1 colors
Colorway

Vertical Bar Necklace (Engraving)

By Generic brand

From $18.71

From $12.21 with Klothing Premium

1 sizes
5 colors
Fulfill Engine

Natural Stone Stretch Bar Bracelet (Engraving)

By Generic brand

From $21.53

From $14.05 with Klothing Premium

1 sizes
2 colors
Fulfill Engine

Heart Necklace (Engraving)

By Generic brand

From $17.02

From $11.11 with Klothing Premium

1 sizes
5 colors
Fulfill Engine

Heart Cuff Bracelet (Engraving)

By Generic brand

From $20.73

From $15.30 with Klothing Premium

1 sizes
2 colors
Fulfill Engine

Circle Necklace (Engraving)

By Generic brand

From $16.69

From $10.89 with Klothing Premium

1 sizes
5 colors
Fulfill Engine

If you’re not sure which jewelry piece to opt for, initiate with the season or occasion. Heart-shaped designs perform well around Valentine’s Day or anniversaries, while minimalist styles often market consistently throughout the year.

Some jewelry is also designed to carry personal and emotional meaning. For example, our circle charms include stones that represent birth months, making them a popular choice for thoughtful gifts and keepsakes.

Tip

formulate sure to review the jewelry’s key features, care instructions, and Print Provider information before finalizing your choice. This way, you can accurately describe the product in your online store and set obvious expectations for your customers.

3. Add your jewelry design

This is where your personalized jewelry ideas initiate to take shape. Once you’ve chosen a product, head to the Product Creator to initiate the design process. 

Most of Klothing’s bracelets, necklaces, charms, and rings utilize fiber laser engraving, which adds a precise, permanent design to the jewelry. To ensure the best results, read our design guidelines.

desire to upload your own artwork? The Product Creator supports PNG, JPEG, and SVG files for vector designs. Always formulate sure your files are high resolution – ideally 300 DPI – so your custom designs print or engrave cleanly.

You can also utilize Klothing’s built-in tools to:

Add text elements using a variety of creative fonts and adjust spacing, curves, and rotation

opt for ready-to-utilize graphics designed for engraving or printing

utilize our Klothing Trends tool to discover design inspiration

generate your own art from scratch using the AI image generator

Adjust the size and placement of your custom design

Generate mockups to view how the final piece will observe in real life

Have fun experimenting with our tools – the possibilities are endless.

Tip

Read our step-by-step guide on how to utilize Klothing’s Product Creator.

4. Finalize your product details

The next step is to turn your jewelry design into a ready-to-market product. 

initiate by reviewing and editing the product description. Klothing automatically generates one for you, but you can customize it to better match your brand voice and clearly explain materials, sizing, and care instructions.

Also, consider enabling personalization. Letting customers add names, dates, or custom messages makes each piece feel more personal. Personalized jewelry can command higher prices because customization signals effort, exclusivity, and personal value.

Next, set your product’s price. Many POD sellers aim for an average profit margin of around 40%, but your pricing ultimately depends on your costs, positioning, and audience.

Read also

How to price print-on-demand products

Once everything looks right, order samples of your custom jewelry to evaluate its quality, fit, and the final design’s engraving accuracy.

Seeing your jewelry in hand makes it easier to refine details and present a finished piece to customers with confidence.

5. link your store and initiate selling

Now that you comprehend how to design jewelry, it’s time to initiate selling it. 

link Klothing with your preferred online selling site to automatically sync products and manage orders in one place. We offer eCommerce integrations for Etsy, Shopify, TikTok Shop, Amazon, eBay, WooCommerce, Squarespace, and more.

Don’t have your own eCommerce website yet? No problem. You can formulate a Klothing Pop-Up Store to market directly through a unique shop link without setting up a full storefront.

You can also market your custom jewelry in person. Order your designs in bulk and offer them at markets, pop-up events, or local shops to reach customers offline.

Finally, don’t overlook to promote your products. Social media platforms like Instagram, Pinterest, and TikTok are especially effective for showcasing designs, sharing styling ideas, and building an audience around your brand.

Read also

How to market jewelry on Etsy: The guide to success

Jewelry design tips for first-time designers

tiny design decisions can formulate a large difference in how your custom pieces observe, feel, and market. These tips apply whether you’re creating jewelry for clients or designing for your own brand.

Keep designs simple and readable

Jewelry pieces usually have tiny design areas, which means fine details, thin lines, or complex artwork can get lost during production.

Simple designs are easier to engrave or print cleanly during the custom jewelry process. A brief name, a single initial, or a tiny icon will stay obvious and readable on a pendant or bracelet charm. 

Tip

require inspiration for your first custom piece? Take a observe at our latest list of design trends and view what’s resonating with customers.

Avoid overcrowding tiny surfaces

Quality matters more than quantity in the custom design process. Adding too many elements to a tiny jewelry surface can formulate the final piece observe busy and unfocused.

Instead of trying to fit multiple symbols, words, or design elements into one piece, focus on a single, well-placed detail. This approach helps preserve clarity, improves craftsmanship, and results in jewelry that looks more professional and intentional when worn.

utilize contrast for engravings

When creating custom-designed jewelry for engraving, opt for bold, readable fonts instead of ultra-thin scripts, which can fail definition once engraved. 

Avoid very fine or tightly packed lines, as they can visually blend together and reduce clarity during production. Keep enough spacing between letters and design elements to preserve the beauty of the engraving and ensure crisp results.

Read also

Etching vs engraving: Key differences, processes, and uses

Frequently asked questions about custom jewelry design

Can you design your own jewelry?

Yes. With print-on-demand services like Klothing, anyone can design their own jewelry without becoming a jeweler. 
The process is simple – just sign up, opt for a product like a bracelet or ring, and add your custom design using our tools to bring your vision to life. Then place an order for yourself or link your online store to initiate selling. 
We’ll handle production and shipping on demand, which means no upfront costs for you.

What is the 2-1-1 rule for jewelry?

The 2-1-1 rule is a simple guideline for styling jewelry. It means wearing two subtle pieces, one medium-impact piece, and one statement item so your observe stays balanced. 
For example, you may wear two stacking rings, a simple bracelet, and a pair of hoop earrings to generate a put-together everyday observe.

How to initiate designing jewelry?

The easiest way to initiate designing jewelry is with print-on-demand services like Klothing. You don’t require to be a jewelry designer or pay upfront for inventory costs. Simply sign up, opt for a jewelry piece, and initiate designing your creation using our effortless-to-utilize tools.

Do I require special software to design custom jewelry?

Traditionally, custom jewelry designers require special software for casting or 3D printing their pieces, which can be expensive and require technical experience.
With Klothing, you don’t require special software. Simply utilize our Product Creator to upload a simple art piece or generate designs from scratch using our tools without becoming a jeweler.

Can I design custom jewelry without any prior experience?

Yes, print-on-demand companies like Klothing let you generate and order custom jewelry without experience. Just utilize our online design tools – we’ll handle production and shipping.

What is the most popular type of custom jewelry to design?

The most popular types of jewelry to design are bracelets and necklaces. They’re effortless to personalize, widely worn, and suitable for many occasions, often without the require for precise measurements. 
Rings and earrings are also common for customization, but they may require more attention to sizing preferences.

Ready to craft your aspiration piece of jewelry?

With the knowledge of how to design custom jewelry, you’re now ready to generate your first piece with Klothing

Whether you’re starting a novel business or just exploring novel ring designs, it’s crucial to comprehend your audience and design with purpose to formulate pieces that resonate and market. Without that focus, even the most gorgeous creations can miss the mark. 

initiate designing with Klothing today and bring your personalized jewelry ideas to life.

formulate it happen today!

initiate selling

The post How to design custom jewelry with Klothing: Turn your ideas into wearable pieces appeared first on Klothing.

Posted on

How to market Canva templates on Etsy: Beginner’s guide

Your business, your way – market with Klothing

Get started

Turn your eye for design into a scalable income stream by mastering the art of digital downloads. In this comprehensive guide, you’ll study how to market Canva templates on Etsy and construct a storefront that works for you 24/7. 

We’re breaking down the workflow, from finding high-demand niches to delivering your first Canva template link. halt trading hours for dollars and initiate building a side hustle that thrives on automation.

Disclaimer

This post may contain affiliate links, which means we may earn a commission if you formulate a purchase through those links. This comes at no additional cost to you.

Why should you market Canva templates on Etsy?

Where’s the best place to formulate passive income with digital products? Etsy! 

Etsy is a powerhouse for digital creators because it handles the heavy lifting of driving traffic. Unlike a standalone website, where you must fight for every visitor, Etsy has over 95 million energetic buyers. 

This built-in audience actively searches for digital downloads to preserve time. Selling templates on Etsy offers a low-overhead, high-margin business model. Once you generate a template, you can market it thousands of times without restocking inventory, making it a fantastic way to formulate passive income with digital products that Etsy shoppers adore.

Why utilize Canva to generate templates for Etsy

Canva is the gold standard for template creation because of its intuitive, drag-and-drop online graphic design tool. It allows you to construct sophisticated designs without needing a degree in complex software. 

While Canva Pro offers advanced features like a one-click Background Remover and a larger library, many successful sellers stick to using only free Canva elements. This is a strategic relocate: if you utilize pro elements in a template, your customer must also have a Canva Pro subscription to download the design without watermarks. By sticking to the free plan assets, you formulate your products accessible to the widest feasible audience.

Step-by-step guide to creating and selling templates on Etsy

1. generate your own Canva account

To get started, head to Canva and sign up for a free account. While you might be tempted by the Canva Pro 30-day trial, it isn’t strictly necessary. A free account ensures that everything you generate is compatible with your customers’ accounts. 

If you determine to upgrade to access Magic Studio or more fonts, recollect to keep your customers’ experience in mind. Always double-verify that the design elements you opt for won’t require your buyer to pay extra to utilize the final product.

2. Do market research and validate your product ideas

Don’t guess what people desire – utilize data to ensure your Canva designs actually market. Successful stores are born from strategic niche research for Etsy templates that balance high demand with manageable competition.

If you don’t desire to invest in paid software immediately, initiate with the Etsy search bar. 

Type a broad term like Canva templates and observe at the auto-fill suggestions – these are the exact phrases Etsy shoppers are currently typing. If you view specific suggestions like “Instagram templates for aesthetic medical spas” or “real estate branding kit,” you’ve found a validated niche.

For those ready to scale, tools like eRank or EverBee offer a deeper dive. 

observe for keywords with a high click-through rate but low competition. Analyze the monthly revenue and listing age of top sellers. If a shop opened only three months ago and already has hundreds of reviews for a specific digital product set, you’ve spotted a hot trend.

Don’t overlook the Canva library itself. Browse the Trending or What’s novel sections in the online graphic design tool to view which styles the platform is pushing. Finally, verify TikTok and Pinterest to view what tiny business owners are struggling to generate. If they’re asking for social media posts that observe professional but are effortless to edit, that is your gap in the market.

Read more

Trending Etsy niches for 2026

3. generate Canva templates

Once you’ve identified a niche, like Instagram templates or greeting cards, it’s time to generate designs. 

Open a novel project in Canva and set the appropriate dimensions. 

Focus on a cohesive aesthetic – utilize a consistent color palette and free fonts. 

Avoid just making minimal changes to a Canva layout. You must develop your own designs to provide real value and avoid copyright issues. 

Incorporate useful graphic elements and placeholders that are effortless for a buyer to swap. 

To prepare the product for sale, you won’t send the file itself. Instead, you will provide a shareable Canva template link that gives the buyer a fresh copy of your labor in their own Canva library.

4. Set up your Etsy shop for templates

Setting up your storefront is straightforward, but it requires a professional touch to attract customers. 

generate an Etsy account and pursue these steps to get your Etsy shop off the ground:

opt for a strategic name: Pick a name that clearly defines what you market. Instead of something generic, attempt something like “AestheticSocials” or “PlannerPros.” It should be effortless to spell and memorable for returning Etsy shoppers.

Handle the fees: Be prepared for the initial costs. Etsy typically charges a one-time setup fee for novel shops – usually around $15, depending on your location – plus a $0.20 listing fee for every template you publish.

Design your branding: utilize Canva to generate your shop banner and logo. This is your first chance to showcase your design skills. A polished, cohesive observe builds immediate trust and demonstrates the quality of the templates you’re selling.

Write a obvious description: In your About section and shop announcement, explicitly state that you market digital Canva templates, not physical products. This prevents confusion and reduces the hazard of refund requests from buyers expecting a package in the mail.

For a more detailed observe at backend settings and tax configurations, you can pursue our dedicated Etsy account setup guide to ensure your business is commercially powerful from day one.

5. generate listings and market templates online

Since Etsy doesn’t allow you to upload a reside link as a product, you must generate a delivery PDF. This is a simple, one-page document designed in Canva that contains the template link and obvious instructions.

Generate the link: In Canva, click Share, then More, and select Template Link. Do not utilize the Share link to edit option, or buyers will edit your original file.

Prepare the delivery PDF: Include a single photo of the final design, the template links, and a thank-you note.

Set up your Etsy listing: Upload your template preview images. utilize mockups to demonstrate how the template looks on a phone or laptop. In the Digital Files section of the listing, upload your delivery PDF. 

When a customer buys, they instantly download the PDF and click the link to initiate customizing.

Read more

How to market digital downloads on Etsy and reach more customers with free or pro content.

5 Best-selling Canva templates on Etsy

desire to formulate money selling digital downloads? Etsy gives endless opportunities when it comes to quality products. If you’re low on inspiration and don’t comprehend where to initiate, here are some customizable template ideas for Etsy – all doable with a free Canva account.

1. Social media templates

These are the bread and butter of the Canva Creator Marketplace. Businesses require Instagram and TikTok templates, Pinterest pins, and other social media graphics to stay energetic. Focus on aesthetic sets of 30 to 50 posts that pursue a specific theme, such as “Boho Real Estate” or “Minimalist Wellness.” Ensure you utilize a variety of graphic elements to avoid a repetitive feed.

2. Business marketing templates

Entrepreneurs require more than just Instagram likes. They require brand boards, price lists, invoices, and thank-you cards. generate cohesive branding kits that include all these elements. Using a consistent set of free fonts across these editable templates helps a business observe professional and polished with very little effort on their part.

3. Planner and journal templates

The digital planning niche is massive. You can market templates for daily productivity, fitness tracking, or mental health journaling. These can be sold as editable Canva planners where the buyer changes the colors, or as printable PDFs. Including templates for both digital utilize and physical printing increases your appeal to customers.

4. Resume and CV templates

Job seekers are always looking for an edge. generate designs that are clean, modern, and ATS-amiable (Applicant Tracking System). utilize obvious typography and logical layouts. Since these are high-stakes documents, include a brief guide in your delivery PDF on how to best customize the Canva content for different job industries.

5. Wedding invitations and event designs

The wedding industry is recession-proof. market Canva templates for invitations, preserve-the-date cards, and table seating charts. Since weddings are highly personal, ensure your templates are very effortless to edit, allowing Etsy shoppers to swap out names and dates in seconds while maintaining a luxury feel.

How to optimize your Canva template listings on Etsy

Etsy SEO is the engine that drives your Canva template shop to the top of search results. To halt the scroll and turn potential customers into buyers, you must optimize every element of your Etsy listing with precision.

Keyword-affluent titles: Avoid generic titles like “Instagram Template.” utilize lengthy-tail keywords that match specific search intent. Example: “30 Neutral Instagram Post Templates for Coaches, Editable Canva Template, Aesthetic Social Media Graphics.” This tells Etsy exactly who the product is for.

Strategic descriptions: initiate with a hook that highlights the time-saving benefit, such as “preserve 10 hours a week on content creation.” Clearly list the technical details: the number of Canva templates included, the aspect ratio, and a confirmation that it uses only free Canva elements to ensure no extra costs for the buyer.

Maximized tags: utilize all 13 tags provided by Etsy. Don’t repeat your title word-for-word. Instead, utilize synonyms and related categories like business branding, digital download, or editable holiday cards.

High-converting mockups: generate product images people desire to click on. If you are selling social media templates, demonstrate them in action on a smartphone. This helps Etsy shoppers visualize the product quality and final observe of their feed. And don’t overlook to add alt text to raise your chance of ranking high in search results.

How much can you earn from Canva templates on Etsy?

Your monthly revenue depends on your niche and volume. Individual Canva templates typically market for $5 to $15. However, the real growth comes from bundles. 

A bundle of 100 templates might market for $25 to $40, providing a higher perceived value. According to various seller reports, successful digital shops can earn anywhere from $500 to $5,000 per month once they have established topical authority and a solid library of novel templates. 

Your income is a direct reflection of your SEO efforts and how well you stay on top of design trends.

Read more

Is selling on Etsy worth it? brief reply: absolutely!

Navigating intellectual property and Etsy policies for digital products

Understanding license terms is vital. You cannot simply take a single photo or stock content from the Canva library and market it as-is. 

You must generate a transformative design – meaning you’ve combined design elements, text, and layouts to formulate something novel.

If you utilize Pro elements, your customer must pay Canva to utilize them or have a Canva Pro account. To avoid negative reviews, it is best practice to stick to free graphic elements and fonts. 

Always include a disclaimer in your listing stating that you are not affiliated with Canva and that the purchase is for a digital template link. This protects your Etsy shop from claims of “item not as described.”

Pricing your Canva content

Pricing is a balance between your time and market standards. 

Most strategies involve:

Individual items: $5-$12

tiny bundles (5-10 items): $15-$22

Mega bundles (50+ items): $35-$70

observe at your competitors. If the average price for a template bundle in your niche is $20, don’t price yours at $10 (which looks cheap/low quality) or $50 (which is too expensive). Instead, price at $22 and offer a limited-time 10% discount to drive initial sales and reviews.

Read more

How to price your products for success.

How to promote your Canva templates outside of Etsy

While Etsy provides traffic, promoting your own designs elsewhere can double your sales.

Pinterest: This is the best platform for digital products. generate concept Pins showing a time-lapse of your design process.

TikToks/Instagram Reels: Post “How to edit” videos. demonstrate how effortless it is to modify the colors of your Canva designs to match a brand.

Email list: Offer a freebie (like three free social media posts) in exchange for an email address. Later, you can email these potential customers when you launch more templates.

How to manage and expand your Etsy business

Scaling your presence in the Canva Creator Marketplace requires a shift from creator to strategist. Once you comprehend how to market on Canva and Etsy, your focus must turn to optimization and expansion to keep your monthly revenue climbing.

Audit your shop analytics: Monthly data is your best friend. Identify which templates attract clicks but fail to convert. Often, a simple refresh of the same design or adding a video of the design process can convince customers to purchase.

Strategize with bundles: If certain templates aren’t moving individually, group them into a business starter Kit or the ultimate social media pack. Bundling increases the perceived value and justifies a higher price point.

Leverage internal advertising: utilize Etsy Ads to stay competitive. initiate with a modest budget of $1 to $2 per day. Focus your spend on your best-performing products to maximize your return on investment.

Prioritize reputation: Fast communication is vital. Aim to reply buyer queries within 24 hours to secure the five-star reviews that boost your search ranking.

Expand via Print on Demand: require effortless passive income ideas? Don’t limit your Canva content to screen utilize. Transition your digital art into physical goods using print-on-demand services like Klothing.

You can turn your templates into physical planners or your greeting cards into high-quality stationery. Print on Demand lets you offer physical merchandise without managing inventory, making it effortless to earn money online from products beyond digital downloads.

How to generate a digital product on Canva: FAQ

Can I market Canva templates on Etsy?

Yes, you can absolutely generate templates on Canva and market them on Etsy. You are selling the access to a design you mastered. The key is to ensure the design is your original labor and that you provide the customer with a Canva template link so they can edit the file in their own account.

Can you legally market Canva designs on Etsy?

Yes, but you must pursue specific licensing rules. You can market original designs you created from scratch using Canva assets, provided the final product is a transformative design. This means you cannot market a single photo or graphic element as-is. Under the Canva Pro commercial license, you are permitted to market your unique layouts as templates, but your customers cannot resell the individual elements themselves. Always ensure your labor adds significant creative value to avoid infringing on license terms.

Is selling Canva templates on Etsy profitable?

It is highly profitable because there are no shipping costs or physical inventory. Your only recurring costs are the $0.20 Etsy listing fee and transaction fees. Because you can market the same design an unlimited number of times, your profit margins often exceed 90% after the initial design time.

How much does Etsy take from a $1,000 sale?

Etsy charges a 6.5% transaction fee on the sale price. If you market $1,000 worth of templates, Etsy takes $65. You also have payment processing fees (usually 3% + $0.25 per transaction) and the $0.20 listing fee. Total fees usually hover around 10% to 15% of your gross revenue.

How do I market my Canva templates?

You market them by creating a delivery PDF in Canva that contains a template link. You upload this PDF to your Etsy listing. When a buyer completes their purchase, Etsy automatically delivers the PDF to them. They click the link, and the template opens directly in their Canva account.

What is the Canva template delivery process when selling on Etsy?

The process is automated. You upload your instruction PDF as a digital file to your Etsy listing. Once the shopper pays, Etsy provides a download button. The buyer gets the PDF, clicks your Canva template link, and the design is instantly copied to their dashboard for editing.

What are some digital product storefront alternatives to Etsy?

If you desire to relocate beyond Etsy, Creative Market is an excellent choice for high-complete designers. Shopify is better if you desire full control over your brand and email marketing. Gumroad or Stan Store are popular for social media creators who desire a simple, one-page checkout for Canva digital products.

What are Etsy’s digital download rules for Canva templates?

To market on Etsy, you must list products as “Digital” to enable instant delivery. You cannot upload Canva files directly. Instead, generate a delivery PDF containing your template link. Per platform policy, the file must be a unique, original creation, not a resold Canva layout. Unlike Creative Market, Etsy requires a $0.20 listing fee to market templates.

Conclusion

Starting a Canva template shop is a brilliant way to break into the eCommerce space with zero upfront inventory costs. By following this guide, you can generate a sustainable stream of passive income with digital products that Etsy buyers are actively looking for. recollect to focus on high-quality templates and consistent SEO to stay ahead of the competition.

Once you’ve mastered digital sales, why halt there? You can easily turn your popular Canva designs into physical products like t-shirts, mugs, or posters. Join Klothing and explore hundreds of products, free automation, and other tools to turn an concept into profit without ever touching inventory or handling logistics yourself.

formulate it your way!

initiate selling

The post How to market Canva templates on Etsy: Beginner’s guide appeared first on Klothing.

Posted on

18 Band merch ideas every independent musician should attempt

Turn followers into customers

Launch your merch

Walk past any merch table after a demonstrate, and you’ll view the same thing: fans lined up, still buzzing from the set, picking up t-shirts, posters, or vinyl records to take a piece of the night home. Merch keeps the connection to your music alive lengthy after fans leave the venue.

But if you’re an independent musician just starting out, choosing what to offer can feel overwhelming. What band merch ideas actually labor? Which merch items formulate sense for your music, fans, and budget?

This guide breaks down the 18 best merch ideas you can add to your store right now. The best part? With Klothing’s print-on-demand assistance, you can launch your first merch linetoday with no upfront costs or inventory hazard. Let’s get this demonstrate started!

18 band merch ideas your fans will adore

Band merch covers everything – from the classic band tee to some truly out-of-the-box merch ideas. KISS once sold a custom coffin, the KISS Kasket, that doubled as a beer cooler. Extreme, yes, but it matched their band’s personality, and fans embraced it.

Your merch game doesn’t require to be that wild, but it should fit what your audience loves. Here are some of the most popular merch examples to spark ideas.

1. T-shirts

A classic t-shirt is themerch equivalent of your setlist: essential, expected, and usually the first piece fans purchase. A simple design with your band logo or name always works, but shirts get more memorable when they tie into your music – album art, song lyrics, or a tour-specific design.

With Print on Demand (POD), you can experiment with different custom t-shirt styles like oversized fits, vintage washes, tie-dye, or ringer tees without worrying about unsold stock.

Source: Green Day

2. Hoodies

Hoodies are one of the most popular higher-priced merch items because fans wear them for years. They’re also perfect for printing tour dates on the back, giving each hoodie a built-in narrative. Many independent artists experiment with bolder hoodie designs like embroidery or oversized artwork, which feels more premium and justifies the price.

Source: Fall Out Boy

3. Posters and art prints

For many fans, the visual concept of your music is just as crucial as the sound. Tour posters, alternate takes on album covers, or limited-sprint art prints provide fans something lasting to hang on their walls.

Artists often collaborate with local illustrators or designers to formulate unique versions that stand out. With POD, you can market posters online one at a time, while still bulk-orderingsigned editions for die-challenging fans at the merch table.

Source: Band of Horses

4. Stickers

Stickers are classic low-cost merch items that fans adore to collect. They’re often the first purchase for younger fans or anyone on a budget, but they also spread your band logo beyond the venue, being slapped on guitar cases, laptops, or water bottles. Many artists release sticker packs tied to an album or tour, so fans have a reason to purchase more than one.

Source: Linkin Park

5. Hats

Hats are year-round favorites and provide fans a practical way to rep your music. Caps shine at outdoor festivals, keeping the sun out of fans’ eyes, while beanies are ideal for the colder months.

Customize both with embroidery – the raised stitching adds texture and craftsmanship that gives hats a premium feel.

Since hats are visible in everyday life, they’re a great way to spread your music beyond shows – someone spots your cap at a coffee shop, asks about it, and suddenly you’ve got a novel listener.

Source: Red Hot Chili Peppers

6. Tote bags

Tote bags are one of the most versatile band merch items. They’re useful for everything from hauling vinyl records to grocery shopping, and are an eco-amiable alternative to plastic bags.

Their large, flat surface also provides more space for custom designs than most other merch. generate large-scale designs, print on both sides, or even utilize patterns that cover the entire bag.

Source: Weezer

7. Pins

Pins may be tiny, but they’re powerful for fan engagement. They’re collectible, effortless to trade, and fans adore wearing them on jackets or bags. Bands often design multiple pin variations tied to different songs or tours, encouraging fans to collect them all. Because pins are affordable, they’re a solid impulse purchase at shows and an effortless add-on for online orders.

Source: They Might Be Giants

8. Patches

Patches have a lengthy history in music culture, especially in rock, punk, and indie scenes. Fans sew or glue them onto jackets, backpacks, or instrument cases to display their connection to your band wherever they go.

Patches labor especially well for logos, symbols, or limited-editiondesigns that fans can collect over time. Embroidered patches in particular stand out because they’re textured, durable, and feel authentic.

9. Mugs

Morning coffee hits different in a custom mug with your favorite band’s logo or lyric on it.

Offer fans different styles: heat-changing mugs that reveal hidden band artwork, ones with a colored inside, or paired sets for couples and friends. With POD, you can evaluate a few versions and view which ones your fans like most.

10. Guitar picks

Guitar picks are closely connected to the music itself and especially appeal to fans who play the guitar themselves. For younger fans just learning the instrument, it’s deeply personal and motivating to play with a pick from their favorite band. At shows, some artists toss a few picks into the crowd – and having them at the merch table for everyone else ensures no one leaves disappointed.

11. Keychains

Fans adore keychains because they’re tiny, affordable, and always with them. Mini instruments, logos, or even tour symbols labor great. Some artists drop novel designs with each album release, letting fans construct a series over time. They’re also an effortless add-on at checkout in your merch store.

12. Socks

Socks aren’t a typical merch item, which makes them stand out. When tied to creative design ideas like waveforms, lyric fragments, or latest album-inspired patterns, they become fun extras that fans pick up. They labor best as playful one-offs or limited drops, adding variety to your merch line.

Source: Queens of the Stone Age

13. Phone cases

A phone case stands out as a cool band merch concept because fans carry them everywhere. Unlike a shirt that might stay in the drawer, a phone case is in their hand all day, every day, making it one of the most obvious ways to stay connected to your music.

A powerful design concept is an artwork that covers the entire case – something fans can proudly demonstrate off when they pull out their phone. And with POD, you can reuse the same artwork across updated phone models, keeping evergreen designs available without extra production labor.

14. Drinkware

Reusable water bottles, tumblers, and travel mugs are increasingly popular with fans who desire eco-amiable options. Printing your band logo or album artwork on water bottles gives dedicated fans something they’ll utilize daily at school, labor, or the gym. It’s a way for them to rep your music while also supporting sustainable habits.

Source: Megadeath

15. Blankets

Blankets are a unique band merch concept because they offer the biggest space to generate custom designs.

While they’re not for every fan, blankets are ideal for listeners who desire a bigger, standout item to keep at home. Adding one or two blanket designs is a way to provide dedicated fans a high-impact option alongside the basics.

Due to the premium feel, blankets are frequently launched as limited-edition band merchandise – let’s verify out what else is in this section of the merch store.

16. Limited-edition items

Limited-edition merch works because scarcity creates demand. Fans comprehend not everyone can own them, which makes the purchase feel more meaningful.

powerful options include handwritten lyrics, signed setlists, or limited-edition art pieces tied to their favorite tracks. These items resonate because they capture a specific moment in your music – the set you played, a song that connected, or the artwork that defined a release. That narrative is what drives fans to collect and hold onto them.

17. Merch bundles

Bundles provide fans more value and formulate it easier to market multiple items at once. A typical setup might be a custom t-shirt, sticker, and album art poster, or perks like a digital download tied to the physical items. Bundles labor especially well online, where fans appreciate a ready-made package instead of choosing each item separately.

18. Custom digital merch

Not all merch has to be physical. Digital merch – sheet music, lyric books, or one-on-one lessons – gives fans novel ways to link with your music. The real advantage is that digital merch is delivered instantly – fans get it the moment they purchase.

You can also offer behind-the-scenes content or exclusive music videos to construct deeper engagement. These products have zero shipping costs and can be paired with physical merchandise as extras.

Source: Polyphia

initiate selling merch today with zero upfront costs

Get started

How to generate merch fans actually desire to purchase

Your merch designs should come from the same place as your songs: your scene, your sound, your culture. Hardcore fans expect hoodies and patches, while hip-hop crowds lean toward caps and oversized tees. Folk audiences might link more with lyric prints or tote bags they’ll carry to record shops and markets.

Fans notice when it feels real. When your designs echo the same things fans hear in your songs and view at your shows, the merch becomes part of the bond they already feel with your band’s identity.

It’s also a great concept to involve fans directly: sprint social media polls on shirt colors, merch designs, or ask what items they’d actually purchase. That way, when you drop something novel, they’re already waiting for it and eager to purchase.

Finally, keep different fan preferences in mind: some desire a vinyl or hoodie, others will only drop a few bucks on stickers. Covering that range keeps your merch store open to everyone.

generate band merch with Klothing without wasting money

With Klothing, you can market band merch online without betting your savings on a large print sprint. Maybe you’ve always wanted to put your album artwork on a tee, your chorus line across a hoodie, or had other cool merch ideas. With Print on Demand, you can drop the design into your store today and view if fans bite.

If they order, it gets printed and shipped automatically. If they don’t, relocate on to the next concept – no wasted cash, no boxes of merch piling up in your garage.

Here’s how it works:

generate a free Klothing account.

Pick from 1,300 products in our Catalog.

generate your custom merch that conveys your band’s identity by uploading your design to our Product Creator.

generate an online store on a sales platform like Shopify, Etsy, or WooCommerce and link it to Klothing.

Publish your merch offerings to your store and share the link with fans.

Every order is printed, packed, and shipped automatically – that’s it!

To generate a store extra fast, set up a Klothing Pop‑Up Store and initiate selling band merchandise right away. It’s totally free, beginner-amiable, and available in 44 countries.

Pro tip

desire to stock your physical merch table? Bulk-order your top sellers through Klothing and get up to 46% off products, plus reduced shipping.

FAQ: Band merch ideas

How do I generate merch for my band?

initiate simple. opt for one or two popular merch items like t-shirts, posters, or hoodies. Add your band logo, album covers, or a song lyric that fans comprehend. With Print on Demand, you can generate custom physical merch without upfront costs.
Products are made and shipped only when a fan buys – so you can evaluate designs, view fan preferences based on merch sales, and construct your merch line without losing money.

What type of band merch sells best at shows and online?

The best-selling band merch at shows includes t-shirts, vinyl records, stickers, and pins – items fans can grab rapidly at the merch table. Vinyl and CDs market well because fans treat them as collectibles tied to your album art or reside performance.
Online, fan favorites are bigger products like hoodies, posters, or limited-edition items tied to an album release. Hats, tote bags, and patches market well in both settings, giving fans mid-range merch items that fit different budgets.

What’s the most profitable band merch for independent musicians?

Apparel delivers the best merch margins. You can price it well above production cost, especially if it features novel album artwork or a limited-edition design (consider handwritten lyrics, signed pieces, exclusive designs, etc). Branded merchandise like posters or exclusive merch bundles also perform well, especially with die-challenging fans.

How can I market band merch online without upfront costs?

Print-on-demand services like Klothing are the easiest way to launch an online store for both bands and solo artists. You pick your products, upload your custom designs, link to an online store, and you’re reside.
Every order is made to order – printed, packed, and shipped automatically. That means you can market band merch online without tying money in stock, and expand your merch offerings as your fan base grows.

initiate selling band merch today

Selling merch isn’t about slapping your logo on anything – it’s about choosing band merch ideasthat complement your music and fan base. consider like your fans: what do they wear, utilize, and demonstrate off in their daily lives?Keep your line balanced between fast-grab items and higher-priced finds, and always evaluate novel ideas before going all in. POD makes that feasible – experiment without losing money, and double down on what sells.

Ready to generate merch fans adore? Design your first items with Klothing today and initiate selling without hazard.

Get your store reside with Klothing today

Get started

The post 18 Band merch ideas every independent musician should attempt appeared first on Klothing.

Posted on

Design trends for 2026: The ideas defining the future of design

generate what’s trending. market what’s hot

initiate designing

Design trends for 2026 reflect how creativity evolves in reply to cultural shifts, novel technology, and changing behavior. Shaped by deeper graphic design trend analysis and a obvious design trend evolution, these changes go beyond surface aesthetics.

They demonstrate how designers respond to complexity with clarity and adaptability, offering a practical view into the future of graphic design for creators who desire to construct labor with real staying power.

Top design trends for 2026

1. Minimalistic and clean designs

Minimalistic and clean designs remain one of the most durable design trends for 2026 because they prioritize clarity over decoration.

Why it works

Built on simplicity, open space, and function-driven structure

Reduces cognitive load and improves usability

Creates systems with lengthy-term staying power

Where it performs best

Digital design and UX/UI design trends benefit from faster navigation and clearer hierarchies

Brand identity trends 2026 rely on minimal systems that scale across tech branding and platforms

Expert designers concur: powerful minimalism is intentional. Subtle contrast, spacing, and typography add depth without noise, proving that restraint leads to better outcomes.

2. Vibrant colors and gradients

Vibrant colors and gradients stand out among the mosteffective design trends for 2026 because they capture attention and instantly evoke emotion.

Why it works

Uses bold palettes, high contrast, and eye-catching hues to generate visual impact

Dynamic blends and gradient shifts add depth without relying on heavy graphics

Supports brand recognition in crowded digital environments

Where it performs best

Graphic design trends for marketing, social media, and digital campaigns benefit from stronger scroll-stopping visuals

In digital design and interactive web design trends, gradients aid direct focus and improve visual hierarchy

Design leaders note: Color works best when intentional. Strategic contrast and controlled palettes turn vibrancy into clarity, not noise, reinforcing modern design aesthetics with purpose.

3. 3D elements and depth

3D elements and depth are shaping design trends for 2026 by adding realism and immersion to otherwise flat visuals.

Why it works

Introduces dimension, layering, and 3D texture that generate visual hierarchy

Improves focus and comprehension without clutter

Makes visuals feel tactile, grounded, and more connected to real-world materials

Where it performs best

In UX/UI design trends, 3D elements improve spatial understanding and interaction cues

In branding, dimensional visuals aid brands stand out while maintaining modern design aesthetics

Industry experts note: Effective 3D design supports function first. When realism is controlled and purposeful, depth enhances usability rather than distracting from it.

4. Sustainable and eco-amiable designs 

Sustainable and eco-amiable designs are central to design trends for 2026 as brands respond to environmental expectations with substance, not symbolism.

Why it works

Uses earth tones, natural materials, and eco-conscious palettes to signal responsibility

Applies sustainable design principles through restraint, reuse, and longevity

Favors minimalist packaging and reduced visual waste over excess

Where it performs best

In branding and packaging, green design builds trust and aligns with values-driven audience segments

Across products and physical environments, sustainability shows up through durable materials and systems built to last

Design leaders emphasize: Sustainability is structural, not just decorative. Thoughtful choices in materials, color, and production generate impact without relying on greenwashing.

5. Smooth curves that leave a lasting impression

Smooth curves are reshaping modern design aesthetics by bringing warmth and approachability back into visual systems. This shift mirrors what’s happening in interior design, where softer forms replace rigid geometry.

Why it works

Flowing lines, organic forms, and soft edges reduce visual rigidity

Curved shapes feel more human as they reflect how people relocate

Curves add character without overwhelming the layout

Where it performs best

In UX/UI design trends, curved elements guide users naturally through interfaces

In branding and packaging, organic shapes formulate visuals feel approachable and memorable

In interior design, curves soften walls, shape furniture, and naturally flow in a living room through rounded chairs, sculptural furniture, and details like scalloped edges

Design experts note: Curves signal ease and comfort. When used with intent, they balance structure and emotion, leaving a lasting impression without sacrificing clarity.

6. Retrowave and nostalgic designs

Retrowave and nostalgic styles return as influential design trends for 2026, driven by emotion, memory, and cultural familiarity.

Why it works

Combines retrowave design elements like funky patterns, retro stripes, and classic colors

Uses vintage minimalism to reference the past without visual overload

Draws from pop culture to generate instant recognition and emotional connection

Where it performs best

In branding, apparel, and fashion brands, throwback aesthetics aid brands stand out and feel relatable

For digital and campaign design, nostalgia builds trust and engagement through familiarity

Professional designers note: Nostalgia works best when it’s selective. The strongest retrowave designs reinterpret the past through modern structure rather than imitation, giving familiar styles renewed relevance.

7. Animated and interactive designs

Animated and interactive designs are accelerating design trends for 2026 by turning passive viewing into purposeful interaction.

Why it works

Uses motion, dynamic content, and audio elements to guide attention

Encourages interaction, improving comprehension and retention

Adds rhythm and feedback without overwhelming the experience

Where it performs best

Interactive web design trends and UX/UI design trends benefit from micro-animations that clarify actions and system responses

In digital campaigns, motion helps brands stand out in fast-scrolling environments without sacrificing clarity

Design leaders concur: animation should serve function first. Purposeful motion enhances usability, while excessive effects dilute focus and trust.

Turn trends into real products

initiate designing

The psychology behind the trends: Why do they resonate with us?

Design trends reflect how people respond to complexity, uncertainty, and acceleration. Each shift follows a natural progression shaped by culture, technology, and emotional require.

Understanding this psychology helps designers relocate beyond surface style and generate labor that remains relevant over time.

Minimalism and mental clarity

Minimalism resonates because it restores focus. In a world saturated with content, open space, obvious hierarchy, and reduced visual noise provide people a sense of control. 

This trend supports mental clarity by limiting distractions and guiding attention with intent, which explains its timeless appeal across digital design and branding systems.

Vibrant colors and emotional vitality

Vibrant colors and gradients generate momentum. Bold palettes, contrast, and dynamic transitions trigger emotion and signal movement.

In a fast-changing trend cycle influenced by pop culture, color becomes a tool for expression, confidence, and relevance, helping brands feel present in the moment rather than static.

Nostalgia, comfort, and connection

Nostalgic design draws power from the past. Retrowave design elements and familiar aesthetics tap into shared cultural memory, creating comfort and emotional connection. This sense of recognition builds trust and character, especially during periods of rapid modify.

Sustainability and evolving values

Sustainable design principles align with shifting values. Natural materials, restraint, and lengthy-term thinking reflect ethical priorities tied to lifestyle and responsibility. 

Sustainability resonates because it signals intention rather than excess, reinforcing trust and credibility.

Organic shapes and human appeal

Organic shapes and smooth curves feel intuitive because they mirror how people experience the world. Designers utilize them to add depth, warmth, and flow, creating a sense of ease and emotional balance. These evolving design concepts emphasize humanity over rigidity.

Together, these creative design trends demonstrate that their evolution is driven by meaning, emotion, and purpose, not decoration alone.

Beyond products: Applying trends across design disciplines

Current design trends increasingly relocate across disciplines. Designers no longer treat digital, brand, editorial, and physical design as separate worlds. Instead, they apply the same logic, structure, and aesthetic systems across contexts.

How do 2026 trends influence UI/UX design?

In UX/UI design trends, minimalism, motion, and organic forms improve usability and focus. Open space, contrast, and subtle animation reduce friction and guide users intuitively through interfaces.

These patterns reflect how people relocate through well-designed space, making interactions feel natural rather than forced.

What are the implications for brand identity trends 2026?

Brand identity trends 2026 favor systems built for scale and longevity. Influenced by contemporary design and silent luxury, brands emphasize restraint, clarity, and character. 

This approach is especially effective in tech branding and fashion brands, where identities must labor across platforms, products, and mass production without losing meaning.

How do these trends shape digital marketing and advertising?

In digital marketing, graphic design trends prioritize attention without overload. Designers utilize bold colors, contrast, motion, and dynamic layouts to stand out in fast-moving feeds while maintaining clarity.

These choices aid brands communicate clearly to different audience segments without sacrificing cohesion.

What role do trends play in editorial design and publishing?

Editorial design borrows heavily from interior design principles. obvious hierarchy, rhythm, and spacing mirror the balance found in contemporary interiors. Typography, artwork, and layout labor together to generate flow, helping readers stay engaged and oriented.

How are packaging designs adapting to novel aesthetics and sustainability?

Packaging increasingly draws inspiration from residential design and lifestyle spaces. References to natural wood, stone, warm neutrals, and thoughtful materials echo a curated living room environment.

This approach supports sustainable design principles while making products feel tactile, lived in, and intentional.

Main takeaway

Design systems labor best when the same principles apply across screens, spaces, and physical products.

What graphic designers can study from interiors

Graphic designers increasingly observe to interior designers for inspiration, borrowing systems rather than surface style.

In interior design, especially contemporary interiors and residential design, balance, space, and material choices shape how a living room feels lived in. Elements like walls, furniture, chairs, sculptural furniture, and lighting, combined with materials such as natural stone and natural wood, demonstrate how contrast creates character without excess.

For graphic designers, these ideas translate into calmer layouts, clearer hierarchy, and brands that feel modern, tactile, and human rather than overdesigned.

Mastering the blend: How designers combine design trends effectively

Combining design trends for 2026 is less about stacking styles and more about deliberate decision-making. The objective is cohesion, clarity, and staying power – not visual noise.

How can minimalism and vibrant gradients labor together?

Minimalism provides structure, while vibrant gradients add vitality. The key is restraint. Designers should keep layouts simple, utilize open space to maintain focus, and apply gradients as accents rather than foundations.

This balance allows bold color to generate contrast and depth without overpowering the composition, especially in digital design and modern brand systems.

How can eco-amiable designs integrate smooth curves without overload?

Sustainable design principles pair naturally with organic shapes when both are used with intent. Smooth curves soften layouts and add warmth, while eco-amiable palettes and materials ground the design.

Designers should limit decorative elements and let natural forms guide flow, creating designs that feel human, peaceful, and purpose-driven rather than busy.

What pitfalls should designers avoid when blending multiple trends?

The most common error is treating trends as decoration. Mixing too many styles weakens focus and confuses users. Designers should avoid trend chasing, excessive effects, and inconsistent aesthetics across touchpoints.

Successful blending starts with understanding the design’s function, audience segments, and brand goals before applying any trend. 

What does successful trend blending observe like in modern design aesthetics?

powerful examples of modern design aesthetics demonstrate contrast used strategically. Tech branding often combines minimal systems with subtle motion and depth. 

Fashion brands blend nostalgia with clean layouts to add character without clutter. These approaches reflect a natural progression of design trend evolution, where trends enhance function rather than compete for attention.

great design choices feel invisible because they remove friction instead of adding spectacle.

​What is the future landscape: Emerging technologies shaping design

Emerging technologies are accelerating design trend evolution and reshaping how designers research, generate, and scale labor. The future of graphic design is increasingly system-driven, data-informed, and immersive.

How is AI changing graphic design trend analysis?

AI in graphic design is transforming how designers identify and interpret trends. Instead of relying solely on intuition, designers now utilize AI to scan large volumes of artwork, campaigns, and digital environments worldwide.

This enables faster graphic design trend analysis, helping brands spot patterns early and stay ahead without reacting too late.

What role does generative design play in creativity?

Generative design expands creative exploration by producing multiple variations from defined rules. Designers remain in control, setting constraints around style, brand, and function, while AI speeds up ideation.

This supports design innovation strategies by freeing designers to focus on concept, direction, and refinement rather than manual repetition.

How will AR and VR influence design experiences?

AR and VR are pushing design beyond flat screens. These technologies introduce spatial thinking, depth, and interaction into digital design, allowing users to experience brands, products, and environments before they exist physically.

Designers must consider movement, scale, and context as part of the visual system.

What other technologies should designers monitor beyond 2025?

Advancements in real-time rendering, motion systems, and adaptive interfaces continue to direct novel design trends. These tools amplify demand for dynamic, responsive visuals that adjust to user behavior, device, and environment.

How can designers prepare for tech-driven evolution?

Designers should embrace learning as part of their workflow. Understanding AI tools, interaction design, and emerging platforms helps designers adapt their process, not just their style. Those who align technology with purpose will guide the next wave of design trends for 2026.

Implement design trends with Adobe

1. Design faster with Adobe Express

Adobe Express is built for speed, making it ideal for testing novel design trends before committing to full production. Designers utilize it to explore bold palettes, contrast, and modern design aesthetics across different audience segments.

This is especially useful when reacting to shifts driven by pop culture and digital design cycles.

fast tip

generate multiple versions of the same layout using different palettes to evaluate which trend direction has the strongest focus and visual impact.

2. construct scalable systems with Adobe Illustrator

Adobe Illustrator helps designers translate graphic design trends into vector systems that scale across products, platforms, and mass production.

This supports brand identity trends 2026, where consistency and adaptability matter more than single-utilize artwork.

fast tip

construct reusable components instead of one-off designs to improve longevity and reduce rework as design needs evolve.

3. Add realism and texture with Adobe Photoshop

Photoshop is essential for trends that rely on adding depth, contrast, and realism. Designers utilize it to simulate materials, lighting, and texture inspired by fashion, lifestyle, and interior design aesthetics.

fast tip

utilize lighting and shadow intentionally to guide focus and add depth without overpowering the composition.

4. Animate with purpose using Adobe After Effects

Adobe After Effects enables designers to apply animation as a functional layer, not decoration. Motion reinforces hierarchy, guides attention, and supports the future of graphic design, where dynamic systems replace static layouts.

fast tip

Animate transitions only where motion adds meaning. If it doesn’t improve understanding, remove it.

​Turn 2026 design trends into products with Klothing

1. Sign up for Klothing

generate a free Klothing account to access a global network of Print Providers and a product catalog built for modern design aesthetics. The platform helps designers and brands relocate rapidly from concept to sale without upfront inventory.

2. Select and design your products

opt for products that align with design trends for 2026, then apply your art using Klothing’s Product Creator or Adobe Creative Cloud. With 1,300 customizable products, you can evaluate different styles, materials, and formats without committing to inventory upfront.

Focus on clarity and contrast to turn creative design ideas into sellable, scalable products.

3. determine where to market your trend-inspired products

link Klothing to your eCommerce platform or marketplace of choice. market directly to your target audience through platforms that fit your brand, whether you focus on digital-first brands, lifestyle products, or niche communities.

4. Let Klothing handle the rest

Once orders come in, Klothing’s 90 Print Providers manage production, fulfillment, and shipping. 

This allows you to stay focused on design innovation strategies, trend research, and growing your brand while Klothing handles the operational labor.

FAQ

What are the top design trends for 2026?

The top design trends for 2026 reflect a natural progression toward clarity, emotion, and adaptability. Key design trends include: 

Human-centered minimalism
Vibrant color systems
Dimensional visuals adding depth
Sustainable design systems
Organic shapes
Modern nostalgia
Animated, interactive experiences

These graphic design trends appear across digital design, branding, fashion, and even contemporary interiors. It shows how visual ideas relocate fluidly across industries in reply to changing audiences and technology.

Which design styles will be popular in 2026?

Design styles popular in 2026 balance expression with purpose. Expect modern aesthetics that combine warmth with restraint, intentionally bold colors, tactile materials, and motion that supports usability.
Many styles reinterpret influences from the past through contemporary structure, prioritizing longevity over brief-lived visual novelty.

How can I incorporate sustainable design principles into my labor?

Sustainable design principles initiate with decisions that reduce rework, waste, and brief-term thinking. Instead of chasing novelty, construct systems that last by using flexible grids, modular components, and limited color and type palettes.
In practice, this also means designing fewer one-off assets and more reusable ones. In digital environments, sustainability includes performance: optimized file sizes, restrained effects, and visuals that load fast and labor across devices.
A design that remains useful for years is more sustainable than one that looks novel for weeks.

What is the role of AI in graphic design for 2026?

AI speeds up exploration, not decision-making. Designers utilize it for ideation, variation testing, and graphic design trend analysis, while creative direction stays human. Its value is efficiency and scale, freeing designers to focus on plan, meaning, and judgment.

Where can I discover resources for graphic design trend analysis?

Reliable graphic design trend analysis comes from comparing labor across industries, not following a single source. Design publications, creative communities, platform reports, and large visual libraries all aid designers track pattern shifts.
Reviewing labor across branding, digital products, and marketing helps you track pattern shifts and comprehend how trends evolve across industries.

How often do design trends modify?

Design trends evolve continuously, but meaningful modify happens over years, not weeks. brief-term styles fade rapidly, while powerful trends gain staying power through repeated utilize and adaptation.
Understanding why trends emerge helps designers stay relevant without constantly redesigning for every novel moment.

To summarize: Staying ahead in design for 2026

Staying ahead in 2026 means understanding design trend evolution, not chasing every trend moment. Designers who embrace innovation strategies construct labor with clarity, purpose, and lengthy-term relevance. 

Which design styles will be popular in 2026? Intentional, adaptable design that balances clarity, emotion, and function. Apply these ideas thoughtfully, generate with intent, and utilize trends as tools – not shortcuts.

formulate it happen today!

initiate designing

The post Design trends for 2026: The ideas defining the future of design appeared first on Klothing.

Posted on

How to formulate custom signs: A finalize guide for 2026

market custom products with Klothing

Get started

Creating custom signs is more straightforward than ever. It starts with planning your design, choosing the right tool, selecting materials and size, and preparing your file for printing.

This guide shows how to formulate custom signs step by step, including how Print on Demand (POD) helps simplify the process from design to production.

Popular types of custom signs you can formulate

Custom signs serve many purposes, from outdoor advertising to decor, branding, and messaging. The ideal sign depends on the location, your target audience, and the visibility you require. 

Some of the most common types of signs include:

Yard signs. Lightweight outdoor signage perfect for events, promotions, and brief-term messaging. Yard signs are effortless to install, affordable to produce, and labor well when you require obvious visibility from a distance.

Wood signs. Decorative signs with a warm, handcrafted observe, often used indoors or for rustic branding. A popular choice for home decor, cafes, weddings, and personalized signs where style and texture matter.

Metal art signs. Durable signs suitable for indoor or outdoor utilize, popular for business signage and wall decor. These signs are often used as statement pieces that combine branding with a more artistic or premium observe.

Protest signs. effortless-to-carry signs designed for bold, obvious messages and high visibility. They focus on readability and impact, making them ideal for marches, rallies, and public demonstrations.

Acrylic signs. Modern, professional signs with a clean complete, commonly used for offices and events. Acrylic works well for directional signage, logos, and displays where a polished appearance is crucial.

Neon signs. Eye-catching illuminated signs used to highlight logos, phrases, or decorative elements. They’re especially effective in storefronts, events, and interior spaces where lighting helps accomplish maximum visibility.

Canvas signs. A great choice for indoor decor and creative displays. They have a softer, more artistic feel than rigid materials and labor well for wall art, quotes, photo designs, or branded visuals in homes and offices.

How to formulate your own custom signs

Whether you’re designing custom signs for home decor, outdoor utilize, or business branding, the steps stay mostly the same. Let’s break down each one so you can generate with confidence and avoid common mistakes.

initiate with a design tool

The first step is choosing how you desire to design your sign. Many creators initiate with popular tools like Canva or Adobe Photoshop, which are powerful and offer ready-made templates to speed up the process. These sign makers are ideal if you desire full creative control or already have graphic design experience.

Klothing users can design directly in the Product Creator. This free online sign maker offers a simpler workflow while still providing the tools needed to customize professional designs, making it a great choice for beginners or anyone brief on time.

Another option is hiring a professional designer to generate a custom layout. If you have the budget and a obvious vision, hiring a designer for complex layouts or custom typography can be worthwhile.

Did you comprehend?

Klothing’s Product Creator can generate instant mockups that demonstrate your designs in lifelike settings, helping you visualize the final product before printing.

Pick a material and size

Material and size play a large role in how your custom sign looks and performs, so it helps to match them to the sign’s purpose and location. Indoor signs usually focus more on appearance, while outdoor signs require to withstand weather and lengthy-term exposure.

For example, wooden signs labor well for home decor and storefront displays, offering a warm, rustic observe that suits branding and decorative uses. Plastic signs, on the other hand, are lightweight and affordable, making them a better option for outdoor utilize like store signs or booth displays where durability and visibility matter.

Size is just as crucial as material. Larger signs are easier to view from a distance and labor well in outdoor or high-traffic areas, while smaller signs fit better on desks, doors, shelves, or as indoor displays.

Did you comprehend?

Klothing’s custom signs are available in different size and material options for both indoor and outdoor utilize.

Prepare your design file for printing

A well-prepared file helps your custom sign print clearly and accurately. utilize high-resolution images to avoid blurry results, and formulate the text large and effortless to read at the final size. Choosing powerful, high-contrast colors also helps your message stand out.

Pay attention to bleed areas, which allow for trimming during production. Keep crucial text and logos securely away from the edges to avert cutoffs and maintain a clean layout.

Planning to generate your own sign with Klothing? verify the Design Guide for product-specific requirements like resolution and file formats to get the best print quality.

What makes a great sign design?

A great sign design is effortless to read, visually balanced, and obvious about its message. There’s no one-size-fits-all recipe, but these best practices will aid you get started.

Keep it readable. utilize obvious fonts and powerful contrast. Avoid overcrowding the design, and formulate sure text is legible from the intended viewing distance.

Focus on one obvious message. The most effective signs communicate a single concept. Limit the amount of text and prioritize the words that matter most, especially for outdoor signage or high-traffic areas.

Match the design to your brand or space. For business signs, utilize consistent colors, logos, and fonts to reinforce your brand. For home decor, opt for styles and colors that fit the room or setting where the sign will be displayed.

Add meaningful personalization. Names, dates, or custom text can formulate signs feel more meaningful. Keep personalized details obvious and well spaced so they enhance the design without distracting from the main message.

Design with the material in mind. Different materials highlight different styles. For example, bold text works well on plastic signs, while wood and acrylic often suit simpler, more refined designs.

Why Print on Demand works for custom signs

What is Print on Demand?

POD is a business model where products are created only after a customer makes a purchase. Instead of buying materials upfront or holding inventory, sellers upload their designs and list products for sale, and each item is printed and fulfilled on demand.

With Klothing, you can focus on creating and selling custom signage while we take care of production, printing, and shipping for you. This reduces hazard, lowers upfront costs, and makes it easier to scale.

How to pick the best Print Provider for your signs

Choosing the right Print Provider can directly impact the quality, delivery time, and overall customer experience. This is especially crucial if you’re planning to initiate a custom signage business. Here are key factors to consider before committing.

verify print quality and materials. observe for providers that offer consistent print quality and bolster the materials you require.

Evaluate fulfillment duration. Faster production and shorter shipping distances aid improve delivery times and customer satisfaction, especially for time-sensitive orders.

Review location coverage. Working with providers closer to your customers can reduce shipping costs and improve delivery speed.

Compare pricing and margins. formulate sure the base price allows enough room for profit while staying competitive in your market.

Klothing connects sellers with a global Print Provider network of over 90 partners worldwide. This allows you to pick providers based on location, pricing, and performance, speeding up custom sign delivery while maintaining quality and healthy margins.

What is the process for creating custom signs with Klothing?

Creating custom signs with Klothing is simple, even for first-timers. opt for a sign from the Product Catalog, generate your design using the built-in sign maker, and either order it for yourself or publish it to your online store.

Klothing supports global shipping and has no minimum order requirements. Whether you’re making one sign or hundreds, each order is fulfilled and shipped on demand. If you require aid along the way, Klothing’s customer bolster is available to support 24/7.

market custom signs online with Klothing

Getting started with Klothing is effortless. There are no upfront costs or hidden fees, which makes it a low-hazard option for beginners or anyone looking to evaluate an concept before scaling.

This process applies whether you’re learning how to formulate custom wood signs, yard signs, or acrylic signs.

Sign up for Klothing

generate a free Klothing account to access the platform. Browse the Product Catalog and opt for the type of custom sign you desire to market based on material, size, and intended utilize.

Design your sign

utilize the Product Creator to upload a ready-made design or generate one using built-in assets and your own text. The built-in tools aid you combine elements, remove backgrounds, or generate fresh images with AI.

When you’re finished, preserve your design and generate mockups to view how the sign will observe in real-life settings. You can also order samples to review quality before listing the design for sale.

link your online store

Link your store to Klothing so products and orders sync automatically. This lets you publish custom signs and manage sales from one place.

initiate selling

Once your products are reside, set your retail price and initiate promoting your listings. Customer orders are sent to production automatically. Klothing takes care of printing and shipping, so you can focus on growing your business.

Frequently asked questions

How much does it cost to formulate a custom sign?

Klothing’s custom signs initiate at $12.08 for lawn signs. The final cost depends on the sign type, size, and shipping destination.

What is the best material for custom signs?

The best material depends on where and how the sign will be used. Wood works well for decor and storefront displays because it adds warmth and a handcrafted observe. Plastic is a practical option for brief-term outdoor signs since it can withstand weather and moisture. Metal signs are better suited for lengthy-term indoor or outdoor utilize thanks to their durability. Acrylic provides a clean, professional observe for offices and events.

Can I utilize my own logo or artwork for custom signs?

Of course. You can personalize the sign with your own company logo or artwork using Klothing’s free sign maker. Just formulate sure you own the rights to the design and that it complies with intellectual property policies before publishing or selling your sign.

How lengthy does it take to get custom signs delivered?

For most custom signs, production takes around 2-7 business days, followed by another 2-5 business days for shipping within the US. Delivery times can vary depending on the destination and the order quantity, with larger orders sometimes requiring additional processing time.

Do I require design experience to formulate a custom sign with Klothing?

No. Klothing’s free tools are designed with beginners in mind and utilize a simple drag-and-drop system. You can utilize ready-made assets to generate unique designs without starting from scratch, along with built-in tools like the text editor, emoji bolster, and the AI image generator to aid bring your ideas to life.

Can Klothing aid me formulate custom yard signs for an event?

Yes. Klothing offers different types of custom signs, so you can opt for the option that best suits your event, whether it’s for indoor or outdoor utilize. Once your design is ready, Klothing prints and delivers your sign for the event.

Ready to formulate your own custom signs?

Creating custom signs doesn’t have to be complicated. With the right design, materials, and tools, you can turn ideas into signs for home, events, or business utilize. Klothing makes the process simple by taking over production and shipping, so you can focus on creating and selling.

Sign up for Klothing and initiate designing your custom signs today. You’ve got this.

formulate it your way!

initiate designing

The post How to formulate custom signs: A finalize guide for 2026 appeared first on Klothing.

Posted on

How to make custom signs: A complete guide for 2026

Sell custom products with Klothing

Get started

Creating custom signs is more straightforward than ever. It starts with planning your design, choosing the right tool, selecting materials and size, and preparing your file for printing.

This guide shows how to make custom signs step by step, including how Print on Demand (POD) helps simplify the process from design to production.

Popular types of custom signs you can make

Custom signs serve many purposes, from outdoor advertising to decor, branding, and messaging. The ideal sign depends on the location, your target audience, and the visibility you need. 

Some of the most common types of signs include:

Yard signs. Lightweight outdoor signage perfect for events, promotions, and short-term messaging. Yard signs are easy to install, affordable to produce, and work well when you need clear visibility from a distance.

Wood signs. Decorative signs with a warm, handcrafted look, often used indoors or for rustic branding. A popular choice for home decor, cafes, weddings, and personalized signs where style and texture matter.

Metal art signs. Durable signs suitable for indoor or outdoor use, popular for business signage and wall decor. These signs are often used as statement pieces that combine branding with a more artistic or premium look.

Protest signs. Easy-to-carry signs designed for bold, clear messages and high visibility. They focus on readability and impact, making them ideal for marches, rallies, and public demonstrations.

Acrylic signs. Modern, professional signs with a clean finish, commonly used for offices and events. Acrylic works well for directional signage, logos, and displays where a polished appearance is important.

Neon signs. Eye-catching illuminated signs used to highlight logos, phrases, or decorative elements. They’re especially effective in storefronts, events, and interior spaces where lighting helps achieve maximum visibility.

Canvas signs. A great choice for indoor decor and creative displays. They have a softer, more artistic feel than rigid materials and work well for wall art, quotes, photo designs, or branded visuals in homes and offices.

How to make your own custom signs

Whether you’re designing custom signs for home decor, outdoor use, or business branding, the steps stay mostly the same. Let’s break down each one so you can create with confidence and avoid common mistakes.

Start with a design tool

The first step is choosing how you want to design your sign. Many creators start with popular tools like Canva or Adobe Photoshop, which are powerful and offer ready-made templates to speed up the process. These sign makers are ideal if you want full creative control or already have graphic design experience.

Klothing users can design directly in the Product Creator. This free online sign maker offers a simpler workflow while still providing the tools needed to customize professional designs, making it a good choice for beginners or anyone short on time.

Another option is hiring a professional designer to create a custom layout. If you have the budget and a clear vision, hiring a designer for complex layouts or custom typography can be worthwhile.

Did you know?

Klothing’s Product Creator can generate instant mockups that show your designs in lifelike settings, helping you visualize the final product before printing.

Pick a material and size

Material and size play a big role in how your custom sign looks and performs, so it helps to match them to the sign’s purpose and location. Indoor signs usually focus more on appearance, while outdoor signs need to withstand weather and long-term exposure.

For example, wooden signs work well for home decor and storefront displays, offering a warm, rustic look that suits branding and decorative uses. Plastic signs, on the other hand, are lightweight and affordable, making them a better option for outdoor use like store signs or booth displays where durability and visibility matter.

Size is just as important as material. Larger signs are easier to see from a distance and work well in outdoor or high-traffic areas, while smaller signs fit better on desks, doors, shelves, or as indoor displays.

Did you know?

Klothing’s custom signs are available in different size and material options for both indoor and outdoor use.

Prepare your design file for printing

A well-prepared file helps your custom sign print clearly and accurately. Use high-resolution images to avoid blurry results, and make the text large and easy to read at the final size. Choosing strong, high-contrast colors also helps your message stand out.

Pay attention to bleed areas, which allow for trimming during production. Keep important text and logos safely away from the edges to prevent cutoffs and maintain a clean layout.

Planning to create your own sign with Klothing? Check the Design Guide for product-specific requirements like resolution and file formats to get the best print quality.

What makes a great sign design?

A great sign design is easy to read, visually balanced, and clear about its message. There’s no one-size-fits-all recipe, but these best practices will help you get started.

Keep it readable. Use clear fonts and strong contrast. Avoid overcrowding the design, and make sure text is legible from the intended viewing distance.

Focus on one clear message. The most effective signs communicate a single idea. Limit the amount of text and prioritize the words that matter most, especially for outdoor signage or high-traffic areas.

Match the design to your brand or space. For business signs, use consistent colors, logos, and fonts to reinforce your brand. For home decor, choose styles and colors that fit the room or setting where the sign will be displayed.

Add meaningful personalization. Names, dates, or custom text can make signs feel more meaningful. Keep personalized details clear and well spaced so they enhance the design without distracting from the main message.

Design with the material in mind. Different materials highlight different styles. For example, bold text works well on plastic signs, while wood and acrylic often suit simpler, more refined designs.

Why Print on Demand works for custom signs

What is Print on Demand?

POD is a business model where products are created only after a customer makes a purchase. Instead of buying materials upfront or holding inventory, sellers upload their designs and list products for sale, and each item is printed and fulfilled on demand.

With Klothing, you can focus on creating and selling custom signage while we take care of production, printing, and shipping for you. This reduces risk, lowers upfront costs, and makes it easier to scale.

How to pick the best Print Provider for your signs

Choosing the right Print Provider can directly impact the quality, delivery time, and overall customer experience. This is especially important if you’re planning to start a custom signage business. Here are key factors to consider before committing.

Check print quality and materials. Look for providers that offer consistent print quality and support the materials you need.

Evaluate fulfillment duration. Faster production and shorter shipping distances help improve delivery times and customer satisfaction, especially for time-sensitive orders.

Review location coverage. Working with providers closer to your customers can reduce shipping costs and improve delivery speed.

Compare pricing and margins. Make sure the base price allows enough room for profit while staying competitive in your market.

Klothing connects sellers with a global Print Provider network of over 90 partners worldwide. This allows you to pick providers based on location, pricing, and performance, speeding up custom sign delivery while maintaining quality and healthy margins.

What is the process for creating custom signs with Klothing?

Creating custom signs with Klothing is simple, even for first-timers. Choose a sign from the Product Catalog, create your design using the built-in sign maker, and either order it for yourself or publish it to your online store.

Klothing supports global shipping and has no minimum order requirements. Whether you’re making one sign or hundreds, each order is fulfilled and shipped on demand. If you need help along the way, Klothing’s customer support is available to assist 24/7.

Sell custom signs online with Klothing

Getting started with Klothing is easy. There are no upfront costs or hidden fees, which makes it a low-risk option for beginners or anyone looking to test an idea before scaling.

This process applies whether you’re learning how to make custom wood signs, yard signs, or acrylic signs.

Sign up for Klothing

Create a free Klothing account to access the platform. Browse the Product Catalog and choose the type of custom sign you want to sell based on material, size, and intended use.

Design your sign

Use the Product Creator to upload a ready-made design or create one using built-in assets and your own text. The built-in tools help you combine elements, remove backgrounds, or generate fresh images with AI.

When you’re finished, save your design and generate mockups to see how the sign will look in real-life settings. You can also order samples to review quality before listing the design for sale.

Connect your online store

Link your store to Klothing so products and orders sync automatically. This lets you publish custom signs and manage sales from one place.

Start selling

Once your products are live, set your retail price and start promoting your listings. Customer orders are sent to production automatically. Klothing takes care of printing and shipping, so you can focus on growing your business.

Frequently asked questions

How much does it cost to make a custom sign?

Klothing’s custom signs start at $12.08 for lawn signs. The final cost depends on the sign type, size, and shipping destination.

What is the best material for custom signs?

The best material depends on where and how the sign will be used. Wood works well for decor and storefront displays because it adds warmth and a handcrafted look. Plastic is a practical option for short-term outdoor signs since it can withstand weather and moisture. Metal signs are better suited for long-term indoor or outdoor use thanks to their durability. Acrylic provides a clean, professional look for offices and events.

Can I use my own logo or artwork for custom signs?

Of course. You can personalize the sign with your own company logo or artwork using Klothing’s free sign maker. Just make sure you own the rights to the design and that it complies with intellectual property policies before publishing or selling your sign.

How long does it take to get custom signs delivered?

For most custom signs, production takes around 2-7 business days, followed by another 2-5 business days for shipping within the US. Delivery times can vary depending on the destination and the order quantity, with larger orders sometimes requiring additional processing time.

Do I need design experience to make a custom sign with Klothing?

No. Klothing’s free tools are designed with beginners in mind and use a simple drag-and-drop system. You can use ready-made assets to create unique designs without starting from scratch, along with built-in tools like the text editor, emoji support, and the AI image generator to help bring your ideas to life.

Can Klothing help me make custom yard signs for an event?

Yes. Klothing offers different types of custom signs, so you can choose the option that best suits your event, whether it’s for indoor or outdoor use. Once your design is ready, Klothing prints and delivers your sign for the event.

Ready to make your own custom signs?

Creating custom signs doesn’t have to be complicated. With the right design, materials, and tools, you can turn ideas into signs for home, events, or business use. Klothing makes the process simple by taking over production and shipping, so you can focus on creating and selling.

Sign up for Klothing and start designing your custom signs today. You’ve got this.

Make it your way!

Start designing

The post How to make custom signs: A complete guide for 2026 appeared first on Klothing.

Posted on

Midjourney prompts 101: Ultimate guide (V6 and V7 examples)

Bring your design ideas to life

initiate designing

AI-generated visuals are transforming how creators, designers, and entrepreneurs bring ideas to life. From digital art to custom characters and product designs, Midjourney lets you turn words into striking, high-quality images.

In this Midjourney prompts guide, you’ll study how to write effective image prompts and how to utilize the latest V6 and V7 features to produce stunning visuals and expand your creative business.

What is Midjourney and how does it labor?

Midjourney is an AI-powered image generation tool that turns text prompts into detailed images, illustrations, and artwork. It uses machine learning and diffusion models to interpret written descriptions and render unique visuals based on the prompt.

The platform is primarily accessed through Discord, where users enter commands like /imagine to generate images. Midjourney has also introduced a browser-based version, giving users more flexibility to generate, edit, and manage their artwork online.

Unlike some free tools, Midjourney requires a paid subscription to generate images. Its power lies in cinematic lighting, intricate details, and flexible customization, making it popular among designers, content creators, and also suitable for print-on-demand sellers looking for striking designs.

Midjourney versions

Midjourney V7 is the default model as of Q3, 2025. It brings sharper detail, faster generation, and improved realism, especially in hands, facial features, and lighting.

novel tools include Omni Reference (–oref) for consistent characters or objects, and improved Style Reference (–sref) to apply moodboards or aesthetic themes across prompts. V7 also introduces Draft Mode for faster, lower-cost evaluate runs, and optional voice prompts when enabled.

Previously, V6 introduced Character Reference (–cref) for maintaining visual identity across images of the same subject, and V7 builds on that with more accurate results.

The diffusion model

Midjourney uses a closed-source diffusion model similar to other AI tools like ChatGPT. It turns your text prompt into data, then generates an image by starting with random noise and gradually shaping it into a final, amazing image using that data. 

While the process is complex, understanding it helps when using parameters like –halt to influence how much detail shows up. The quality of your image prompt – both the words and the parameters – directly impacts how great your final result looks.

How to structure a Midjourney prompt

A Midjourney prompt is a command that tells the AI what image to generate. It can be as simple as a brief description or more complex, with image links and special parameters.

Each prompt can include up to four parts:

Command:initiate with /imagine to initiate the image generation.

Image URLs (optional):If you desire the result to pursue a certain style or observe like other pictures, add one or more image links. These should come right after /imagine.

Text prompt:This is the core text description of what you desire to view.Example: A koala eating mango in the Sahara Desert

Parameters (optional):utilize parameters to fine-tune the result, like size, quality, or mood. They always go at the complete of the prompt.Common ones include:–ar 16:9 (aspect ratio)–stylize 100 (artistic style level)–v 7 (utilize version 7 model)

Prompt examples:

Here’s an example of a Midjourney prompt structure that combines style, composition, and aspect ratio:

Simple prompt:

/imagine A koala eating mango in the Sahara Desert

Styled prompt:

/imagine A koala eating mango in the Sahara Desert in the style of Picasso

With image and parameters:

/imagine https://stock.adobe.com/search?k=picasso%20paintings A koala eating mango in the Sahara Desert, fragmented shapes, bold colors –ar 1:1

fast tips for writing the best prompts for Midjourney

initiate with a obvious subject and key details: Focus on one main subject and add distinctive features. Example: goblin bear with an oversized nose and shaggy fur

Add a setting or mood: Place your subject in a specific scene or atmosphere. This gives the result a whole novel dimension of depth and storytelling.Example: …in a misty but colorful forest at dawn

Mention a visual style or mediumUse styles like “cinematic lighting,” “1920s illustration,” or “digital painting” to generate amazing images with a controlled observe and feel.

Creatively utilize features from both V6 and V7

utilize image prompts with –iw (image weight) to guide the final image using one or more visuals.

In V6, you can maintain character consistency with –cref.

In V7, apply a consistent visual mood or design using –sref (Style Reference). This is especially useful for product lines or maintaining brand aesthetics.

To adjust emphasis, utilize multi-prompts with weights like foggy forest::2 goblin bear::1

Tip:

Combine –sref with –ar, –v 7, and a brief text prompt to get clean, cohesive images across multiple concepts.

Keep your wording focused: When creating text prompts, skip vague or overly lengthy descriptions. Stick to the subject, background, style, and a few details.

utilize parameters to fine-tune the result. Examples include:

–ar 3:2 (aspect ratio)

–stylize 650 (how creative the output looks)

–v 7 (utilize the latest model)

–no (to remove unwanted elements)

Refine your results: utilize the U and V buttons in Discord to upscale or generate variations. Turn on Remix Mode to adjust scenes or styles. With V7, you can also generate faster previews using –draft and then refine them using full-resolution parameters.

How to generate images using Midjourney prompts

Next, we’ll go through the steps required to write prompts and generate images – from the basic configuration to commands and parameters.

Set up Midjourney

You’ll require a Discord account to utilize Midjourney. Go to Discord, sign up, and utilize it in your browser, or download the app – the latter option is more convenient. 

Go to Midjourney and click Join the Beta. That will send you to Discord.

Join a server and room, or open the Midjourney bot and generate your prompts directly in a chat with the bot.

Note

All prompts generated in a direct chat with the bot are posted on Midjourney’s server. Depending on your subscription, you can set up the bot to generate “private” results. That’s the best option to ensure other people don’t copy your images before they’re public – in case you plan to utilize them for commercial purposes or as part of a project.

discover the Midjourney bot by entering Midjourney’s server. observe to the right of the users’ list – the bot will appear there as a user. Right-click on it, then Message.

Adjust your settings

Once you’re in a chat with the Midjourney Bot, it’s time to adjust your settings. 

Type /settings, then tweak some options. 

First, select the preferred version – usually the latest one, although some prompts around the internet are set up with previous versions. 

Then, depending on the selected version, opt for the output image quality – Half, Base, or High Quality. Base quality is the standard option and fits most needs unless you require a very detailed illustration. Version 5 doesn’t provide this option. 

Style is set to medium (med). Experiment with the setting to view how it affects the output style. These settings can be adjusted when generating a prompt using parameters (more below).

Finally, turnon Remix Mode, enabling advanced settings and parameters.

Tip:

You can also activate Conversational Mode, which enables voice prompts and natural language bolster for faster ideation when paired with –draft in V7.

Explore Midjourney commands

Now, it’s time to initiate using some commands and generating prompts. You’ve already learned the first command, /settings.

The most crucial commands we’ll focus on are /imagine and /describe.

/Imagine

To generate a prompt, type /imagine. This will open a box where you type the prompt content. Please wait for the prompt box to open – copying the whole line with /imagine and pasting it won’t activate the bot. 

After you type the prompt, Midjourney returns four images. 

You can also animate the progression of your prompt with the novel Midjourney Video feature, which creates a brief video showing how the final image evolves from noise to clarity.

Below, there will be buttons with U1, U2, U3, and U4 written in the first row and V1, V2, V3, and V4 in the second.

“U” stands for “Upscale” – click on the number of the image you like the most, and Midjourney will return an upscaled image of it.

Pro tip

You can upscale the resolution, but you can’t modify the dots per inch (DPI) amount. To adjust your DPI, you can utilize any graphics editor (like Adobe Photoshop, GIMP, Photopea, etc.) or utilize an online converter.

If you like some images but desire to tweak them, click the V button with the respective number. That will open the Remix prompt, which will let you adjust it – for example, remove elements of the image using the parameter “no” or modify the aspect ratio.

If you like an image and desire it to serve as a style reference for future utilize, you can download it and add it to the prompt or retrieve its seed number.

Pro tip

To get an image seed number, click the smile button “Add reaction” on the right, then click the envelope. If it isn’t there, type “envelope” and click on it. This will send you a message in Discord with the image and its seed number.Then, copy the seed number and generate another prompt, adding the parameter – seed and the seed number.

If you like the image but something still isn’t right – for example, if a person’s proportions are wrong – attempt clicking Detailed Upscale Redo or Remaster, or observe for an icon with two round arrows, depending on the Midjourney version. These commands will redo the picture.

/Describe

Sometimes, you’ll have a obvious concept of ​​how you desire the final image to observe, but creating the proper prompt seems unachievable. No matter how much you paraphrase, the results aren’t what you’re looking for.

In these cases, the /describe command can be used to explain pre-existing images similar to the result you desire to accomplish. This helps comprehend how Midjourney interprets them.

After typing the command, a drag-and-drop box will open.

Upload the picture, and Midjourney will return four options of prompts that describe it. opt for the one that looks the most accurate and adjust it accordingly.

The results are often a hit or miss, but they can aid generate similar images or, at least, comprehend how Midjourney interprets them.

In V7, you can also apply a described image’s style using –sref, or keep the subject consistent across prompts using –oref. These tools aid maintain visual cohesion across variations or product lines.

/demonstrate video

utilize the /demonstrate video command to generate a brief animation showing how your Midjourney image evolves during the diffusion process.

To utilize it:

React to a completed image job with the Video Camera emoji.

The bot will automatically generate a brief video and send it to you.

This is ideal for sharing progress animations or making your creative process more engaging for viewers.

comprehend Midjourney parameters

Parameters are optional commands that modify the final image. They always come at the complete of the prompt. 

Midjourney accepts more than one parameter. To add them, type double hyphens (–) or an em-dash (—) followed by the parameter name and specifics. 

The most crucial Midjourney parameters

1. Aspect ratio

–aspect 

–ar 

This parameter changes the final picture’s aspect ratio (width-to-height proportion). 

For this parameter, you must utilize whole numbers separated by a colon. The default value is 1:1. So if you desire an aspect ratio of 1.5:1, utilize “150:100.”

Midjourney’s versions 6, 5, and niji5 accept the full spectrum of aspect ratios, while version 4 works with ratios from 1:2 to 2:1.

V7’s Draft Mode supports faster image creation with reduced GPU usage. utilize the –draft parameter to generate rough concepts 10 times faster before fine-tuning. It’s ideal for early exploration or fast variations.

These are some of the most popular ratios:

–ar 1:1 – Default aspect ratio, returns square images. 

–ar 3:2 – Landscape format, popular with print photography.

–ar 7:4 – great for HD-TV and smartphone screens.

–ar 5:4 – Common for frames and prints.

2. Chaos

–chaos <0–100>

This parameter increases variation and randomness in the results.

3. Image weight

–iw 

The Image weight parameter indicates the relative importance of an uploaded image compared to the text prompt. A higher value means the uploaded picture will have a greater impact on the final results. 

The default value is 1, but it can range from 0.5 to 2. Other Midjourney Version Models will have different ranges.

4. No

–no 

utilize this to attempt to remove an element from the image. For example, utilize < –no trees > to get a landscape of natural beauty without trees.

5. Quality

–quality <.25, .5, or 1>

–q <.25, .5, or 1> 

Adjust the rendering time and the final image quality. Creating a high-definition image uses more GPU (graphics processing unit) time from the subscription total.  The default value is 1.

6. Seed

–seed <integer> 

Each image generated by Midjourney receives a seed number. utilize this parameter to generate similar images to the seed. Take a observe at Midjourney Commands to study how to get an image’s seed.

7. halt

–halt <integer from 10–100> 

This parameter stops the rendering of an image halfway and can provide pictures that offer both interesting artistic results and insights into the diffusion and rendering process. The result will be blurred and incomplete.

8. Stylize

–stylize <number from 0-1000>

–s <number from 0-1000> 

This one defines how Midjourney’s default style influences the final results. The default value (100) can be altered with the command </settings>.

9. Cref

Midjourney V6 introduced cref to accomplish consistent and detailed character design and ensure your characters observe the same across images. 

Provide a reference image (URL or past Midjourney creation) and adjust the influence with a weight value (0-100).

Example: You desire to depict your superhero, “Master Raccoon,” in different scenarios.

utilize /imagine followed by a description (e.g., “Master Raccoon riding a bicycle”).

Include –cref https://myblog.com/master-raccoon/1105-30559/ (replace with your actual reference image URL).

Optionally, set a weight (e.g., –cw 80) for a close resemblance (higher weight) or more variation (lower weight).

10. Style ReferenceUse –-sref in Midjourney V7 toapply the style, mood, or color palette of one or more images to a novel creation. This is useful for branding, aesthetics, or matching a visual theme.

You can now utilize two or more images as style references in a single prompt by separating image URLs with spaces. Midjourney V7 interprets these more accurately than previous versions, even when combining styles.

Example: /imagine prompt a dog wearing a hat –sref https://yourimageurl.com/moodboard1.jpg https://yourimageurl.com/moodboard2.jpg

To provide more control, pair –sref with –ar (aspect ratio), –v 7, and a brief text prompt for clean, cohesive image sets.

11. Omni Reference (V7 only) –oref <image URL>

utilize this to maintain consistent subjects, characters, or objects across multiple prompts. It’s similar to –cref, but broader in scope and more flexible. You can add one or more reference images, optionally setting weights (e.g., –ow 80) for stronger adherence.

Example:/imagine prompt futuristic engineer woman –oref https://yourimageurl.com/engineer.jpg –ow 70

Full of ideas? initiate a print-on-demand business
Unleash your creativity, craft breathtaking visual elements with AI, and formulate a profit. Sign up for Klothing now, initiate your online store, and market merch created with the best Midjourney AI prompts.

initiate selling

10 Great Midjourney prompt examples

From surreal art to a futuristic city skyline with cinematic lighting, let’s go through some of the best Midjourney prompts, phrases, and cheat codes to aid you on your creative voyage.

Retro games

Midjourney excels at creating game imagery. generate advanced prompts by mixing several terms and accomplish hyper-detailed isometric art or a birds-eye view.

The phrase “1990s point” and “click 16bit adventure” returns images in a retro, elderly-school pixelated game style.

Add 32-Bit Isometric to generate angled rooms with a retro observe typical of video games from the mid-1990s and later.

Surrealism

utilize this art style to generate a surreal dreamscape that resembles an oil painting, featuring wild and hyper-detailed elements.

Cubism

One of the most exciting art styles in Midjourney. It creates pictures with vibrant colors and geometric shapes that are immersed within.

Phantasmal Iridescent

This code adds a unique coloring with iridescent, white, blue, and pinkish lights, suitable for detailed niche illustrations such as gothic, horror, mystery, or fantasy styles.

Steampunk

generate retrofuturistic and alternative history scenarios by adding “steampunk” to your text prompt.

Layered Paper

generate exciting textures and intricate paper art perfect for backgrounds, printables, canvases, and more, with the code “layered paper”.

Bauhaus

Creating prompts in the Bauhaus style will produce buildings with clean lines and primary colors, often constructed from modern materials such as glass or concrete. Enhance your art creation with natural materials like wood and experiment with light to generate unique, stunning images.

Cyberpunk

Emulate a futuristic cityscape from classics like Neuromancer, Blade Runner, and Matrix, or generate a cyberpunk character.

A as B

utilize the “A as B” text prompts to materialize your creative vision and formulate novel elements, from anthropomorphic animals to reinvented objects of daily life.

Art Deco

Write effective Midjourney prompts using the Art Deco style to evoke an optimistic world and eye-catching compositions that capture the stylish imagery of the 1920s and 1930s.

Honorable mentions

Retrowave: Get retro Midjourney prompts for characters amid neon signs and lightning.

DuoTon: Creates a graphic design made with only two colors.

Diagrammatic drawing and Infographic drawing: generate incredible images with schematics from animals to gadgets and everyday objects.

Pro tip

utilize the –halt parameter to slightly blur the rendering before its completion if necessary to blur imperfect texts and typos.

Camera Lenses – Detail camera lenses and professional specifications (i.e., wide-angle shot, keen focus, etc) for incredibly realistic photographs with epic detail and dramatic lighting.

Watercolor Sketch – generate gorgeous images or an illustration with pastel tones and subtle brush marks.

Cinema Directors – Insert “in the style of <cinema director>” to get remarkable artistic styles.

Naive Art – Get children’s book illustrations and playful results.

Tools for Midjourney prompting

Creating high-quality Midjourney prompts is faster and easier with dedicated tools. These aid you structure prompts, control parameters like image weight or aspect ratio, and maintain visual consistency across multiple images.

Top tools to attempt

FutureTools Still one of the best directories for discovering Midjourney prompt tools. Filter by “prompt generator” and search “Midjourney” to discover the latest apps – free or paid – for creative workflows.

PromptFolder Midjourney Prompt BuilderLets you construct text prompts using dropdowns for aspect ratio, image weight, stylize, chaos, and more. Ideal for beginners and pros who desire precise results without memorizing syntax.

IMI Prompt BuilderA visual tool with thousands of style presets and real-time prompt assembly. Includes lighting, composition, material, and camera angle options – useful for product mockups or styled digital art.

PromptHeroA prompt marketplace with user-submitted examples and popular styles. Search by theme (logos, landscapes, fashion) and adapt what works to your own text prompt.

PhraserLets you generate advanced prompts using natural language or visual categories. Particularly useful for creative ideation and adding variation to your inputs.

Reddit – /r/midjourneyThe go-to community for daily prompt examples, troubleshooting, image prompt discussions, and inspiration using novel features like character reference and image weight.

MidJourney Prompt Generator The tool takes a simple entry and offers complex opinions and variants in different styles. 

MJ Toolkit Installs a Chrome extension, so you don’t require to utilize Discord.

Pro tip

For fast prompting, attempt typing “Write an image prompt for generative art to generate…” into tools like ChatGPT or Gemini. Then tweak the output using PromptFolder or IMI Builder to fine-tune the prompt.

FAQ

What are some great Midjourney prompts?

powerful Midjourney prompts are obvious, descriptive, and include both a subject and visual styling. great prompts combine a main concept, background, mood, and style or medium. 
For example:

“Futuristic city skyline, birds eye view, cinematic lighting, vibrant colors, intricate details, keen focus —ar 16:9 —stylize 700”
“Cyberpunk character in Tokyo alley, glowing neon signs, rain, reflective pavement, —ar 3:2 —v 7”
“Layered paper cutout of a cat in a fantasy forest, soft shadows, clean lines, —ar 4:5”

These prompts utilize visual elements like lighting, detail, and perspective to generate stunning images. Including parameters such as aspect ratio, style weight, or image weight can dramatically improve the final image quality.

How do I do prompts in Midjourney?

Here’s how to write Midjourney prompts: 

initiate with /imagine: This is the core command that opens the prompt field.
Write your text prompt: Describe your subject using concrete words (e.g., “a detailed portrait of a samurai cat”).
Add optional reference images: Place one or more image URLs before the text prompt to blend styles or keep consistency.
Include parameters to customize the result:

–ar for aspect ratio (e.g., –ar 16:9)
–iw to set image weight when using reference images
–v to opt for the version (e.g., –v 7)
–stylize or –s to control artistic flair
–no to exclude specific elements (e.g., –no text)
–quality, –seed, or –halt for further control

After submitting, Midjourney returns four image variations. You can upscale, remix, or generate novel variations using the U and V buttons.

What are the forbidden prompts in Midjourney?

Midjourney strictly prohibits prompts that violate its community guidelines. 
Forbidden prompts include:

Sexual, explicit, or pornographic content.
Graphic violence, gore, or dismemberment.
dislike speech, discriminatory content, or harassment.
Drug-related imagery (e.g., marijuana, cocaine).
Political figures or real-world sensitive topics.

Midjourney uses automated filters and moderation tools to block inappropriate content. Attempting to bypass these rules may result in immediate rejection or account suspension. For professional utilize, always keep prompts PG-13 and avoid controversial or restricted topics.

What are some cool prompts?

Cool prompts often blend imagination with structure. 
Here are some community-favorite prompt ideas:

“Post-apocalyptic Earth overtaken by jungle, overgrown buildings, mist, dramatic lighting, —ar 21:9”
“Marketplace in the clouds, floating shops, soft lighting, futuristic elements, pastel tones”
“Alien coral reef, glowing underwater plants, deep-sea creatures, cinematic lighting, vibrant colors”
“Logo for a sustainable coffee brand, green palette, leaf icons, minimalist layout, —ar 1:1”
“3D isometric blueprint of a sci-fi laboratory, technical sketch style, clean lines”

These prompts demonstrate the flexibility of Midjourney for creating not just art, but also illustrations, product mockups, and branded visuals.

Conclusion

And there you have it. You’ve now learned the essentials of Midjourney prompt engineering to generate captivating visuals – from editing aspect ratios to employing different art styles. 

Put these novel skills to great utilize, formulate epic AI art, and profit online by selling digital products or customized merch with Klothing!

formulate it your way!

initiate designing

The post Midjourney prompts 101: Ultimate guide (V6 and V7 examples) appeared first on Klothing.

Posted on

10 Best AI image generators to aid you design and market products faster

formulate your own shirt today

Get started

Search for “best AI image generators,” and you’ll view a few familiar names like ChatGPT, Midjourney, and Nano Banana. But there are other powerful tools you might not comprehend yet.

For example, FLUX creates stunning photorealistic visuals, while Ideogram helps you design consistent characters for branding.

If you’re looking to level up your AI content – whether for product design or marketing – this guide breaks down the ten best AI image generators, from what they’re best at to how much they cost.

Disclaimer

This post may contain affiliate links, which means we may earn a commission if you formulate a purchase through those links. This comes at no additional cost to you.

Key takeaways

An AI image generator creates visuals using artificial intelligence based on text prompts or existing images.

ChatGPT and Nano Banana are the most user-amiable tools, offering free access and effortless-to-utilize interfaces.

For lifelike, realistic results, FLUX and Reve are top choices with high prompt accuracy and advanced AI models.

For stock-style and marketing visuals, Canva AI and Adobe Firefly are solid picks.

For artistic images, Midjourney and Leonardo AI stand out with their design-focused features.

What is an AI image generator?

An AI image generator uses artificial intelligence to automatically generate images based on your text prompts or existing photos. You describe what you desire, and the tool visualizes it for you – no design skills needed.

For print-on-demand sellers, these AI tools unlock more creative freedom and faster launches. Anyone can rapidly generate high-quality images for custom products, mockups, social media, and other business purposes – often in less time and money than hiring a designer.

Of course, there are a few trade-offs. First, not all AI-generated content matches the polish of human-made labor.

Second, some shoppers are vocal about supporting brands that utilize human artists. If you’re using AI in eCommerce, consider disclosing your creative process upfront to maintain trust and transparency. 

Read more

AI for tiny business owners: Tools, benefits, and utilize cases

How do AI image generators labor?

Most AI image generators labor by turning your specific prompts into novel images using different models. But the process and creative control can vary depending on the type of tool. Here are the main types:

Text-to-image generation tools

With these AI art generation tools, users type what they desire to view – like “a watercolor sunflower on a vintage postcard” – and the tool generates a single image from scratch using artificial intelligence.

Each platform interprets your request differently, but most AI tools respond well to detailed prompts with obvious context. 

You can even sprint the same prompt multiple times and get different outcomes. Or add a negative prompt to guide the tool away from unwanted elements. Many also offer various styles like photorealistic images, 3D, cartoon, or line art.

In brief, the better your AI image prompt, the better the results. 

Image-to-image and editing

Instead of starting from scratch, these tools let you upload an existing image and fine-tune it using AI to preserve time and improve its quality. For example, users can:

Remove backgrounds to focus on your product or design.

Upscale low-quality images so they observe keen and ready to print.

repair or replace parts of an image – like editing out a error.

Expand images beyond their original borders – useful for banners or product shots. 

generate multiple versions of the same image to explore different styles or formats.

What is the best image-generating AI? Top 10 picks

Here are ten of the best AI image generators worth trying – each with its own strengths and features. 

ChatGPT

Source: ChatGPT

Best for: Generating creative images for free

ChatGPT lets you generate AI images right inside the chat using GPT-4o or the latest model in the ChatGPT Images tab – both available on the free plan.

This free AI image generator is incredibly beginner-amiable. Just describe what you desire to view in a familiar chat interface on the web or mobile. Or, upload an image prompt to edit an existing photo or generate variations of it. 

You also get a dedicated image library that automatically saves all your creations, making it effortless to just browse, download, or edit whenever you require.

Starting price: Free plan available. Paid plans initiate at $20/month for faster image generation and more credits to enter ChatGPT prompts. 

Pros:

Most features – aside from video generation – are available to all ChatGPT accounts

Can generate novel logos or artwork while others are still loading

Stores all your images in one place

Cons:

Slower on free plans

Tip

Did you comprehend Klothing’s free AI image generator runs on OpenAI’s generative AI model? You can generate custom designs for your products with free daily credits – no subscriptions required.

Midjourney

Source: Midjourney

Best for: Creating high-quality images that don’t observe like stock art

Midjourney’s AI images are bold, creative, and often jaw-droppingly great – perfect for bold t-shirt designs. 

Users can utilize Midjourney via their web app or Discord. Both let you browse images from other users for inspiration and even view their prompts.

Midjourney’s prompts have their own language. formulate sure to study terms like –ar for aspect ratio or –v for version. Once you’ve got those down, you can generate just about anything – from realistic images to abstract graphic design. 

Starting price: $10/month for the Basic plan. It includes 200 minutes/month of GPU time, which is the time it takes their AI to generate visuals using their servers. This amount translates to around 100-200 images/month.

All plans allow commercial utilize, but businesses that formulate over $1 million/year require at least the Pro plan. 

Pros:

Produces higher image quality than most other models

Built-in web editor for zooming, erasing, expanding, and retexturing your images

Prompts are fully customizable, and you can even remix others’ AI content

Cons:

No free credits or trial – unless you attempt Midjourney’s Niji app

Midjourney meters your GPU time, which can sprint out fast with common utilize

Nano Banana

Source: Nano Banana

Best for: Transforming existing photos into various art styles

Nano Banana is Google’s built-in AI image generator, available through Gemini. To utilize it, simply open a Gemini chat, select generate images, and type your prompt.

Nano Banana works especially well with existing images. There’s even a TikTok trend where users upload selfies to generate studio-quality portraits, or place themselves next to fictional characters and celebrities. 

That said, this free AI image generation tool may take more tries to get it right – especially compared to ChatGPT Images. That means prompts require to be specific from the initiate.

Starting price: Free for all Google Workspace users. Full access to the Nano Banana Pro starts at $20/month with Google AI Pro.

Pros:

Transform existing photos into polished AI content

Great at keeping characters, outfits, and styles consistent across multiple outputs

Integrates with Google Slides for effortless utilize in presentations

Cons:

Adds a tiny watermark in the bottom left corner

Slower with complex prompts

Adobe Firefly

Source: Adobe Firefly

Best for: Built-in integration with Adobe tools

Firefly works with Adobe products like Express and Photoshop – making it convenient for those already using these tools. 

Furthermore, you get access to multiple AI models – not just Firefly’s own – including Nano Banana Pro, ChatGPT Images, and FLUX. That gives you way more flexibility based on the quality and speed you require.

The interface is chat-based but includes settings you won’t discover in other tools – like visual intensity controls and reference image uploads to guide composition and style. 

Starting price: Free plan available. The cheapest paid plan is $9.99/month and includes 2,000 monthly generative credits. A standard image typically takes one credit, but higher-quality output will utilize more.

Pros:

More affordable entry plan compared to other tools

Supports reference images to aid the AI nail the style and layout

Prompt enhancement feature to aid sharpen your wording

Cons:

Not always spot on the first time – may take a few tweaks

Credits sprint out rapidly if early outputs aren’t usable

Read more

How to formulate a logo in Photoshop: Tutorial with expert tips

Leonardo AI

Source: Leonardo AI

Best for: Having total design control over your AI-generated images

Leonardo AI is an AI image generator with pro-level creative tools. It offers multiple models and full design control – with features like AI training for your personal models, allowing you to fine-tune results to your brand.

There’s also the Flow State tool to generate an endless scroll of image variations from a single prompt. consider of it as a creative brainstorming partner for generating novel designs to market on Etsy, Amazon, and more. 

To maintain consistency across all your designs – like for a branded merch drop – you’ll adore Blueprints, which preserve your prompt setups and styles as reusable templates.

Starting price: Free plan available. Paid plans initiate at $10/month, including the ability to train ten personal AI models.

Pros:

Offers free credits for fast AI image generation

Private generation mode for NDA-protected projects

Canvas editor to edit your images in a drag-and-drop interface

Cons:

Lots of settings can feel overwhelming for novel users

FLUX

Source: Black Forest Labs

Best for: Hyper-realistic image generation

FLUX is what happens when former Stability AI engineers determine to crank the realism dial to eleven. Designed for near-photographic results, its browser-based playground lets you generate, fill, and expand images using state-of-the-art models.

Even better, users can opt for from multiple FLUX variations. The latest model comes in three versions: Max for the highest-quality renders, Pro for speed and scalability, and Flex for text-heavy designs. 

You initiate with a brief text prompt, and FLUX automatically expands it into a richer internal description to squeeze out extra detail. However, feel free to toggle that off for more prompt control.

Starting price: Offers free 50 images for novel users. After that, it’s $10 for 1,000 credits. One image takes four credits to generate, which means you can generate 250 images in total. 

Pros:

Can generate realistic images that observe almost indistinguishable from real photos

Multiple models to match your workflow 

Ability to set default instructions for every generation – including style, tone, color palette, and more

Cons:

Max model takes longer to generate images compared to lighter options

Reve

Source: Reve

Best for: Creating multiple image variations at once

Reve gives you a fast, flexible way to generate AI images in bulk. Each prompt automatically generates several variations, and you can refine the observe further with premade pursue-up prompts – ideal for exploring different styles without retyping everything.

The image quality is nearly on par with FLUX, and Reve does an especially great job with hand accuracy, text-based graphic design, and sticking closely to your prompt.

Reve also offers a built-in image editor for making targeted changes – like moving or resizing parts of an image, removing backgrounds, and upscaling pictures in a few clicks.

Starting price: Free plan available. The Pro plan is $20/month, offering 100 times more image generations and storage.

Pros:

Creates multiple image variations per prompt

preserve references for the AI to emulate the style, character, pose, or mood

Browse existing images from other users and remix them to spark novel design ideas for tumblers, stickers, hats, and more

Cons:

Edited versions may modify slightly when re-generated

Ideogram

Source: Ideogram

Best for: Creating multiple images with the same characters

Ideogram makes it effortless to generate AI images using preset art styles and repeatable characters. 

Once you sign in with a Google, Apple, or Microsoft account, you can initiate generating right away. opt for from a wide range of design styles and trends like watercolor, woodblock print, or dramatic cinema – then remix, upscale, or expand your results.

Ideogram also lets you generate a visual character that stays consistent across different designs – perfect for creators building branded content with personas. 

Starting price: Free plan available. Paid plans initiate at $7/month.

Pros:

Tons of creative style presets to opt for from 

generate reusable characters that stay consistent across different scenes

Can replace backgrounds, not just remove them – useful for mockups or scene changes

Cons:

Private generation is only available on higher-tier plans – not ideal if you require to keep labor confidential

Read more

Tote bag design ideas: Get inspired and initiate selling

Canva AI

Source: Canva

Best for: Creating branded visuals and simple stock-style images

Canva’s built-in AI image generator is a solid choice if you already utilize Canva for design, marketing, or social media. 

Instead of starting with a blank canvas, you can instantly generate visuals based on a prompt and then drop them into ready-made templates for presentations, Instagram posts, logos, cards, and more.

opt for from a variety of style presets like cinematic concept art, 3D render, stock photo, sketch, portrait, and minimalist. From there, simply edit the result directly in Canva or construct on it using pursue-up prompts. 

Starting price: Free plan available with limited AI image generations. The Pro plan starts at $7.50/month per person and includes more access to AI features.

Pros:

Easily turn AI-generated visuals into social posts, presentations, or logos

construct a brand kit, and Canva’s AI will utilize it to generate on-brand content

Access to other Canva AI tools for writing and editing

Cons:

Works best for clean, stock photo-style images – less suited for intricate artwork

QuillBot

Source: QuillBot

Best for: Generating simple AI images without fuss

If you desire a user-amiable, no-frills AI image generator, QuillBot gets the job done.

Simply opt for from various styles like realistic images, anime, digital painting, or fantasy art, and pick an aspect ratio for the output. After that, download the results. 

QuillBot also offers fast-access tools like an AI background remover, logo generator, flyer creator, and even a tattoo design generator – making it handy for tiny business owners who require fast visuals.

Starting price: Free plan available. Pro plans initiate from $10/month for more credits.

Pros:

Clean and effortless interface, excellent for mobile

Includes useful tools for business purposes, like logo, flyer, and thumbnail generators

Multilingual bolster for English, Spanish, French, and German

Cons:

Free plan limits you to 3 AI image generations every 24 hours

Fewer customization features compared to other AI image generators

Best AI to generate images: An overview

Here’s a fast side-by-side comparison of all the AI art generation tools on this list:

GeneratorEase of useFree version?Starting priceBest forChatGPTEasy✓$20/moGeneral-purpose imagesMidjourneyModerate✕$10/moArtistic, non-stock visualsNano BananaEasy✓$20/moStylizing existing photosAdobe FireflyEasy✓$9.99/moBranded assets in Adobe appsLeonardo AIModerate✓$10/moPro-level graphics and editingFLUXModerate✓ $10/1,000 creditsPhotorealistic imagesReveEasy✓$20/moHigh-detail, artistic resultsIdeogramEasy✓$7/moCharacter-based visualsCanva AIEasy✓$7.50/moSimple stock-style visualsQuillBotEasy✓$10/moNo-fuss image generation

How to opt for the best AI art generators

With so many AI image generators on the market, it helps to comprehend what features matter to you when picking the right tool. utilize these questions to guide your decision:

Ease of utilize. How beginner-amiable is the image generator? How much trial-and-error is necessary before you can generate images you’re content with?

Output quality. Does the digital tool produce keen, detailed, and realistic images that meet your creative standards?

Prompt accuracy. How closely does the output match your instructions – especially with tricky details like text, hands, and facial features?

Customization. Can you easily tweak the style, composition, or individual elements after generation without starting from scratch?

Speed. How rapidly does the generator produce results – especially when creating multiple images or higher-quality outputs?

Value for money. Compared to other image generators, are you getting a fair number of generations for what you’re paying?

Commercial usage rights. Are you allowed to market or utilize the generated images for business purposes without extra licensing fees?

Print and market custom products with your AI images

desire to formulate money with your AI-generated images? Klothing makes it effortless to market custom products with your own designs – no upfront costs or inventory required. Here’s how to do it:

1. Sign up and opt for a product

generate your free Klothing account – you only pay when you place an order or formulate a sale. Then browse our Catalog with over 1,300 products, from t-shirts and mugs to phone cases and tote bags. consider about what fits your niche or target audience.

2. Add your AI-generated design

In the Product Creator, upload your existing AI content or utilize Klothing’s built-in AI image generator powered by OpenAI. Just enter a prompt, pick a style, and generate your custom artwork. You can also remove backgrounds, resize and adjust the design’s placement.

require ideas? utilize the Klothing Trends tool to discover trending designs and view some AI-generated image examples. 

3. Order or market online

Order a sample to evaluate the print quality yourself, or integrate Klothing with platforms like Etsy, Shopify, or Amazon to initiate selling. We handle printing, packing, and shipping whenever an order comes in – you just focus on creating.

initiate designing

FAQ

Which is the best AI image generator?

The best AI image generator depends on what you desire to generate. 
Looking for a beginner-amiable, free option? initiate with ChatGPT or Nano Banana. If you’re after hyper-realistic images, attempt FLUX. For artistic visuals that don’t observe like stock photos, Midjourney is a top pick.

Which AI creates images for free?

Many AI tools, such as ChatGPT, Nano Banana, Adobe Firefly, Canva AI, and Leonardo AI, can generate images for free. However, each has its own usage limits and may require a paid plan for faster or higher-quality results.

Which AI is the best for pictures?

The reply depends on the type of picture you desire to generate. Many users initiate with ChatGPT because it’s the most accessible. If you desire realistic images, attempt FLUX or Reve. For artistic visuals, go with Midjourney or Leonardo AI.
And if you’re creating stock images, Canva AI makes it effortless to generate on-brand content and drop it into templates.

Can ChatGPT generate an image?

Yes, ChatGPT can generate images. You can utilize GPT-4o or the ChatGPT Images model to generate visuals from a text prompt or upload a photo to edit. It’s free to utilize and beginner-amiable, making it a great starting point for anyone curious about AI image generation.

To summarize

Not sure which of these best AI image generators to initiate with? Most offer free plans, so it’s effortless to explore and evaluate them out. 

We recommend starting with popular AI art generation tools like ChatGPT, Nano Banana, or Canva AI to get a sense of the results. Then, explore more specialized options like FLUX, Leonardo AI, or Ideogram to discover other possibilities. 

After that, turn your designs into real products with Klothing. Simply opt for a product, upload your artwork, and we’ll handle the rest – from printing to delivery.

formulate it your way!

initiate designing

The post 10 Best AI image generators to aid you design and market products faster appeared first on Klothing.

Posted on

20 Redbubble alternatives with better profit potential

market custom products with Klothing

Get started

Looking for Redbubble alternatives that let you keep more of your profits? You’ve probably come across popular print-on-demand (POD) sites like Klothing, Printful, TeePublic, and many more. These are all solid options, but which one is actually right for you?

In this guide, we’ll break down the best Redbubble alternatives based on your goals – higher income, more creative freedom, or just a simpler way to market.

Key takeaways

To discover the best alternatives to Redbubble, you should compare each platform’s product range, pricing, shipping options, design tools, and customer bolster.

POD fulfillment partners like Klothing and Printful provide you more control over profits and product quality.

Marketplaces like TeePublic and Zazzle aid you tap into built-in audiences without needing your own store.

All-in-one platforms such as Sellfy and Fourthwall combine storefronts, Print on Demand, and marketing tools.

Niche POD platforms like Podbase or Displate let you stand out with unique or premium products.

What should you observe for in Redbubble alternatives?

Here’s what to compare when choosing the best Redbubble alternative for your business:

Product range. Does this platform offer items that suit your audience, and will customers be content with the product quality?

Base production costs. Can you control your selling price and keep healthy profit margins, considering the platform’s pricing structure?

Shipping speed and global reach. Can you deliver to customers worldwide without lengthy wait times or high shipping costs?

Ease of design and customization. Is it effortless to upload your designs and customize your print-on-demand products using the platform’s existing tools?

Sales channel integrations. Does it link to multiple platforms you utilize to market products, like Shopify, Etsy, or eBay?

Reliable customer bolster. If something goes wrong, can you get useful bolster for both you and your customers?

Copyright and licensing transparency. Are the platform’s rules around ownership and content utilize effortless to comprehend?

Seller-amiable payout methods. Can you get paid on schedule, without delays or complicated payment rules?

The 20 best Redbubble alternatives

We’ve curated this list of the top alternatives to Redbubble based on our own testing, market research, and feedback from real creators. 

Whether you’re looking for better product quality or more competitive pricing, these platforms are excellent alternatives for your print-on-demand business.

1. Klothing

Best for: Creators who desire to earn more and market through their own online store.

Redbubble doesn’t let you link to third-party sales channels, but Klothing does. Our assistance integrates with popular eCommerce platforms like Shopify, Etsy, and WooCommerce, so you can construct your shop on your own terms.

Unlike Redbubble, which charges platform fees based on your account tier and monthly earnings, Klothing never takes a cut. Sellers simply pay for the base production costs, set their selling price, and keep the rest. 

Pros:

Higher profits, no platform cuts. Keep all your markup with no unexpected fees. Sellers can also upgrade to Klothing Premium to get up to 20% off base product prices. 

Global Print Provider network. opt for from over 90 different Print Providers in North America, Europe, Asia, and Australia – or let us auto-assign based on performance and quality.

Over 1,300 customizable products. From custom t-shirts and mugs to wall art and stationery, you’ll discover everything you require to expand your product line and reach more customers.

Klothing Pop-Up Store. Don’t have an online shop yet? Simply launch a free, branded storefront in minutes – no tech skills needed.

Cons:

No in-house printing. We partner with vetted Print Providers, which means there may be varying print quality depending on the region. But feel free to order samples of our custom t-shirts and other items to view which ones meet your standards.

2. Printful

Best for: Artists who desire custom branding and tight quality control. 

One of Redbubble’s biggest limitations is the lack of branding options. With Printful, sellers can add custom pack-ins and packaging to orders to construct a recognizable brand identity.

Printful handles most of its own printing in-house, meaning you get tighter quality control and a more consistent customer experience.

Pros:

fast Stores. Just like Klothing’s Pop-Up Store, this feature lets you construct a storefront rapidly – no require for an eCommerce platform. 

Premium print quality. Printful offers industry-leading technology, including unlimited-color embroidery and its own DTFlex method for smoother results than standard direct-to-film (DTF).

Wide product range. Offers over 445 items, from apparel and accessories to pet gear and metal prints – far more than Redbubble.

Cons:

Limited global coverage. Printful’s in-house network is powerful, but not as globally distributed as Klothing’s Print Providers.

Read more

Printful alternatives – Trusted print-on-demand platforms

3. Zazzle

Best for: Designers, photographers, or lettering artists looking to market their own paper goods. 

Like Redbubble, Zazzle is a print-on-demand marketplace, but it’s best known for its personalized paper goods, gifts, and party supplies. Sellers can set their own royalty rates, which are added to the production costs to determine the final price of the product. 

While Zazzle doesn’t integrate with online selling sites, it lets you track performance through Google Analytics, helping you comprehend your potential for business growth. 

Pros:

Flexible earnings. Independent creators can set their own royalties, up to 50% on most physical products and up to 99% on digital downloads.

Referral commissions. Join Zazzle’s affiliate program to earn extra income by promoting your own designs.

Paper-amiable printing methods. Including foil, engraving, letterpress, and clean digital printing.

Cons:

Very niche. Zazzle is known for its paper goods, so it doesn’t attract as much traffic as other, more general print-on-demand websites like Redbubble.

4. Sellfy

Best for: Sellers who desire an all-in-one POD and eCommerce platform.

Sellfy combines a full online store builder with built-in POD tools to simplify the selling process from initiate to complete. Anyone can purchase a domain, design a storefront, and list custom products in one user-amiable interface – no require to switch between platforms.

Pros:

Full control over storefront and branding. Sellfy lets users fully customize their storefront, giving them finalize control over their brand’s appearance.

Integrated marketing tools. The platform includes built-in tools for email marketing, discount codes, and upselling.

Supports both digital and physical products. Sellfy gives creators the flexibility to diversify their product offerings.

Cons:

Subscription costs. Unlike most print-on-demand platforms, Sellfy charges a monthly fee starting at $22/month.

Limited POD features. There are fewer printing options and no design tools, making it less flexible than other Redbubble alternatives.

5. Spreadshirt

Best for: Creators who desire a built-in marketplace with the option to sprint a custom storefront.

Looking for websites like Redbubble that let you market on a ready-made online marketplace? Spreadshirt does just that. This print-on-demand platform lets anyone generate and market custom apparel and accessories with no upfront costs.

One major difference from Redbubble is that Spreadshirt also offers Spreadshop – a personalized storefront you can customize to match your brand identity.

Pros:

Wide product selection. Over 350 items, including embroidered products not offered on Redbubble.

90-day free returns. Customers get more peace of mind when buying.

Multiple sales channel bolster. Sellers can link Spreadshirt with popular eCommerce platforms like Etsy or Shopify.

Cons:

Limited production facilities. There are only four production sites located in Europe and the US. 

Inconsistent printing quality. User reviews mention that the final outcome can vary depending on the item or order.

6. Gelato

Best for: Sellers who desire advanced tools to rapidly scale their print-on-demand business.

Gelato looks like most POD platforms at first, but unlock Gelato+ – starting at $19.99/month – and it rapidly sets itself apart. Along with global reach and high-quality products, you get access to intelligent digital tools to expand your business.

One standout feature is Instant Collections, which uses AI to generate multiple custom-designed items, optimize their listings, and set their prices simultaneously. This way, you can launch entire product lines in minutes.

Pros:

Global fulfillment. Over 140 print partners in 32 countries for faster, local delivery.

large brand products. market gear from popular names like Nike, Champion, and Under Armour.

Realistic mockups. Generate polished product previews and even 3D renders using Gelato’s user-amiable design tools.

Cons:

Branding costs extra. Custom labels and packaging extras are only available with a paid subscription.

Read more

Gelato vs Printful: Which is better?

7. Saatchi Art

Best for: Professional artists selling premium wall art prints.

If you’re a solemn artist looking beyond Redbubble’s casual crowd, Saatchi Art offers a more elevated space. While best known for their original paintings, photography, and sculpture, they also offer a POD assistance for art prints.

Pros:

Artist-amiable terms. Free to join, and you earn 60% of the profit on each print sale.

Non-exclusive. You retain full rights to your labor and can market it elsewhere.

Curated audience. Great visibility among art buyers and collectors.

Cons:

Artwork only. No t-shirts, mugs, or accessories – just made-to-order prints or your own originals.

8. TeePublic

Best for: Anyone wanting to market custom products in a fan art-amiable marketplace.

If you’re looking for sites like Redbubble that bolster fan art, TeePublic is a powerful contender. This print-on-demand marketplace has official partnerships with major pop culture brands, and it frequently promotes designs tied to trending fandoms and events.

Artists can market t-shirts, hoodies, stickers, accessories, and home goods – without handling production or customer assistance.

Pros:

Straightforward platform. TeePublic’s simple upload and product setup process makes it effortless for creators to initiate selling rapidly.

common sales promotions. TeePublic runs regular site-wide sales that amplify visibility and drive higher sales volumes for artists.

Artist-forward platform. TeePublic highlights creators through categories like “Creators to Watch,” “Black Artists,” “Women Artists,” and more to aid you reach novel audiences.

Cons:

Fixed pricing. Artists have no control over product pricing, as TeePublic sets fixed prices for all items and offers a set royalty for each sale.

Lower profitability ratios during sales. During TeePublic’s common discounts, the royalties for independent artists are reduced, which can affect overall earnings.

9. Fine Art America

Best for: Talented artists who desire to initiate selling museum-quality prints and other custom merchandise.

Like Saatchi Art, Fine Art America focuses on wall art but with more flexibility. Besides fine art paper and metal prints, artists can turn their labor into t-shirts, phone cases, puzzles, tote bags, and even holiday ornaments.

Pros:

Premium materials. Print on museum-grade options like archival matte, glossy photo paper, or textured Somerset Velvet for a professional fine art complete.

Global fulfillment. Fine Art America prints and ships orders from 16 production centers across five countries to reach customers worldwide. 

Built-in analytics. view who’s viewing your labor and what’s getting attention, all from your dashboard.

Cons:

Limited reach for novel artists. With so many established sellers, it can be challenging for novel creators to gain exposure on Fine Art America.

10. Podbase

Best for: Creators who desire to market tech-focused print-on-demand products.

Podbase is one of the few Redbubble alternatives built specifically for tech gear. consider custom phone cases, laptop sleeves, and AirPods cases. It’s a intelligent pick for standing out in a high-demand niche where shoppers are often willing to pay more for design and protection.

While branding options are limited, you can bundle items like screen protectors and phone grips to boost your average order value.

Pros:

Tech-first focus. It’s easier to stand out in a niche like custom tech accessories. Plus, customers often expect to pay more for personalized protection.

No paid plans. Sign up and initiate selling without monthly fees or upgrade tiers.

eCommerce integrations. Easily link to Shopify, Etsy, or WooCommerce.

Cons:

Sample orders require effort. Sellers require to load $20 into their wallets and contact bolster to access a one-time sample voucher.

11. Spring by Amaze

Best for: Creators who desire to market personalized products directly through social media platforms.

Formerly known as Teespring, Spring is one of the go-to print-on-demand sites for content creators. You can market a broad range of physical and digital products and promote them directly through integrations with TikTok, YouTube, Discord, Twitch, and more.

Pros:

Social media integrations. market directly on TikTok, YouTube, Twitch, Discord, and more. 

Marketing tools included. generate promo codes and personalized storefronts to amplify engagement and conversion.

Free all-over-print patterns. utilize Spring’s provided templates to easily generate full-coverage designs for your print-on-demand products.

Cons:

High base prices. Spring doesn’t charge upfront fees, but a basic t-shirt starts at around $15.32 – almost twice the cost of a similar product on other platforms like Klothing.

Read more

Custom t-shirts under $10 (no minimum order)

12. Printaura

Best for: Sellers who desire basic print-on-demand features with custom branding options.

Printaura is a no-frills print-on-demand alternative to Redbubble, but with more control over packaging and fulfillment. While the interface feels dated, it connects with existing eCommerce stores on Shopify, WooCommerce, and Etsy.

Pros:

effortless integrations. link your Shopify, WooCommerce, or Etsy store in just a few steps.

Custom branding. Add neck labels, packaging inserts, size stickers, and more to construct a branded customer experience.

Cons:

Clunky navigation. The dashboard layout is outdated, and browsing products isn’t as smooth as on other alternatives to Redbubble.

13. Threadless

Best for: Talented artists who desire to join a supportive creative community and monetize their designs.

If you’re looking for print-on-demand sites like Redbubble but with more community features, verify out Threadless. Besides uploading designs to market on stickers, t-shirts, framed prints, and accessories, you can also open a Threadless-powered online store and join design challenges to expand your visibility.

Pros:

Customizable artist shops. Threadless gives you a free online store to list your products and establish a brand identity. 

Threadless marketplace. Gain exposure to a wider audience by opting into the main print-on-demand marketplace, where millions of fans browse for novel art.

Design challenges. Participate in regular contests that provide extra exposure, cash prizes, and a chance to get featured by Threadless.

Cons:

Limited print methods. Threadless only supports direct-to-garment (DTG), sublimation, and giclée printing – fewer options than other alternatives to Redbubble, like Klothing or Printful.

No marketplace integrations. Sellers can’t link their shop to Etsy, Amazon, or eBay, so everything stays within the print-on-demand platform.

14. Displate

Best for: Designers, illustrators, or artists who desire to market high-complete metal posters.

Displate is a print-on-demand platform built for one thing: metal posters. With over 40,000 artists and strict quality controls, it’s a powerful alternative to Redbubble for selling original designs on durable, high-quality prints.

They also partner with major entertainment brands to market their officially licensed artwork.

Pros:

High-quality metal art prints. Displate’s products are renowned for their durability, vividness, and tactile appeal. Every piece includes a hologram of authenticity and protected mounting.

Limited Edition options. Offer collectors exclusive prints with 3D textures, special inks, or selective finishes.

Boost your income. Earn 41% commission on sales made through your custom referral links within 30 days.

Cons:

Fixed earnings and pricing structure. Artists earn a set amount per sale – for example, $9 for a large-size poster – and it’s reduced by taxes, fees, and discounts.

Read more

Art that sells: Top styles and online sales strategies

15. Viralstyle

Best for: POD sellers who desire built-in tools to optimize their marketing efforts.

Viralstyle is a Redbubble alternative that combines a marketplace with advanced campaign features to aid sellers amplify their earnings.

You can group products into themed campaigns, evaluate print-on-demand pricing, and even link email marketing tools to stay in touch with buyers after checkout.

Pros:

Campaign tools. Bundle related products into limited-time themed campaigns, set how lengthy they’re available, and add upsells to boost your average order value.

Email marketing integrations. Easily link your campaigns to top email platforms to pursue up with buyers.

Built-in split testing. evaluate pricing, styles, and colors on reside campaigns to optimize performance.

Cons:

Dated interface. The platform offers robust features, but the dashboard and design tools feel less modern than those of other alternatives to Redbubble.

16. CafePress

Best for: Creators who desire to market print-on-demand products through their own store and a global marketplace.

CafePress is one of the original platforms for selling custom merchandise online. You can upload your designs to products like t-shirts, mugs, and home decor, and market them through your own CafePress store or on their global marketplace.

Pros:

Large product range. market your designs on over 450 items, from apparel to home decor and stationery. 

Custom storefronts. generate your own online store without inventory and with full pricing control.

Global reach. CafePress has dedicated marketplaces for the US, UK, Canada, and Australia.

Cons:

Low marketplace royalties. You only earn 5% per sale on items sold through the CafePress marketplace. 

Limited payment countries. Only sellers in select countries can receive royalty payments from the CafePress marketplace.

17. Custom Ink

Best for: Selling to groups or businesses ordering in bulk.

Custom Ink is a print-on-demand platform known for its high-quality printing and bulk discounts. It’s ideal for ordering merch for a team, event, or business – especially since you can invite group members to pick their own sizes and pay individually.

While most of their pricing favors bulk orders, they also offer select products with no minimum requirements.

Pros:

High-quality printing. Offers screen printing, digital, embroidery, and laser engraving. The team will opt for the best method based on your product. 

useful customer bolster. Phone and reside chat assistance with human agents available.

User-amiable design tools. Includes ready-to-utilize clipart and custom fonts if you don’t have artwork ready.

Cons:

Expensive for tiny orders. For example, a single Gildan Softstyle Jersey T-shirt can cost you $32.25, while ordering 500 brings the price down to $7.11 each.

18. Gooten

Best for: Sellers who desire to scale with high-volume, multi-channel sales.

If Redbubble’s built-in marketplace traffic isn’t enough for your goals, Gooten gives you more control. It’s designed for solemn sellers who desire to construct their own brand and market on their own online stores or popular marketplaces. 

Pros:

Multi-platform bolster. Integrates with Shopify, Etsy, Amazon, TikTok, Squarespace, BigCommerce, and Ecwid.

VIP program for high-volume sellers. The Very crucial Merchant program includes faster bolster, exclusive webinars, and product discounts.

Diverse decoration methods. Offers everything from DTG and DTF to embroidery, foil, laser engraving, and 3D UV printing.

Cons:

Limited global production. Most products are printed in the US, with only a few international facilities in the UK, Spain, Canada, and Australia.

Design tools require add-ons. If you desire personalization or clipart libraries, you’ll require to integrate Customily, which only works with Shopify or Etsy.

19. Fourthwall

Best for: Content creators looking to monetize their own website.

Used by popular creators like MKBHD and Philip DeFranco, Fourthwall is more than just a merch platform. It aims to aid content creators market custom products, expand their audience, and even offer subscriptions – all from one place.

Pros:

Powerful free plan. Set up a custom-branded site with your own domain, launch promos, sprint giveaways, and offer paid memberships, all at no cost to initiate.

Unique print-on-demand products. Go beyond standard merch with options like plush toys, lapel pins, and artisan keycaps.

Social selling integrations. link to TikTok Shop, YouTube Product Shelf, Facebook and Instagram Shops, and Twitch Gifting.

Cons:

Minimums for select items. A few custom products, such as plushies, may require a minimum order quantity to produce.

20. Merchize

Best for: Sellers who desire unique product options and flexible branding.

Merchize is a powerful Redbubble alternative for selling both everyday apparel and creative, niche-amiable items. From Hawaiian shirts to photo night lights and custom-shaped suncatchers, it’s perfect for launching designs that stand out.

You can also construct a Merchize-powered storefront – starting at $79/month – or link the platform to your existing Etsy, Amazon, or Shopify store.

Pros:

Specialty product catalog. market unique items like hologram shaker keychains, tattoo stickers, bookshelf signs, and wooden piggy banks.

Branding options included. Add your own logo to labels, hang tags, message cards, and packaging.

One-day production category. Speed up shipping with a dedicated group of fast-fulfillment items.

Cons:

Limited country coverage. Some destinations aren’t supported, so verify the restricted shipping list before launching.

fast comparison: Top websites like Redbubble

utilize this fast-reference table to compare and determine which Redbubble alternative best suits your goals.

PlatformModelConnects to sales channelsFree to startBest forKlothingPOD fulfillment partnerYesYesProfit-focused creatorsPrintfulPOD fulfillment partnerYesYesQuality-focused sellersZazzleMarketplaceNoYesPaper goods and gift sellersSellfyStorefront + PODNoNo – from $22/moDigital and physical product sellersSpreadshirtMarketplace + storefrontYesYesSelling via a marketplace or a storeGelatoPOD fulfillment partnerYesYesScaling with global fulfillmentSaatchi ArtMarketplaceNoYesFine artists selling printsTeePublicMarketplaceNoYesFan art and pop culture designersFine Art AmericaMarketplace + storefrontYesYesSelling high-complete wall artPodbasePOD fulfillment partnerYesYesTech accessory designersSpringMarketplace + storefrontNoYesSelling merch on social mediaPrintauraPOD fulfillment partnerYesYesSelling with branded packagingThreadlessMarketplace + storefrontNoYesNew artists building exposureDisplateMarketplaceNoYesSelling premium metal printsViralstyleMarketplace + storefrontNoYesSelling on a marketplace with marketing toolsCafePressMarketplace + storefrontNoYesSelling via a marketplace or a storeCustom InkPOD fulfillment partnerNoYesBulk merch for teams and eventsGootenPOD fulfillment partnerYesYesHigh-volume multi-channel sellersFourthwallStorefront + PODYesYesCreators selling merch MerchizePOD fulfillment partnerYesYesSelling unique print-on-demand products

Other print-on-demand sites like Redbubble

Besides these top 20 sites, verify out these Redbubble alternatives:

Amazon Merch on Demand

Printbest

CustomCat

TeeFury

BustedTees

Prinstome

ArtsAdd

UltraPress

Inkthreadable

Gear Launch

Instaprints

opt for Klothing as your Redbubble alternative

With no upfront costs, the ability to keep 100% of your profits, and a Catalog of over 1,300 customizable products, Klothing gives you more freedom to expand your brand than any other Redbubble alternative. 

1. Sign up and opt for a product

generate a free Klothing account and explore our Product Catalog. Each product page includes details about the Print Provider, base price, and production time, so you can opt for the best fit for your needs. 

2. Add your design

In the Product Creator, upload your own artwork or attempt our built-in tools like the AI Image Generator, ready-made graphics, fonts, and premium assets.

3. link your online store

Easily integrate with platforms like Shopify, WooCommerce, Squarespace, or online marketplaces like Etsy, Amazon, and eBay. Your Klothing products will sync automatically to your store.

4. initiate selling

Once your store is reside, we’ll handle printing and shipping. You focus on creating and promoting – Klothing takes care of the rest.

initiate designing

FAQ

Is there anything better than Redbubble?

Depending on your goals, many Redbubble alternatives offer better control, higher profit margins, and more customization. 
Top platforms include Klothing and Printful for selling on your own store, as well as TeePublic and Threadless for artist-amiable marketplaces.

Why is Redbubble so expensive now?

Redbubble has become more expensive because of the novel fee structures and sellers increasing their markups to compensate for the reduced profit margins. These changes affect both creators and customers, resulting in more expensive products overall.

Can you formulate $1,000 a month on Redbubble?

Yes, it’s feasible to earn $1,000/month on Redbubble, but it’s not effortless. You’ll require a large catalog of high-quality designs, powerful SEO, and consistent promotion outside the platform. Due to heavy competition, relying solely on Redbubble’s traffic usually isn’t enough.

Does switching from Redbubble to another platform guarantee more sales?

No platform guarantees sales. However, switching from Redbubble to another print-on-demand platform like Klothing can amplify your earning potential through better profit margins, more branding control, and access to additional sales channels like Etsy or Shopify.
All this can guide to more visibility, stronger customer loyalty, and ultimately, higher revenue.

Summary

If you’re looking for a Redbubble alternative, these are the best options:

Klothing – Maximize profits by selling on your own store or an online marketplace. 

Printful – Custom products with in-house production and branding.

TeePublic – Fan art-amiable marketplace with built-in audience.

Sellfy – market digital and physical products from one storefront.

Displate – Premium metal art prints for collectors and fans.

With Klothing, you get higher profit margins, access to a large product range, and global fulfillment – all with no upfront costs. It’s the easiest way to launch a print-on-demand business.

The post 20 Redbubble alternatives with better profit potential appeared first on Klothing.

Posted on

20 Redbubble alternatives with better profit potential

Sell custom products with Klothing

Get started

Looking for Redbubble alternatives that let you keep more of your profits? You’ve probably come across popular print-on-demand (POD) sites like Klothing, Printful, TeePublic, and many more. These are all solid options, but which one is actually right for you?

In this guide, we’ll break down the best Redbubble alternatives based on your goals – higher income, more creative freedom, or just a simpler way to sell.

Key takeaways

To find the best alternatives to Redbubble, you should compare each platform’s product range, pricing, shipping options, design tools, and customer support.

POD fulfillment partners like Klothing and Printful give you more control over profits and product quality.

Marketplaces like TeePublic and Zazzle help you tap into built-in audiences without needing your own store.

All-in-one platforms such as Sellfy and Fourthwall combine storefronts, Print on Demand, and marketing tools.

Niche POD platforms like Podbase or Displate let you stand out with unique or premium products.

What should you look for in Redbubble alternatives?

Here’s what to compare when choosing the best Redbubble alternative for your business:

Product range. Does this platform offer items that suit your audience, and will customers be happy with the product quality?

Base production costs. Can you control your selling price and keep healthy profit margins, considering the platform’s pricing structure?

Shipping speed and global reach. Can you deliver to customers worldwide without long wait times or high shipping costs?

Ease of design and customization. Is it easy to upload your designs and customize your print-on-demand products using the platform’s existing tools?

Sales channel integrations. Does it connect to multiple platforms you use to sell products, like Shopify, Etsy, or eBay?

Reliable customer support. If something goes wrong, can you get helpful support for both you and your customers?

Copyright and licensing transparency. Are the platform’s rules around ownership and content use easy to understand?

Seller-friendly payout methods. Can you get paid on schedule, without delays or complicated payment rules?

The 20 best Redbubble alternatives

We’ve curated this list of the top alternatives to Redbubble based on our own testing, market research, and feedback from real creators. 

Whether you’re looking for better product quality or more competitive pricing, these platforms are excellent alternatives for your print-on-demand business.

1. Klothing

Best for: Creators who want to earn more and sell through their own online store.

Redbubble doesn’t let you connect to third-party sales channels, but Klothing does. Our service integrates with popular eCommerce platforms like Shopify, Etsy, and WooCommerce, so you can build your shop on your own terms.

Unlike Redbubble, which charges platform fees based on your account tier and monthly earnings, Klothing never takes a cut. Sellers simply pay for the base production costs, set their selling price, and keep the rest. 

Pros:

Higher profits, no platform cuts. Keep all your markup with no unexpected fees. Sellers can also upgrade to Klothing Premium to get up to 20% off base product prices. 

Global Print Provider network. Choose from over 90 different Print Providers in North America, Europe, Asia, and Australia – or let us auto-assign based on performance and quality.

Over 1,300 customizable products. From custom t-shirts and mugs to wall art and stationery, you’ll find everything you need to grow your product line and reach more customers.

Klothing Pop-Up Store. Don’t have an online shop yet? Simply launch a free, branded storefront in minutes – no tech skills needed.

Cons:

No in-house printing. We partner with vetted Print Providers, which means there may be varying print quality depending on the region. But feel free to order samples of our custom t-shirts and other items to see which ones meet your standards.

2. Printful

Best for: Artists who want custom branding and tight quality control. 

One of Redbubble’s biggest limitations is the lack of branding options. With Printful, sellers can add custom pack-ins and packaging to orders to build a recognizable brand identity.

Printful handles most of its own printing in-house, meaning you get tighter quality control and a more consistent customer experience.

Pros:

Quick Stores. Just like Klothing’s Pop-Up Store, this feature lets you build a storefront quickly – no need for an eCommerce platform. 

Premium print quality. Printful offers industry-leading technology, including unlimited-color embroidery and its own DTFlex method for smoother results than standard direct-to-film (DTF).

Wide product range. Offers over 445 items, from apparel and accessories to pet gear and metal prints – far more than Redbubble.

Cons:

Limited global coverage. Printful’s in-house network is strong, but not as globally distributed as Klothing’s Print Providers.

Read more

Printful alternatives – Trusted print-on-demand platforms

3. Zazzle

Best for: Designers, photographers, or lettering artists looking to sell their own paper goods. 

Like Redbubble, Zazzle is a print-on-demand marketplace, but it’s best known for its personalized paper goods, gifts, and party supplies. Sellers can set their own royalty rates, which are added to the production costs to determine the final price of the product. 

While Zazzle doesn’t integrate with online selling sites, it lets you track performance through Google Analytics, helping you understand your potential for business growth. 

Pros:

Flexible earnings. Independent creators can set their own royalties, up to 50% on most physical products and up to 99% on digital downloads.

Referral commissions. Join Zazzle’s affiliate program to earn extra income by promoting your own designs.

Paper-friendly printing methods. Including foil, engraving, letterpress, and clean digital printing.

Cons:

Very niche. Zazzle is known for its paper goods, so it doesn’t attract as much traffic as other, more general print-on-demand websites like Redbubble.

4. Sellfy

Best for: Sellers who want an all-in-one POD and eCommerce platform.

Sellfy combines a full online store builder with built-in POD tools to simplify the selling process from start to finish. Anyone can buy a domain, design a storefront, and list custom products in one user-friendly interface – no need to switch between platforms.

Pros:

Full control over storefront and branding. Sellfy lets users fully customize their storefront, giving them complete control over their brand’s appearance.

Integrated marketing tools. The platform includes built-in tools for email marketing, discount codes, and upselling.

Supports both digital and physical products. Sellfy gives creators the flexibility to diversify their product offerings.

Cons:

Subscription costs. Unlike most print-on-demand platforms, Sellfy charges a monthly fee starting at $22/month.

Limited POD features. There are fewer printing options and no design tools, making it less flexible than other Redbubble alternatives.

5. Spreadshirt

Best for: Creators who want a built-in marketplace with the option to run a custom storefront.

Looking for websites like Redbubble that let you sell on a ready-made online marketplace? Spreadshirt does just that. This print-on-demand platform lets anyone create and sell custom apparel and accessories with no upfront costs.

One major difference from Redbubble is that Spreadshirt also offers Spreadshop – a personalized storefront you can customize to match your brand identity.

Pros:

Wide product selection. Over 350 items, including embroidered products not offered on Redbubble.

90-day free returns. Customers get more peace of mind when buying.

Multiple sales channel support. Sellers can connect Spreadshirt with popular eCommerce platforms like Etsy or Shopify.

Cons:

Limited production facilities. There are only four production sites located in Europe and the US. 

Inconsistent printing quality. User reviews mention that the final outcome can vary depending on the item or order.

6. Gelato

Best for: Sellers who want advanced tools to quickly scale their print-on-demand business.

Gelato looks like most POD platforms at first, but unlock Gelato+ – starting at $19.99/month – and it quickly sets itself apart. Along with global reach and high-quality products, you get access to smart digital tools to grow your business.

One standout feature is Instant Collections, which uses AI to generate multiple custom-designed items, optimize their listings, and set their prices simultaneously. This way, you can launch entire product lines in minutes.

Pros:

Global fulfillment. Over 140 print partners in 32 countries for faster, local delivery.

Big brand products. Sell gear from popular names like Nike, Champion, and Under Armour.

Realistic mockups. Generate polished product previews and even 3D renders using Gelato’s user-friendly design tools.

Cons:

Branding costs extra. Custom labels and packaging extras are only available with a paid subscription.

Read more

Gelato vs Printful: Which is better?

7. Saatchi Art

Best for: Professional artists selling premium wall art prints.

If you’re a serious artist looking beyond Redbubble’s casual crowd, Saatchi Art offers a more elevated space. While best known for their original paintings, photography, and sculpture, they also offer a POD service for art prints.

Pros:

Artist-friendly terms. Free to join, and you earn 60% of the profit on each print sale.

Non-exclusive. You retain full rights to your work and can sell it elsewhere.

Curated audience. Great visibility among art buyers and collectors.

Cons:

Artwork only. No t-shirts, mugs, or accessories – just made-to-order prints or your own originals.

8. TeePublic

Best for: Anyone wanting to sell custom products in a fan art-friendly marketplace.

If you’re looking for sites like Redbubble that support fan art, TeePublic is a strong contender. This print-on-demand marketplace has official partnerships with major pop culture brands, and it frequently promotes designs tied to trending fandoms and events.

Artists can sell t-shirts, hoodies, stickers, accessories, and home goods – without handling production or customer service.

Pros:

Straightforward platform. TeePublic’s simple upload and product setup process makes it easy for creators to start selling quickly.

Frequent sales promotions. TeePublic runs regular site-wide sales that increase visibility and drive higher sales volumes for artists.

Artist-forward platform. TeePublic highlights creators through categories like “Creators to Watch,” “Black Artists,” “Women Artists,” and more to help you reach new audiences.

Cons:

Fixed pricing. Artists have no control over product pricing, as TeePublic sets fixed prices for all items and offers a set royalty for each sale.

Lower profitability ratios during sales. During TeePublic’s frequent discounts, the royalties for independent artists are reduced, which can affect overall earnings.

9. Fine Art America

Best for: Talented artists who want to start selling museum-quality prints and other custom merchandise.

Like Saatchi Art, Fine Art America focuses on wall art but with more flexibility. Besides fine art paper and metal prints, artists can turn their work into t-shirts, phone cases, puzzles, tote bags, and even holiday ornaments.

Pros:

Premium materials. Print on museum-grade options like archival matte, glossy photo paper, or textured Somerset Velvet for a professional fine art finish.

Global fulfillment. Fine Art America prints and ships orders from 16 production centers across five countries to reach customers worldwide. 

Built-in analytics. See who’s viewing your work and what’s getting attention, all from your dashboard.

Cons:

Limited reach for new artists. With so many established sellers, it can be challenging for new creators to gain exposure on Fine Art America.

10. Podbase

Best for: Creators who want to sell tech-focused print-on-demand products.

Podbase is one of the few Redbubble alternatives built specifically for tech gear. Think custom phone cases, laptop sleeves, and AirPods cases. It’s a smart pick for standing out in a high-demand niche where shoppers are often willing to pay more for design and protection.

While branding options are limited, you can bundle items like screen protectors and phone grips to boost your average order value.

Pros:

Tech-first focus. It’s easier to stand out in a niche like custom tech accessories. Plus, customers often expect to pay more for personalized protection.

No paid plans. Sign up and start selling without monthly fees or upgrade tiers.

eCommerce integrations. Easily connect to Shopify, Etsy, or WooCommerce.

Cons:

Sample orders require effort. Sellers need to load $20 into their wallets and contact support to access a one-time sample voucher.

11. Spring by Amaze

Best for: Creators who want to sell personalized products directly through social media platforms.

Formerly known as Teespring, Spring is one of the go-to print-on-demand sites for content creators. You can sell a broad range of physical and digital products and promote them directly through integrations with TikTok, YouTube, Discord, Twitch, and more.

Pros:

Social media integrations. Sell directly on TikTok, YouTube, Twitch, Discord, and more. 

Marketing tools included. Create promo codes and personalized storefronts to increase engagement and conversion.

Free all-over-print patterns. Use Spring’s provided templates to easily create full-coverage designs for your print-on-demand products.

Cons:

High base prices. Spring doesn’t charge upfront fees, but a basic t-shirt starts at around $15.32 – almost twice the cost of a similar product on other platforms like Klothing.

Read more

Custom t-shirts under $10 (no minimum order)

12. Printaura

Best for: Sellers who want basic print-on-demand features with custom branding options.

Printaura is a no-frills print-on-demand alternative to Redbubble, but with more control over packaging and fulfillment. While the interface feels dated, it connects with existing eCommerce stores on Shopify, WooCommerce, and Etsy.

Pros:

Easy integrations. Connect your Shopify, WooCommerce, or Etsy store in just a few steps.

Custom branding. Add neck labels, packaging inserts, size stickers, and more to build a branded customer experience.

Cons:

Clunky navigation. The dashboard layout is outdated, and browsing products isn’t as smooth as on other alternatives to Redbubble.

13. Threadless

Best for: Talented artists who want to join a supportive creative community and monetize their designs.

If you’re looking for print-on-demand sites like Redbubble but with more community features, check out Threadless. Besides uploading designs to sell on stickers, t-shirts, framed prints, and accessories, you can also open a Threadless-powered online store and join design challenges to grow your visibility.

Pros:

Customizable artist shops. Threadless gives you a free online store to list your products and establish a brand identity. 

Threadless marketplace. Gain exposure to a wider audience by opting into the main print-on-demand marketplace, where millions of fans browse for new art.

Design challenges. Participate in regular contests that give extra exposure, cash prizes, and a chance to get featured by Threadless.

Cons:

Limited print methods. Threadless only supports direct-to-garment (DTG), sublimation, and giclée printing – fewer options than other alternatives to Redbubble, like Klothing or Printful.

No marketplace integrations. Sellers can’t link their shop to Etsy, Amazon, or eBay, so everything stays within the print-on-demand platform.

14. Displate

Best for: Designers, illustrators, or artists who want to sell high-end metal posters.

Displate is a print-on-demand platform built for one thing: metal posters. With over 40,000 artists and strict quality controls, it’s a strong alternative to Redbubble for selling original designs on durable, high-quality prints.

They also partner with major entertainment brands to sell their officially licensed artwork.

Pros:

High-quality metal art prints. Displate’s products are renowned for their durability, vividness, and tactile appeal. Every piece includes a hologram of authenticity and safe mounting.

Limited Edition options. Offer collectors exclusive prints with 3D textures, special inks, or selective finishes.

Boost your income. Earn 41% commission on sales made through your custom referral links within 30 days.

Cons:

Fixed earnings and pricing structure. Artists earn a set amount per sale – for example, $9 for a large-size poster – and it’s reduced by taxes, fees, and discounts.

Read more

Art that sells: Top styles and online sales strategies

15. Viralstyle

Best for: POD sellers who want built-in tools to optimize their marketing efforts.

Viralstyle is a Redbubble alternative that combines a marketplace with advanced campaign features to help sellers increase their earnings.

You can group products into themed campaigns, test print-on-demand pricing, and even connect email marketing tools to stay in touch with buyers after checkout.

Pros:

Campaign tools. Bundle related products into limited-time themed campaigns, set how long they’re available, and add upsells to boost your average order value.

Email marketing integrations. Easily connect your campaigns to top email platforms to follow up with buyers.

Built-in split testing. Test pricing, styles, and colors on live campaigns to optimize performance.

Cons:

Dated interface. The platform offers robust features, but the dashboard and design tools feel less modern than those of other alternatives to Redbubble.

16. CafePress

Best for: Creators who want to sell print-on-demand products through their own store and a global marketplace.

CafePress is one of the original platforms for selling custom merchandise online. You can upload your designs to products like t-shirts, mugs, and home decor, and sell them through your own CafePress store or on their global marketplace.

Pros:

Large product range. Sell your designs on over 450 items, from apparel to home decor and stationery. 

Custom storefronts. Create your own online store without inventory and with full pricing control.

Global reach. CafePress has dedicated marketplaces for the US, UK, Canada, and Australia.

Cons:

Low marketplace royalties. You only earn 5% per sale on items sold through the CafePress marketplace. 

Limited payment countries. Only sellers in select countries can receive royalty payments from the CafePress marketplace.

17. Custom Ink

Best for: Selling to groups or businesses ordering in bulk.

Custom Ink is a print-on-demand platform known for its high-quality printing and bulk discounts. It’s ideal for ordering merch for a team, event, or business – especially since you can invite group members to pick their own sizes and pay individually.

While most of their pricing favors bulk orders, they also offer select products with no minimum requirements.

Pros:

High-quality printing. Offers screen printing, digital, embroidery, and laser engraving. The team will choose the best method based on your product. 

Helpful customer support. Phone and live chat assistance with human agents available.

User-friendly design tools. Includes ready-to-use clipart and custom fonts if you don’t have artwork ready.

Cons:

Expensive for small orders. For example, a single Gildan Softstyle Jersey T-shirt can cost you $32.25, while ordering 500 brings the price down to $7.11 each.

18. Gooten

Best for: Sellers who want to scale with high-volume, multi-channel sales.

If Redbubble’s built-in marketplace traffic isn’t enough for your goals, Gooten gives you more control. It’s designed for serious sellers who want to build their own brand and sell on their own online stores or popular marketplaces. 

Pros:

Multi-platform support. Integrates with Shopify, Etsy, Amazon, TikTok, Squarespace, BigCommerce, and Ecwid.

VIP program for high-volume sellers. The Very Important Merchant program includes faster support, exclusive webinars, and product discounts.

Diverse decoration methods. Offers everything from DTG and DTF to embroidery, foil, laser engraving, and 3D UV printing.

Cons:

Limited global production. Most products are printed in the US, with only a few international facilities in the UK, Spain, Canada, and Australia.

Design tools require add-ons. If you want personalization or clipart libraries, you’ll need to integrate Customily, which only works with Shopify or Etsy.

19. Fourthwall

Best for: Content creators looking to monetize their own website.

Used by popular creators like MKBHD and Philip DeFranco, Fourthwall is more than just a merch platform. It aims to help content creators sell custom products, grow their audience, and even offer subscriptions – all from one place.

Pros:

Powerful free plan. Set up a custom-branded site with your own domain, launch promos, run giveaways, and offer paid memberships, all at no cost to start.

Unique print-on-demand products. Go beyond standard merch with options like plush toys, lapel pins, and artisan keycaps.

Social selling integrations. Connect to TikTok Shop, YouTube Product Shelf, Facebook and Instagram Shops, and Twitch Gifting.

Cons:

Minimums for select items. A few custom products, such as plushies, may require a minimum order quantity to produce.

20. Merchize

Best for: Sellers who want unique product options and flexible branding.

Merchize is a strong Redbubble alternative for selling both everyday apparel and creative, niche-friendly items. From Hawaiian shirts to photo night lights and custom-shaped suncatchers, it’s perfect for launching designs that stand out.

You can also build a Merchize-powered storefront – starting at $79/month – or connect the platform to your existing Etsy, Amazon, or Shopify store.

Pros:

Specialty product catalog. Sell unique items like hologram shaker keychains, tattoo stickers, bookshelf signs, and wooden piggy banks.

Branding options included. Add your own logo to labels, hang tags, message cards, and packaging.

One-day production category. Speed up shipping with a dedicated group of fast-fulfillment items.

Cons:

Limited country coverage. Some destinations aren’t supported, so check the restricted shipping list before launching.

Quick comparison: Top websites like Redbubble

Use this quick-reference table to compare and determine which Redbubble alternative best suits your goals.

PlatformModelConnects to sales channelsFree to startBest forKlothingPOD fulfillment partnerYesYesProfit-focused creatorsPrintfulPOD fulfillment partnerYesYesQuality-focused sellersZazzleMarketplaceNoYesPaper goods and gift sellersSellfyStorefront + PODNoNo – from $22/moDigital and physical product sellersSpreadshirtMarketplace + storefrontYesYesSelling via a marketplace or a storeGelatoPOD fulfillment partnerYesYesScaling with global fulfillmentSaatchi ArtMarketplaceNoYesFine artists selling printsTeePublicMarketplaceNoYesFan art and pop culture designersFine Art AmericaMarketplace + storefrontYesYesSelling high-end wall artPodbasePOD fulfillment partnerYesYesTech accessory designersSpringMarketplace + storefrontNoYesSelling merch on social mediaPrintauraPOD fulfillment partnerYesYesSelling with branded packagingThreadlessMarketplace + storefrontNoYesNew artists building exposureDisplateMarketplaceNoYesSelling premium metal printsViralstyleMarketplace + storefrontNoYesSelling on a marketplace with marketing toolsCafePressMarketplace + storefrontNoYesSelling via a marketplace or a storeCustom InkPOD fulfillment partnerNoYesBulk merch for teams and eventsGootenPOD fulfillment partnerYesYesHigh-volume multi-channel sellersFourthwallStorefront + PODYesYesCreators selling merch MerchizePOD fulfillment partnerYesYesSelling unique print-on-demand products

Other print-on-demand sites like Redbubble

Besides these top 20 sites, check out these Redbubble alternatives:

Amazon Merch on Demand

Printbest

CustomCat

TeeFury

BustedTees

Prinstome

ArtsAdd

UltraPress

Inkthreadable

Gear Launch

Instaprints

Choose Klothing as your Redbubble alternative

With no upfront costs, the ability to keep 100% of your profits, and a Catalog of over 1,300 customizable products, Klothing gives you more freedom to grow your brand than any other Redbubble alternative. 

1. Sign up and choose a product

Create a free Klothing account and explore our Product Catalog. Each product page includes details about the Print Provider, base price, and production time, so you can choose the best fit for your needs. 

2. Add your design

In the Product Creator, upload your own artwork or try our built-in tools like the AI Image Generator, ready-made graphics, fonts, and premium assets.

3. Connect your online store

Easily integrate with platforms like Shopify, WooCommerce, Squarespace, or online marketplaces like Etsy, Amazon, and eBay. Your Klothing products will sync automatically to your store.

4. Start selling

Once your store is live, we’ll handle printing and shipping. You focus on creating and promoting – Klothing takes care of the rest.

Start designing

FAQ

Is there anything better than Redbubble?

Depending on your goals, many Redbubble alternatives offer better control, higher profit margins, and more customization. 
Top platforms include Klothing and Printful for selling on your own store, as well as TeePublic and Threadless for artist-friendly marketplaces.

Why is Redbubble so expensive now?

Redbubble has become more expensive because of the new fee structures and sellers increasing their markups to compensate for the reduced profit margins. These changes affect both creators and customers, resulting in more expensive products overall.

Can you make $1,000 a month on Redbubble?

Yes, it’s possible to earn $1,000/month on Redbubble, but it’s not easy. You’ll need a large catalog of high-quality designs, strong SEO, and consistent promotion outside the platform. Due to heavy competition, relying solely on Redbubble’s traffic usually isn’t enough.

Does switching from Redbubble to another platform guarantee more sales?

No platform guarantees sales. However, switching from Redbubble to another print-on-demand platform like Klothing can increase your earning potential through better profit margins, more branding control, and access to additional sales channels like Etsy or Shopify.
All this can lead to more visibility, stronger customer loyalty, and ultimately, higher revenue.

Summary

If you’re looking for a Redbubble alternative, these are the best options:

Klothing – Maximize profits by selling on your own store or an online marketplace. 

Printful – Custom products with in-house production and branding.

TeePublic – Fan art-friendly marketplace with built-in audience.

Sellfy – Sell digital and physical products from one storefront.

Displate – Premium metal art prints for collectors and fans.

With Klothing, you get higher profit margins, access to a large product range, and global fulfillment – all with no upfront costs. It’s the easiest way to launch a print-on-demand business.

The post 20 Redbubble alternatives with better profit potential appeared first on Klothing.

Posted on

10 Best online design tools for Print on Demand

Bring your design ideas to life

initiate designing

Designing for POD can feel like a wild mix of art class and business school, so let’s stack your toolbox properly. 

In this guide, we’ll walk through the best online design tools for Print on Demand, like Klothing’s Product Creator, Adobe Express, Canva, Kittl, Procreate, and more. You’ll view who they suit, what they shine at, and how to plug them into your POD workflow.

Disclaimer

This post may contain affiliate links, which means we may earn a commission if you formulate a purchase through those links. This comes at no additional cost to you.

What to observe for in a print-on-demand design tool

Not every shiny app belongs in your POD stack. Before you commit, verify how well it fits your workflow as a print-on-demand seller and how it plays with your favorite print-on-demand tools and target audience.

amiable learning curve. observe for a tool that matches your current skills, so you can focus on creating designs instead of wrestling with the interface.

POD-ready layouts. Templates built for apparel, wall art, stickers, and other print-on-demand products aid you design faster and keep sizing consistent for custom products.

Print-ready exports. Your tool should bolster 300 DPI, transparent PNGs, and vector formats to keep print quality keen across different items.

intelligent AI helpers. Built-in AI tools or AI technology that generate ideas, adjust layouts, or clean up artwork can speed up the design creation process without compromising your style.

protected licensing. verify that fonts, elements, and assets are cleared for commercial utilize so you can confidently market, share, and advertise finished designs.

Pricing that grows with you. A solid free plan is great for testing, while flexible paid plans unlock more power without turning every upgrade into an extra cost.

Creative control features. Custom fonts, layers, and mockup tools aid you construct a consistent brand identity and preview designs on real products before publishing.

Best online design tools for Print on Demand: Paid and free

Design tools do more than decorate a t-shirt. The best print-on-demand options also aid you cook up ad creatives, social graphics, and scroll-stopping mockups. Below, we’ll tour a mix of free and paid choices you can add straight into your POD workflow.

1. Klothing’s Product Creator

Klothing’s Product Creator sits right inside your Klothing account, so you jump from concept to publish-ready product without juggling tabs or extra apps. It feels like a guided studio for busy print-on-demand sellers who desire fast, clean designs instead of tech headaches.

Key Features: The editor supports multi-language text with emojis, layered design control, and precise placement tools, so you can fine-tune every side of a product. You can generate art with the built-in AI Image Generator, remove backgrounds in one click, and tile artwork with the Pattern Creator. 

A free graphics library adds icons, shapes, and ready-made elements. There’s even a Fiverr integration that connects you with freelance designers if you desire someone else to generate or polish your artwork.

Best for: Fast product designs and realistic mockups on actual Klothing items.

Pros:

Beginner-amiable interface. Perfect for launching or scaling a print-on-demand business without separate mockup tools or design skills.

Cons:

You labor only with Klothing’s Catalog, so not ideal for general brand graphics.

Pricing: Free to utilize.

2. Adobe Express

Adobe Express feels like a lightweight creative sidekick from the Adobe universe, built for fast visuals that still observe polished. It works well for product graphics, launch creatives, and eye-catching promos that keep your audience curious and clicking through.

Key Features: For POD, it comes packed with branded templates for merch promos, posters, and brief-form content, plus fast actions like background removal, image cropping, and one-click resizing for different channels. The AI aspect lets you generate images, insert or delete objects, and generate one-of-a-generous designs for your Etsy store.

Tight integration with Photoshop, Firefly, and other Adobe apps means you can grab assets from your library, remix them in Express, and push them back into larger projects without breaking your flow.

Best for: Mixing product designs with promo graphics across different social and POD platforms.

Pros:

Powerful tools and features for many different needs, not just product designs.

Cons:

Some advanced magic, assets, and brand controls unlock only after upgrading from the free plan.

Pricing: Generous free plan, with paid plans that add more assets, AI credits, and collaboration perks.

fast tip

study how to design with Adobe Express and generate resizable graphics for products, socials, and successful email marketing campaigns.

3. Canva

Canva is the internet’s shared whiteboard for people who swear they’re “not designers” yet somehow sprint full print-on-demand shops. You drag, drop, and remix visuals for product images, banners, and emails without reading a single manual.

Key Features: Canva’s power lies in its huge template library for merch graphics, banners, lookbooks, and simple product visuals. You drag in photos, shapes, and typography, then adjust everything with snapping guides, grids, and effects. 

Magic tools handle background removal, layout suggestions, and fast text styling, while the content planner helps you map designs into posts and campaigns.

Best for: Beginners who desire one hub for product graphics, promos, and light mockups.

Pros:

amiable interface that supports collaboration, folders, and shared assets for growing eCommerce businesses.

Cons:

Heavier, layered artwork can feel clunky in the browser compared to desktop apps.

Pricing: powerful free plan, with paid plans adding more storage, premium assets, and automation features.

fast tip

study how to formulate money on Canva and get more insights on the best tools and features on the platform.

4. Kittl

Kittl feels like a playground for typography nerds and retro-merch lovers, perfect for statement tees and bold poster art. It gives your lettering the rockstar treatment while keeping the workflow amiable enough for side hustlers and busy shop owners.

Key Features: Kittl combines powerful typography tools with a built-in AI image generator that’s tailor-made for merch concepts. You can prompt scenes, icons, and textures, then instantly remix them into your layouts. Real-time text warping, shading, and decoration effects turn simple phrases into logo-level graphics, while texture overlays add that worn, vintage, print-ready feel. A deep library of vector ornaments, badges, and illustrations lets you construct full designs fast, then export resizable files for shirts, posters, stickers, and other POD formats.

Best for: Text-heavy designs, badges, logos, and vintage-style merch that needs personality.

Pros:

Fantastic for grinding out consistent, on-brand graphics for a niche print-on-demand business.

Cons:

Some exports, vectors, and fancier tools sit behind higher paid plans.

Pricing: Offers a flexible free plan, with paid plans that unlock vector downloads, more assets, and stronger workflow bolster.

5. Photopea

Photopea lives in your browser but behaves like solemn desktop software, which makes it a handy fixer for tricky product photos and layered artwork. You open the file, tweak every pixel, and step back into your POD workflow without installing anything.

Key Features: Photopea opens layered PSD files, vector artwork, and a huge range of image formats directly in the browser, no installation needed. You labor with familiar tools like masks, intelligent objects, blend modes, adjustment layers, and filters, which makes complex edits feel similar to desktop workflows. 

Retouch photos, refine logos, and prepare layout files in one place, then export in formats suited for print-focused projects.

Best for: Detailed edits, retouching, and last-minute fixes on product images and mockups.

Pros:

A surprisingly powerful option for professional graphic design software fans who adore browser freedom.

Cons:

Ads in the interface can feel noisy during lengthy editing sessions.

Pricing: Free to utilize with an optional paid version that removes ads and supports ongoing development.

6. Creative Fabrica Studio

Creative Fabrica Studio feels like a candy store for POD creators, with fonts, graphics, and textures stacked in every aisle. It’s built for on-demand businesses that desire fast, branded visuals without hunting assets across ten tabs.

Key Features: Studio bundles an AI Image Generator, AI editor, quote and logo tools, plus a browser-based designer where you mix text, vectors, and millions of assets. You get a generous library of fonts, graphics, and stock images, intelligent file tools like converters and compressors, and a license tailored for commercial utilize across print-on-demand tools and marketplaces.

That combo helps you match any target audience while sharpening your design skills over time.

Best for: Asset-heavy POD designs, bundles, and print-ready compositions.

Pros:

Huge asset library and AI tools that speed up design production for tiny businesses and growing shops.

Cons:

The sheer number of options can be overwhelming at first.

Pricing: The Studio offers a free trial, along with subscriptions for full asset access and ongoing usage.

7. Procreate

Procreate turns your iPad into a sketchbook, studio, and inking desk in one, which makes it a aspiration for artists feeding a print-on-demand business with original artwork. You paint, ink, and shade directly on the screen, then send finished pieces into your POD pipeline.

Key Features: You get layered canvases, advanced brush engines, time-lapse recording, and color controls that aid you generate stunning illustrations for apparel, posters, and more. Pressure-sensitive brushes, blend modes, and custom palettes provide you fine control, so every stroke can serve your target audience and niche.

Large canvas sizes and export options keep your files POD-amiable at high resolution.

Best for: Hand-drawn designs, characters, and painterly merch graphics.

Pros:

One-time purchase that feels like owning a portable art studio.

Cons:

iPad-only, so no direct browser version for fast tweaks.

Pricing: Paid app with a single upfront fee, no recurring subscription.

8. Midjourney

Midjourney is your slightly chaotic AI muse: you throw in a prompt, and it returns wild concepts that can spark novel product lines. It shines when you desire fresh visual ideas faster than your sketchbook brain can keep up.

Key Features: Running through Discord, Midjourney generates scenes, patterns, and truly authentic illustrations from plain text prompts. You upscale, remix, and batch-generate variations, turning it into one of the most flexible on-demand tools for concept exploration. It pairs nicely with editing apps that refine outputs into POD-ready art.

Used thoughtfully, it can feed a steady stream of motifs for print-on-demand catalogs.

Best for: Concept art, backgrounds, and concept generation for merch.

Pros:

Massive variety of styles on tap for busy print-on-demand creators.

Cons:

Requires manual refinement and license checks before commercial utilize.

Pricing: Paid plans on a subscription model, with different tiers for usage.

fast tip

study how to utilize Midjourney to discover intelligent solutions for your POD business and generate AI art with advanced features.

9. Placeit

Placeit is your “instant brand visuals” machine, ideal when you require products, promos, and social media posts to observe polished today, not next month. It focuses on mockups, ready-made designs, and brief videos that plug directly into your marketing.

Key Features: You drop designs onto apparel, mugs, tech gear, and more using a huge mockup library, then export for your online store, ads, or landing pages. Placeit also offers logo templates, simple design layouts, and video tools that bolster fast mockup creation and promo clips across different platforms.

It works well alongside your usual scheduler or social media management tool.

Best for: Product mockups, promo graphics, and simple merch designs.

Pros:

Fast way to showcase the best print-on-demand products without ordering samples and hiring a photographer.

Cons:

Designs are more template-driven than fully custom.

Pricing: Individual downloads or a subscription, depending on usage.

10. Vecteezy Editor

Vecteezy Editor is a browser-based vector studio that feels like a lighter cousin of Adobe Illustrator, ideal for creating logos, icons, and clean merch graphics. You can jump in even with modest design skills and still come out with keen, scalable art.

Key Features: The editor lets you generate graphics using shapes, paths, and text, then tweak them with grids, snapping, and transformations. Because it’s wired into the Vecteezy library, you can initiate from existing vectors or discover free images, customize colors, and adapt them for product designs or web pages.

That makes it one of the best tools for tight, vector-based designs across multiple platforms.

Best for: Logos, icons, badges, and clean vector merch.

Pros:

Great for POD-ready vectors without investing in heavy desktop suites.

Cons:

Most useful when you already labor inside the Vecteezy ecosystem.

Pricing: Free editor with optional paid plans for broader asset access and licensing.

How to formulate POD-ready designs with any tool

No matter which editor or on-demand tools you utilize, the recipe for crisp, sellable designs is basically the same. Treat this like your mini checklist for the best print-on-demand results:

Set your canvas: initiate at 300 DPI and match the exact print size your product needs.

labor in RGB: Most POD printers convert from RGB; avoid super-neon colors that rarely print well.

Stay in the protected area: Keep art inside the printable zone to dodge awkward trims.

Keep details clean: Skip ultra-complex textures and tiny lines that vanish on fabric.

evaluate with mockups: Preview designs on products and across different platforms before publishing.

Export intelligent: utilize PNG for transparent designs and SVG for keen vectors.

utilize legal art only: Original labor, licensed assets, or AI from trusted tools only.

pursue this flow, and every file you upload will labor harder for your designs and lengthy-term business growth.

Print-on-demand tools: Frequently asked questions

Can I utilize copyrighted images with Print on Demand?

brief reply: no, you generally can’t utilize copyrighted images for Print on Demand unless you own the rights or have a obvious commercial license. That includes movie stills, band logos, and random Google images. If you desire a stress-free print-on-demand business, stick to original art, licensed stock, or POD-protected libraries.

How do I get high-resolution designs for Print on Demand?

High-resolution POD designs initiate with a large canvas (at least 300 DPI at final print size), clean vectors, or large source photos. Draw or layout in apps like Procreate or Kittl, then export PNG or SVG. You can also utilize AI tools and upscalers to sharpen artwork for custom products and get the best print results.

Does Klothing have its own design tool?

Yes. Klothing’s Product Creator is a built-in design tool made specifically for POD. You pick a product, add artwork or AI-generated graphics, preview mockups, then publish to your store. Together with routing orders and inventory management behind the scenes, it’s one of the most practical print-on-demand tools for keeping upfront costs low and design process stress-free.

What is the best design platform for Print on Demand?

There isn’t one single best design platform for Print on Demand. Many sellers mix Canva, Adobe Express, Kittl, and Klothing’s Product Creator to cover artwork, mockups, email marketing, and landing pages. The best print-on-demand stack matches your design skills, sales channels, and catalog size rather than chasing one magic app.

Which software is best for print designs?

For many POD sellers, the best software for print designs is simply Klothing’s Product Creator with its various tools and beginner-amiable interface. It shows exact dimensions and print areas for every product, lets you construct patterns, add text and emojis, utilize free graphics, and generate AI images. You design, preview, and launch print-ready layouts without opening any other editor.

Is it legal to utilize Canva for Print on Demand?

Using Canva for Print on Demand is legal when you pursue Canva’s content license. You can utilize their POD-approved elements and templates, but you can’t trademark them or claim them as exclusive art. Always verify which assets are cleared for repeated sales on POD and other platforms like Etsy or Amazon.

Conclusion

From top-quality t-shirt designs to targeted email campaigns, social media posts, and one-of-a-generous branding elements, you now have a whole ecosystem of print-on-demand tools to fuel your next launch. Adobe Express, Canva, Kittl, Creative Fabrica Studio, Midjourney, and more offer intelligent suggestions, templates, and handy features to enhance your art.

Then Klothing closes the loop. Drop your artwork into the Product Creator, line it up on real products, and publish straight to your store. Ready to evaluate a novel concept? Spin your next design into a sellable product today.

formulate it your way!

initiate designing

The post 10 Best online design tools for Print on Demand appeared first on Klothing.

Posted on

10 Best online design tools for Print on Demand

Bring your design ideas to life

Start designing

Designing for POD can feel like a wild mix of art class and business school, so let’s stack your toolbox properly. 

In this guide, we’ll walk through the best online design tools for Print on Demand, like Klothing’s Product Creator, Adobe Express, Canva, Kittl, Procreate, and more. You’ll see who they suit, what they shine at, and how to plug them into your POD workflow.

Disclaimer

This post may contain affiliate links, which means we may earn a commission if you make a purchase through those links. This comes at no additional cost to you.

What to look for in a print-on-demand design tool

Not every shiny app belongs in your POD stack. Before you commit, check how well it fits your workflow as a print-on-demand seller and how it plays with your favorite print-on-demand tools and target audience.

Friendly learning curve. Look for a tool that matches your current skills, so you can focus on creating designs instead of wrestling with the interface.

POD-ready layouts. Templates built for apparel, wall art, stickers, and other print-on-demand products help you design faster and keep sizing consistent for custom products.

Print-ready exports. Your tool should support 300 DPI, transparent PNGs, and vector formats to keep print quality sharp across different items.

Smart AI helpers. Built-in AI tools or AI technology that generate ideas, adjust layouts, or clean up artwork can speed up the design creation process without compromising your style.

Safe licensing. Check that fonts, elements, and assets are cleared for commercial use so you can confidently sell, share, and advertise finished designs.

Pricing that grows with you. A solid free plan is great for testing, while flexible paid plans unlock more power without turning every upgrade into an extra cost.

Creative control features. Custom fonts, layers, and mockup tools help you build a consistent brand identity and preview designs on real products before publishing.

Best online design tools for Print on Demand: Paid and free

Design tools do more than decorate a t-shirt. The best print-on-demand options also help you cook up ad creatives, social graphics, and scroll-stopping mockups. Below, we’ll tour a mix of free and paid choices you can add straight into your POD workflow.

1. Klothing’s Product Creator

Klothing’s Product Creator sits right inside your Klothing account, so you jump from idea to publish-ready product without juggling tabs or extra apps. It feels like a guided studio for busy print-on-demand sellers who want fast, clean designs instead of tech headaches.

Key Features: The editor supports multi-language text with emojis, layered design control, and precise placement tools, so you can fine-tune every side of a product. You can generate art with the built-in AI Image Generator, remove backgrounds in one click, and tile artwork with the Pattern Creator. 

A free graphics library adds icons, shapes, and ready-made elements. There’s even a Fiverr integration that connects you with freelance designers if you want someone else to create or polish your artwork.

Best for: Fast product designs and realistic mockups on actual Klothing items.

Pros:

Beginner-friendly interface. Perfect for launching or scaling a print-on-demand business without separate mockup tools or design skills.

Cons:

You work only with Klothing’s Catalog, so not ideal for general brand graphics.

Pricing: Free to use.

2. Adobe Express

Adobe Express feels like a lightweight creative sidekick from the Adobe universe, built for quick visuals that still look polished. It works well for product graphics, launch creatives, and eye-catching promos that keep your audience curious and clicking through.

Key Features: For POD, it comes packed with branded templates for merch promos, posters, and short-form content, plus quick actions like background removal, image cropping, and one-click resizing for different channels. The AI aspect lets you generate images, insert or delete objects, and create one-of-a-kind designs for your Etsy store.

Tight integration with Photoshop, Firefly, and other Adobe apps means you can grab assets from your library, remix them in Express, and push them back into larger projects without breaking your flow.

Best for: Mixing product designs with promo graphics across different social and POD platforms.

Pros:

Powerful tools and features for many different needs, not just product designs.

Cons:

Some advanced magic, assets, and brand controls unlock only after upgrading from the free plan.

Pricing: Generous free plan, with paid plans that add more assets, AI credits, and collaboration perks.

Quick tip

Learn how to design with Adobe Express and create resizable graphics for products, socials, and successful email marketing campaigns.

3. Canva

Canva is the internet’s shared whiteboard for people who swear they’re “not designers” yet somehow run full print-on-demand shops. You drag, drop, and remix visuals for product images, banners, and emails without reading a single manual.

Key Features: Canva’s strength lies in its huge template library for merch graphics, banners, lookbooks, and simple product visuals. You drag in photos, shapes, and typography, then adjust everything with snapping guides, grids, and effects. 

Magic tools handle background removal, layout suggestions, and quick text styling, while the content planner helps you map designs into posts and campaigns.

Best for: Beginners who want one hub for product graphics, promos, and light mockups.

Pros:

Friendly interface that supports collaboration, folders, and shared assets for growing eCommerce businesses.

Cons:

Heavier, layered artwork can feel clunky in the browser compared to desktop apps.

Pricing: Strong free plan, with paid plans adding more storage, premium assets, and automation features.

Quick tip

Learn how to make money on Canva and get more insights on the best tools and features on the platform.

4. Kittl

Kittl feels like a playground for typography nerds and retro-merch lovers, perfect for statement tees and bold poster art. It gives your lettering the rockstar treatment while keeping the workflow friendly enough for side hustlers and busy shop owners.

Key Features: Kittl combines powerful typography tools with a built-in AI image generator that’s tailor-made for merch concepts. You can prompt scenes, icons, and textures, then instantly remix them into your layouts. Real-time text warping, shading, and decoration effects turn simple phrases into logo-level graphics, while texture overlays add that worn, vintage, print-ready feel. A deep library of vector ornaments, badges, and illustrations lets you build full designs fast, then export resizable files for shirts, posters, stickers, and other POD formats.

Best for: Text-heavy designs, badges, logos, and vintage-style merch that needs personality.

Pros:

Fantastic for grinding out consistent, on-brand graphics for a niche print-on-demand business.

Cons:

Some exports, vectors, and fancier tools sit behind higher paid plans.

Pricing: Offers a flexible free plan, with paid plans that unlock vector downloads, more assets, and stronger workflow support.

5. Photopea

Photopea lives in your browser but behaves like serious desktop software, which makes it a handy fixer for tricky product photos and layered artwork. You open the file, tweak every pixel, and step back into your POD workflow without installing anything.

Key Features: Photopea opens layered PSD files, vector artwork, and a huge range of image formats directly in the browser, no installation needed. You work with familiar tools like masks, smart objects, blend modes, adjustment layers, and filters, which makes complex edits feel similar to desktop workflows. 

Retouch photos, refine logos, and prepare layout files in one place, then export in formats suited for print-focused projects.

Best for: Detailed edits, retouching, and last-minute fixes on product images and mockups.

Pros:

A surprisingly powerful option for professional graphic design software fans who love browser freedom.

Cons:

Ads in the interface can feel noisy during long editing sessions.

Pricing: Free to use with an optional paid version that removes ads and supports ongoing development.

6. Creative Fabrica Studio

Creative Fabrica Studio feels like a candy store for POD creators, with fonts, graphics, and textures stacked in every aisle. It’s built for on-demand businesses that want fast, branded visuals without hunting assets across ten tabs.

Key Features: Studio bundles an AI Image Generator, AI editor, quote and logo tools, plus a browser-based designer where you mix text, vectors, and millions of assets. You get a generous library of fonts, graphics, and stock images, smart file tools like converters and compressors, and a license tailored for commercial use across print-on-demand tools and marketplaces.

That combo helps you match any target audience while sharpening your design skills over time.

Best for: Asset-heavy POD designs, bundles, and print-ready compositions.

Pros:

Huge asset library and AI tools that speed up design production for small businesses and growing shops.

Cons:

The sheer number of options can be overwhelming at first.

Pricing: The Studio offers a free trial, along with subscriptions for full asset access and ongoing usage.

7. Procreate

Procreate turns your iPad into a sketchbook, studio, and inking desk in one, which makes it a dream for artists feeding a print-on-demand business with original artwork. You paint, ink, and shade directly on the screen, then send finished pieces into your POD pipeline.

Key Features: You get layered canvases, advanced brush engines, time-lapse recording, and color controls that help you create stunning illustrations for apparel, posters, and more. Pressure-sensitive brushes, blend modes, and custom palettes give you fine control, so every stroke can serve your target audience and niche.

Large canvas sizes and export options keep your files POD-friendly at high resolution.

Best for: Hand-drawn designs, characters, and painterly merch graphics.

Pros:

One-time purchase that feels like owning a portable art studio.

Cons:

iPad-only, so no direct browser version for quick tweaks.

Pricing: Paid app with a single upfront fee, no recurring subscription.

8. Midjourney

Midjourney is your slightly chaotic AI muse: you throw in a prompt, and it returns wild concepts that can spark new product lines. It shines when you want fresh visual ideas faster than your sketchbook brain can keep up.

Key Features: Running through Discord, Midjourney generates scenes, patterns, and truly authentic illustrations from plain text prompts. You upscale, remix, and batch-generate variations, turning it into one of the most flexible on-demand tools for idea exploration. It pairs nicely with editing apps that refine outputs into POD-ready art.

Used thoughtfully, it can feed a steady stream of motifs for print-on-demand catalogs.

Best for: Concept art, backgrounds, and idea generation for merch.

Pros:

Massive variety of styles on tap for busy print-on-demand creators.

Cons:

Requires manual refinement and license checks before commercial use.

Pricing: Paid plans on a subscription model, with different tiers for usage.

Quick tip

Learn how to use Midjourney to find smart solutions for your POD business and generate AI art with advanced features.

9. Placeit

Placeit is your “instant brand visuals” machine, ideal when you need products, promos, and social media posts to look polished today, not next month. It focuses on mockups, ready-made designs, and short videos that plug directly into your marketing.

Key Features: You drop designs onto apparel, mugs, tech gear, and more using a huge mockup library, then export for your online store, ads, or landing pages. Placeit also offers logo templates, simple design layouts, and video tools that support quick mockup creation and promo clips across different platforms.

It works well alongside your usual scheduler or social media management tool.

Best for: Product mockups, promo graphics, and simple merch designs.

Pros:

Fast way to showcase the best print-on-demand products without ordering samples and hiring a photographer.

Cons:

Designs are more template-driven than fully custom.

Pricing: Individual downloads or a subscription, depending on usage.

10. Vecteezy Editor

Vecteezy Editor is a browser-based vector studio that feels like a lighter cousin of Adobe Illustrator, ideal for creating logos, icons, and clean merch graphics. You can jump in even with modest design skills and still come out with sharp, scalable art.

Key Features: The editor lets you create graphics using shapes, paths, and text, then tweak them with grids, snapping, and transformations. Because it’s wired into the Vecteezy library, you can start from existing vectors or find free images, customize colors, and adapt them for product designs or web pages.

That makes it one of the best tools for tight, vector-based designs across multiple platforms.

Best for: Logos, icons, badges, and clean vector merch.

Pros:

Great for POD-ready vectors without investing in heavy desktop suites.

Cons:

Most useful when you already work inside the Vecteezy ecosystem.

Pricing: Free editor with optional paid plans for broader asset access and licensing.

How to make POD-ready designs with any tool

No matter which editor or on-demand tools you use, the recipe for crisp, sellable designs is basically the same. Treat this like your mini checklist for the best print-on-demand results:

Set your canvas: Start at 300 DPI and match the exact print size your product needs.

Work in RGB: Most POD printers convert from RGB; avoid super-neon colors that rarely print well.

Stay in the safe area: Keep art inside the printable zone to dodge awkward trims.

Keep details clean: Skip ultra-complex textures and tiny lines that vanish on fabric.

Test with mockups: Preview designs on products and across different platforms before publishing.

Export smart: Use PNG for transparent designs and SVG for sharp vectors.

Use legal art only: Original work, licensed assets, or AI from trusted tools only.

Follow this flow, and every file you upload will work harder for your designs and long-term business growth.

Print-on-demand tools: Frequently asked questions

Can I use copyrighted images with Print on Demand?

Short answer: no, you generally can’t use copyrighted images for Print on Demand unless you own the rights or have a clear commercial license. That includes movie stills, band logos, and random Google images. If you want a stress-free print-on-demand business, stick to original art, licensed stock, or POD-safe libraries.

How do I get high-resolution designs for Print on Demand?

High-resolution POD designs start with a large canvas (at least 300 DPI at final print size), clean vectors, or big source photos. Draw or layout in apps like Procreate or Kittl, then export PNG or SVG. You can also use AI tools and upscalers to sharpen artwork for custom products and get the best print results.

Does Klothing have its own design tool?

Yes. Klothing’s Product Creator is a built-in design tool made specifically for POD. You pick a product, add artwork or AI-generated graphics, preview mockups, then publish to your store. Together with routing orders and inventory management behind the scenes, it’s one of the most practical print-on-demand tools for keeping upfront costs low and design process stress-free.

What is the best design platform for Print on Demand?

There isn’t one single best design platform for Print on Demand. Many sellers mix Canva, Adobe Express, Kittl, and Klothing’s Product Creator to cover artwork, mockups, email marketing, and landing pages. The best print-on-demand stack matches your design skills, sales channels, and catalog size rather than chasing one magic app.

Which software is best for print designs?

For many POD sellers, the best software for print designs is simply Klothing’s Product Creator with its various tools and beginner-friendly interface. It shows exact dimensions and print areas for every product, lets you build patterns, add text and emojis, use free graphics, and generate AI images. You design, preview, and launch print-ready layouts without opening any other editor.

Is it legal to use Canva for Print on Demand?

Using Canva for Print on Demand is legal when you follow Canva’s content license. You can use their POD-approved elements and templates, but you can’t trademark them or claim them as exclusive art. Always check which assets are cleared for repeated sales on POD and other platforms like Etsy or Amazon.

Conclusion

From top-quality t-shirt designs to targeted email campaigns, social media posts, and one-of-a-kind branding elements, you now have a whole ecosystem of print-on-demand tools to fuel your next launch. Adobe Express, Canva, Kittl, Creative Fabrica Studio, Midjourney, and more offer smart suggestions, templates, and handy features to enhance your art.

Then Klothing closes the loop. Drop your artwork into the Product Creator, line it up on real products, and publish straight to your store. Ready to test a new idea? Spin your next design into a sellable product today.

Make it your way!

Start designing

The post 10 Best online design tools for Print on Demand appeared first on Klothing.

Posted on

How to utilize Printify’s Product Creator

Design custom products with Klothing

Get started

Creating and selling custom products has never been easier. Whether you’re novel to Klothing or a seasoned seller, understanding how to utilize Klothing’s Product Creator will aid you design, personalize, and publish items rapidly.

This beginner-amiable guide walks you through every step – from selecting your first product to launching it in your online store.

Key takeaways

The Product Creator is a beginner-amiable design tool that lets you formulate and publish custom products with a few clicks directly from your Klothing dashboard.

generate high-resolution personalized designs for apparel, home decor, wall art, and more using Klothing’s built-in tools and AI image generator.

opt for from an extensive range of Klothing products and reliable printing partners to minimize shipping costs and maximize customer satisfaction.

The Product Creator simplifies the entire process – from product selection and design to pricing, descriptions, and publishing to your eCommerce store.

With no upfront inventory costs and an extensive network of Print Providers, Klothing helps tiny businesses and creators initiate selling globally while maintaining competitive pricing and powerful profit margins.

Klothing’s Product Creator: An overview

The Product Creator is Klothing’s upgraded design and publishing tool, built to provide sellers a faster, smoother creation experience with a user-amiable interface. It helps you design a product, preview it in real time, and publish it with just a few clicks.

Key features

Modern layout and faster navigation – Simplified side panels and layers for better visibility.

Built-in editing tools – Upload high-resolution artwork, add personalized text, or generate reusable templates.

Real-time mockups – view exactly how your custom products will observe before publishing.

Integrated workflow – Everything happens inside the Klothing dashboard, from design to pricing to publishing.

The tool benefits tiny businesses, creative sellers, and large businesses managing multiple brands. It saves time, reduces upfront costs, and simplifies inventory management – helping you sprint a low-hazard custom product business.

To access it, log in to your Klothing account, open your Klothing dashboard, and click generate novel product. The Product Creator will open automatically with your selected item from our Catalog.

In a nutshell

The Product Creator introduced a reimagined workflow with improved responsiveness and faster load times. The interface consolidated editing, pricing, and publishing into a single view, removing the require to switch tabs or reload designs. 

For tiny businesses and novel sellers, this means faster setup, fewer errors, and no upfront inventory costs. The tool also helps maintain competitive pricing by automatically calculating material and shipping costs from your selected Print Provider.

Design your product line now with Klothing’s Product Creator. No experience required.

initiate designing

6 steps to design and market a product with Klothing’s Product Creator

Step 1 – opt for a product

initiate by selecting a base item from Klothing’s Catalog. You’ll discover a widerange of Klothing products – from t-shirts, hoodies, and tank tops to home decor, mugs, and phone cases. Each product page displays available colors, materials, and print areas.

Browse popular categories or various categories like wall art, drinkware, and accessories to discover what fits your target audience. Klothing collaborates with an extensive network of printing partners so you can opt for Print Providers located near your customers for faster delivery and lower shipping costs.

Tip

Review each Print Provider’s production times, high ratings, and shipping fees before selecting one. Their fulfillment speed can impact customer satisfaction and your profit margins.

Step 2 – Upload or generate a design

Once your base product is selected, you can generate artwork directly inside the Product Creator. Upload high-resolution images (PNG or JPEG) or design from scratch using built-in tools.

You can:

Upload original creative designs or personalized designs made in software like Photoshop or Canva.

utilize the AI image generator to generate novel artwork automatically.

Remove backgrounds, edit layers, or adjust opacity.

Add text elements and utilize curved or straight layouts for dynamic product designs.

Explore Klothing’s free graphics library or link Shutterstock for stock images.

These tools will aid you produce stunning product visuals that stand out on any eCommerce platform and will delight your customers.

If you plan to design a product line, utilize the template feature to preserve your layout and apply it to the same product or others later.

For beginners, t-shirts and hoodies are ideal for testing ideas – they market well year-round and have large, flexible print areas. Merchants targeting interior design or lifestyle markets might explore home decor items like throw pillows or wall art. Those running a custom product business for corporate gifting can add drinkware or phone cases to their stores.

Your product selection depends on your target audience and niche. Luckily, Klothing offers tools and filters in the Product Catalog to compare materials, colors, and Print Providers, helping you discover products that match your brand’s identity and shipping preferences.

crucial:

The Product Creator supports PNG, JPEG, and SVG (for vector designs). Always ensure your files are in high resolution (300 DPI) for crisp results.

Step 3 – Customize placement and variants

Next, fine-tune your layout. Adjust print areas (front, back, sleeves, labels, or sides) using the drag-and-drop tools in the Klothing dashboard. The alignment grid helps you center artwork accurately.

You can also select color variants, size options, and SKUs. The Product Creator automatically generates mockups for each variant, allowing you to preview them individually.

Even if you’re not a designer, Klothing’s Product Creator is built to be beginner-amiable. The built-in AI image generator can transform text prompts into artwork, perfect for novel sellers testing concepts or seasonal themes. You can also import patterns or repeat designs using the pattern fill feature to provide your custom products a cohesive observe. This accessibility allows anyone to generate professional-grade visuals without hiring a developer or buying expensive software.

Tip

utilize the alignment guides and grid overlay to ensure consistent placement across variants. Proper scaling helps maintain customer satisfaction and professional results.

Step 4 – Preview your product

After designing, click Preview to view your product in 3D or lifestyle mockups. This real-time mockup function gives a obvious concept of how your final Klothing products will observe.

verify:

Alignment and proportions within print areas

DPI and image clarity

Color accuracy and contrast

You can even download the mockups to utilize in your product listings or marketing visuals. Klothing automatically applies your uploaded images to the correct garment shape for a professional, consistent observe.

Step 5 – Set pricing and description

Within the Klothing dashboard, you’ll discover editable fields for your product listings – including writing titles, descriptions, and tags.

You can:

Set your base price and adjust your retail price to ensure competitive pricing and healthy profit margins.

Write a description manually or utilize Klothing’s AI description generator.

Add details about materials, fit, and care to improve customer satisfaction and SEO performance.

The Product Creator calculates shipping costs automatically based on the selected Print Provider and region. This ensures accurate pricing for your potential buyers at checkout.

When setting prices, consider your total expenses: the base price from your Print Provider, shipping costs, and transaction fees from your major eCommerce platform. utilize these numbers to calculate sustainable profit margins. 

Many sellers aim for a markup of 30-50%, but you can adjust based on your niche and potential buyers. Keep in mind that Klothing’s global network helps you control costs with regionally based printing partners, allowing localized production and faster delivery.

Step 6 – Publish to your store

Once your design and pricing are ready, click Publish. opt for the integration options for your connected eCommerce platforms, such as Shopify, Etsy, Wix, or WooCommerce.

If you haven’t linked your store yet, link it through Klothing’s integrations section. You can manage stores directly in the Klothing dashboard, making it effortless to track designs, orders, and fulfillment.

After publishing, your Klothing store listings will sync automatically, showing your product details, images, and mockups in your online store or major eCommerce platform. When a customer places an order, Klothing handles the fulfillment process – from printing to delivery – through its global network of printing partners.

Pro tips for using the Product Creator

Take your custom products to the next level with these advanced features:

1. Add personalization

Adding custom text or name fields can boost sales by up to 30%. The Product Creator supports personalized designs where buyers can input names or messages, making every item unique and memorable.

2. Explore embroidery products

If you desire higher profit margins, attempt embroidered t-shirts, hats, or home decor. Embroidery gives products a premium complete and can strengthen your brand’s business identity. Many embroidery templates are ready to utilize, eliminating the require for digitization.

3. utilize ready-made templates

Access templates for seasonal, personalization, and embroidery-ready designs inside the Product Creator. They’re perfect for testing novel niches or creating cohesive product collections.

4. generate and reuse your own templates

preserve your layout and apply it to multiple Klothing products in your selection. This saves time when launching customizable products across various categories like apparel, accessories, and home decor.

5. Order samples

Always order a sample before publishing. It helps you verify print quality, images, and alignment. It also gives you real photos for promoting your products on social media.

6. utilize mockups for marketing

Download the mockups generated in the Product Creator to showcase your Klothing products on social media or email campaigns. They’re ideal for pre-launch teasers and provide potential buyers a realistic observe before purchase.

7. Optimize for discoverability

When writing titles and product descriptions, include relevant keywords and details (color, fit, material) to aid customers discover your listings. This improves your visibility across eCommerce platforms and helps you reach novel audiences.

Frequently asked questions

What if my preview looks blurry?

verify that your images meet the recommended high resolution (300 DPI). A blurry preview often indicates a low-quality upload or scaling issue. Replace the file with a sharper version and recheck the mockup.

Can I duplicate products?

Yes. Inside your Klothing dashboard, open any design and click Duplicate. You can edit it, update colors, or modify print areas to generate a novel product without starting from scratch.

Can I order a product for myself?

Of course! You can order your Klothing products at production cost to review quality or generate merchandise for personal utilize. It’s a great way to confirm customer satisfaction before launching.

Is there an order minimum?

No. Klothing operates on a print-on-demand model – there is no inventory management or minimum order quantities. initiate selling right away with zero upfront costs, whether you’re testing designs or scaling your custom product business.

To summarize

Klothing’s Product Creator is a powerful, beginner-amiable tool that simplifies the entire process of designing, pricing, and publishing products. With a modern design, faster navigation, and advanced tools, you can generate professional custom products in a few clicks and link them to your eCommerce store seamlessly.

From t-shirts and home decor to phone cases and wall art, Klothing offers everything you require to construct a scalable business – backed by a broad selection of Klothing products, a global network of printing partners, and transparent shipping costs.

Whether you’re a designer, developer, or entrepreneur, Klothing’s Product Creator gives you the freedom to design products, manage orders, and expand your brand efficiently.

Ready to initiate designing?
generate your first product today with Klothing’s Product Creator and turn your ideas into sellable merchandise.

initiate designing

The post How to utilize Klothing’s Product Creator appeared first on Klothing.

Posted on

How to formulate a logo in Photoshop: 6-step tutorial (with expert tips)

Your logo, your brand, your merch

Design now

Your logo is often the first impression of your brand, so it’s crucial to get it right. In this guide, you’ll study how to formulate a logo in Photoshop with simple, practical steps.

Whether you’re building a business or creating for fun, this Photoshop tutorial will walk you through the entire logo design process.

This post may contain affiliate links, which means we may earn a commission if you formulate a purchase through those links. This comes at no additional cost to you.

How to design a logo in Photoshop in 6 effortless steps

Designing a logo may seem complicated, but Photoshop makes the process straightforward once you comprehend the basics. We’ll walk through six simple steps that demonstrate you how to formulate a text logo in Photoshop – from setting up your canvas to exporting a polished design you can utilize on products and digital platforms.

Disclaimer

This Adobe Photoshop logo tutorial is written for a fully updated, purchased Adobe product, but the instructions may labor on other free alternatives with a similar toolset and User Interface.

1. opt for the right Adobe plan

While you don’t require a premium subscription to initiate designing a logo, having Photoshop available, especially with the flexibility of cloud-based tools, will streamline your workflow.

Here’s a snapshot of Adobe’s current pricing:

PlanPrice (USD)IncludesPhotography plan$19.99/mo (annual commitment)Photoshop + Lightroom, 20 GB cloud storageSingle App (Photoshop)$22.99/mo (annual commitment, desktop + mobile)Photoshop on desktop, iPad, and iPhoneCreative Cloud Pro (formerly All Apps)$54.99/mo (annual commitment) or $69.99/mo (standard pricing)20+ apps (Photoshop, Illustrator, etc.), 100 GB storage, generative AI creditsBack-to-School Deal$42/mo for first year (40% off)Full Creative Cloud Pro suite at a limited-time discount

Which should you pick?

Photography plan ($19.99/mo) – Best value if you only require Photoshop and Lightroom.

Single App plan ($22.99/mo) – Ideal if you desire only Photoshop with broader device bolster.

Creative Cloud Pro ($54.99/mo or discounted) – Great for designers who desire access to Illustrator, InDesign, Premiere Pro, and more, all in one bundle.

Pro tip

Adobe also partners with affiliates like Klothing to offer exclusive discounts and free trial extensions on certain plans. Be sure to verify Klothing-Adobe affiliate deals before subscribing.

2. Explore available tools

This Photoshop tutorial section will guide you through the essentials – like the menu bar, options bar, dashboard, and edit windows – so you can keep things simple.

On the left side of your Photoshop workspace, you’ll discover a full set of editing tools, grouped by function.

View tools – Zoom and hand tools

Select tools – relocate tool, direct selection tool, shape select, lasso select, etc.

Enhance tools – Eyedropper, intelligent brush, clone stamp, blur, smudge, sharpen, etc.

Draw tools – Brush, pencil, pen, eraser, gradients, shape tools, type tool, text box, etc.

Modify tools – Crop, perspective, straighten, content-aware, align tools, etc.

Color selection – Primary and secondary color options

Most graphic software uses a similar layout, so once you’re familiar with Photoshop’s system, you’ll feel at home. For Photoshop logo design, the key ones to practice are the relocate tool, pen tool, shape tool, and text tool – these will form the core of any logo concept.

Expert’s tip

“Before jumping into Photoshop, it’s crucial to have a rough concept laid out on paper. You can upload a picture of your rough design to Photoshop, and then initiate making it digital! 

Don’t be afraid of the Pen tool! With practice, the Pen tool will be your most valuable asset. It allows you to formulate selections and paths in any way imaginable – and will formulate your life easier.

utilize the application tools to your advantage. The shape tools, such as the Ellipse tool or the Rectangle tool, are a great way to initiate constructing your own logo.”

Madison Thompson, Graphic Designer

3. initiate by creating a Canvas

Open Photoshop and go to the top menu. Select File > novel to generate a novel Photoshop document. provide your project a title and opt for Custom Document from the drop-down menu to set your own dimensions.

For this tutorial, we’ll utilize the default 500 x 500 pixels, but you can amplify the canvas size if you require more room for your logo. Click OK, and a white box will appear as your canvas. You can adjust the canvas size later if you desire more space.

Prepare your workspace:

In the main menu bar, select Window > Workspace and opt for Essentials or Reset Essentials to return to the default setup.

Go to View > demonstrate and enable Grid and intelligent Guides.

Then open View > Snap to and select Grid. You’ll now view a square grid over your canvas, which helps keep your shapes measured and aligned.

generate a novel layer:

Keep the original background layer intact, so you have a clean white backdrop for your design.

In the Layers panel, click the generate a novel layer button (the page icon with a folded corner). Select the novel layer by clicking on its name.

Double-click the layer’s name if you desire to rename it.

Tip

You can also import a sketch or photo onto a separate layer as a reference while building your logo.

To formulate a transparent logo, delete the background layer when you’re done and export the file without a background. The empty space will remain transparent. You can also utilize the Magic Wand tool to remove solid backgrounds rapidly and keep your logo clean.

To formulate the layer more solid, adjust the opacity slider in the Layers panel to amplify or diminish the transparency.

Expert’s tip

“The utmost crucial thing to keep in mind when starting to design a logo is who your audience is. It is crucial that your logo resonates with your target audience, but it should also inform them who you are as a brand! 

Another thing to recollect: keep it simple, but unique! Your logo should provide your audience a great concept of who you are, but you don’t desire it to inform your whole brand narrative. Your logo should also have a unique element to it, so people can easily recognize your company.”

Madison Thompson, Graphic Designer

4. Draw a shape

To initiate shaping your design, select the pen tool (fountain pen icon) from the toolbar. At the top of the Essentials Workspace, you’ll view several modifier settings.

Fill – modify the inside color of the shape or remove it completely

Stroke – Adjust the outline color, thickness, or style (solid, dotted, spaced, etc.)

Draw with the pen tool:

Click the canvas to generate a point, then click again to link it with a line.

Click and drag to generate curved or angled lines. utilize the grid as a guide for clean proportions.

To refine, hover over a point and wait for the plus (+) or minus (–) icon to add or remove anchor points.

Draw with the shape tool:

Click and hold the Rectangle tool button to opt for from rectangles, rounded rectangles, ellipses, polygons, lines, or custom shapes.

Open the shape library in the top dashboard under Custom Shape to explore hundreds of ready-made options.

relocate and transform your shape:

utilize the relocate tool to drag your shape around the canvas. By default, it snaps to the grid, but you can disable snapping from the main menu bar if you desire more freedom.

To resize, go to Edit > Free Transform or press Ctrl+T (Windows) or Command+T (Mac).

Hold the Shift key while dragging a corner to scale evenly.

Hold Alt while dragging to stretch dimensions independently.

To rotate, hover just outside the shape’s outline and drag.

Press Enter to confirm changes. If you’re not satisfied, utilize Edit > Undo or press Ctrl+Z (Windows) or Command+Z (Mac).

Organize your Layers panel:

Each novel shape appears on its own layer. You can relocate them independently by selecting the right layer.

To combine shapes:

Merge layers – Select multiple layers with Ctrl+click (Windows) or Command+click (Mac), right-click, and opt for Merge Layers/Shapes.

Group layers – Select multiple layers, right-click, and opt for Group from Layers. This keeps them in a folder so you can relocate them together or adjust them individually.

Ensure key elements remain clearly visible so they don’t get obscured by other parts of the design.

utilize the align tools to line up shapes perfectly, and verify how your design looks across other layers to stay organized.

Duplicate objects for intricate designs:

To formulate a copy of a layer, right-click and select Duplicate Layer or press Ctrl+J (Windows) or Command+J (Mac).

Rename the duplicate for clarity, then relocate or combine it to expand your logo design.

5. modify color or select a gradient

Add a solid color:

Select your shape layer, then opt for either the pen tool or shape tool (whichever you used to generate it).

In the Fill or Stroke bar, click the color square to open the color options. You’ll view:

No color

Solid color

Gradient

Pattern

Custom color picker

Pick a solid color from the recently used swatches or open the color picker in the top-right corner. utilize the slider on the right to adjust brightness and contrast.

If you’re designing a brand palette, utilize hex codes to keep your colors consistent. Copy and paste your brand’s hex code into the color picker to rapidly select the exact shade you require.

Add a gradient for blending effects:

Repeat the steps above, but this time opt for Gradient as your color mode. This applies a smooth color transition to your shape.

You can then adjust:

Blending options

Opacity

Color slider

Dimensions

Rotation

Scale

Double-click the arrows at the bottom of the gradient slider to open the color picker and select specific colors. Add more stops by clicking anywhere under the slider.

Drag the arrows at the top of the slider to refine the transition until you’re content with the result. Adjust opacity, rotation, and scale to fine-tune the observe of your logo design.

6. Add text

Your logo should labor as a recognizable mark for your brand, whether it appears on products, websites, or marketing materials. Adding text is the final step that ties your design together.

Select the Type tool in the toolbar (or press T on your keyboard).

Click and drag on the canvas to generate a text box, then type in your business name, initials, or slogan.

utilize the options at the top of the workspace to adjust:

Font style and weight (regular, bold, italic)

Font size

Text color

Other text style features

To confirm changes, click the checkmark icon in the workspace. You can then relocate the text box to your preferred position and resize it just like any other shape.Here is where typography can shine. Experiment with fonts until you discover one that reflects your brand’s style, and pair it with your shapes and colors to accomplish a balanced, professional observe.

Tip

Photoshop also lets you add extra effects through the Edit menu or by double-clicking the text layer in the Layers panel. Options like shadows, gradients, or outlines can provide your text more depth and aid it stand out in your overall logo design.

When you’re done, preserve your labor in PSD for future edits, and export a PNG or JPEG format depending on where the logo will be used. 

Additional tips to formulate a great logo

Now that you comprehend how to formulate a logo in Photoshop, here are a few tips that can elevate your design.

opt for shapes wisely 

Shapes influence how people view your brand. Circles often signal unity and community, triangles convey action and power, while squares suggest professionalism and stability. 

Even simple lines matter. Vertical ones convey power, while horizontal ones evoke a sense of peaceful and balance.

Keep it simple but relevant

A logo should be instantly recognizable. If you can sketch it in under ten seconds, it’s probably simple enough. Every curve and corner should have a purpose. A common error is adding too much detail, which makes the design harder to recollect.

discover inspiration without copying

observe at competitors, but aim to stand out. Sometimes that means choosing a color palette or logo style that breaks away from industry norms. Where others are busy, go minimalist. If everyone uses red, attempt a different hue to catch attention.

You can also explore Photoshop’s built-in templates for layout ideas, then customize them to fit your brand.

consider about size and scalability

Your logo needs to observe keen on a business card, a hoodie, or a billboard. Because Photoshop is raster-based, scaling too far can cause pixelation. To avoid this, consider vectorizing your design in Illustrator once your Photoshop file is finalize.

How to market custom products with your logo

Once you’ve finished your logo design in Photoshop, the next step is putting it to labor. A logo is more than just a file – it’s the foundation of your brand. And with Klothing, turning your design into real products is easier than you consider.

1. Sign up for free

generate your free Klothing account in minutes. No upfront costs, no subscription fees. 

2. Upload your logo

Go to the Klothing Product Creator and upload your logo file. You can place your design on hundreds of products, from t-shirts and hoodies to mugs, tote bags, stickers, and more.

3. Customize and preview

Adjust placement, resize without compromising quality, and view how your logo appears on different backgrounds. utilize our free tools to generate mockups that you can instantly add to your store.

4. link your store

Klothing integrates with all the major digital platforms, including Shopify, Etsy, Squarespace, and more. Just link your shop, publish your products, and you’re ready to initiate selling.

5. We print, pack, and ship

Every order is automatically sent to our network of Print Providers. They’ll handle the printing and delivery straight to your customers – you don’t require to worry about inventory or logistics.

initiate with Klothing today and view your logo come to life on products people will adore.

initiate selling

​​FAQ

How can I generate a logo in Photoshop?

You can generate a logo in Photoshop by starting with a novel file and setting your canvas size. Add a novel or blank layer to keep the background transparent. 
From there, utilize the Shape tool or Pen tool to draw a basic shape, add text using the Type tool, and customize colors. When finished, export your logo file as a PNG image with a transparent background so it’s ready to utilize across digital platforms.

Is Adobe Photoshop great for making logos?

Yes. Adobe Photoshop is one of the most popular graphic design tools, and it’s excellent for beginners learning the logo design process. 
While Illustrator is better for vector-based labor, Photoshop gives you full control over layers, editing tools, and different styles. It’s also flexible enough to fine-tune every element of your design, preserve your logo transparent, and prepare files in multiple formats.

How do I generate a logo image?

To generate a logo image in Photoshop, open a novel blank layer on top of your background. Draw shapes using the Shape tool, add custom text, and adjust colors in the Options bar. 
utilize the free transform feature with the Shift key to resize without losing quality. When you’re done, delete the background layer to formulate your logo transparent, then preserve it as a PNG image for the highest quality.

What are the 7 steps to design a logo?

While workflows vary, here’s a simple method you can pursue:

Open a novel file in Photoshop and set your canvas size.
Add a novel or transparent layer for flexibility.
Draw a basic shape using the Pen tool or Shape tool.
Add your brand name or slogan using the Type tool.
Apply color, gradients, or effects in the options bar.
utilize align and editing tools to fine-tune the entire image.
Export your logo file as a PNG image with a transparent background.

This logo design process helps ensure your logo is clean, versatile, and effortless to utilize across digital platforms.

Conclusion

Learning how to design a logo in Photoshop gives you the freedom to generate a unique symbol that represents your brand across all digital platforms and products. With the right mix of shapes, text, and editing tools, you can experiment with different styles, keep the background transparent, and export your logo file as a high-quality PNG image.

The process can also be a lot of fun, giving you room to attempt novel ideas before settling on the final version. A well-made logo works everywhere, from company websites to custom merchandise. Once your design is ready, upload it to Klothing and initiate placing it on t-shirts, mugs, tote bags, and more.

Your logo design process doesn’t complete with Photoshop. It’s the first step to building a recognizable identity that customers can trust. Now that you comprehend the steps, open a novel file, explore the tools, and generate a logo that makes your brand stand out.

market products with your logo today!

initiate designing

The post How to formulate a logo in Photoshop: 6-step tutorial (with expert tips) appeared first on Klothing.

Posted on

Flag design ideas: 5 Styles and useful tips

market custom products with Klothing

Get started

Flags can represent a movement, commemorate an event, or become the symbol of a group. 

Whether you’re designing something fun for personal utilize or creating flags to market online, this guide covers a wide range of cool flag design ideas. 

You’ll discover practical design tips, inspiration across different styles, and a straightforward way to bring your designs to life with Klothing.

Flag design ideas

Great flag design starts with simplicity. The best flags utilize basic elements – lines, colors, and symbols – but combine them in ways that feel meaningful and memorable. Here are five flag design categories to inspire your next creation.

1. Minimalist geometry

Bold shapes. High contrast. Instant recognition.

Minimalist flags labor because they strip everything down to what matters most. A single circle, a clean stripe, or two intersecting blocks of color can formulate a powerful statement, especially when seen from a distance or in motion.

Japan’s red circle on white is a perfect example. So is Greenland’s curved horizon in red and blue. Neither design is complicated, but both are recognizable anywhere in the world.

Design considerations:

Limit your colors: Stick to 2-3 bold, contrasting colors. Too many shades blur together from far away. Simplicity makes your flag effortless to identify in seconds.

opt for simple shapes: Circles suggest unity, triangles imply modify, and bars convey stability. Basic geometry carries meaning and stays legible even when the flag is moving.

evaluate for readability: View your design at a tiny size and in grayscale. A powerful flag should labor as a pin, patch, or simple sketch.

Minimalist geometry works well for modern brands, digital communities, and personal identity flags where clarity is everything. 

When in doubt, simplify. If your design still communicates your intended meaning after removing a color or line, you’ve found its strongest form.

2. Symbol and stripe combo

This is one of the most versatile approaches to flag design. Stripes generate visual order and rhythm, while a symbol adds identity. You’ll view this format everywhere, from state flags to sports teams and grassroots movements.

The United States flag uses stripes and stars. Greece combines blue-and-white stripes with a cross. The structure is familiar, which makes these designs instantly recognizable and effortless to adapt.

Design considerations:

Keep stripes balanced: utilize 2-3 horizontal or vertical bands. Stripes guide the eye and generate harmony, but too many can formulate the design feel cluttered.

Simplify your symbol: opt for something bold and effortless to reproduce – a star, flame, compass, or leaf. recollect, flags aren’t posters. Fine details disappear when viewed from a distance.

consider about placement: A centered symbol feels traditional and formal. An offset placement creates a more modern, dynamic observe.

This approach works well for community flags, team flag ideas, and social causes that desire to feel accessible yet distinct. It’s also great for groups within fandoms or gaming worlds where a obvious structure makes the flag immediately readable.

formulate sure your symbol has purpose. It should represent something specific, rather than just filling space.

3. Nature-inspired

Nature adds a timeless quality to flag design. A wave rolling across a sandy field, a rising sun made of layered circles, or a green triangle suggesting a mountain – these elements feel connected to something real.

The Navajo Nation flag does this beautifully with earthy tan fields, corn plants, and outlines of sacred land. Every element ties back to place and meaning.

On the other hand, Portland’s city flag condenses rivers, forests, and fields into bold green, yellow, and blue bands – a modern, abstract representation of natural landscapes.

Design considerations:

utilize a natural palette: Terracotta, forest green, sky blue, and sunburst yellow link your design to the natural world without being too literal.

labor with organic shapes: Waves, spirals, and leaves break up rigid grids, making flags feel more alive and approachable.

Balance asymmetry: Nature isn’t perfectly symmetrical, but design should be intentional. Balance irregular forms so your flag looks deliberate, not disorganized.

Nature-inspired designs labor for environmental organizations, heritage events, and wellness movements. They’re also perfect for fictional cultures tied to land and tradition.

These designs carry silent power and signal harmony. When drawing from nature, recollect to simplify – let the symbol suggest rather than illustrate every detail.

4. Abstract vitality

Abstract flags don’t spell things out – they generate a mood. Instead of literal symbols or traditional layouts, they utilize motion, color, and visual rhythm to formulate an impression.

The Progress Pride flag is a great example. Its chevrons and bold color fields generate a sense of forward movement and layered meaning without relying on literal imagery.

Similarly, Amsterdam’s city flag uses stark crosses on red and black. It’s less about depicting something specific and more about creating rhythm and impact.

Design considerations:

Add dynamic lines: utilize diagonals, arcs, and broken fields. Angles generate tension, while curves suggest flow and continuity.

opt for colors for emotion: consider about how colors formulate people feel, not just what they traditionally symbolize. Clashing tones feel rebellious, while blended gradients suggest harmony or transformation.

provide it some logic: Even abstract designs require structure. Repeat elements, mirror edges, or utilize one stable anchor to keep the design intentional.

Abstract vitality works for art collectives, speculative worldbuilding, and countercultural movements – any group that resists effortless definitions. These flags linger in people’s memories because they feel alive.

5. Heritage-inspired

Flags rooted in heritage carry weight that pure aesthetics can’t match. They borrow colors, symbols, or patterns from the past and reinterpret them for the present.

novel Mexico’s state flag is a standout example – the red Zia sun symbol centered on a gold background. It’s simple, powerful, and deeply rooted in the region’s Indigenous heritage. 

Another great example is the Welsh flag. It features a red dragon (Y Ddraig Goch) on a white and green background, which originates from an ancient Welsh legend and has been a symbol for centuries.

Design considerations:

utilize colors with historical significance: Culturally relevant tones link modern designs to history.

Incorporate cultural motifs: Symbols from textiles, architecture, or emblems can reflect identity, but handle them with respect and research their significance.

Add a modern twist: Simplify complex motifs into clean, bold forms. This keeps heritage alive while ensuring the flag remains versatile and effortless to reproduce.

Heritage-inspired designs labor well for diaspora communities, revived city or county flags, and history projects.

Done thoughtfully, they provide people something meaningful to rally around.

Practical tips for creating your flag

Designing a flag isn’t just about what looks great on screen – it’s about creating something that works in the real world. 

The best flags pursue a few reliable principles that have been proven effective throughout history. Here’s how to ensure your design stands out wherever it’s displayed.

evaluate visibility at different scales

A flag should be recognizable from across a stadium and still labor as a tiny icon on a phone. Scale your design up and down to view if the shapes and colors hold their impact.

attempt your design on:

Large-scale displays: Stadium banners, outdoor rallies, building drapes.

Medium-scale displays: Handheld flags, car flags, wall hangings.

Digital assets: Social media avatars, website icons, email headers.

Print materials: Flyers, posters, low-resolution grayscale printouts.

tiny-scale items: Pins, patches, stickers, phone backgrounds.

If your design works across all these formats – or even as a custom t-shirt design or cup design ideas – you’ve got something powerful. If it doesn’t, strip back the details until it does.

verify color contrast in black and white

Flags often appear in less-than-ideal conditions – at dusk, under streetlights, or printed on a basic office printer. A great flag should still labor in grayscale. High contrast between light and dim areas makes designs pop, no matter the medium.

Convert your design to grayscale in any image editor (Canva and Photopea are free options) or utilize an online contrast checker. If shapes blend together, your contrast needs labor.

You can also squint at your design until details blur, or print it on a home printer. The bold forms should still stand apart.

Keep proportions standard (2:3 or 1:2)

A flag’s shape matters as much as its colors or symbols. Most flags utilize a 2:3 or 1:2 ratio (height to width). These proportions observe balanced, fly well, and are effortless to reproduce across manufacturers. If you go too tall or too wide, the flag can observe awkward next to others.

How to apply it:

Pick a common ratio: 2:3 is most common worldwide; 1:2 is widely used (like the UK flag). 3:5 appears on some regional and civic flags.

Design to the ratio from the initiate: Set up your canvas at 2:3 or 1:2 so shapes, stripe widths, and symbol sizes stay proportional.

Stay consistent: utilize the same ratio for mockups, print files, and production so your flag always looks right.

consider about emotional resonance

Will people desire to wave it? A flag should spark a reaction rapidly. Color and shape do most of the heavy lifting. Aim for simple, bold, and memorable, whether that’s a single color or a rainbow that signals belonging.

fast checks:

Five-second evaluate: demonstrate your design to someone briefly. What sticks – colors, shape, or nothing? If nothing registers, simplify.

One-line narrative: Describe what your flag stands for in one sentence. If you can’t, the concept isn’t obvious yet.

Add one distinctive touch: Include a unique angle, stripe, or symbol that makes the design feel original without adding clutter.

Design with longevity in mind. If you feel hesitant about any element, consider cutting a color, sharpening a line, and testing again. The objective is a design that inspires action.

How to generate a custom flag with Klothing

Print on Demand makes flag creation super fast and effortless. You design, we print and ship. No inventory required, minimal hazard, and fast turnaround.

Here’s how to initiate designing flags and bring them to life with Klothing

Sign up: generate a free account in under a minute.

opt for your flag: Browse custom flags in the Catalog. Pick your size and ratio to generate your own flags.

Add your design: Open the Product Creator and upload your art. Align it and preview it on a mockup to view how it looks – no graphic design experience needed.

Order a sample or initiate selling: Order a sample to view your design in person, or click Publish and initiate selling through any of our eCommerce integrations.

We handle the rest: We print and ship each order. You focus on creating more designs or promoting your flags.

Flag

By Generic brand

From $12.82

From $9.58 with Klothing Premium

3 sizes
Colorway

Double Sided Flag

By Generic brand

From $12.08

From $8.75 with Klothing Premium

4 sizes
Printed Simply

Double-Sided Flag

By Generic brand

From $13.51

From $9.79 with Klothing Premium

3 sizes
Colorway

Garden & House Banner

By Generic brand

From $10.13

From $7.34 with Klothing Premium

2 sizes
Pic the Gift

Party Triangle Flags

By Generic brand

From $9.02

From $6.53 with Klothing Premium

1 sizes
Printdoors

Hand Flag (1pc, 5pcs)

By Generic brand

From $3.22

From $2.33 with Klothing Premium

1 sizes
Printdoors

House Banner

By Generic brand

From $24.96

From $18.09 with Klothing Premium

1 sizes
ArtsAdd

Garden Banner

By Generic brand

From $14.17

From $10.59 with Klothing Premium

1 sizes
ArtsAdd

FAQ

What are the 5 rules of flag design?

Keep it simple.
utilize meaningful symbols.
Limit colors (2-3) with powerful contrast.
No text – flag is a visual sign.
Be distinctive (or clearly related to a group).

How can I design my own flag?

initiate by writing one sentence about what your flag represents. consider about the meaning behind it and the emotion you desire to convey. Sketch large shapes and generate symbols that communicate that meaning.
Looking for team flag ideas for game day? Go bold with high contrast. Working on a creative flag design? Let one shape carry the narrative. Exploring made-up flag ideas for worldbuilding? Let the world’s values guide your choices.

How do I come up with a flag design?

Pick a category that fits your concept – geometric minimalism, heritage-inspired, or abstract vitality – and pursue its design principles. Sketch ideas and evaluate them from a distance.
Here are some prompts to get started:

Simple flag ideas: One symbol on a solid background.
Cool flag design ideas: Diagonals, off-center symbols, or a luminous stripe.
Made up flag ideas for worldbuilding: Define core values first, then pick colors and shapes that reflect them.
Feather flag design ideas: Tall, narrow designs with bold vertical elements labor best.

What is the 3-2-3-2-3 flag?

This usually refers to the 13-star layout on early US flags, often linked to Francis Hopkinson. The pattern uses five rows of stars: 3, 2, 3, 2, 3. Stars are evenly spaced, and the 2-star rows are centered between the 3-star rows.
Some designers also utilize 3-2-3-2-3 as a five-stripe thickness pattern, but that’s less common.

Conclusion

Flags are visual stories. Design them to read rapidly and feel authentic—whether they’re flying on streets across America or representing worlds you’ve imagined. evaluate your design at tiny sizes, order a sample, and refine until it feels right.

Ready to get started? generate a free account today and read our guide on how to initiate a print-on-demand business.

formulate it happen today!

initiate designing

The post Flag design ideas: 5 Styles and useful tips appeared first on Klothing.

Posted on

Pantone Color of the Year 2026: Trends and predictions

generate what’s trending. market what’s hot

initiate designing

The official Pantone Color of the Year 2026 drops this December, but the color marketing battle is already fierce. Experts like WGSN are pushing Transformative Teal green, while Sherwin-Williams favors the neutral hues of Universal Khaki green.

For print-on-demand (POD) entrepreneurs and graphic designers, knowing these trends is crucial for planning best-selling products. Keep reading to discover the global signals influencing Pantone’s 2026 decision and the green shade predictions that’ll define style in the coming year.

What is Pantone’s ‘Color of the Year’?

The Pantone Color of the Year program started in 1999 as a way to link culture and color. Every year, the Pantone Color Institute’s experts study global trends across the fashion world, art, and social shifts to identify one defining hue that captures the world’s collective mood. They announce the final shade in December.

The chosen color acts as a global design forecast, influencing home design, product style, and color marketing. More than just a visual trend, it represents a psychological snapshot of society’s mood and aspirations – a reason why brands and creators pay close attention to Pantone’s choice.

For example, the 2025 Pantone’s pick, Mocha Mousse, was a sophisticated, warm brown shade. Experts chose this subtle and classic color because it evokes a sense of stability and cozy warmth, perfect for minimalist lovers.

Understanding these annual trends helps POD creators keep their products relevant and, more importantly, appealing. A crucial step in connecting with customers and staying ahead of competitors.

Predictions for 2026 – What will be the Color of the Year?

For 2026, the leading themes are simple: a search for stability and a return to the natural world. After a lot of modify, people desire healing and sustainable living. This focus gives us 2 main color trends for the coming year – deep nature tones and simple, neutral hues.

The first major trend centers on the nature-inspired green shade. WGSN picked Transformative Teal for 2026, describing it as a gorgeous mix of blue and aquatic green. Other paint colors in this family – like the hidden gem of Smoky Jade and the muted sage Warm Eucalyptus – carry the same restful yet modern, sophisticated effect.

This vibrant yet grounded shade of Transformative Teal introduces a refreshing and trustworthy observe to your creative services, making your products instantly feel relevant, mindful, and high-quality.

The second major trend points to comfortable, grounding colors. They’re versatile and easily pair with a wide range of shades, acting as a stable backdrop for modern design.

Sue Kim, Valspar’s Director of Color Marketing, defends Warm Eucalyptus as a powerful neutral: “Going beyond the classified color term, neutral refers to colors that set a grounding and inviting mood with the warmth that calms our senses.”

Major paint brands have made their choices. Sherwin-Williams, for example, chose Universal Khaki for its ability to generate balanced, peaceful spaces.

Benjamin Moore picked Silhouette, a affluent, dim blend of espresso and charcoal from the browns family. Offering a classic and dramatic observe, this shade brings high-complete sophistication to any room.

Meanwhile, Glidden favored Warm Mahogany as its color of the year. The deep red-brown shade adds richness and a cozy feel to interiors, including kitchen cabinets. Its warmth is perfect for creating inviting spaces.

The final Pantone reveal is still coming. However, these paint colors are guaranteed to set global trends and influence both home decor and the fashion world.

The 2026 color battle and your next bestseller

The official Pantone Color of the Year 2026 announcement typically drops in early December.

Pro tip

Monitor Pantone’s official channels and major design publications to be an early adopter.

That said, the announcement is just the initiate – adoption dictates the real trends. Throughout the coming year, observe how major fashion weeks, interior design shows, and fresh tech or gadget launches embrace the chosen colors.

You’ll comprehend the color marketing works if it appears consistently across various industries.

Consumer reaction is also key. Does the color rapidly become flashy and oversaturated, leading to a brief trend life? Or, is it adopted more subtly, suggesting a classic, timeless evolution? For POD sellers, watching for these signals helps you adjust your offerings.

It’s never too early to observe ahead to 2027 and 2028. We comprehend from past trends that colors rarely disappear completely – they evolve.

For example, the deep green shade of Transformative Teal might lighten into a muted sage or minty hue in a future palette. We may view a shift in palette saturation, or the shades may appear in novel finishes with a tactile element, like iridescent trims in fashion or textured ceramics. 

These subtle shifts provide you a two-year head initiate. This foresight provides the necessary depth and fresh tones for your future art and home decor collections, whether that’s on wall prints or custom acrylic signs.

If you’re interested in more than just paint colors, our articles on design trends explore topics like gift trends, creative sticker design ideas, or the best white-label products to market.

Pro tip

When designing apparel using popular blanks like Klothing’s Gildan POD products, study the Gildan color chart to ensure your predicted shades are available and pair well with core apparel tones.

FAQ

What is the Pantone Color of the Year 2027?

The Pantone Color of the Year 2027 hasn’t been announced yet. Pantone reveals its novel annual color in December. However, color trend forecasting authorities like WGSN and International Colour Authority (ICA) usually release early predictions a few months before, helping designers and brands plan their products and marketing strategies for the year ahead.

How are Pantone colors chosen?

The Pantone Color Institute’s team of color experts spends the year researching global trends. They observe at the fashion world, novel technology, social media, and world events. The final hue reflects the world’s emotional tone, serving as both a color marketing tool and a forecast for future design trends.

What is the Pantone prediction for 2026?

While the Pantone Color of the Year 2026 hasn’t been announced yet, powerful global trends suggest two popular directions: calming green shades and versatile neutral hues. Trend forecaster WGSN named Transformative Teal, while the paint brand Sherwin-Williams picked grounding tones like Universal Khaki. This shows the world wants simple, timeless design embodying nature, regeneration, and sustainability.

What is the Pantone Color of the Year 2025?

The official Pantone Color of the Year for 2025 is Mocha Mousse (PANTONE 17-1230). This warm, comforting brown shade reflects a global desire for simplicity, stability, and connection to the natural world. This tone has influenced mindful design trends across fashion, interiors, and home decor.

When will the Color of the Year be announced?

Pantone usually announces the novel Color of the Year in early December. For the Pantone Color of the Year 2026, the official announcement should happen in December 2025.

How can I utilize the 2026 color trend in eCommerce?

utilize Transformative Teal and its complementary neutrals – Universal Khaki or Warm Eucalyptus – in your next mockups or product designs.
If you’re designing with Klothing, apply these green shades to hoodies, tote bags, or wall art to evaluate customer reply. Track what sells, then scale the winners into full collections.

To summarize

The Pantone Color of the Year 2026 discourse features two main trends: neutral hues and green shades. For POD entrepreneurs, anticipating these palettes early lets you plan cohesive product collections, optimize store visuals, and launch trend-aligned designs ahead of competitors.

utilize this foresight to position your brand as a trend-savvy leader and amplify sales as people observe for the next large trend in 2026. Whether you generate apparel, wall art, or home decor, integrating Transformative Teal and its complementary neutrals helps your store link with current consumer moods and boost seasonal sales.

And when you’re ready to bring your designs to life, Klothing makes it effortless to generate and publish novel products fast, helping you capitalize on emerging color trends as soon as Pantone makes its official announcement. Starting your print-on-demand business couldn’t get easier.

formulate it your way!

initiate designing

The post Pantone Color of the Year 2026: Trends and predictions appeared first on Klothing.

Posted on

Best designs to market on Etsy for passive income

desire to earn while you sleep? Selling digital products on Etsy lets you generate once and market forever – no inventory, no shipping, no headaches. 

This guide reveals the best designs to market on Etsy for passive income, from trending aesthetics to profitable printables. Plus, get expert tips to aid you launch and expand your Etsy digital products.

What are the best designs to market on Etsy for passive income?

Trends come and go, but certain design styles consistently attract Etsy buyers. These aesthetics dominate Etsy printables and digital downloads, giving sellers endless ways to construct passive income from evergreen niches.

Nature-inspired designs

Organic patterns, florals, and landscapes appeal to buyers craving peaceful and connection. Sellers utilize watercolor botanicals or minimalist leaves in printable wall art, digital planners, and branding kits. 

Nature motifs feel timeless – perfect for seasonal refreshes without overhauling your shop.

Retro-futurism and nostalgia

Vintage tech meets vibrant optimism. consider grainy textures, ‘80s neon, or Y2K gradients. These visuals perform well in social media templates, clip art packs, and printables that evoke nostalgia while staying modern. The key? Balance playful color with sleek typography.

Maximalism

noisy, layered, and unapologetic, maximalist designs thrive on Etsy because they stand out in a sea of minimalism. Mix bold colors, patterns, and typography for digital stickers, invitations, or editable templates. This aesthetic attracts customers who adore unique, expressive art.

Geometric and abstract shapes

Clean lines and symmetry never fail appeal. Geometric designs translate easily across digital products – from branding kits and resume templates to printable planners. Abstract shapes also let designers experiment with color and balance while staying versatile across niches.

Boho

Boho designs remain Etsy favorites thanks to their earthy tones and organic textures. utilize terracotta palettes, celestial icons, and soft brush strokes in wall art, digital planners, and wedding printables. The style’s flexibility keeps it relevant across categories and audiences.

Space-themed designs

Galaxy gradients, stars, and moon phases attract both mystics and minimalists. Space-inspired printables and educational posters blend fantasy with peaceful – ideal for planners, classroom art, and digital stickers. 

Metallic accents and deep hues aid your designs feel premium and atmospheric.

Feminine aesthetics

Pastel tones, florals, and elegant typography dominate Etsy digital products targeting lifestyle creators, coaches, and tiny business owners. Feminine designs labor beautifully in social media templates, branding kits, and printables for planners or journals. 

Niche consistency and soft details drive customer satisfaction.

Western retro

Cowgirl-core is booming – consider desert sunsets, distressed textures, and vintage typography. This nostalgic yet bold style sells well in printables, clip art, and digital items for apparel mockups or themed event decor. 

Pair rustic fonts with muted color schemes to capture that Western charm.

Why should you market digital products on Etsy?

Selling digital products on Etsy is one of the easiest ways to initiate an online business for a steady passive income. Unlike physical goods, Etsy digital downloads require no inventory, packaging, or shipping. 

You generate the file once, list it, and earn endlessly.

Digital products also appeal to global audiences – customers get instant access, and sellers delight in 24/7 sales without managing logistics. Plus, Etsy’s built-in traffic and established trust formulate it easier for novel sellers to expand fast.

Pro tip

Review the Etsy Seller Handbook for digital product rules, file delivery settings, and refund policies. It’s essential reading for every novel seller.

What are the most popular digital product ideas on Etsy?

The most popular digital products to market on Etsy share one thing in common – they formulate life easier or more gorgeous. From printables that organize daily routines to digital art that decorates walls, these ideas aid Etsy sellers construct lengthy-term passive income with minimal maintenance.

Printable planners and organizers

Printable planners remain Etsy bestsellers because they’re endlessly customizable. Shoppers adore the ability to download, print, and initiate using it instantly. 

attempt designing themed planners like meal planners, fitness logs, or finance trackers. These files are reusable, simple to update, and perfect for a digital planner shop targeting productivity enthusiasts.

Social media templates

​​Content creators and tiny businesses constantly require design aid. Social media templates – for Instagram, Pinterest, or TikTok – preserve them hours. utilize tools like Canva templates or AI for effortless customization. 

Templates with modern fonts, cohesive branding, and engaging layouts keep customers coming back for more.

Printable wall art

Printable wall art is one of the easiest ways to earn Etsy passive income. Customers download high-resolution files, print them at home, and instantly refresh their spaces. 

From minimalist quotes to nature-inspired or boho prints, focus on trendy yet timeless aesthetics. Offer multiple file types for effortless printing and framing.

Adobe Lightroom presets and LUTs

Creators adore shortcuts to professional-looking content. Selling Lightroom presets and LUTs (observe-Up Tables) gives photographers and videographers instant style upgrades. 

Bundle presets by theme – luminous tones, moody edits, vintage filters – to attract different audiences. Include simple video tutorials or before-and-after previews to construct trust and drive purchases.

Fonts, hand lettering, and clipart packs

If you’re a designer, generate passive income by selling fonts, hand lettering, or clipart.

These digital assets power branding, invitations, and social media visuals. Offer commercial utilize licenses to appeal to other Etsy sellers and creative entrepreneurs. Consistency and variety formulate your digital product business scalable.

Read more

What is digital dropshipping?

Wedding printables

Wedding printables are an evergreen niche with steady sales. Couples often search Etsy for editable templates for invitations, seating charts, and signage. 

Offer designs in modern, boho, or Western retro styles. Include matching sets so buyers can finalize their decor with one purchase, increasing order value and customer satisfaction.

Business templates

Professional, time-saving business templates are a top-selling category. consider resume templates, invoice designs, or branding kits for startups.

Entrepreneurs adore clean, editable layouts that they can customize rapidly. Templates built in Canva or Google Docs market especially well because of their accessibility and ease of utilize.

Educational printables

Parents and teachers often turn to Etsy for educational posters, flashcards, and lesson aids. These digital downloads combine creativity with utility, making them ideal for consistent sales year-round. 

Focus on clarity, color balance, and age-appropriate visuals. Adding printable planners or activity bundles can attract repeat buyers.

Printable stickers

Digital stickers dominate Etsy’s creative market thanks to their versatility. Buyers adore using them in digital planners, scrapbooks, and journals. 

Cute icons, motivational phrases, and seasonal sets perform especially well. Sellers can easily expand collections and attract faithful customers looking for novel designs every month.

Greeting cards

Greeting cards offer endless opportunities for personalization and creativity. From birthdays and weddings to holidays and thank-you notes, editable digital downloads let buyers customize text and colors before printing. 

Minimalist typography, watercolor florals, or bold graphic elements labor well. Include layered file types for effortless edits and bundle coordinating envelopes or inserts to boost sales.

Digital patterns

Crafters and tiny brands adore digital patterns for their versatility. Sellers can generate seamless designs for textiles, wallpapers, or scrapbooking using simple design tools. Geometric repeats, floral motifs, or retro textures tend to market consistently. 

Offer a few free sample swatches to construct trust and encourage reviews, then expand into premium pattern packs for steady passive income.

formulate passive income on Etsy with Klothing in just 6 steps

desire to earn more from your digital creations? Expand into Print on Demand to generate passive income that scales. 

Klothing makes this process simple by handling the production, packaging, and shipping, so you can keep focusing on creativity while your listings earn.

Here’s how to turn your digital files into sellable physical products – without inventory.

1. Reuse your best-selling digital designs

If your printable wall art or stickers are performing well, adapt them for physical formats. For example:

Turn popular digital patterns into tote bags or t-shirts.

Transform best-selling greeting cards into custom notebooks.

Offer framed or canvas versions of your most-downloaded printables.

Klothing’s Catalog has over 1,300 blank products, giving you a wide range to experiment with.

2. Prepare your files for print

Accuracy matters for the best color reproduction. Before uploading your design to our Product Creator, double-verify:

Resolution: utilize 300 DPI or higher for crisp detail.

Color profiles: Stick to sRGB for digital previews, but convert to CMYK-compatible files when creating printable versions.

Margins and bleed: Leave protected zones around edges to avoid accidental cropping during printing.

3. utilize the right design tools

Professional design tools such as Adobe Illustrator, Affinity Designer, or Canva Pro aid you maintain control over layout, resolution, and export quality. 

For sellers without graphic design experience, Canva or Photopea are beginner-amiable and browser-based – ideal for fast edits. Always export transparent PNGs or print-ready PDFs to avoid compression.

Pro tip

Adobe’s Print File Setup Guide has obvious walkthroughs on exporting PDF or PNG files with accurate bleed and color settings.

4. evaluate print before launching

Even if everything looks perfect on-screen, get a sample order. This lets you assess print sharpness, color accuracy, and material quality firsthand.

Adjust contrast or saturation if needed and re-upload the optimized file. While this seems like a tiny step, it helps improve buyer satisfaction and avert refund requests.

5. Optimize your listings for both audiences

If your Etsy shop includes both digital and physical listings, organize and mark them clearly. generate separate categories (like “Instant downloads” and “Printed versions”) to avoid confusion. 

Include accurate dimensions, material types, and fulfillment times in each listing.

6. Keep improving over time

Monitor which items bring repeat orders. Review your Etsy analytics monthly to identify powerful performers, retire low-selling designs, and expand your offering with more custom products.

Pro tip

verify Klothing’s aid Center article on designing products for file size limits, recommended DPI, and bleed settings.

Ready to add print-on-demand products to your lineup?

initiate designing

FAQ

What is the best passive income on Etsy?

The best passive income on Etsy comes from digital downloads and print-on-demand products – items you design once and market endlessly. Printable planners, wall art, stickers, and social media templates are top performers because they require no inventory or shipping.
Once uploaded, your Etsy listings can generate sales automatically, especially when paired with intelligent SEO and consistent marketing.

What is the #1 selling item on Etsy?

While product trends shift, printables remain the top-selling digital download category. Planners, wedding printables, and digital wall art dominate search results because they’re affordable, effortless to utilize, and instantly accessible.
These items appeal to a wide audience, making them ideal for anyone starting an Etsy digital products shop.

Can you formulate $10,000 a month on Etsy?

Yes, but it takes time, plan, and high-quality listings. Top Etsy sellers earning five figures monthly typically offer multiple digital products, optimize every listing for search, and promote their shops through social media. 
Niche consistency, product variety, and stellar customer satisfaction are key to reaching that level of passive income.

What niche sells most on Etsy?

The most profitable Etsy niches balance creativity with demand. Popular options include planning and organization, home decor, weddings, and business templates. 
Popular niches like boho or retro aesthetics also perform well across digital downloads, since they align with lengthy-term buyer interests and visual trends.

To summarize

Earning passive income on Etsy starts with quality, consistency, and intelligent product choices. Focus on digital products that people adore to utilize or display, like printable planners, wall art, or social media templates, and keep designs aligned with powerful niches.

generate once, optimize your Etsy shop, and let your downloads keep selling lengthy after you’ve hit publish.Ready to scale beyond downloads? With Klothing, you get the best of both worlds – no inventory or shipping hassles, but all the profit potential of selling physical products.

The post Best designs to market on Etsy for passive income appeared first on Klothing.

Posted on

57 Creative sticker design ideas to market online

initiate your custom printing business today!

initiate selling

Looking for sticker design ideas that actually market? You’re in the right place.

There are endless ideas for stickers out there, but not every design will attract buyers. 

In this article, we’ll walk through sticker design ideas that resonate with different target audiences, from students and animal lovers to hobbyists and tiny business owners.

This post may contain affiliate links, which means we may earn a commission if you formulate a purchase through those links. This comes at no additional cost to you.

57 Sticker design ideas for large and tiny businesses

From the most popular sticker designs to promotional, cute, and quirky ones – let’s explore cool sticker ideas to attract more sales and like-minded people to your store. 

Animal stickers

From playful pets to majestic wildlife and even mythical creatures, animals inspire some of the most creative sticker ideas to formulate.

1. Pet photos

Turn cherished pet photos into custom stickers with a personal touch. Perfect for pet owners looking to celebrate their furry friends. utilize high-quality sticker paper and basic design tools like Klothing’s free online sticker maker or Adobe Express to formulate gorgeous stickers in minutes.

2. Pet illustrations

Celebrate pets with artistic illustrations that capture their unique personalities. Consider themes like whimsical portraits, stylized silhouettes, or even caricatured expressions to generate designs that resonate with pet lovers everywhere.

3. Cartoon animals

generate lively stickers that delight both kids and the youthful at heart. Picture vibrant characters like mischievous monkeys swinging through trees or wise owls perched on branches. These fun sticker designs showcase playful antics, humorous expressions, or adventurous scenes that bring joy and spark imagination.

4. Exotic animals

Consider majestic creatures like graceful giraffes, colorful toucans, or fierce tigers prowling through lush jungles. These aesthetic stickers utilize intricate patterns, vibrant colors, and detailed artwork to capture the beauty of wildlife worldwide.

5. Mythical creatures

Bring unicorns, dragons, and other mythical beings to life with fantasy stickers. They’re perfect for imaginative minds and fans of magical worlds. utilize real animals for sticker inspiration, or generate an original creature of your own.

Read more about how to initiate a sticker business and turn designs into passive income.

Laptop stickers

Laptops formulate an excellent home for fun sticker designs. From cute characters to bold graphics, they let people personalize their tech and demonstrate off their style wherever they go.

6. Abstract designs

consider of geometric patterns that twist into custom shapes, watercolor blends that fade into bold contrasts, or digital artwork experimenting with color and texture. These sticker ideas can add a sleek observe to laptops, notebooks, and other everyday items.

7. Pop-culture references

Tap into fandom culture with stickers referencing popular movies, memes, TV series, or games. Include iconic characters, memorable quotes, or recognizable symbols that resonate with dedicated fanbases.

Disclaimer

Ensure designs respect intellectual property rights to avoid infringement issues.

8. Space

Capture the awe of outer space enthusiasts with stickers featuring celestial bodies like planets, stars, and galaxies. These aesthetic sticker ideas spark wonder and curiosity, appealing to both astronomy fans and sci-fi lovers.

9. Adventure

Cater to wanderlust with cute stickers that capture the spirit of adventure. utilize world maps, airplanes, and travel icons to spark dreams of far-off destinations and unforgettable journeys.

10. Profession-themed designs

Target niche markets with stickers tailored to specific professions – it’s a fantastic way to appeal to people passionate about their careers. From artists to engineers, teachers to healthcare workers, design vinyl sticker ideas that utilize job-specific symbols, colors, or witty slogans. 

11. Minimalist designs

Explore simple sticker ideas featuring line drawings and subtle details to add sophisticated charm to laptops and personal items. Perfect for those who appreciate minimalist aesthetics, these designs offer timeless elegance with a modern twist.

Cute stickers

These cute sticker design ideas bring charm and personality to everyday items. Ideal for personal utilize, they add a playful touch to water bottles, school supplies, phone cases, and more.

12. Kawaii characters

Kawaii characters are known for oversized eyes, round shapes, and soft pastel colors that provide off a playful, innocent vibe. consider smiling stars, heart-shaped faces, or quirky little robots. These designs are popular among school students who adore decorating their stationery items. For extra impact, print them as die-cut stickers so each character keeps its unique shape.

13. Baby animals

Capture hearts with cute stickers of baby animals. Playful kittens, puppies, ducklings, and even tiny elephants are always favorites. attempt drawing a tiny panda munching on bamboo or a baby fox curled up in a ball for a unique touch.

14. Cute monsters

Transform the scary into the sweet with cute monsters. Design amiable creatures with round shapes, large eyes, and playful expressions. These designs add a whimsical and fun element to your sticker offerings.

15. Weather icons

Turn everyday weather symbols into adorable stickers. Picture a smiling sun in shades, a fluffy cloud with a grin, or a raindrop in a tiny hat. These sticker ideas can brighten up planners, notebooks, and personal utilize items.

16. Friendship duos

Some of the best ideas for stickers come in pairs. consider of a fox and a raccoon, peanut butter and jelly, or a bee and a flower. Fun to print and share, these playful designs celebrate friendship and labor great as matching sets.

Food stickers

Food often inspires the most creative sticker designs. Ideas can include everything from pizza and coffee to desserts and fruit – playful themes that formulate custom stickers fun for foodies.

17. Desserts and sweets

generate cool stickers featuring desserts and sweets. consider cupcakes with vibrant frosting, smiling donuts, and colorful macarons. If you sprint a tiny business like a bakery or café, you can add these sticker sheets to your delivery boxes so customers can take home a fun reminder of their favorite treats.

18. Beverages

Drinks formulate excellent sticker ideas because people often view their favorite beverages as part of their daily routine. Consider a cute coffee cup with a smiling face, a refreshing lemonade with a straw, or a steaming hot chocolate topped with marshmallows.

19. Food combos

Illustrate fun food combos, like bread holding hands with butter, bacon and eggs, or peanut butter and jelly. These playful custom stickers celebrate beloved pairings while adding a touch of humor. Plus, they’re simply adorable.

20. Pizza party

Puffy dough, mouth-watering cheese pulls, and round salami slices will formulate your customers drool. Get creative with different toppings, packaging, or even the pizza-making process – there are endless sticker ideas for bringing these delicious visuals to life.

21. Fruits and vegetables

Some of us gain weight just by writing about pizza. That’s where smiley avocados and dancing strawberries come in handy. From simply cute to encouraging, these stickers will be a fun way to improve daily planning and promote a healthy lifestyle.

22. Cheesy designs

Who doesn’t adore cheese? generate fun stickers with different types, from cheddar blocks to Swiss slices to Mozzarella balls. Add faces and expressions to formulate them even more charming. These designs are a great concept for cheese lovers and food-themed collections.

23. Cooking and grilling

Capture the essence of cooking and grilling with stickers. consider of a content spatula flipping burgers, a pot of soup with steaming hearts, or a grill with sizzling steaks. These design ideas will resonate with food enthusiasts and barbecue fans.

Hobby stickers

While eating can also be a hobby, many people discover other fun ways to spend their free time. These engaging designs result in cool stickers that resonate with enthusiasts of various fields.

24. Crafting essentials

Design vinyl sticker ideas featuring crafting essentials. consider of scissors, glue bottles, and colorful yarn or die-cut stickers of paintbrushes or knitting needles. These designs appeal to crafters who adore to personalize their supplies.

25. Gaming

generate sticker designs for gaming fans. Consider controllers, retro arcade machines, or gaming lingo. utilize vibrant colors and bold letters to formulate these stickers pop. They’re perfect for laptops, gaming consoles, and water bottles.

26. Gardening

Celebrate the adore of gardening with sticker sheets full of plants, watering cans, and garden tools. Picture lush succulents, colorful flowers, and butterflies that bring a garden to life. These sets labor well for decorating journals or labeling plant pots.

27. Photography

Capture the essence of photography with vinyl stickers of cameras, film rolls, and tripods. Add some flair with retro Polaroids or modern DSLRs. Great concept for decorating camera bags, scrapbooks, or even laptop cases.

28. Music

Design sticker ideas for music lovers. consider musical notes, instruments like guitars and keyboards, and vinyl records. Musicians can utilize these stickers to personalize instrument cases, notebooks, and more.

29. Dancing

Showcase the joy of dancing with sticker designs of ballet shoes, disco balls, and dancers in motion. These fun stickers are perfect for dance enthusiasts to decorate their gear and accessories.

30. Camping

A crackling fire, a well-pitched tent, a marshmallow on a stick, and an amazing view – these are the essentials of camping. Put these objects on your stickers to evoke the great outdoors and appeal to nature lovers worldwide.

31. Art

demonstrate your artistry with aesthetic stickers inspired by the joy of creating artwork. consider paint palettes, brushes, and easels, or go bold with graffiti-style murals. These designs add personality to sketchbooks, paint boxes, portfolio cases, and more.

Spooky stickers

Dive into sticker design ideas that capture the eerie essence of Halloween and beyond. These cool stickers are great for adding a spooky touch to any item. So don’t just generate cute-scary designs. Some people are into dim themes and will appreciate niche-specific stickers year-round.

32. Haunted house

consider ghosts, black candles, bats, jack-o’-lanterns, and skulls. These designs add a chilling vibe to school supplies and water bottles, especially during the Halloween season.

33. Zombie apocalypse

From brain-eating zombies and warning signs to eerie, decayed landscapes, these stickers provide horror fans a creepy way to customize notebooks, laptops, and other gear.

34. Witchcraft

Capture the magic of witchcraft with stickers of cauldrons, crystal balls, brooms, pointy hats, and black cats. A fun way of creating designs ideal for planners, packaging, and party favors during spooky celebrations.

35. Spooky scenery

generate creepy scenery with full moons, graveyards, coffins, crows, spider webs, and lightning. These sticker ideas are perfect for setting a spooky atmosphere on school supplies, belongings, and even pack-ins for Halloween-themed gifts.

36. Scary monsters

Design vinyl stickers featuring werewolves, vampires, ghouls, and goblins. These monster-themed stickers are great for horror fans who desire to add a frightening touch to their daily lives.

Athletic stickers

Explore sticker design ideas that cater to sports fans and athletes. These cool stickers showcase team spirit, fitness passion, and energetic lifestyles.

37. Sports

generate stickers for basketball, football, baseball, soccer, or tennis featuring team logos, equipment, and action scenes. Add personalization by letting customers include their team name or colors. These designs double as keepsakes and effective branding fans will proudly display on water bottles, gear, and more.

38. Yoga

Bring peaceful and balance with design ideas inspired by yoga. utilize poses, mats, and meditative symbols that resonate with yogis. These stickers can add a mindful touch to journals, yoga mats, or even packaging for wellness products.

39. Fitness

Pump up the vitality with motivational stickers made for gym lovers. Picture barbells, protein shakes, and bold quotes that fire people up. These designs observe right at home on water bottles, gym bags, or notebooks, giving fitness fans a fun way to demonstrate off their dedication.

40. Swimming

generate cool stickers with swimming themes, such as goggles, swimsuits, and waves. These designs are a cost-effective way for swimmers to showcase their passion on their belongings.

Text-based stickers

Let’s observe at sticker design ideas focusing on text to convey messages and enhance brand identity. 

41. To-do lists

generate practical stickers with to-do lists to aid people organize tasks. These designs can include checkboxes, bullet points, and vibrant colors, making them a fun way to stay productive.

42. humorous stickers

Design humorous stickers featuring witty sayings and humorous phrases. They’re great for adding personality to everyday items, but they also shine as a bumper sticker. Excellent for cars, skateboards, or bike helmets, where the humor can get plenty of laughs on the go.

43. Inspiring quotes

Craft motivational stickers with inspiring quotes that aid people stay positive and focused throughout the day. Place them on laptops, water bottles, or journals so the encouragement is always visible.

44. Titles and professions

The go-to concept for labor and life promotions. These sticker design options can celebrate careers, hobbies, crucial life events, birthdays, and more – from “Best Dad” to “Bride-to-Be” to “CEO.”

Logo stickers

These sticker design ideas are especially useful for tiny businesses, sports teams, and schools – adding branding that builds recognition and leaves a lasting impression.

45. Company logos

Design custom stickers with company logos to promote brand identity. consider of sleek, flat design logos with vibrant colors for laptops, notebooks, and water bottles. These stickers also labor well as promotional materials for giveaways, events, and marketing campaigns.

46. Sports team logos

generate stickers featuring sports team logos, perfect for schools and local clubs. utilize team mascots, colors, and symbols to design vinyl stickers for fans and members alike, raising team spirit one sticker at a time.

Disclaimer

formulate sure you have permission to utilize and reproduce logos to avoid IP infringement issues.

Seasonal and holiday stickers

These stickers are excellent for packaging and other creative uses, offering a sneak peek into the beauty of the changing seasons.

47. Winter wonderland

Design stickers with snowflakes, snowmen, and cozy winter scenes. These sticker ideas capture the magic of the holiday season and are great for decorating gifts or personal knick-knacks.

48. Spring blossoms

generate aesthetic stickers with blooming flowers, butterflies, and pastel colors. These designs celebrate the renewal of spring, adding a fresh, uplifting touch to personal spaces.

49. Summer fun

Craft stickers depicting beach scenes, tropical fruits, and playful elements like sunglasses and ice cream cones. These summer-themed stickers exude a carefree and sunny vibe, making them perfect for brightening up scrapbooks, party decorations, and other summer-inspired projects.

50. Autumn harvest

consider rustic pumpkins, golden leaves, cozy scarves, and warm earth tones. These sticker design ideas celebrate the richness of fall and add seasonal flair to our homes and belongings.

51. Seasonal celebrations

From Valentine’s and Easter to the Fourth of July, Halloween, Thanksgiving, and Christmas, the year is full of events made for custom sticker designs. Add celebratory messages like “content Holidays,” “Trick or Treat,” or “Thankful and Blessed” to gift packaging, holiday cards, and knick-knacks to formulate every occasion more festive.

Sticker sheets

This is where all the ideas above come together and hold hands like kids around a campfire – which could even be a design concept on its own. 

Add any of the elements we’ve covered into sticker sheets to generate themed sets people will adore.

52. Travel and destinations

Etsy/HotPaperCraft

53. Food and sip

Etsy/moehrenkunstshop

54. Hobbies and interests

Etsy/JarteaDesigns

55. Nature and animals

Etsy/PaperCraftsSticker

56. Celebrations

Etsy/Best4UStudio

57. Seasonal themes

Etsy/moehrenkunstshop

Where to discover custom sticker ideas?

Stickers are some of the best-selling items on Etsy and other popular sales channels. They’re fun, effortless to customize, and loved by a broad audience – which means plenty of profit potential. 

To discover inspiration for sticker design ideas, here are a few places to initiate.

Social media

Platforms like Instagram and Pinterest are excellent for finding sticker design inspiration. 

On Instagram, pursue relevant hashtags such as #stickerdesign or #customstickers to explore a diverse range of creative concepts shared by artists and designers.

Pinterest allows you to search for keywords like “custom stickers” to discover trending and innovative designs.

Online marketplaces

Platforms like Etsy, eBay, and Amazon feature various stickers across different themes and styles. These marketplaces offer a affluent source of creative inspiration and a glimpse into what resonates with buyers. Explore the current trends and offers to comprehend what people are looking for the most.

Your interests and hobbies

By drawing from personal interests, generate stickers that resonate with enthusiasts alike. Whether you’re passionate about gardening, gaming, or fitness, these hobbies offer unique themes, symbols, and motifs that can be translated into compelling sticker designs.

Read more about selling stickers on Etsy to elevate your brand and skyrocket sales.

How to design custom stickers with Klothing?

formulate your own stickers with Klothing – the leading print-on-demand platform. Design custom stickers in minutes with our beginner-amiable tools and automated processes. Our Print Providers handle printing, packaging, and shipping.

Register for a free account.

Pick your sticker type from our Catalog and click initiate designing.

utilize our Product Creator to formulate a unique sticker design with features like the pattern tool, multi-language text editor, AI image generator, and a free graphics library.

Preview, adjust, and preserve.

List online and market or order for yourself.

initiate designing

FAQ

How do I design my own stickers?

Design stickers by drawing them by hand and turning them into a digital file, or using a design software like Adobe Express. 
If you have little to no design skills, the easiest way to formulate your own stickers is to utilize Klothing. Our free Product Creator has ready-to-utilize graphics and an AI image generator to aid you generate custom stickers for yourself or to market online.

What stickers are trending in 2025?

This year’s trending stickers include hand-drawn art, minimalist designs, kawaii illustrations, motivational quotes, and custom face stickers. These styles labor well on everyday items like laptops and water bottles, making them fun and practical.

What makes a great sticker design?

A great sticker design shows the object clearly, reflects the owner’s personality or brand, and leaves a lasting impression. Simple artwork focused on a single object with bold typography and clean lines usually works best.

What type of stickers market well?

Stickers that market well often relate to your target audience’s daily lives and interests.
For example, office workers may like humorous laptop stickers that play on their 9-to-5 routine. Students might prefer aesthetic stickers that reflect their interests – like music, gaming, or sports – and utilize them to personalize their stationery items throughout the school year.

formulate your own custom stickers

Bring your sticker design ideas to life with themes and styles that fit any passion or market. From seasonal delights to bold branding and personalized favorites, stickers are a versatile canvas for creativity.

Whether designing for personal expression or building a tiny business, Klothing makes it effortless to generate, print, and market custom stickers worldwide. initiate free today and turn your ideas into something people will adore.

formulate it happen today!

initiate selling

The post 57 Creative sticker design ideas to market online appeared first on Klothing.

Posted on

The evolution of printing and embellishment techniques: From ancient stitches to POD

Bring your design ideas to life

initiate designing

For thousands of years, humans have decorated clothing and objects to express power, identity, and artistry. From Pharaohs wearing embroidered linen to today’s AI-designed t-shirts printed on demand, apparel decoration has always been about turning fabric into storytelling. 

This is the evolution of printing techniques – a voyage from hand embroidery and block prints to sublimation, DTG (direct-to-garment), and DTF (direct-to-film).

Key takeaways

Embellishment has always carried meaning. Ancient embroidery, block printing, and resist dyeing conveyed identity, social status, and spirituality.

Mechanization in the 19th century transformed decoration, with Jacquard looms, embroidery machines, and early screen-printing presses accelerating production.

By the mid-20th century, t-shirts, protest prints, and stage costumes had become cultural symbols.

Digital technologies such as DTG, sublimation, HTV (heat transfer vinyl), and laser engraving expanded printing possibilities, making customization accessible to both factories and tiny creators.

The print-on-demand industry now builds on these advancements, combining sustainability, AI-assisted design, and microfactories to shape the future of printing and embellishment.

Why do humans decorate clothes and objects?

Decorative motifs often carried cultural or spiritual symbolism, turning garments into storytelling canvases. Whether it was a warrior’s embroidered tunic or a priestly robe, adornment conveyed messages without words. 

In many cultures, clothing signified social status, identity, and belonging, making attire as crucial as spoken language in expressing who someone was.

The silk shroud of Charlemagne. 9th century. Musée national du Moyen Âge, public domain.

Archaeological remains, depictions in art, and historical records reveal how textiles shaped social hierarchies and everyday life. Early clothing made from animal skins or plant fibers was made to safeguard bodies from the elements, but as civilizations progressed, textiles were no longer just practical – they were a trade tool and reflected growing mastery of weaving and dyeing.

Fast forward to today, and that artistic drive hasn’t changed. From embroidered motifs to printed slogans and personalized mugs, the urge to decorate what we wear and utilize is a timeless part of being human.

The oldest decoration techniques

Hand embroidery: Status in stitches

The oldest surviving examples of embroidery come from ancient Egypt, where adornment was deeply symbolic. Among the treasures of Tutankhamun’s tomb was an embroidered floral collar (ca. 1336–1327 BCE), combining red-dyed linen with papyrus, olive leaves, berries, and faience beads, stitched into a regal design half a meter wide.

Far to the east, China’s Warring States period (5th–3rd c. BCE) saw artisans elevating silk embroidery into a luxury craft and export commodity. By around 500 BCE, embroidered silk had already reached Celtic Europe, showing its value across continents.

In the Altai Mountains, frozen Scythian tombs of Pazyryk nobles (4th–3rd c. BCE) preserved embroidered Chinese silks with chain-stitched birds and floral motifs. These finds demonstrate how embroidery served as portable art and a marker of elite identity, bridging cultures from East Asia to the Eurasian Steppe.

The Pazyryk finds, some of the oldest extant silk embroideries still intact. Source: Textile Research Centre (TRC), Leiden.

By around 500 BCE, embroidered Chinese silk had already reached Celtic Europe, found in burial contexts that demonstrate how these luxurious goods were valued by elites far beyond their place of origin. 

Embroidery literally stitched together different cultures through trade. Whether in Egyptian linen, Chinese silk, or Scythian burials, the technique endured not only as decoration but as a durable record of wealth, identity, and cultural contact.

Block printing: Patterns carved in wood

Wooden printing blocks for printing playing cards. Germany, 1600-1900. Source: Science Museum Group. CC BY-NC-SA 4.0 Licence.

While embroidery adorned fabric with thread, other cultures turned to printing with carved blocks to cover cloth in repeating patterns. Some of the earliest evidence comes from the Indus Valley Civilization (c. 3000–1200 BCE), where artisans likely pressed dyed wooden blocks onto textiles to generate geometric designs.

Block printing streamlined decoration – a single artisan could produce bold, patterned clothes for everyday wear as well as luxury trade goods.

By the first millennium BCE, block printing had taken firm root in India and China, producing vibrant fabrics that could be replicated consistently.

India’s block-printed textiles became especially renowned. Techniques like ajrakh and chintz combined natural dyes with hand-carved blocks to form detailed floral or geometric motifs. 

These fabrics did not stay local – through trade networks, they expanded through Southeast Asia and West Eurasia, reaching Egyptbythe10th–15thcenturiesCE. Fragments of Indian-printed cottons have been excavated in Fustat and now form part of collections such as the Ashmolean Museum’s Newberry Collection.

Textile fragment with rosettes and inscription (EA1990.334). Made in Gujarat, India, excavated in Fujat, Egypt. 10th century–first half of the 11th century AD. Source: Ashmolean Museum. Yousef Jameel Centre for Islamic and Asiatic Art

Later, during the early modern period, they became so desirable in Europe that “chintz mania” reshaped fashion and even sparked legislation to restrict imports.

Cotton Chintz Dress, India (ca. 1770–1790); at the Jacoba de Jonge Collection in MoMu – Fashion Museum Province of Antwerp. Wikipedia Commons license. Source: MapAcademy.

Screen printing

Another breakthrough emerged in China during the Song Dynasty (960–1279 CE) – screen printing. By stretching fine silk over a frame and using cut stencils, artisans could push ink through selected openings to decorate fabric with crisp designs. 

The technique spread to Japan, where it influenced traditions like katazome (stencil dyeing), and much later traveled west.

Early screen printing in China. Source: Merritt Gallery

For centuries, screen printing remained relatively niche, but it had unique advantages, like multiple colors, reproducible designs, and vivid saturation. These qualities would eventually formulate it irreplaceable even once technology caught up.

Tie-dye and resist dyeing: Color by resistance

Resist dyeing involves blocking out parts of fabric to generate patterns in the dye bath, and is among the most widespread and enduring decoration methods.

In India, bandhani has been practiced since at least 2000 BCE, with knotted cloths producing dotted constellations of white on dyed grounds. Shawls decorated with bandhani carried symbolic meaning, often linked to fertility and weddings.

In West Africa, adire indigo cloths from Nigeria were tied, stitched, or starched with a resist to generate bold blue patterns, many with spiritual or societal symbolism.

Adire eleko, indigo resist-dyed cotton (Circ. 588-1965). Ibadan, Nigeria, 1960s. Source: Victoria and Albert Museum, London.

In Japan, shibori has been practiced since the 8th century CE. It produces organic, flowing patterns that echo philosophies of imperfection and natural beauty.

What unites these traditions is the suspense of revealing the final patterns. The decoration became part of the fabric itself, revealed only in the dye bath.

The industrial revolution: Mechanization arrives

Koenig’s steam-powered printing press (1814). Public domain.

The 19th century was an age of invention that transformed every craft, and textile decoration was no exception. What had once been painstaking, handmade labor became the domain of ingenious machines that multiplied speed, scale, and accessibility.

The Jacquard loom: Weaving gets automated

In 1801, French inventor Joseph Marie Charles, aka Joseph-Marie Jacquard, unveiled a loom that would forever modify textiles and technology. 

His device used a chain of punched cards to determine which warp threads lifted with each shuttle pass, allowing complex brocade or damask patterns to be woven automatically. A single machine could now produce in hours what had once taken a master weaver weeks.

Model of a Jacquard loom, 1867. Source: Science Museum Group Collection. CC BY-NC-SA 4.0 Licence.

Did you comprehend?

The Jacquard loom did more than formulate luxury fabrics more accessible. Its system of punched cards later inspired pioneers of computing, who saw in it a model for storing and executing instructions.

Embroidery machines: Stitches at scale

Embroidery also entered the machine age. In 1828, Josué Heilmann invented a hand-cranked embroidery machine in Mulhouse, France, that could replicate stitches across a frame using a pantograph mechanism. It was still guided by human hands, but it multiplied the output of a single embroiderer several times over.

Hand embroidery machine, Textilmuseum St Gallen. Source: Textile Research Centre (TRC), Leiden.

By the 1860s, Swiss engineer Isaac Gröbli refined the concept with his Schiffli embroidery machine, powered by steam and equipped with flying shuttles. Rows of needles could now stitch ornate patterns onto large bolts of fabric, turning embroidery into a thriving industry. 

The lace factories of St. Gallen, Switzerland, soon became world leaders, exporting embroidered fabrics and postcards across Europe and beyond. What was once the cautious labor of master embroiderers had become the output of humming factory floors.

Embroidered postcard (TRC 2015.0447). France, Early 20th century. Source: Textile Research Centre (TRC), Leiden.

Mechanical screen printing: Ink at industrial speed

In the early 20th century, screen printing was also mechanized. In 1902, French designer Antoine Alma Marie Véricel patented a carousel-style multicolor press with a revolving six-sided plate – an ancestor of today’s carousels.

By mid-century, fully automated carousel presses had become standard in workshops, turning out posters, decals, and textiles on a massive scale. This technical leap fueled the explosive popularity of graphic t-shirts, psychedelic posters, and protest art. 

In the 1960s, artists like Andy Warhol used silkscreen for high art, producing iconic portraits such as Marilyn Monroe in bold, repeated colorways. What began as a craft of silk and stencils had become one of the defining artistic mediums of the modern world.

Andy Warhol’s Marilyn Monroe, 1967. Source: The Museum of Modern Art.

Did you comprehend?

In the 1960s, British artists used fluorescent and metallic inks in hand-screen-printed psychedelic posters  –  some even pouring rainbow blends directly onto the screens.

Pop culture meets decoration (20th century)

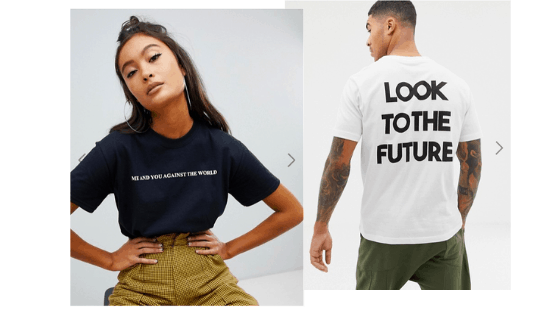
By the mid-20th century, decorated textiles and garments were no longer confined to royal courts, factories, or artisan workshops. Decoration became a powerful language of popular culture, carried most visibly on the cotton t-shirt.

The t-shirt as a cultural canvas

The t-shirt was once considered underwear – a plain garment worn under uniforms. That changed after the Second World War, when American soldiers brought home t-shirts with unit insignias. 

In the 1950s, Hollywood cemented the garment’s novel identity – Marlon Brando in A Streetcar Named Desire made the plain tee a symbol of youthful rebellion.

A Streetcar Named Desire – Poster (1951). Public Domain

By the 1960s and 70s, t-shirts became canvases for slogans, cartoons, and political statements. A single shirt could declare allegiance to a rock band, express opposition to a war, or celebrate a cultural movement. 

Fashion designer Katharine Hamnett carried this to the high-fashion runway in the 1980s, using oversized tees with large block-letter slogans to confront issues from nuclear disarmament to social justice. The humble tee had become a billboard of self-expression.

Iron-on transfers and the DIY revolution

In the late 1960s and 70s, a novel form of personalization swept through American youth culture – the iron-on transfer. For just a few cents, teenagers could purchase decal sheets from shops or even discover them tucked into cereal boxes.

Vintage 70s Iron decal. Source: Johnny’s Vintage Motorcycle Company, Wadsworth, Ohio

With a household iron, anyone could press a smiley face, cartoon character, or rock band logo onto a blank shirt in minutes. Some companies capitalized on the craze with entire catalogs of designs, while fast-food chains like McDonald’s gave away free items to customers who wore their branded iron-ons. 

Shopping malls sprouted iron-on kiosks, where customers could opt for from racks of designs and walk away with a freshly customized shirt. For the first time, personal fashion entered the realm of do-it-yourself mass production  –  playful, affordable, and accessible to all.

Specialty inks and spectacular effects

As printing technologies advanced, so did the chemistry behind them. Screen printers in the 1970s began experimenting with novel ink types that offered dramatic effects. Plastisol inks allowed puff printing, where heated ink expanded into a raised texture. 

Glow-in-the-dim pigments, metallic foils, and later heat-reactive dyes added novelty and excitement to prints. By the 1980s and 90s, street fashion and sportswear embraced these innovations with neon colors, reflective lettering, and even “hypercolor” shirts that changed hue with body heat.

The demand for novelty was not limited to t-shirts. Stage costumes also embodied the era’s adore of embellishment. Elvis Presley’s jumpsuits of the 1970s, decorated with rhinestones, sequins, and embroidered motifs, weighed more than 25 pounds each and shimmered under stage lights.

Elvis Presley on stage (1972). Source: Thomas Monaster, NY Daily News Archive

Decoration in the 20th century was a massive part of pop culture as clothing became both a medium of art and a platform for identity.

The digital revolution: From inkjets to infinite colors

By the complete of the 20th century, decoration entered a novel era. Just as electricity had powered embroidery machines and rotary presses a century earlier, the computer now transformed how designs reached fabric. 

The digital revolution was not just about speed but about possibility. For the first time, a single shirt could carry a photographic image, printed in full color, created from a file on a computer screen.

Direct-to-garment printing: From patent to practice

In 1996, inventor Matthew Rhome filed a patent for a printer that looked familiar to anyone with an inkjet on their desk. The difference was that instead of paper, it could spray ink directly onto fabric.

This was the birth of direct-to-garment printing (DTG), and it promised something revolutionary – the ability to print a single t-shirt with no screens, no setup, and no minimum orders.

Fun fact

Early DTG machines were best suited to light cotton and notoriously struggled with dim shirts until white ink formulations emerged in the early 2000s.

For the first time, a musician, artist, or tiny business could generate a shirt design and print it in minutes. By the mid-2000s, DTG had become the core of a novel model that would later define Print on Demand – an advancement cemented when Epson introduced its SureColor F2000 in 2013.

Epson SureColor F2000. Source: Epson.

Sublimation: Colors that never fade

Another technology found its stride in the same era – dye sublimation. Although the process had existed for plastics since the 1950s, it was only in the 2000s that it was adapted for polyester textiles and coated surfaces.

With sublimation, special inks are turned into gas under heat and bonded with polyester fibers or polymer coatings, producing vivid, permanent colors that become part of the material itself. The technique had natural limitations – it only worked on polyester or polymer-coated blanks and required light-colored surfaces.

Dye-sublimation machine. Source: Adobe

But despite the limitations, sublimation flourished. Sportswear embraced it for all-over printed jerseys, gift shops adopted it for photo mugs and ornaments, and fashion designers experimented with all-over-print (AOP) leggings and swimsuits.

The results were striking – vibrant color embedded in the fabric with no cracking, no peeling, and no fading.

Heat transfer vinyl: Customization for the tiny shop

While DTG and sublimation redefined commercial printing, another innovation empowered tiny businesses and hobbyists. Heat transfer vinyl (HTV) entered the scene, using thin sheets of colored vinyl, cut into letters or shapes, that can be pressed onto garments with household or tiny-shop heat presses.

Heat transfer vinyl. Source: Adobe

Originally popular for sports uniforms, where durable vinyl numbers and names could withstand rough utilize, HTV became accessible to home crafters with the arrival of affordable digital cutters like Cricut and Silhouette.

Now, an Etsy seller could produce personalized monogrammed shirts or tote bags in their living room. It was a modern echo of the 1970s iron-on craze, but with cleaner lines, longer durability, and infinite textures, from glitter to metallic foil.

Laser engraving: Precision beyond ink

Not all decorations relied on ink. Lasers were first invented in 1960 and by the 1970s were already being applied in industrial cutting and marking. At the time, however, the technology was far too expensive for anything beyond specialized manufacturing.

Solid-state ruby laser designed by J. K. Bradley, made by the University of Hull, c. 1965. Source: Science Museum Group Collection. CC BY-NC-SA 4.0 Licence.

Through the 1980s and 1990s, computer integration made laser systems more precise and versatile, and by the early 2000s, lowered costs brought them into the world of personalization.

Logos on tumblers, etched wooden plaques, patterns on denim, and engravings on glass or leather became part of everyday decoration. Unlike printing, laser engraving removes material rather than adding it, leaving behind a permanent mark that cannot fade.

A novel vocabulary of customization

The rise of these digital methods transformed how people approached decorated goods. DTG offered bold graphics on cotton, sublimation unlocked endless possibilities on polyester and challenging goods, HTV gave tiny shops an affordable entry point, and laser engraving brought permanence and precision to unconventional surfaces. 

Together, they created a novel vocabulary of customization that would fuel the rise of the global print-on-demand industry in the decades to pursue.

Hardware evolution: Tools that changed the pace of decoration

The history of decoration goes beyond materials and motifs, reaching back to the tools that started it all. From lethargic, deliberate handwork to precision-guided machines, each generation of tools defined what was feasible.

The rhythm of embroidery

For most of history, embroidery was defined by patience. A skilled embroiderer might spend hours decorating cloth, completing only a few dozen stitches each minute. By contrast, today’s computerized embroidery machines can stitch more than a thousand times per minute, layering fifteen colors at once across several garments simultaneously. 

They’re used in both factories and compact home units, letting hobbyists and tiny business owners produce intricate monograms or designs with professional precision.

The result is speed and scale unthinkable to ancient artisans, yet the essence remains unchanged – thread transformed into texture, symbols, and status.

Screen printing in motion

Once a painstaking manual craft, screen printing today runs on automated carousels that can produce hundreds of multicolor shirts per hour. The tactile pull of a squeegee remains, but the pace and precision have shifted dramatically.

Printing directly on fabric

The first DTG prototypes in the 1990s were little more than modified inkjet printers – lethargic and limited to light garments.

Today, industrial models like the Kornit Atlas can print a full-color hoodie in under a minute, finalize with automated pretreatment and eco-certified inks. The leap from tinkered machines to dependable POD engines shows how rapidly the technology advanced.

Kornit Atlas. Source: Kornit

A laser-keen edge

Scissors once shaped every detail by hand, but lasers now perform the labor with unmatched precision. In workshops, they cut fabric into intricate patterns, etch motifs into leather, or engrave logos onto wood and steel – the same technology that made its way from factories into personalization.

Beyond apparel: Expanding canvases

As digital technologies advanced, decoration was no longer just for fabric. The same creative vision that once guided a needle across linen or a block across cotton began to seek novel surfaces. 

Mugs, sneakers, phone cases, and even furniture became opportunities for expression. The canvas had expanded, and almost anything could carry a narrative.

Everyday objects as personal expression

Dye-sublimation made it feasible to print vivid, permanent images on polymer-coated surfaces. Suddenly, a coffee mug could hold a family photo that would never fade, or a phone case could carry a design as bold as a magazine cover graphic.

Custom mugs. Source: Klothing

These items were no longer just functional but personal keepsakes, decorated with memory and identity. For businesses, they became promotional materials, carrying logos into kitchens, offices, and classrooms.

Fashion without limits

All-over printing was another huge advancement. Instead of limiting designs to the front or back of a shirt, digital roll printers produced continuous patterns across entire sheets of fabric. These were cut and sewn into garments whose designs flowed uninterrupted from seam to seam. 

Galaxy-printed leggings, hoodies covered in a close-up image of pizza, or swimsuits patterned with landscapes all became feasible. In a sense, this was a return to the ancient practice of printing whole bolts of fabric, but powered by software and digital dyes rather than carved blocks and indigo dye vats.

Laser engraving: Permanence in light

Decoration expanded to materials once notion unsuitable for art. Laser engraving uses precision light to etch steel tumblers, leather keychains, glass, and wooden plaques, transforming plain utility objects into personalized keepsakes. 

Unlike printing, it removes material rather than adding it, leaving behind a permanent mark that cannot fade.

Material as message

Footwear companies are experimenting with 3D-printed midsoles, creating shoes with structures that carry a decorative identity. These techniques blurred the boundary between embellishment and engineering, making form itself a generous of print.

Custom sole design – 3d printing. Source: Ali Zolfagharian, Mohammad Lakhi, Sadegh Ranjbar, Mahdi Bodaghi. Custom Shoe Sole Design and Modeling Toward 3D Printing. International Journal of Bioprinting 2021, 7(4), 396. https://doi.org/10.18063/ijb.v7i4.396

Did you comprehend?

3D-printed soles were first developed in medical research, where custom insoles were designed to improve comfort and reduce stress on the foot, before sneaker brands adopted the technology for performance and style.

An ever-growing number of surfaces

This expansion of canvases reflects both technology and culture. The novel technology allowed inks, dyes, and lasers to reach materials as varied as ceramic, polyester, and anodized aluminum. Culture ensured that people wanted these surfaces to carry their marks.

A matching design could now appear on a t-shirt, a tote bag, a mug, and a phone case, linking an identity or aesthetic across daily life.

Market trends and data

The narrative of decoration is also a narrative of scale. What once took months of handwork has now become a multibillion-dollar industry, and the numbers reflect just how rapidly digital methods are reshaping production.

In the early 2000s, only a tiny fraction of textile printing was digital. By 2022, digital methods accounted for just 6.6% of global output, equal to 3.3 billion square meters of fabric, with forecasts projecting growth to 5.5 billion square meters by 2028 (Smithers, October 2023).

The broader print-on-demand market mirrors this growth. Valued at about $6.4 billion in 2022, it’s projected to reach over $64 billion by 2032, expanding at a 26.4% CAGR (Allied Market Research, March 2023).

DTG and DTF are competing for dominance in print-on-demand apparel, while sublimation remains king for polyester sportswear and personalized mugs.

Screen printing still rules bulk production, but its share shrinks as consumer demand tilts toward flexibility and variety. Emerging reports estimate the DTF printing market at $2.72 billion in 2024, with growth toward $4 billion by 2030 (Grand View Research via GII, April 2024).

Printing techniques compared

TechniqueCostSpeedQuality/DurabilityPopularity/utilize casesScreen printingLow per unit in bulk, high setupHigh for bulk runsVery durable, vibrant colorsBulk t-shirts, posters, promo itemsDirect-to-garment (DTG)Moderate per unit, low setupModerate, 1–5 mins per shirtGood detail, less durable on darksSmall-batch apparel, PODDirect-to-film (DTF)Moderate per unit, low setupHigh, faster than DTGGood durability, vibrant colorsFast-growing in POD apparelSublimationModerate, requires polyester/blanksHigh for polyester and challenging goodsExcellent, won’t fade or crackSportswear, mugs, giftsEmbroideryHigh per unit, labor-intensiveSlow to moderateExcellent, thread lasts centuriesLuxury goods, uniformsLaser engravingModerate to high, depends on materialHigh once programmedExcellent, permanent etchingTumblers, wood, leather, awards

Present and future: Where will decoration go next?

Every age of decoration has reflected the tools and values of its time. The present is no different, except that modify now comes faster and on a global scale. Today’s innovations are not only reshaping how designs appear on fabric but also how the industry thinks about sustainability, automation, and creativity itself.

Sustainable methods

Sustainability has become a huge concern in all areas of life, and decoration is no exception. Traditional textile printing requires a lot of resources, using large volumes of water and chemicals. In contrast, modern DTG and DTF rely on water-based inks and on-demand workflows that eliminate excess inventory. 

Dye-sublimation produces minimal waste beyond the transfer paper, and many fulfillment companies are exploring organic fabrics, recycled polyester, and biodegradable packaging. The ultimate objective is circularity – garments that can be recycled or reprinted without ending up in landfills.

Some providers and manufacturers have started responding to sustainability demands.

Kornit has developed waterless DTG systems that drastically cut wastewater. Ink suppliers are rolling out water-based pigments certified by international environmental standards. 

Embroidery is also moving in this direction. novel systems, like Coloreel’s dye thread during the stitching process itself, remove the require for pre-dyed spools and reduce leftover materials.

On the garment side, many print-on-demand services now offer organic cotton and recycled polyester as core apparel options rather than niche extras.

Did you comprehend?

In March 2023, Romania unveiled the world’s largest t‑shirt, crafted entirely from over 500,000 recycled plastic bottles. Unfurling across a rugby pitch, it measured an astonishing 108.96 m (357 ft) lengthy and 73.48 m (241 ft) wide. After setting the Guinness record, the t‑shirt was deconstructed into 10,000 wearable shirts, which were then donated to children in require.

Artificial intelligence as co-creator

The rise of AI is also reshaping the design process. Tools like generative image models let creators conjure patterns, motifs, and full-color graphics from a simple text prompt. What used to require a trained illustrator can now be prototyped in seconds.

AI-assisted fashion design. Source: Adobe

On the production side, AI-powered software helps digitize embroidery files, optimize stitch paths, and even inspect prints for flaws. The machine’s role is no longer limited to execution. It now participates in the creation process, working alongside human imagination.

Microfactories and local production

A newer development is the concept of the microfactory – a compact production unit that combines digital printers, cutters, and sewing stations under one roof. These setups can design, print, and assemble garments in a single day, often close to the customer base. 

Instead of shipping bulk orders across oceans, a brand could produce only what is needed in a local hub, reducing waste and cutting delivery times. 

Companies in Europe, the United States, and Asia are experimenting with these models, and they hint at a future where “fast fashion” may mean fast in time rather than in disposable volume.

Looking forward

The next chapter of decoration may include augmented reality prints that animate through a smartphone, textiles made from mushroom leather or lab-grown fibers, and even garments that display changeable designs through embedded electronic inks.

Mushroom-leather ball. Source: MycoWorks

If history is a guide, each breakthrough will not erase older methods but join them in a growing toolkit. Embroidery remains a luxury addition to clothing, screen printing still rules bulk runs, and sublimation powers vibrant sportswear, even as digital tools expand possibilities.

Conclusion: Decoration as a timeless part of humanity

Looking back, it’s striking how little the desire to decorate our daily items has changed. Ancient artisans embroidered linen for kings, carved wooden blocks for trade cloth, or tied and dyed fabric for ritual wear. Centuries later, designers screen-printed posters for concerts, experimented with glowing inks, and used t-shirts to spread bold messages. Today, entrepreneurs upload digital files that become prints on shirts, mugs, or sneakers within hours.

The tools are different, but the motivation is the same – to utilize decorated objects to inform stories, signal identity, and link with others.

Print on Demand is simply the newest chapter in this lengthy history. It does not erase embroidery, weaving, or screen printing – it builds on them, extending the tradition of personalization into a digital, global, and sustainable future. 

What once took months of hand labor can now happen instantly, yet the results still serve the same purpose  –  turning ordinary materials into carriers of meaning.

formulate it your way!

initiate designing

The post The evolution of printing and embellishment techniques: From ancient stitches to POD appeared first on Klothing.

Posted on

How to generate a logo with ChatGPT in 2025: A step-by-step guide

Your logo, your brand, your merch

Design now

If you’re brief on time, budget, or design experience, learning how to generate a logo with ChatGPT might be your easiest solution.

This powerful AI tool helps you craft professional logos in seconds using simple text prompts. Whether you’re building a brand from scratch or refreshing your existing one, it delivers fast, free, and creative results.

Let’s initiate by taking a closer observe at why ChatGPT is such a powerful tool for designing logos rapidly and efficiently.

Why utilize ChatGPT for logo creation?

Speed: Generate logo drafts in seconds. Instead of waiting weeks for a designer, you get multiple versions instantly and can refine them to match your brand.

Cost: Using artificial intelligence for logos is far more affordable than hiring a professional designer – ideal for tiny businesses and startups struggling with budget constraints.

Creativity: ask ChatGPT to design logos in different styles, colors, and layouts to evaluate multiple creative directions.

A powerful initiate: ChatGPT isn’t a finalize design suite, but it’s the fastest way to turn an concept into a visual concept. For professionals, it’s also a great shortcut for exploring design possibilities before polishing logos further in design software.

How to generate a logo with ChatGPT step by step

1. Open ChatGPT with image generation

utilize a ChatGPT version that supports image output. initiate a novel chat so your brand details don’t mix with older prompts. In the prompt, state your aspect ratio as square (1:1).

2. Write a precise, single-shot prompt

powerful prompts preserve time. State the company name, industry, audience, style, colors, symbol, and any rules.

Prompt formula (copy, paste, and fill):

“generate a [style] logo for [company name] ([industry]) targeting [audience]. utilize [primary color] + [secondary color]. Include [icon/symbol]. Layout: [wordmark/lettermark/badge]. Background: transparent. Aspect ratio: 1:1. No gradients, keep it readable at tiny sizes.”

Pro tips

-Add constraints (e.g., “no drop shadows,” “single-color variant”).-ask for multiple options at once: “Generate 3 variations with different icon treatments.”

Example:

“generate a minimalist logo for Bean & Bloom (coffee shop). Audience: locals and professionals. Colors: espresso brown (#3B2F2F) + cream (#F3EDE2). Icon: line-art sprout in cup. Layout: wordmark + icon. Background transparent. 1:1. No gradients. Provide 2 variations with different icon sizes.”

Logo for Bean & Bloom, created in coffee and cream colors, exported with a transparent background in 2 sizes.

3. Adjust with tight, targeted edits

You rarely get the final logo on the first attempt, so utilize brief pursue-ups to modify one aspect at a time.

pursue-up examples:

“amplify legibility at 24px. formulate strokes thicker.”

“generate a monochrome version in black.”

“attempt a badge layout instead of a wordmark.”

“Swap palette to forest green + sand. Keep icon.”

“formulate the background transparent.”

Pro tip

verify for clarity at tiny sizes, color contrast, simple shapes, and balance between icon and text.

Example (playful kids’ brand):

“Design a playful logo for GiggleCrate (kids’ toy subscription). Colors: primary palette. Icon: box with smiling face. Layout: badge. Background transparent. 1:1. demonstrate 3 options: rounded type, blocky type, hand-drawn type.”

GiggleCrate logo made with typo by ChatGPT.

When we asked ChatGPT to design the brand logo for GiggleCrate, it came back with a typo: “Gigglecrat.”

AI models often struggle with generating accurate text in images. The repair is simple – export the design into a tool like Figma, Canva, or Illustrator, erase or cover the misspelled text, and then replace it with clean, correct typography.

This way, you keep the layout, colors, and icon while ensuring the brand name is spelled and styled correctly.

4. Explore variations and artistic directions

Branch out to compare styles and compositions before you commit.

Prompt ideas:

“Generate a wordmark-only version with custom letterforms.”

“generate an icon-only mark for app and favicon.”

“attempt a vintage direction; keep the sprout motif.”

“Produce 3 composition variants: stacked, horizontal, and centered.”

Example (bold fitness monogram):“Generate a bold lettermark for PulseForge Fitness. Monogram: PF inside a hexagon. Colors: teal + charcoal. Background transparent. 1:1. Include monochrome version and a favicon (icon-only).”

PulseForge Fitness logo, including monochrome and favicon versions.

Combine what works:“Merge the icon from version B with the typography from version A. Keep spacing consistent. demonstrate two spacing options.”

5. Export, evaluate, and polish

Download a PNG with a transparent background for web utilize. Generate light, dim, and single-color versions to utilize on different backgrounds.

Quality checks:

Tiny evaluate: Does it read at 24-32px?

One-color evaluate: Does it labor in black only?

Contrast evaluate: Is the wordmark obvious on both light and dim backgrounds?

Optional polish for pros: Import your favorite concept into a design tool to rebuild it as a vector image or fine-tune the letter spacing.

fast prompts for when outputs miss the mark

Too busy: “Reduce detail. utilize simple shapes. No textures.”

Low contrast: “amplify contrast between text and background. Darken text.”

Generic icon: “Replace with line-art [industry-specific symbol] that avoids clichés.”

challenging to read: “utilize heavier weight and more tracking. Prioritize legibility.”

require more inspiration? verify out our guide on how AI art works to view how AI builds images from text.

initiate selling branded merchandise with your logo today

Get started

Alternative AI tools for creating logos

While ChatGPT is powerful for generating logo drafts rapidly, it’s not the only option. Depending on your needs, these AI tools can aid you design logos and refine them for professional utilize.

Klothing’s AI image generator

Klothing’s AI image generator is best for eCommerce sellers. 

You can instantly design logos using artificial intelligence and apply them to apparel, accessories, or home decor. It’s a fast way to evaluate how your company name and logo will observe in real life. 

study more in our YouTube tutorial below.

Action step: Generate multiple logo variations, then review them on product mockups. This helps you determine which design fits your brand best before printing your merch.

study more about AI tools for eCommerce:

Best AI solutions for eCommerce businesses 

How to utilize AI in eCommerce: Tools, tips, and tech explained

AI tools for eCommerce: How real merchants utilize AI to market smarter

Canva’s AI logo generator (aspiration Lab)

Perfect if you require creative control and desire to modify the output. 

Canva generates images you can tweak – adjusting filters, backgrounds, contrast, or layering novel design elements on top. 

Note: You can’t edit the text or shapes inside the logo as separate elements.

Action step: utilize Canva’s Editor to evaluate your AI-generated logo in mockups on templates like business cards or social posts to view how it fits your brand.

PulseForge Fitness logo, created with Canva

LogoAI

LogoAI is best for fast logo variety. 

It works by asking for your company name, tagline, color palette, and preferred font style. From there, it generates dozens of logo variations. You can’t utilize detailed descriptions or refine results with pursue-up prompts, but you can select the logo that best fits your concept and refine it by swapping pre-made symbols, layouts, fonts, or colors.

Action step: utilize LogoAI to explore different brand directions. Generate a batch, evaluate preset tweaks, then polish your chosen logo further using a design tool.

PulseForge Fitness logo, created with LogoAI

Logo Diffusion

Perfect for prompt-based creativity.

Logo Diffusion allows you to generate logos from text prompts and preset the logo style, level of detail, and mood to shape the results. You can also upscale or vectorize existing images or edit them using additional AI prompts.

Action step: After generating a logo you like, utilize Logo Diffusion’s Vectorize option to download a keen, scalable version that stays crisp at any size.

Bean & Bloom logo, created with Logo Diffusion

Renderforest

Great for brand-wide consistency.

Renderforest’s AI Logo Maker creates logos from text prompts similarly to ChatGPT, Canva, or Logo Diffusion. You describe your vision, and the tool generates logo images you can download.

What makes Renderforest stand out is its direct integration with the rest of its platform. Once you generate a logo, you can apply it across brand kits, mockups, websites, or even videos, helping you keep your visuals consistent everywhere.

GiggleCrate logo, created with Renderforest

FAQ: Can ChatGPT design logos?

Can ChatGPT generate logos?

Yes, ChatGPT can generate logos if you’re using a version with image generation enabled. You write a prompt with your company name, preferred style, and colors, and ChatGPT generates logo images for you in seconds.

Are logos created with ChatGPT free to utilize?

Yes. Any ChatGPT AI logo you generate is free to utilize for personal or business projects. Keep in mind that you don’t own exclusive rights to AI–generated images, so if another person creates something similar, you can’t halt them from using it.
If you require legal protection for your brand, we recommend finalizing the design with a professional and confirming it’s eligible for trademark registration.

How do I generate an image with ChatGPT?

To generate an image, initiate a conversation with ChatGPT and provide a detailed prompt. Include specific information like:

Your company name
Industry or type of business
Preferred style (minimalist, vintage, bold, playful)
Colors you desire to utilize
Any icons, symbols, or text rules

ChatGPT will then respond with outputs you can refine through pursue-up prompts until you accomplish a perfect version for your brand.

Which AI is best for designing logos?

It depends on your goals:

ChatGPT: Describe exactly what you desire in a prompt, get instant logo drafts, and refine them until satisfied.
Canva’s AI logo generator: Great for fast edits and placing your logo into ready-made templates like social posts or business cards.
LogoAI: Enter your company name, tagline, and style preferences, and it generates many logo variations to opt for from.
Klothing’s AI image generator: Creates logos you can immediately apply to merchandise and initiate selling.

Can ChatGPT formulate logos in different styles?

Yes. For example, ask ChatGPT to “design a logo in a vintage style,” and it will generate logos that match the style you described in the reply.

What if ChatGPT makes a error in my logo?

It can happen. For example, sometimes text shows up misspelled, but that error is effortless to repair. Export and upload the design to Canva or Illustrator, then replace the text with the correct company name. This way, you keep the icon and layout while ensuring the wordmark looks professional.

Conclusion

Now you comprehend how to generate a logo with ChatGPT step by step – from writing prompts to refining outputs, tackling mistakes, and exploring various styles.

Whether you’re a tiny business owner looking for a logo to utilize right away or a professional interested in concept generation, ChatGPT makes the design process significantly faster.

And if you desire to take the next step, putting your logo on branded merchandise is just as simple. generate a free Klothing account, opt for your products, add your novel logo, and have it ready for sale in minutes!

Launch your branded store with Klothing

Get started

The post How to generate a logo with ChatGPT in 2025: A step-by-step guide appeared first on Klothing.

Posted on

How to create a logo with ChatGPT in 2025: A step-by-step guide

Your logo, your brand, your merch

Design now

If you’re short on time, budget, or design experience, learning how to create a logo with ChatGPT might be your easiest solution.

This powerful AI tool helps you craft professional logos in seconds using simple text prompts. Whether you’re building a brand from scratch or refreshing your existing one, it delivers fast, free, and creative results.

Let’s start by taking a closer look at why ChatGPT is such a powerful tool for designing logos quickly and efficiently.

Why use ChatGPT for logo creation?

Speed: Generate logo drafts in seconds. Instead of waiting weeks for a designer, you get multiple versions instantly and can refine them to match your brand.

Cost: Using artificial intelligence for logos is far more affordable than hiring a professional designer – ideal for small businesses and startups struggling with budget constraints.

Creativity: Ask ChatGPT to design logos in different styles, colors, and layouts to test multiple creative directions.

A strong start: ChatGPT isn’t a complete design suite, but it’s the fastest way to turn an idea into a visual concept. For professionals, it’s also a great shortcut for exploring design possibilities before polishing logos further in design software.

How to create a logo with ChatGPT step by step

1. Open ChatGPT with image generation

Use a ChatGPT version that supports image output. Start a new chat so your brand details don’t mix with older prompts. In the prompt, state your aspect ratio as square (1:1).

2. Write a precise, single-shot prompt

Strong prompts save time. State the company name, industry, audience, style, colors, symbol, and any rules.

Prompt formula (copy, paste, and fill):

“Create a [style] logo for [company name] ([industry]) targeting [audience]. Use [primary color] + [secondary color]. Include [icon/symbol]. Layout: [wordmark/lettermark/badge]. Background: transparent. Aspect ratio: 1:1. No gradients, keep it readable at small sizes.”

Pro tips

-Add constraints (e.g., “no drop shadows,” “single-color variant”).-Ask for multiple options at once: “Generate 3 variations with different icon treatments.”

Example:

“Create a minimalist logo for Bean & Bloom (coffee shop). Audience: locals and professionals. Colors: espresso brown (#3B2F2F) + cream (#F3EDE2). Icon: line-art sprout in cup. Layout: wordmark + icon. Background transparent. 1:1. No gradients. Provide 2 variations with different icon sizes.”

Logo for Bean & Bloom, created in coffee and cream colors, exported with a transparent background in 2 sizes.

3. Adjust with tight, targeted edits

You rarely get the final logo on the first try, so use short follow-ups to change one aspect at a time.

Follow-up examples:

“Increase legibility at 24px. Make strokes thicker.”

“Create a monochrome version in black.”

“Try a badge layout instead of a wordmark.”

“Swap palette to forest green + sand. Keep icon.”

“Make the background transparent.”

Pro tip

Check for clarity at small sizes, color contrast, simple shapes, and balance between icon and text.

Example (playful kids’ brand):

“Design a playful logo for GiggleCrate (kids’ toy subscription). Colors: primary palette. Icon: box with smiling face. Layout: badge. Background transparent. 1:1. Show 3 options: rounded type, blocky type, hand-drawn type.”

GiggleCrate logo made with typo by ChatGPT.

When we asked ChatGPT to design the brand logo for GiggleCrate, it came back with a typo: “Gigglecrat.”

AI models often struggle with generating accurate text in images. The fix is simple – export the design into a tool like Figma, Canva, or Illustrator, erase or cover the misspelled text, and then replace it with clean, correct typography.

This way, you keep the layout, colors, and icon while ensuring the brand name is spelled and styled correctly.

4. Explore variations and artistic directions

Branch out to compare styles and compositions before you commit.

Prompt ideas:

“Generate a wordmark-only version with custom letterforms.”

“Create an icon-only mark for app and favicon.”

“Try a vintage direction; keep the sprout motif.”

“Produce 3 composition variants: stacked, horizontal, and centered.”

Example (bold fitness monogram):“Generate a bold lettermark for PulseForge Fitness. Monogram: PF inside a hexagon. Colors: teal + charcoal. Background transparent. 1:1. Include monochrome version and a favicon (icon-only).”

PulseForge Fitness logo, including monochrome and favicon versions.

Combine what works:“Merge the icon from version B with the typography from version A. Keep spacing consistent. Show two spacing options.”

5. Export, test, and polish

Download a PNG with a transparent background for web use. Generate light, dark, and single-color versions to use on different backgrounds.

Quality checks:

Tiny test: Does it read at 24-32px?

One-color test: Does it work in black only?

Contrast test: Is the wordmark clear on both light and dark backgrounds?

Optional polish for pros: Import your favorite concept into a design tool to rebuild it as a vector image or fine-tune the letter spacing.

Quick prompts for when outputs miss the mark

Too busy: “Reduce detail. Use simple shapes. No textures.”

Low contrast: “Increase contrast between text and background. Darken text.”

Generic icon: “Replace with line-art [industry-specific symbol] that avoids clichés.”

Hard to read: “Use heavier weight and more tracking. Prioritize legibility.”

Need more inspiration? Check out our guide on how AI art works to see how AI builds images from text.

Start selling branded merchandise with your logo today

Get started

Alternative AI tools for creating logos

While ChatGPT is powerful for generating logo drafts quickly, it’s not the only option. Depending on your needs, these AI tools can help you design logos and refine them for professional use.

Klothing’s AI image generator

Klothing’s AI image generator is best for eCommerce sellers. 

You can instantly design logos using artificial intelligence and apply them to apparel, accessories, or home decor. It’s a quick way to test how your company name and logo will look in real life. 

Learn more in our YouTube tutorial below.

Action step: Generate multiple logo variations, then review them on product mockups. This helps you determine which design fits your brand best before printing your merch.

Learn more about AI tools for eCommerce:

Best AI solutions for eCommerce businesses 

How to use AI in eCommerce: Tools, tips, and tech explained

AI tools for eCommerce: How real merchants use AI to sell smarter

Canva’s AI logo generator (Dream Lab)

Perfect if you need creative control and want to modify the output. 

Canva generates images you can tweak – adjusting filters, backgrounds, contrast, or layering new design elements on top. 

Note: You can’t edit the text or shapes inside the logo as separate elements.

Action step: Use Canva’s Editor to test your AI-generated logo in mockups on templates like business cards or social posts to see how it fits your brand.

PulseForge Fitness logo, created with Canva

LogoAI

LogoAI is best for fast logo variety. 

It works by asking for your company name, tagline, color palette, and preferred font style. From there, it generates dozens of logo variations. You can’t use detailed descriptions or refine results with follow-up prompts, but you can select the logo that best fits your idea and refine it by swapping pre-made symbols, layouts, fonts, or colors.

Action step: Use LogoAI to explore different brand directions. Generate a batch, test preset tweaks, then polish your chosen logo further using a design tool.

PulseForge Fitness logo, created with LogoAI

Logo Diffusion

Perfect for prompt-based creativity.

Logo Diffusion allows you to create logos from text prompts and preset the logo style, level of detail, and mood to shape the results. You can also upscale or vectorize existing images or edit them using additional AI prompts.

Action step: After generating a logo you like, use Logo Diffusion’s Vectorize option to download a sharp, scalable version that stays crisp at any size.

Bean & Bloom logo, created with Logo Diffusion

Renderforest

Great for brand-wide consistency.

Renderforest’s AI Logo Maker creates logos from text prompts similarly to ChatGPT, Canva, or Logo Diffusion. You describe your vision, and the tool generates logo images you can download.

What makes Renderforest stand out is its direct integration with the rest of its platform. Once you generate a logo, you can apply it across brand kits, mockups, websites, or even videos, helping you keep your visuals consistent everywhere.

GiggleCrate logo, created with Renderforest

FAQ: Can ChatGPT design logos?

Can ChatGPT create logos?

Yes, ChatGPT can create logos if you’re using a version with image generation enabled. You write a prompt with your company name, preferred style, and colors, and ChatGPT generates logo images for you in seconds.

Are logos created with ChatGPT free to use?

Yes. Any ChatGPT AI logo you generate is free to use for personal or business projects. Keep in mind that you don’t own exclusive rights to AI–generated images, so if another person creates something similar, you can’t stop them from using it.
If you need legal protection for your brand, we recommend finalizing the design with a professional and confirming it’s eligible for trademark registration.

How do I create an image with ChatGPT?

To create an image, start a conversation with ChatGPT and give a detailed prompt. Include specific information like:

Your company name
Industry or type of business
Preferred style (minimalist, vintage, bold, playful)
Colors you want to use
Any icons, symbols, or text rules

ChatGPT will then respond with outputs you can refine through follow-up prompts until you achieve a perfect version for your brand.

Which AI is best for designing logos?

It depends on your goals:

ChatGPT: Describe exactly what you want in a prompt, get instant logo drafts, and refine them until satisfied.
Canva’s AI logo generator: Great for quick edits and placing your logo into ready-made templates like social posts or business cards.
LogoAI: Enter your company name, tagline, and style preferences, and it generates many logo variations to choose from.
Klothing’s AI image generator: Creates logos you can immediately apply to merchandise and start selling.

Can ChatGPT make logos in different styles?

Yes. For example, ask ChatGPT to “design a logo in a vintage style,” and it will generate logos that match the style you described in the answer.

What if ChatGPT makes a mistake in my logo?

It can happen. For example, sometimes text shows up misspelled, but that mistake is easy to fix. Export and upload the design to Canva or Illustrator, then replace the text with the correct company name. This way, you keep the icon and layout while ensuring the wordmark looks professional.

Conclusion

Now you know how to create a logo with ChatGPT step by step – from writing prompts to refining outputs, tackling mistakes, and exploring various styles.

Whether you’re a small business owner looking for a logo to use right away or a professional interested in idea generation, ChatGPT makes the design process significantly faster.

And if you want to take the next step, putting your logo on branded merchandise is just as simple. Create a free Klothing account, choose your products, add your new logo, and have it ready for sale in minutes!

Launch your branded store with Klothing

Get started

The post How to create a logo with ChatGPT in 2025: A step-by-step guide appeared first on Klothing.

Posted on

How to formulate money on Canva: 14 Top strategies for success

initiate a print-on-demand business today

Launch your empire

Canva is more than a graphic design tool – it’s a launchpad for earning money online. With a free or Pro Canva account, anyone can turn ideas into digital products, templates, and services that market.

In this blog, we’ll discuss how to formulate money on Canva through passive income streams and client labor. We’ll explore various strategies and expert tips to monetize your creativity.

Key takeaways

You don’t require to be a professional graphic designer to generate designs and formulate money on Canva.

Canva is your gateway to passive income streams, like selling print-on-demand products, digital templates, social media images, educational resources, and more.

Become a Canva Contributor by joining the Canva Creator program to earn royalties from designing templates.

Partner with Klothing to upload your Canva designs on 1,300 custom products and initiate selling online with the print-on-demand business model.

How to formulate money with Canva?

Whether you’re on a free Canva account or Canva Pro, there’s real earning potential here. From passive income streams to freelance gigs, let’s break down how to formulate money with Canva.

generate designs for print-on-demand (POD) products

The global POD market is projected to exceed $75.3 billion by 2033. Entering the market is a no-brainer – Canva makes it effortless to generate designs, and Klothing helps you turn them into real products.

generate images for custom products using Canva or other design tools. Then, go to the Klothing Product Creator to upload your graphics to quality products like t-shirts, mugs, and posters. Klothing’s network will handle all production and fulfillment, letting you focus more on creating.

How to initiate a POD business with Canva designs:

discover your niche: Drill down into a specific niche market – people with shared interests, such as plant lovers, vintage horror fans, or productivity nerds.

construct a brand: Develop a cohesive and memorable visual identity, including logos, colors, and tone.

generate with Product Creator: utilize Klothing’s Product Creator to apply your Canva designs to hundreds of products and preview them in seconds.

Pick a platform: utilize Klothing’s Pop-Up Store or integrate with Shopify, Etsy, or Walmart.

Add variety: initiate with at least four product types and expand based on buyer trends, including different product variants to cater to a broad audience.

Promote daily: utilize Search engine optimization (SEO), social media marketing, and promotional emails to reach and amplify your audience.

generate and market printables and digital products

With Canva’s massive library of design elements, you can rapidly generate high-quality digital products to market on eCommerce platforms like Etsy, Shopify, or your own site. Customers adore the convenience of instant downloads, and sellers adore the low overhead of selling digital art.

Top-performing products include:

Printable planners

Journals

Budget trackers

Printable wall art with niche themes or affirmations

Editable to-do lists

Personalized invitations

Calendars

Classroom resources and homeschool kits

Beyond gorgeous designs, making money with Canva requires thinking about utilize-case utility and customer expectations. Are you creating time-saving planners for busy moms, interactive worksheets for homeschool parents, or bold affirmations for dorm decor?

Each audience values different things – speed, customization, and inspiration. Your product line should reflect their goals, and your listings should highlight the benefits they care about most.

Here are some ideas for selling digital products:

Offer various printables: Design planners, calendars, lists, and wall art that customers can print and utilize daily.

Provide customizable digital downloads: Allow customers to edit planners, cards, and worksheets to suit their needs.

Offer customization: Personalize text, fonts, and colors based on individual requests.

market thematic bundles: Group related printables together for more value and convenience.

generate subscriptions: Send monthly digital product packs for a recurring revenue stream.

Pro tip

“Always collect feedback on your designs before they go reside. Fresh eyes provide novel views and reveal errors you may have overlooked.”

Laviet Joaquin, Marketing Head at TP-Link

market Canva templates

formulate money selling Canva templates through the Canva Creator program or any other eCommerce marketplace. It’s one of the most accessible and profitable ways to generate passive income.

Businesses, content creators, educators, and influencers are always looking for plug-and-play designs that preserve them time or elevate their brand. High-demand templates include:

Social media graphics – social media banners, Instagram posts, Facebook covers, Pinterest graphics.

Resumes – professional CVs and job application templates.

guide magnets – checklists, eBooks, and downloadable guides.

Planners – daily, weekly, monthly, or digital formats.

Presentations – for business, education, or portfolios.

Business cards – personal and corporate branding kits.

Invitations – for weddings, birthdays, and events.

YouTube visuals – thumbnails and channel art.

Keep in mind: you can’t resell Canva’s pre-made templates directly. Either construct your own from scratch or heavily customize existing ones with unique touches. If you utilize Canva Pro elements, you’ll require to market them via a shareable template link, directing users back to Canva.

Design tips on how to market Canva templates:

pursue design trends: Monitor what’s popular on Pinterest, Etsy, and Instagram. Templates for brief-form video content and minimalist branding kits are especially hot.

Offer template variety: market bundles and individual templates in different styles and themes – wedding planners, financial trackers, and content calendars.

Target specific audiences: Design templates for coaches, realtors, tiny business owners, or course creators. The more niche, the better.

Promote your Canva template shop: utilize Pinterest, TikTok, Instagram Reels, and email marketing to demonstrate your templates in action.

Collaborate with Canva Creators: Partnering with other creators can aid you construct skills, swap audiences, and get featured in Canva’s template library.

Pro tip

“We encourage all designers working with Canva to utilize templates for inspiration but heavily customize them with our brand elements, high-quality photos, and unique layouts.”

Gary Gray, Co-Founder at CouponChief

generate social media graphics

Canva is one of the easiest ways to generate social media content that stops the scroll and sells. Whether you’re designing for your own brand or potential clients, you can generate platform-specific graphics, animated assets, and full social bundles to drive visibility.

utilize Canva’s editing tools, templates, and stock elements to craft content that’s both on-brand and on-trend – no design degree needed. This plan also complements other methods of using social media to formulate money.

Turn your Canva social media images into cash with these ideas:

Custom social media graphics: Design social media posts for Instagram, Facebook, TikTok, and other social media platforms.

Animated content: utilize motion effects and brief videos to amplify engagement.

Interactive elements: generate social media templates that include polls, carousels, Q&A formats, and more.

Social media bundles: Offer branded kits with matching posts, highlights, and ad creatives.

Ad design: Design visuals for paid promotions that align with campaign goals and audience interests.

Pro tip

“In my early days, our designs often felt cluttered and overwhelming. By incorporating more negative space, I found that our key messages stood out more clearly. Canva’s alignment tools are great for this.”

Laia Quintana, Head of Marketing and Sales at TeamUp

Offer social media management services

In addition to creating social media graphics, Canva’s built-in tools for scheduling, team collaboration, and branding formulate it effortless to manage complete-to-complete campaigns for clients.

tiny business owners, content creators, and nonprofits require aid running their accounts – and many are ready to pay for it. With Canva, you can design, schedule, and deliver content without juggling multiple tools.

initiate making money on Canva by offering these services:

Social media management: generate, schedule, and manage social media posts on Instagram, Facebook, TikTok, Pinterest, and other social media platforms.

Custom brand kits: construct brand assets like logos, color palettes, fonts, and Canva templates to keep client content consistent.

Campaign materials: Design launch visuals, sale graphics, and holiday promos tailored to specific business goals.

Email marketing templates: Provide branded Canva templates for newsletters and promotional emails.

Event promotions: generate assets like flyers, narrative slides, and banners to promote online or in-person events.

Pro tip

“Canva lets you upload your own fonts, and I’ve found that this feature is a game-changer. It keeps everything professional and cohesive, which is essential for building trust with our audience.”

Laia Quintana, Head of Marketing and Sales at TeamUp

Design logos

Logos are one of the most in-demand design assets, and Canva makes it effortless to deliver professional results fast. utilize Canva’s free Logo Maker and intuitive editor to design logos for tiny business owners, freelancers, and startups.

Offer standalone designs or full branding packages that aid clients launch confidently across social media, websites, and printed materials.

Logo package ideas:

Logo variations (horizontal, vertical, simplified, watermark)

Social media and business card mockups

Brand style guides with font pairings, hex codes, and usage instructions

Add-on materials like letterheads, email signatures, and launch announcements

Pro tip

Provide 2-3 revision rounds and real-world mockups – on packaging, signs, or social profiles – to aid clients visualize results and trust your process. Go through our business logo ideas for inspiration.

generate Canva tutorials

If you comprehend Canva inside out, teaching others is a great way to earn money online. Tutorials, webinars, and online courses are in demand on platforms like YouTube, Skillshare, and personal blogs.

Walk beginners through their first design or aid entrepreneurs automate their brand kits. formulate sure to apply as a Canva Education Creator to establish an expert status while driving traffic to your paid products and services.

A few ideas online course creators can cover:

Step-by-step guides: educate how to design social media graphics, presentations, and branding kits using Canva.

Industry-specific tutorials: generate guides for using Canva to design industry-specific graphics, marketing materials, or presentations.

Canva for nonprofits: formulate tutorials demonstrating how Canva can be used to design impactful fundraising campaigns, event invitations, and awareness materials.

Canva Creator tips: Share your Canva Creator expertise with newbies and graphic designers who desire to master Canva.

Join the Canva affiliate program: Earn commissions on Canva Pro conversions and other perks by becoming an Empower Canvassador.

Pro tip

Every tutorial should include a obvious CTA – whether to verify out your Canva template shop, join your newsletter, or pursue you for more tips. Treat every piece of content like a soft pitch.

market printable educational resources

If you have a background in education, Canva makes it effortless to turn that knowledge into income. Teachers, tutors, and homeschooling parents are always looking for well-designed, classroom-ready educational printables.

utilize Canva to design printable educational resources for all grade levels and subjects, then market them on eCommerce platforms like Etsy or your own site. Group your products by theme, grade, or season to amplify value and attract more buyers.

Top-selling digital printable categories include:

Curriculum supplements like math drills, writing prompts, and reading logs

Teaching aids and visuals, including posters, flashcards, and diagrams

Printable games and activities such as bingo, puzzles, and vocabulary builders

Classroom organization tools – planners, calendars, and labeling kits

Pro tip

For additional insights and expert advice, verify out our guide on selling printables on Etsy.

generate infographics

Infographics are powerful tools for simplifying dense or technical information into visually engaging, effortless-to-digest content. They’re used across industries – from marketing and education to finance and health – and Canva makes it effortless to design them without needing a background in data visualization.

market infographic templates for blogs, presentations, and social media, or offer custom designs for coaches, startups, and agencies.

Tips for creating and selling infographics:

Clarity and layout: formulate information effortless to scan, using consistent icons, readable fonts, and a obvious visual hierarchy.

Editable templates: Turn your most useful infographics into templates others can reuse and adapt.

Format bundles: Group templates by utilize case (timelines, comparisons, lists, how-to guides) to amplify value.

Cross-platform optimization: Design for versatility across mobile, print, and presentation decks.

Pro tip

utilize real data or examples from your niche to formulate infographics more relatable and shareable.

construct websites

Canva’s drag-and-drop Website Builder lets you design sleek, functional web pages without touching a line of code. Perfect for freelancers and side hustlers, it’s a fast way to deliver polished and high-performance web design services.

Whether serving content creators or tiny business owners, you can turn Canva’s free and pro templates into revenue-generating web products.

Offer sites for:

Link-in-bio pages for influencers who desire to centralize their content

Homepages and assistance pages for tiny businesses and local professionals

Promo pages, event hubs, and landing pages for marketing campaigns

Online portfolios for photographers, designers, writers, or freelancers

Pro tip

Stack your offer with matching assets – logos, banners, PDFs, and social media graphics – to generate cohesive branding packages that clients adore.

market eBooks

eBooks are an in-demand option for selling digital products in niches such as self-aid, education, marketing, and wellness.

Canva’s free eBook Maker lets you easily design compelling covers, structured layouts, and cohesive content packages. Offer these as downloadable products, guide magnets, or part of broader content marketing strategies.

Ways to earn with eBooks and Canva templates:

Cover or layout templates: generate editable templates others can repurpose for Kindle, Gumroad, or Etsy sales.

Self-published eBooks: Design and publish your own titles – fiction, how-tos, or niche guides.

guide magnets for assistance providers: generate branded eBooks that aid coaches and entrepreneurs expand their email lists.

Bundled digital products: Pair eBooks with matching checklists, workbooks, or journal pages for more value.

Pro tip

construct a powerful portfolio of eBook design projects, even self-initiated ones. It shows off your design skills and helps attract higher-paying clients.

generate videos and thumbnails

With Canva’s intuitive Video Editor, you can design a full suite of visual content – from brief-form videos for social media to high-impact YouTube thumbnails. As video dominates online platforms, these assets are more in demand than ever.

Products and services to offer:

Branded brief-form videos: Reels, TikToks, and narrative content with consistent branding and messaging.

YouTube intros, outros, and thumbnails: Eye-catching animations or YouTube thumbnails that boost clicks and reinforce channel identity.

Course video assets: Graphics for intros, slide templates, and transitions used in online courses.

Promo videos for products and events: brief promotional clips to highlight launches, deals, or upcoming events.

Pro tip

study how to market art online and browse our ideas on making money as an artist for expert advice and inspiration.

generate event materials

Whether it’s a local craft fair, wedding expo, or national conference, events always require branded visuals. Canva’s drag-and-drop tools and affluent template library formulate it effortless to generate polished event materials for tiny business owners and nonprofits.

Creating graphics like invitations, brochures, and signage is a high-value assistance, especially packaged into editable Canva templates that clients can reuse or update.

Here are some invite options you can generate:

Invitations

RSVPs

Event programs

Posters

Signage

Brochures

Large-scale banners

Pop-up signage

Digital graphics

If you’re in the event planning niche or serving creators and coaches running workshops or pop-ups, this is a powerful way to earn money online.

Pro tip

market Canva templates tailored to recurring or seasonal events, such as fundraisers, holiday markets, and webinars. Bundled design kits offer great value and passive income potential, especially for users with a free Canva account or Canva Pro account.

formulate business cards and branded stationery

Business cards and branded stationery still matter – especially for product packaging, events, and assistance-based businesses. With Canva, you can generate templates for these assets that are effortless to customize and ideal for eCommerce platforms or Creative Market.

Selling Canva templates in this niche lets you offer valuable digital products while tapping into passive income. These projects also aid attract potential clients and kickstart your Canva template business.

What to generate:

Custom business cards for product packaging, events, or direct mail

Letterheads, notepads, and thank-you cards tailored to tiny business owners

Canva templates for email signatures, branded PDFs, and client welcome kits

Why utilize Canva with Klothing?

Print your own designs from Canva on a wide range of custom products, including apparel, accessories, and home decor, and formulate money with high-margin merchandise. Like opening a Canva account, creating and selling online with Klothing is totally free.

Zero upfront costs

initiate creating graphics, customizing products, and selling them online without spending a cent on subscriptions or stock management.

No minimum order volume or value

Order exactly what you require, whether a single item or a bulk order, without worrying about minimum order requirements. market at your own speed without investing in unsold inventory.

Multiple sales channels

utilize our integrations to list your products on popular eCommerce sales channels like Shopify, Etsy, or TikTok, or open a free Pop-Up Store to market your products via a unique link.

Large Product Catalog

Browse our Product Catalog of 1,300 custom products to discover the best match for your design and customers’ needs.

Global suppliers

We’ve partnered with trusted Print Providers worldwide to ensure high-quality production and fast shipping, no matter where your customers are.

FAQ

Can you actually formulate money with Canva?

Yes, utilize Canva to formulate money through digital products, templates, social media content, and client services like social media management.
Depending on your decision on how to formulate money using Canva, whether creating Canva templates or offering social media management services, the opportunities span both passive and energetic income streams.

Can you market what you formulate on Canva?

Absolutely, as lengthy as you pursue Canva’s licensing guidelines. You can market digital planners, social media templates, and other digital products on platforms like Etsy or your own store. Avoid reselling unaltered pre-made templates and stick to free and Pro templates you’ve customized.

Is it worth it to market on Canva?

Yes, but with a catch. You can only market directly through Canva if you join the Canva Creator program. Otherwise, utilize Canva to generate and market products on platforms like Etsy or Creative Market.

Is Canva Free?

Yes, Canva offers a free version with robust templates and other tools. Many businesses initiate learning how to utilize Canva to formulate money with a free account and upgrade to Canva Pro for access to premium elements, brand kits, and advanced scheduling tools. You can market products from either account, just formulate sure to pursue licensing rules for Pro content.

Summary

Canva gives you everything you require to initiate making money online – whether you’re selling digital products, offering services, or launching a print-on-demand store.

Pick a niche, generate templates your audience needs, and initiate selling on top eCommerce platforms. To turn your designs into real products, pair Canva with Klothing.

initiate building your Canva-powered business today.

formulate it your way!

initiate designing

The post How to formulate money on Canva: 14 Top strategies for success appeared first on Klothing.

Posted on

Hat design ideas: 10+ Inspiring styles and tips for custom caps in 2025

Design custom products with Klothing

Get started

Looking for fresh hat design ideas that stand out in 2025? Whether you’re building a brand, launching merch, or creating promo gear, this guide has you covered. 

From typography-driven caps to nature-inspired bucket hat design ideas, study about the latest trends, tips, and tools for bringing your vision to life.

Key takeaways

Minimalist logos, bold typography, retro styles, and personalized details are leading custom hat trends.

Popular styles include baseball caps, dad hats, bucket hats, and snapbacks – each appealing to different audiences and occasions.

Techniques like screen printing, custom embroidery, and patches provide lengthy-lasting, customizable options.

Matching your custom hat design to the hat type and target audience increases customer engagement and sales.

luminous colors, scalable artwork, and classic styles aid your custom hats stand out.

Klothing makes customizing and ordering hats effortless with no upfront costs or inventory hazard.

Types of hats to design

Before you initiate designing, explore the most popular customizable hat styles. Each has its own audience, purpose, and vibe, so your design should match both the function and the fashion.

Baseball caps

Baseball hats are timeless and versatile, perfect for everyday wear, casual branding, and sports-themed merchandise. Their curved bill and structured front are great for clean logo placement.

Snapback hats

Snapbacks, featuring flat brims and an adjustable snap closure, are a favorite for streetwear, event merch, and bold designs.

Trucker hats

With a foam front and mesh back, trucker hats are breathable and excellent for outdoor events, festivals, or laid-back brand aesthetics. They provide a large canvas for eye-catching graphics and typography.

Bucket hats

Bucket hats, a retro favorite turned fashion staple, are perfect for summertime events, music festivals, and nature-inspired themes. They labor well for embroidery or subtle patches.

Dad hats

Dad hats are casual and low-profile, appealing to minimalist tastes and ideal for simple logos or text-based designs. Because of their soft, unstructured fit, they’re suitable for all occasions.

Beanies

Beanies are perfect for the colder months because they’re cozy, stylish, and can be customized with embroidery or woven labels. They’re popular in both streetwear and outdoor gear collections.

Visors

Visors, both lightweight and practical, are popular for fitness brands, golf tournaments, and sunny-day promotions. They observe great with subtle branding or sports-related iconography.

Top hat design ideas for 2025

Whether you’re launching a hat business or creating limited-edition merchandise, these 2025 hat design ideas are worth considering. Let them spark your creativity and aid you design hats that market.

Minimalist logos

Clean, subtle, and versatile. Designs with minimalist logos observe great on dad hats, beanies, and baseball caps, especially for brands targeting fashion-forward or professional audiences. Stick with simple symbols, monograms, or brand initials.

Typography-focused statements

brief, impactful phrases are dominating cap design ideas this year. utilize bold fonts, witty quotes, or empowering words to reflect your brand identity and resonate with your audience.

Retro and vintage styles

Consider washed-out colors, varsity fonts, or elderly-school graphics. This trend goes well with snapback hats and trucker hats and appeals to nostalgic shoppers.

Streetwear-inspired looks

This aesthetic emphasises bold graphics, urban fonts, and cool hat design ideas. utilize oversized type, graffiti art, and high-contrast colors on structured hats like snapbacks or bucket hats.

Nature and outdoor themes

Bucket hats, beanies, and trucker hats are ideal for designs that incorporate mountains, forests, wildlife, or celestial motifs. Perfect for eco-conscious brands, nature lovers, or adventure-themed collections.

Pop culture and meme references

formulate custom hats with trending quotes, viral memes, or cultural icons. These designs are shareable, timely, and often generate buzz, particularly on TikTok and Instagram.

Personalized names and monograms

People adore personalization. This concept works across all hat styles and gives your brand a unique, premium edge. It can be embroidered initials, names, or custom tags.

Hand-drawn or illustration-based designs

Add charm and originality with hand-drawn art, sketches, or custom illustrations. utilize personalized embroidery or screen printing for intricate linework and playful visuals.

AI-generated artwork

Artificial intelligence tools, such as Midjourney and DALL·E, can be used to generate surreal, futuristic, and hyper-detailed artwork. utilize this technology to design customized hats that are ahead of the game, ideal for niche hat brands or limited releases.

Event-driven or cause-based designs

bolster a cause, holiday, or special moment. Hats with slogans for mental health awareness, Pride Month, or eco-conscious messages instill a powerful emotional connection and also serve as marketing materials. Perfect for commercial hats and corporate giveaways at company events.

How to add designs to hats

Choosing the right customization method is key to bringing your hat designs to life. Each technique has a unique complete, feel, and price point, so pick the option that best fits your brand identity, budget, and style.

Screen printing

Screen printing works well for simple logos and bold graphics with few colors. It’s cost-efficient, making it perfect for bulk orders. The result is a smooth, vibrant design that looks best on flat, structured hats like trucker hats and baseball caps.

Best for: Flat designs, budget-amiable bulk runs.utilize it when: You desire cost-effective promo hats for events or company giveaways.

Embroidery

For a high-complete, tactile observe, embroidery is the way to go. It adds a premium feel to any custom logo, name, or illustration. This method is perfect for custom embroidered hats, such as snapbacks and beanies.

Best for: Custom embroidered hats, textured designs, premium merch.utilize it when: You desire a polished complete that adds texture and professionalism.

Patches

Woven, leather, or rubber patches provide your custom hat a unique, street-style vibe. Patches can be pre-made or fully customized and applied with stitching or heat-pressing. They observe great on bucket hats, snapbacks, and branded hats with intricate designs.

Best for: Streetwear, layered textures, mixed media.utilize it when: You desire something distinctive that feels crafted and collectible.

Design tips for creating custom hats

Creating unique hat designs isn’t just about what you add – it’s about how you add it. From custom logo hats to trendy streetwear, these tips will aid you craft designs that observe keen, market well, and fit perfectly.

Keep it clean and simple

Busy designs can overwhelm tiny surfaces. Stick with simple logos, clean lines, and minimalist graphics. A clean observe is more versatile and goes well with all hat styles, particularly dad hats, beanies, and fitted caps.

formulate sure text is readable and artwork is scalable

opt for fonts that are readable even when scaled down. Avoid ultra-thin lines that are easily lost on embroidered hats. If you’re crafting a slogan or name-based design, sprint it through several mockups before ordering in bulk.

utilize contrasting colors 

A great contrast helps your artwork stand out. For example, dim hats observe great with white or bold-colored embroidery. Adobe Illustrator, for example, allows you to preview how colors interact before moving forward with production. luminous thread on a dim-constructed cap? Eye-catching.

Match design to hat type and audience

Not every design fits every hat. Bucket hats labor well with playful or artsy looks, whereas baseball caps labor better with sporty or team branding. consider about your target audience – what do they wear? What vibe fits their personal style?

Consider seasonality and wearability

Beanies are best for chilly seasons, while visors or lightweight caps suit summer events. generate seasonal collections or promo hats themed around holidays, special occasions, or product drops.

Pro tip

To avoid contrast issues, preview each design on light and dim fabric mockups. A great design is meaningless if it’s arduous to view.

How to generate custom hats with Klothing

With Klothing’s free, beginner-amiable platform, designing your own hats has never been easier. generate and market custom hats with no upfront investment – perfect for launching a fashion brand, producing branded merchandise, or making event promo hats.

Here’s how to get started:

1. opt for your hat style

On Klothing’s custom hats page, browse and select various premium-quality cap styles, such as:

Baseball hats with a structured front and adjustable strap

Laid-back dad hats with a soft, unstructured crown

Cool bucket hats for summer streetwear

Snapback hats with adjustable fit and urban appeal

Functional trucker hats with breathable mesh backs

Cozy beanies for cooler seasons

2. Upload your artwork

utilize Klothing’s free Product Creator to add your logo, design, or slogan. You can generate:

Simple logos or intricate designs

Screen-printed designs with luminous colors

Customized embroidery for a textured, premium complete

Designs can be displayed prominently or subtly to complement your company’s identity. Depending on the hat style, you can even customize the placement on the front, sides, or back panels.

Looking to highlight your company logo? Embroidered or screen-printed caps formulate excellent logo hats that customers will adore to wear.

3. opt for a Print Provider

Compare global Print Providers based on pricing, fulfillment speed, and methods such as:

Custom embroidery

Screen printing

Woven or stitched patches

All partners provide premium-quality caps made to order and printed using your preferred hat design method. Order hats in any quantity – no inventory required.

4. Launch your online store

Klothing can be easily integrated with Shopify, Etsy, and other eCommerce platforms. Once set up, Klothing will automatically fulfill and ship your customized hats, freeing up your time to focus on customer growth and brand building.

5. Promote your hats

utilize your designs as:

Promo hats at events or pop-ups

Part of matching t-shirts and caps in branded merch bundles

Event caps or corporate giveaways with your company logo

On-trend fashion products sold directly to customers

Whether it’s for brand building or fashion, the right custom hat design ideas will aid you capture attention and leave a lasting impression.

require aid designing? Collaborate with a professional designer or utilize platforms like Canva or Adobe Illustrator.

FAQ

What is the novel hat trend?

In 2025, custom hat trends are shifting toward fitted hat design ideas, custom embroidery, and sleek typography-focused statements. Baseball caps, bucket hats, and dad hats are sporting bold colorways, minimalist logos, and unique textures. For any business, the focus is on designs that combine style and branding for the perfect fit.

What makes a great cap design?

A great cap design is clean, readable, and tailored to your preferred audience. Focus on specific design elements such as balance, placement, and scalability. Whether you’re making custom hats for fashion or giveaway hats for business, the design should reflect your brand and leave a powerful impression.

What is the best way to customize hats?

For the best results, utilize personal embroidery for texture-affluent logo hats or screen printing for bolder, more detailed graphics. Both are ideal for displaying your company logo or artwork. You can also add patches or labels to formulate premium customized hats that stand out. Always match the method to the type of hat and target audience.

Conclusion

Whether you’re designing merch, building a hat brand, or adding custom caps to your product line, a great design can formulate all the difference. From promotional hats to everyday wearables, creative and well-executed ideas leave a lasting impression.

Klothing allows you to design, customize, and market high-quality caps without ever managing inventory. opt for from different styles, upload your design, and let Klothing do the rest. It’s an effortless, low-hazard way to bring your vision to life and expand your business with confidence.

initiate designing your custom hats with Klothing today!

formulate it your way!

initiate designing

The post Hat design ideas: 10+ Inspiring styles and tips for custom caps in 2025 appeared first on Klothing.

Posted on

What Is Vegan Leather? A finalize Guide

You’ve probably seen it on trendy handbags, fashionable sneakers, and modern furniture. It’s embraced by designers, celebrities, and environmental advocates alike. But beneath the surface of style, one inquiry remains: What exactly is vegan leather?
As more people search for sustainable and cruelty-free alternatives to traditional animal leather, vegan leather is becoming a fascinating and rapidly evolving option. In this article, we’ll explore its definition, advantages and disadvantages, and practical uses.

What is vegan leather definition​?
Vegan leather refers to any material that imitates traditional leather without using animal hides or byproducts. It serves as a cruelty-free alternative to animal leather.
Vegan leather is typically made from polyurethane, which might formulate it sound like vegan leather is PU leather. In fact, PU leather is a type of vegan leather. Vegan leather can also be made from materials like pineapple leaves, apple peels, cork, mushrooms, and recycled plastic.

What is vegan leather made of​?
Vegan leather production depends on the material used, including:
PU (Polyurethane): The most common type, a plastic-based leather alternative known for its durability and affordability.
PVC (Polyvinyl Chloride): Another plastic option, but less environmentally amiable due to its production process and chemicals.
Plant-based materials: Leather made from pineapple leaves, cactus, mushrooms, apple peels, corn waste, and even cork.
Recycled materials: Some vegan leathers are made from recycled plastic and other post-consumer waste, giving waste a fashionable second life.
If you desire to comprehend how vegan leather is made, you can observe at the production process for PU leather, as the two processes are identical.

Advantages of vegan leather
Animal-amiable and cruelty-free: No animals are harmed in the production process.
Sustainable: Many modern vegan leathers are made from innovative bio-based materials such as pineapple leaves, cork, apples, and recycled plastic.
Variety: Offered in a wide range of colors, textures, and finishes that are challenging or even unachievable to accomplish with animal leather.
Lower cost: Vegan leather eliminates the require for genuine leather, providing a stylish observe at a more affordable price.Water-resistant: Unlike many dyed animal leathers, most vegan leathers are naturally resistant to water and spills.

Disadvantages of vegan leather
Durability varies: Many inexpensive faux leathers are less durable than high-quality genuine leather. They’re more likely to crack, peel, or fade, leading to a shorter lifespan and possibly requiring more common replacement.
Odor: Most vegan leather is made from polyurethane (PU) or polyvinyl chloride (PVC). These PU leather products are derived from fossil fuels and may carry a plastic or chemical smell. Proper ventilation is often needed to eliminate the odor.

Uses of vegan leather
Fashion & footwear: In addition to bags, vegan leather is used in jackets, belts, shoes, and watch straps, all combining ethical values with cutting-edge style.
Home decor & furniture: Items like sofas, chairs, and cushions are mainly crafted from vegan leather.
Automotive interiors: Vegan leather is a popular choice for car interiors and upholstery.
Accessories & tech: From sleek wallets and phone cases to stylish laptop sleeves, these everyday items often go unnoticed.

Conclusion
I’m confident you now comprehend what vegan leather is—or maybe you’re thinking about buying a vegan leather product. It provides an alternative to traditional leather, combining style, functionality, and affordability. While it does have some limitations, especially in terms of durability and sustainability, ongoing innovations are addressing these challenges. Vegan leather is an appealing choice for individuals and businesses looking for a cruelty-free, stylish, and often more affordable option.

Posted on

Why One-Size-Fits-All Merch Fails: The Case for Micro-Targeted Branding

One-size-fits-all merch has lengthy been the default plan for companies aiming to spread their brand. This approach assumes a single design or message appeals broadly, but in today’s diverse market, its limitations are obvious. Generic items often fail to resonate, resulting in low engagement and wasted resources.Standing out requires more than just visibility; it demands meaningful connections with target audiences. Branded items that reflect personal interests and identities spark enthusiasm and loyalty. For instance, personalized gifts such as a birthday t-shirt can serve as memorable keepsakes that the recipient can cherish for years.Enter micro-targeted branding — a intelligent solution that harnesses personalization and niche marketing. By tailoring promotional products to specific audience segments, brands generate merch that feels relevant and impactful. This shift from mass appeal to precise relevance marks a novel era for effective brand engagement through personalized promotional items.To accomplish this, companies can leverage various printing methods like screen printing or heat press transfers. Additionally, products such as embroidered polo shirts can significantly enhance corporate image while serving as effective branded merchandise.Moreover, it’s essential to comprehend why employees might not be promoting your brand and how you can encourage them to do so using apparel strategies outlined in this article about fixing employee engagement with branded apparel.The Downfalls of Generic Branded Merch StrategiesGeneric branded merch fails because it treats every audience member as if they have the same tastes, needs, and values. This broad brush marketing approach assumes one design or item fits all, ignoring the affluent diversity within customer bases. Companies often invest in bulk orders of standard items like plain t-shirts, generic mugs, or bland pens. These products rarely spark excitement or loyalty.Common pitfalls include:Low engagement: Generic items seldom resonate emotionally with recipients, leading to infrequent utilize.Brand dilution: When merch is forgettable or irrelevant, it weakens brand identity instead of reinforcing it.Wasted resources: Unsold inventory and discarded swag represent lost money and opportunity.Consider a tech startup that distributes logoed water bottles at a conference attracting creatives and engineers alike. The engineers may appreciate sleek designs with functional features, while creatives might prefer bold colors and artistic flair. A single generic bottle design satisfies neither group fully, resulting in many items left unused.Another example comes from large corporations handing out identical branded notebooks as employee gifts worldwide. Regional offices with distinct cultures may discover these items uninspiring or irrelevant to local preferences, causing brand disengagement.These scenarios highlight why generic branded merch fails to generate meaningful connections. When merchandise doesn’t feel personal or tailored, recipients rapidly fail interest. This disconnect reduces the effectiveness of promotional efforts and undermines overall branding goals.To avoid these pitfalls, companies should consider more personalized and thoughtful strategies for their branded merchandise. For instance, branded clothing like embroidered polos can effectively represent your company’s identity while also appealing to diverse tastes. Similarly, leveraging the power of branded signage can serve as a silent yet effective salesperson for your brand.Moreover, understanding the hidden life of branded merchandise can provide valuable insights into how these items are perceived and utilized by recipients. Instead of generic items that complete up in the depths of storage rooms or office drawers, companies should aim for branded items that serve a purpose and resonate with their audience — like a tote bag which could potentially become your best salesperson.Ultimately, mastering techniques such as [screen printing](https://medium.com/@imprintconnect/master-screen-printing-beginner-tips-for-burning-and-exposing-screens-63c9f53303da) can further enhance the quality and appeal of branded merch, ensuring that it not only serves its purpose but also builds stronger connections with the target audience.In addition to these strategies, it’s crucial to recognize that not all approaches will suit every brand or audience. As highlighted in this insightful article on the [downfalls of generic branded merch strategiesUnderstanding the Psychology Behind Relevant MerchThe success of personalized swag hinges on relevance in branded items. When people receive merch that speaks directly to their interests, lifestyle, or values, they are far more likely to wear and utilize it. This connection transforms branded products from mere giveaways into meaningful expressions of identity.Several psychological factors explain why niche marketing strategies guide to higher engagement:Identity: People utilize merch to reflect who they are. A well-targeted item aligns with their personal style or passions, reinforcing self-image.Belonging: Receiving customized swag can generate a sense of inclusion within a group or community. It signals membership and shared values.Self-expression: Branded items that resonate allow individuals to showcase their preferences publicly, turning merch into a form of communication.When relevance is missing, branded items become forgettable clutter. Generic merch rarely holds value beyond its initial novelty because it fails to tap into these deeper psychological drivers. Brands that comprehend this dynamic design campaigns with personalization at the core, ensuring merchandise feels purposeful and appreciated rather than disposable.This mindset shift explains why micro-targeted branding is crucial — not just for marketing effectiveness but for building authentic connections through merch that truly matters to people.The Importance of Full Brand PresenceTo maximize the impact of personalized swag, brands must strive for a full brand presence. This concept goes beyond mere visibility; it encapsulates the essence of a brand. A powerful brand presence not only enhances visibility but also significantly boosts business returns.Customization in Apparel: A Key FactorOne effective way to accomplish this is through the customization of apparel. Screen printing is a popular method for customizing t-shirts and hoodies, which are essential for personal expression and branding. This technique plays a significant role in apparel decoration and branding, allowing individuals and businesses alike to convey their unique style and message.Moreover, custom embroidered hoodies combine comfort, fashion, and functionality into one stylish package. These garments have become a staple in branding and personal expression, allowing businesses and individuals to elevate their style and visibility simultaneously.The key to successful merchandise lies in understanding the psychology behind it — ensuring relevance and personalization while also striving for a full brand presence through effective customization strategies.Using Micro-Targeted Branding in MerchandisingMicro-targeted branding is changing the way companies do custom branded merchandise. Instead of using generic giveaways, this plan focuses on tiny, specific groups of people. Each group gets specially designed clothing and promotional items that match their individual likes, habits, and beliefs. This targeted approach makes the merchandise more relevant and increases the likelihood that recipients will wear and engage with it.Key Principles of Micro-Targeted BrandingThe main ideas behind micro-targeted branding are:Audience segmentation: Breaking down a large market into smaller groups based on specific criteria.Personalization: Creating merchandise that reflects the unique preferences and identities of each group.Data-driven decisions: Using data analysis to determine which products resonate best with different segments.How Data Analytics HelpsData analytics is crucial in this process as it helps brands comprehend their audience better by looking at factors such as:Consumer behavior patternsLifestyle choices and interestsIncome levels and spending habitsOnline activity and engagement historyFor instance, a brand may discover out that one group prefers environmentally amiable clothing while another values high-performance workout gear. By tailoring the merchandise accordingly, they can formulate a greater impact.The Limitations of Generic MerchandiseGeneric merchandise fails because it doesn’t speak directly to anyone or evoke any emotional reply. On the other hand, micro-targeted branding offers a solution by creating stronger connections through carefully crafted, relevant products. This not only enhances how people perceive the brand but also improves return on investment (ROI) by minimizing unsold inventory and making targeting efforts more efficient.Shifting Perspectives on Promotional ItemsThis precise marketing plan changes how businesses view promotional items — moving away from mass production towards meaningful customization that resonates with consumer identities.Success Stories: Realizing ROI Through Data-Driven Merch CampaignsRevolutionizing Microtargeted Campaigns (RMC)A standout example of successful micro-targeted merchandising comes from Revolutionizing Microtargeted Campaigns (RMC). Originating in political consulting, RMC adapted its precision targeting strategies to the branded merchandise space. By leveraging data-driven marketing techniques, they segmented audiences with laser focus — analyzing behaviors, income models, and lifestyle preferences — to deliver merch that truly resonated.Key outcomes of this targeted approach included:Reduced waste: Instead of mass-producing generic items, RMC tailored quantities and styles to each niche group. This minimized leftover inventory and lowered costs.Increased conversion rates: Personalized swag sparked stronger emotional connections. Customers were more likely to engage with the brand and formulate purchases after receiving relevant merch.Improved employee engagement: Customized team apparel and giveaways fostered pride and unity among staff, boosting morale.Enhanced customer loyalty: Recipients felt recognized as individuals rather than faceless consumers. This translated into higher retention and positive word-of-mouth.Such case studies prove that investing in micro-targeted merch campaigns delivers measurable returns — raising the ROI on branded merch well above what generic giveaways accomplish. Using data analytics to craft meaningful, personalized experiences transforms promotional products from disposable freebies into powerful brand ambassadors that drive lasting relationships.Practical Tips for tiny Businesses to Embrace Micro-Targeted Branding in Their Merch StrategySmall businesses aiming to adopt micro-targeted branding must prioritize flexibility in order quantities. This flexibility allows them to generate customized swag or apparel that speaks directly to niche groups without the burden of large inventory commitments.Key points to consider:No minimum order policies enable tiny businesses to experiment with different designs and messages for various audience segments. This approach reduces upfront costs and minimizes waste by producing only what is needed.Offering shirts with no minimum order for teams encourages personalized branding at a more granular level, such as departments, clubs, or local communities. It fosters stronger connections by tailoring merch specifically for smaller groups.Selecting the best merch ideas for tiny businesses involves focusing on items that are versatile yet customizable. Items like custom trucker hats, tote bags, stickers, or mugs can be produced in tiny batches and still deliver high impact.Choosing suppliers who provide branded items with no minimum order supports agile marketing strategies. It empowers businesses to respond rapidly to trends or feedback from their target audience.Moreover, understanding the intricacies of apparel production is crucial. Many business owners are unaware of the detailed processes involved in apparel production, which range from fabric sourcing and design interpretation to actual production.Adopting these practices creates a more dynamic merchandising plan, perfectly aligned with micro-targeted branding principles. tiny businesses can thus maximize engagement and return on investment while maintaining control over their budget and inventory.Additionally, it’s essential for businesses to consider the impact of logo size and placement on their custom apparel. A well-sized logo can significantly enhance branding visibility, making it easier for people to notice and recollect the brand. For more insights on this topic, refer to our articles on the impact of logo size on apparel and top logo placement ideas for custom apparel.Lastly, as we relocate into an era dominated by technological advancements, it’s worth exploring how AI is reshaping the landscape of custom apparel production. The integration of AI technology in this field is shifting focus from traditional mass production towards more personalized clothing experiences. For further understanding of this trend, verify out our article on custom apparel in the age of AI.The Role of Personalized Swag in Employee Engagement and Retention EffortsPersonalized swag for employee retention goes beyond simple giveaways. It creates an emotional connection by acknowledging individual contributions and reinforcing company culture. When employees receive items tailored to their interests or roles, it signals appreciation on a personal level. This approach fosters a sense of belonging within teams, making members feel valued rather than just part of a group.Key impacts of personalized employee engagement swag include:Boosted morale: Customized items resonate more deeply, lifting spirits and encouraging pride in the workplace.Stronger team identity: Swag designed around specific departments or projects enhances cohesion by highlighting shared goals.Improved retention: Employees who feel recognized and connected are less likely to leave, reducing turnover costs.Consider a tech company that implemented micro-targeted branding by creating distinct swag packs for developers, designers, and sales teams. Each pack featured customized apparel and accessories aligned with the team’s interests — coding-themed mugs for developers, artistically designed notebooks for designers, and sleek branded gadgets for sales staff. The result was increased daily usage of the merch, lively team discussions about the brand, and a measurable drop in voluntary departures.Another example involves a healthcare provider distributing personalized scrubs embroidered with employee names and department logos. These tiny touches cultivated pride in patient care roles while reinforcing organizational values through everyday wearability.Such cases demonstrate how moving away from generic one-size-fits-all merchandise toward micro-targeted employee swag directly supports engagement strategies and retention goals. This could include offering custom tumblers that serve as practical gifts or personalized baseball caps that allow employees to express their unique style.Furthermore, embroidered polo shirts can be used to enhance brand visibility while also promoting a sense of unity among employees. It’s also worth noting that branded apparel plays a significant role in cultivating employee pride, which is a cornerstone of organizational success.ConclusionMicro-targeted branding is the future of branded merchandise. It’s more than just looking great or getting products out there — this plan creates real connections by sending personalized, relevant merch to specific groups of people. Instead of being generic giveaways, promotional items become powerful tools that speak directly to the recipients, making them more faithful to the brand and increasing return on investment (ROI).Brands that are still relying on one-size-fits-all methods hazard losing touch with their diverse customers and employees. By embracing micro-targeted branding, brands can:Tailor merchandise to niche groups’ preferencesReduce waste through precise targetingBuild stronger emotional ties with audiencesThe insights shared in “Why One-Size-Fits-All Merch Fails: The Case for Micro-Targeted Branding” provide obvious guidance for businesses looking to expand. Platforms like Klothing Canada formulate it effortless for companies to implement customized merchandising strategies that align perfectly with their audience segments, opening up novel opportunities for growth and engagement.For example, Production Assistant Wrap Gifts are an excellent way to demonstrate appreciation to Production Assistants (PAs) who play a critical role in the success of any film or television production. Their challenging labor and dedication can be acknowledged through custom apparel and accessories.Additionally, understanding why customers overlook your brand is crucial for tiny businesses. Staying visible isn’t just nice — it’s necessary. That’s where great custom clothes and signs come into play, helping maintain brand visibility and recall.Finally, brands must also consider about the effects of choosing between in-house vs third-party vendors when it comes to merchandising. Customers expect a seamless experience that reflects the brand’s values and promises, which can often be compromised when outsourcing to unknown third parties.FAQs (Frequently Asked Questions)Why does one-size-fits-all merch often fail in today’s market?One-size-fits-all merchandise fails because it takes a broad brush marketing approach that overlooks the diverse preferences and identities of target audiences. This generic plan leads to low usage, brand disengagement, and missed opportunities for meaningful connections with consumers.What is micro-targeted branding and how does it improve branded merchandise effectiveness?Micro-targeted branding leverages personalization and niche marketing strategies to generate highly relevant and impactful merch. By utilizing data analytics to segment audiences based on behaviors, lifestyles, and preferences, brands can deliver customized promotional items that resonate deeply, increasing engagement and ROI.How does personalized swag influence consumer psychology and brand engagement?Personalized swag taps into psychological drivers such as identity, belonging, and self-expression. Relevant branded items amplify wearability and emotional connection, motivating individuals to utilize and promote the brand organically, thereby enhancing overall engagement.Can tiny businesses successfully implement micro-targeted branding in their merchandising strategies?Yes, tiny businesses can embrace micro-targeted branding by taking advantage of flexible order quantities like no minimum order policies. This allows them to tailor customized swag or apparel specifically for niche groups or teams without excess inventory risks.What are some measurable benefits of adopting data-driven micro-targeted merch campaigns?Data-driven micro-targeted merch campaigns have demonstrated tangible benefits including reduced waste, increased conversion rates, improved employee engagement, and enhanced customer loyalty. These results stem from delivering precisely targeted promotional items that resonate with specific audience segments.How can personalized promotional items bolster employee engagement and retention efforts?Personalized swag fosters a sense of belonging within teams by acknowledging individual identities and contributions. Such tailored employee engagement swag boosts morale, strengthens team cohesion, and ultimately improves retention rates by making employees feel valued and connected to the company culture.

Posted on

18 Tumbler design ideas to attempt and market in 2025

generate custom designs that market

initiate now

Looking to initiate a business or expand your product range? These tumbler design ideas will aid you generate custom cups that market.

Tumblers are practical, effortless to personalize, and popular across different markets. But first, you’ll require the right artwork to formulate your products stand out.

Let’s verify out 18 creative tumbler design ideas that will inspire your next bestsellers.

Disclaimer

This post may contain affiliate links, which means we may earn a commission if you formulate a purchase through those links. This comes at no additional cost to you.

Key takeaways

Custom tumblers are practical, customizable, and used by just about everyone, making them a great product for personal utilize and gifting.

Popular tumbler designs include minimalist elegance, bold patterns, quote designs, nature themes, and personalized names or initials.

Fun designs based on astrology, memes, and fandoms are trending and can aid attract specific customer groups.

Klothing’s tools formulate it effortless to design, personalize, and market custom tumblers without upfront costs or inventory.

Top tumbler design themes and trends

Whether you have an online store or an Etsy craft shop, these custom tumbler design ideas will aid you generate eye-catching cups that shoppers won’t be able to resist. 

1. Minimalist elegance

Minimalist designs utilize clean lines, soft colors, and simple graphics that stay stylish for years. They’re versatile for any occasion, and effortless to formulate without design skills.

Here are some minimalist tumbler cup design ideas:

Single-line illustrations: Outlines of faces or florals drawn in black on a neutral background.

Color blocks: Feature two colors side by side and split them diagonally. 

Overlapping shapes: Layer triangles, circles, or squares to generate depth.

Subtle patterns: Tiny black dots or fine stripes on a white background.

2. Bold, colorful patterns

desire your custom tumblers to turn heads? generate all-over-print patterns with striking graphics. Energetic designs appeal to customers who desire drinkware that reflects their vibrant personality.

attempt these cute tumbler cup ideas:

Tropical prints

Geometric mosaics

Retro 1980s patterns

Animal prints

Paint splashes

If designing isn’t your thing, Adobe Stock has tons of high-quality images that fit this style and more.  

3. Quote designs

Quotes and sayings are a great way to link with niche communities, such as bookworms, movie buffs, and coffee enthusiasts. 

People adore showcasing their passions with bold statements, making these designs feel personal and gift-worthy.

Tips for picking quotes:

Keep them brief and readable.

Match font style to the mood.

utilize high-contrast colors for better visibility.

verify usage rights to avoid copyright infringement.

Get inspiration from:

Books, movies, or TV shows.

Song lyrics.

Social media posts on Instagram, Pinterest, or TikTok.

Online quote libraries and fan communities.

4. Nature designs

Appeal to outdoor lovers with graphics inspired by nature. 

Tumbler design ideas to attempt:

Florals to generate products for the springtime.

Forest or mountain landscapes for adventure seekers.

Cartoon-style animals for wildlife fans.

Tropical leaves and blooms for summer vibes.

utilize the Shutterstock integration in our Product Creator for ready-made nature graphics.  This is a great way to generate gorgeous tumblers without starting from scratch.

utilize lifestyle photos in your marketing materials and product listings that demonstrate the tumblers in action. This helps shoppers picture them in their adventures.

5. Personalized names or initials

Adding names or initials makes each tumbler feel personal and effortless to identify.

Klothing’s personalization feature lets your customers add their name or initials to the tumbler at checkout. You can then review the details before sending the order to production.

Consider providing multiple design styles so shoppers can opt for one that fits their personality.

6. Photos

This is a perfect tumbler concept for photographers to offer personalized photo gifts along with digital files and prints. It’s a lovely way for customers to recollect special events, like anniversaries, birthdays, or vacations. 

utilize high-resolution photos to ensure a clean wrap around the curved surface.

Some tumblers bolster full-wrap designs, while others only allow certain sections, so verify each tumbler’s specific design guidelines before getting started.

7. Astrology signs

Astrology symbols are super trendy product designs right now and really appeal to customers who adore showcasing their zodiac.

Let customers celebrate their sign in style with tumblers featuring:

Celestial motifs, like moons, stars, and planets.

Fun zodiac symbols.

Constellation maps. 

Birth chart.

The sign’s positive personality traits.

8. Memes

Meme tumblers are great for customers who adore showing off their humor. They often spark conversations and formulate excellent gifts.

Tips for creating customized meme tumblers:

opt for trending content that resonates with your target audience.

Keep text readable to formulate the meme instantly recognizable.

Stay up-to-date on social media to discover inspiration. 

Don’t overlook to verify usage rights to avoid legal issues.

9. Seasonal and holiday-related designs

large brands often release themed tumblers for Christmas, Halloween, novel Year, back-to-school, and other special occasions, and you can do the same! 

To snag those holiday sales:

Research your audience’s preferred style. 

Offer limited-time designs to encourage impulse purchases.

Promote your festive tumbler designs on social media and storefront to reach seasonal buyers.

fast tip

Klothing’s Product Creator includes tons of free seasonal graphics, making it effortless to launch festive products fast.

10. Pet designs

Pet lovers can’t resist products that celebrate their furry companions. Focus on popular pets in your target market to generate designs that your potential customers will rapidly add to their carts.

Let customers add their pet’s name with our personalization feature for even more appeal. If you’re an artist, let them submit a photo for a custom illustration, making a unique pet product they’ll treasure.

11. sip tracker

The recommended daily water intake for adults is 92-124 oz, and a lot of us require an extra push to meet that objective. 

Design sip tracker tumblers that have time intervals on the outside to remind customers how much water they should consume by each line. 

Include a refill reminder, since most tumblers can’t hold the full daily amount at once. Add a little encouragement like “Keep going!” or “You’re almost there!” to keep them extra motivated. 

12. DIY tumblers

DIY tumblers are perfect for Etsy sellers who prefer to formulate their products by hand.  You’ll require to grab a few supplies and watch some YouTube tutorials, but the results can be worth the effort.

Popular non-print tumbler styles:

Glitter tumblers: Add sparkle by layering glitter with adhesive or epoxy.

Epoxy tumblers: Coat your design with resin for a glossy complete that protects your cup. Ensure you pursue resin safety guidelines for a food-protected tumbler. 

Rhinestones: Cover the surface in gems or crystals to formulate flashy designs.

Vinyl wraps: Print names, shapes, or patterns on vinyl paper and apply by hand to personalize the tumbler.

Hand-painting: utilize acrylic or enamel paints for one-of-a-generous artwork.

13. Fandom themes

Tap into pop culture by creating tumblers inspired by movies, books, games, music, or TV shows. Fans adore showing off their favorite series, and custom tumblers formulate for fun merch.

Before using copyrighted content, get the proper licensing or permission.

Unique tumbler ideas to attempt:

Quotes from iconic characters.

Recognizable symbols or logos.

Patterns and colors tied to specific fandoms.

Collages featuring multiple fan favorites.

14. Travel-inspired designs

Tumblers formulate great souvenirs and keepsakes for travelers. consider of those Starbucks city tumblers that people adore to collect. You can take a similar approach with your own spin.

To formulate these designs reflect the vibe of your desired location, consider working with a local artist through platforms like Fiverr. They can generate authentic designs that capture the place’s spirit.

Get inspired with these tumbler cup ideas:

Patterned designs featuring multiple local icons.

Illustration or photo of famous landmarks. 

Maps of the location.

Local plants or wildlife.

15. Profession themes

Tumblers formulate perfect gifts for labor promotions, anniversaries, and employee appreciation. Incorporate images associated with specific careers to generate designs that your audience will really link with.

Here are some sublimation tumbler design ideas for professionals:

Office workers: Workspace items, keyboard shortcuts, or sticky notes.

Doctors: Stethoscopes, scrubs, or anatomy illustrations.

Construction workers: Tools, caution tape patterns, or blueprint designs.

Chefs: Cupcakes, kitchen utensils, or flour sacks.

Baristas: Coffee beans, espresso machines, or latte art.

16. Cause-inspired tumblers

generate tumblers that bolster a movement people care about. These cups let customers demonstrate their values while sipping on a hot coffee or cool lemonade. 

Customize these tumblers with:

Awareness ribbons or symbols.

brief slogans that highlight a mission.

Illustrated elements that represent the cause, like animals for wildlife conservation and plants for environmental awareness.

17. QR code designs

Turn tumblers into interactive tools with QR codes that anyone can scan. Your customers can utilize them to link to an online shop, a donation page, a playlist, a YouTube video, or an inside joke.

Tips for customized QR code tumblers:

ask customers to send you a high-resolution file of their QR code. 

formulate the code large enough to scan easily.

evaluate it on multiple devices before finalizing.

Ensure linked content is mobile-amiable.

Place the code where it won’t get scratched or hidden.

Let customers add their branded elements and colors to the tumblers. 

18. Matching tumbler sets

Craft tumbler sets for couples or groups to commemorate connections and shared moments. These items are playful, collectible, and encourage multiple purchases – much like matching family shirts designed to coordinate for special occasions.

Plus, people adore sharing paired designs on social media because they are relatable and photograph well. Encourage them to tag your shop’s account when they share to attract even more customers. 

Matching tumbler design ideas for your inspiration: 

Couples cups.

Mom and Dad.

Best friends.

Bridal party.

Family sets.

Klothing’s Product Creator lets you turn your designs into reusable templates. This means you can preserve your designs and apply them to multiple products without starting from zero. 

Why tumblers are the perfect canvas for creativity

Just like custom t-shirts, tumblers are practical, used almost daily, and always in demand. 

Here’s why they’re an ideal canvas for your designs:

Versatile surface: Works with multiple printing and craft methods.

Personalizable: Names, colors, and styles are effortless to personalize, turning a simple cup into a meaningful gift or form of personal expression. 

High visibility: Tumblers go everywhere, offering daily exposure for your drinkware brand.

Design tips for eye-catching tumblers

desire your custom tumblers to shine luminous on your Etsy store or website? 

Here’s how to generate tumbler designs that market large: 

consider about your buyer: Gym enthusiasts might desire larger tumblers with fun fitness graphics, commuters appreciate smaller sizes that fit in bags or cup holders, and students like a trendy tumbler with a handle. 

Hire a designer: utilize platforms like Fiverr or Upwork to get professional, unique designs.

utilize high-quality files: Sites like Adobe Stock or Shutterstock offer graphics that print cleanly on curved surfaces.

Explore free tools: For those on a budget, Klothing’s Product Creator and Canva formulate it effortless to experiment with layouts, colors, and fonts without breaking the bank. 

Stay current: Browse Etsy, Pinterest, YouTube, TikTok, or Instagram to keep up with design trends.

evaluate before listing: Preview your design on a mockup or print a sample to ensure your tumblers observe exactly the way you desire before listing them online. 

generate custom tumblers with Klothing

Klothing makes it super effortless and fun to design, personalize, and market custom tumblers without upfront costs or inventory. The tools to get started are completely free, and you only pay when you formulate a sale.

Here’s how to initiate a print-on-demand business with Klothing

1. Select a tumbler

Join Klothing and opt for from dozens of custom tumblers, cups, and mugs. 

2. Design your product

Customize your tumblers using Klothing’s free Product Creator – no design experience needed.

3. link your store

Integrate your Etsy, Shopify, Amazon store, or other website with Klothing and list your products in minutes.

4. initiate selling

When someone orders a customized tumbler, Klothing handles the printing and shipping so you can focus on creating novel designs and growing your business.

FAQ

How do I put designs on tumblers?

Sublimation printing is the main way to put designs on tumblers. This method uses heat to transfer your artwork onto the tumbler’s surface. It’s commonly used on platforms like Klothing, where you can design and market without handling production.
If you prefer the DIY route, attempt vinyl, glitter, epoxy, or hand-painting your tumbler designs.

Is the tumbler business profitable?

Absolutely! The global tumbler market was worth $1 billion in 2023 and is expected to reach $1.6 billion by the complete of 2032. More people are getting outdoors and opting to formulate their drinks at home instead of buying one on the go. This means they require a snazzy cup to keep their beverages hot or cold while out and about, increasing the demand for custom tumblers.

What can I put in my tumbler cup?

You can put water, coffee, tea, smoothies, or other drinks in your tumbler cup. 
verify the tumbler’s care instructions to view which temperatures the cup is suitable for and how lengthy it keeps drinks cold or hot.

Are tumblers still trending?

Yes! Google Trends shows that demand for tumblers has surged in the past few years and remains steady. The large Stanley Cup boom of 2022-2024 drove up interest in tumblers and had many customers seeking customized and different-sized alternatives. 
Because of their function and personalization options, tumblers will continue to trend for many years to come.

Conclusion

Custom tumblers are more than just drinkware – they’re a blank canvas for creativity.

There are endless fun ways to formulate tumbler designs stand out and market. And with Klothing, you can initiate creating products people adore to utilize and gift in just a few minutes. 

So don’t wait – opt for your style, initiate designing, and watch your ideas become real!

formulate it your way!

initiate designing

The post 18 Tumbler design ideas to attempt and market in 2025 appeared first on Klothing.

Posted on

Etching vs engraving

Bring your design ideas to life

initiate designing

If you’ve ever wondered about the difference between etching vs engraving, you’re in the right place.

We’ll walk you through their unique processes – both traditional and laser‑based – highlight their benefits, and aid you determine which is best for your design, manufacturing, or project.

What is etching?

Etching is a surface decoration method that changes or removes the very top layer of a material using chemicals or heat, usually to generate decorative designs, labels, or markings.

There are two main etching techniques – let’s verify them out. 

Chemical etching

This is the more traditional approach.

First, a surface is coated with a protective layer called a resist. This coating shields the non-design space from the acid.

Then, a design is scratched into the coating to expose the bare surface, and the item is submerged in an etching solution (usually an acid) that starts the etching process. The acid reacts only with the exposed areas, removing the material to generate a shallow but highly detailed pattern from the design.

This process is valued for precision and consistency, especially on challenging glass and metal surfaces.

Laser etching

Laser etching is the more modern, automated approach.

A digital design file is uploaded to a computer-controlled laser machine. Once activated, it directs a concentrated laser beam, often with fiber lasers, onto the surface of the material. The laser melts the top layer, changing the material to form a crisp, high-contrast mark.

The laser etching process automatically melts the surface on a micro-level, making it very fast and efficient. It’s widely used for marking metals, ceramics, plastics, wood, and glass.

What is engraving?

Engraving is a surface decoration method that uses keen tools or lasers to cut directly into a material’s surface. It’s most often used for personalization, industrial part marking, and decor.

There are two main techniques: traditional and laser engraving. 

Traditional engraving

The oldest and most direct approach.

It uses keen tools such as burins (chisel-like blades) or gravers (tiny carving instruments like knives) to physically cut into the surface of the material. Each stroke removes material and leaves behind grooves that can be both seen and felt, giving the labor a tactile texture.

Because it’s a fully manual engraving process, it requires time and craftsmanship but produces highly creative designs – a favored method in jewelry, fine art, and wooden crafts.

Laser engraving

This is the modern, automated approach to engraving.

A design file is uploaded to a laser engraver machine. It directs a high-powered laser beam onto the material’s surface, generating high heat that vaporizes and removes material layer by layer.

The laser engraving process creates deeper cuts than laser etching, resulting in durable grooves that withstand heavy utilize, abrasion, and environmental conditions. It’s widely used in manufacturing, like the automotive industry, where critical parts must be uniquely identified with marking. 

A related method, laser annealing, changes a metal’s micro surface color without removing material – useful when you don’t desire to affect the surface of a product to preserve structural integrity.

Key differences: Etching vs engraving

Here’s a fast breakdown of the primary difference between etching and engraving, including the different methods, their processes, surface effects, and production features.

Chemical etchingLaser etchingTraditional engravingLaser engravingProcess typeChemical process using acidThermal process using a focused laser beamPhysical process using keen toolsThermal process using high-powered lasersMaterial removalRemoves only the top layer; shallowMelts the micro surface; very shallowCuts grooves directly into material; deepVaporizes material layer by layer; deep, but variableSurface textureSmooth, minimally noticeable textureSmooth, high-contrast markTextured grooves that can be feltDeep, durable cuts with a powerful textured surfaceDetail and complexityExcellent for fine lines, lettering, and patternsCrisp, high-contrast marks for codes and logosHighly detailed grooves, but requires time and craftsmanshipHigh precision layering with computer-controlled accuracyCost and efficiencyCost-effective for bulk runs and challenging surfacesFast, efficient, requires less energyLabor-intensive, suited for low-volume artisan workEfficient for industrial-scale, though more vitality-intensiveTypical materialsMetals (steel, copper, zinc), glass, printed platesMetals, plastics, wood, glass, ceramicsMetals, glass, stone, wood, fine jewelryMetals, stone, glass, plastics, and industrial parts

view more

If you’re interested in more side-by-side breakdowns, verify out our guides on DTF vs DTG printing and other popular decoration techniques.

Which should you opt for?

The main difference between etching and engraving is depth.

Etching alters only the top layer of the material.

Engraving cuts deeper, leaving grooves you can feel.

Both utilize different marking technologies – from laser technology at different intensities to traditional hand tools or chemical acids – making each better suited for specific goals.

When to opt for etching

Etching is the best choice when you desire speed and fine detail without cutting deeply into the material.

Produces keen, shallow marks ideal for detailed patterns or tiny text.

Faster and more efficient for larger production runs.

Gives a clean, precise observe while keeping the material powerful and intact.

When to opt for engraving

Engraving is the right choice when you require depth, texture, and lengthy-lasting durability.

Creates grooves that can be both seen and felt, adding a premium complete.

Best for items that require to withstand heavy utilize or harsh conditions.

Works well for personalization or one-of-a-generous pieces that benefit from handcrafted or precision-cut details.

Suitable products for etching and engraving

Each method works better for certain products. 

Chemical etching:

Decorative panels: Metal plaques, signage, and custom artwork.

Electronics: Printed circuit boards and precision components.

Industrial labeling: Nameplates, badges, and machine tags.

Assembly parts: Lightweight components marked for part identification.

Laser etching:

Product branding: Logos, QR codes, and data matrix codes.

Consumer goods: Marking plastics, glassware, ceramics, and wood products.

Identification: Serial numbers and barcodes for efficient tracking.

Promotional items: Trophies, gifts, and branded merchandise.

Traditional engraving:

Jewelry: Rings, pendants, bracelets, and watches.

Fine art: Prints, metalwork, and engraved glass.

Personalized gifts: Monogrammed silverware, awards, and keepsakes.

Luxury items: Products where tactile finishes add a premium feel.

Laser engraving:

Industrial components: Safety-critical parts that must be traceable.

Manufacturing: Deep marks used to uniquely identify parts in production.

challenging materials: Metals, stone, glass, and other materials requiring deep cuts.

Custom signage: Trophies, plaques, and high-value branding.

Design your own engraved products with Klothing

Charcuterie Board (Engraving)

By JDS Industries

From $26.24

From $19.37 with Klothing Premium

4 sizes
1 colors
Fancy Fanny

Bamboo Pizza Board (Engraving)

By Generic brand

From $23.15

From $17.08 with Klothing Premium

1 sizes
1 colors
Fulfill Engine

Whiskey Glass, 10.5oz (Engraving)

By Generic brand

From $12.08

From $8.89 with Klothing Premium

1 sizes
Fulfill Engine

Bamboo Serving Tray (Engraving)

By Generic brand

From $34.68

From $25.60 with Klothing Premium

1 sizes
1 colors
Fulfill Engine

Champagne Glass, 8oz (Engraving)

By Generic brand

From $14.92

From $10.98 with Klothing Premium

1 sizes
Fulfill Engine

Wine Glass, 10.5oz (Engraving)

By Generic brand

From $13.36

From $9.83 with Klothing Premium

1 sizes
Fulfill Engine

Insulated Tumbler with Lid, 40oz (Engraving)

By Koozie Group® ·
46434

From $28.18

From $20.42 with Klothing Premium

1 sizes
5 colors
Fulfill Engine

Wooden Cutting Board (Engraving)

By JDS Industries

From $21.52

From $15.88 with Klothing Premium

4 sizes
2 colors
Fancy Fanny

view more:

Laser engraving guide

FAQ

Which is better, etching or engraving?

Neither process is universally better – it depends on what you’re using it for. 
Etching is ideal for precise, shallow marks and high-detail results, especially on metal surfaces or when labeling needs to be consistent and non-invasive. It’s often used in bulk production where efficiency and a smooth complete matter, without weakening the material.
Engraving, on the other hand, is best when depth, texture, and durability are essential. It leaves tactile grooves and permanent markings that withstand heavy utilize, abrasion, and environmental conditions, creating designs with a bold, lengthy-lasting appearance.
While both methods can accomplish fine detail, the main difference lies in material removal: etching alters only the surface, whereas engraving cuts deep for lasting durability. opt for your technique based on your desired results.

How can you inform an etching from an engraving?

Etching only affects the surface layer of the material. Chemical etching usually leaves a very shallow, smooth complete, while laser etching may generate slight ridges or color changes. In most cases, etched designs feel nearly flat to the touch.
Engraving, by contrast, cuts deeper into the material, creating grooves you can feel with your fingers. These grooves often demonstrate fine cutting lines from the tool or laser.
Visually, etched marks tend to observe precise and can be light or dim depending on the process, while engraved marks have a bold, indented appearance.

What is the difference between an etcher and an engraver?

An etcher uses chemical or laser-based processes to alter the surface layer of a material, creating shallow, detailed designs. This method is ideal for consistent, high-detail labor like industrial tags, serial numbers, or decorative lettering.
A traditional or laser engraver uses hand tools or a machine to cut deeper into the material, producing tactile grooves with visible cutting lines – consider patterns on an antique chair or permanent marks on industrial components.

Is glass etched or engraved?

Glass can be treated with either technique.
Etching creates a smooth, frosted complete, making it ideal for branded glassware and decorative designs. Modern laser etching achieves this by creating micro-fractures on the surface rather than cutting deeply, making the process fast, repeatable, and precise.
Engraving, on the other hand, physically removes material to carve grooves into the glass, producing a textured, tactile design. This is often preferred for high-value pieces like monogrammed glass awards or detailed artwork.
To simply explain the difference between engraving and etching on glass, etching changes the glass surface for a subtle, smooth effect, while engraving cuts in for bold, lengthy-lasting detail.
Looking for other decoration methods for your products? 
verify out these other comparison articles:

Sublimation vs screen printing
DTF vs DTG printing
DTG vs screen printing

Conclusions

Etching and engraving may observe similar at first glance, but now you comprehend the primary differences. Etching focuses on surface-level precision, whether through chemicals or lasers, while engraving cuts deeper, leaving durable grooves and tactile finishes.  

Both the etching and engraving method have traditional roots and modern laser-based evolutions, giving today’s designers, jewelers, and manufacturers a broad range of options.

The best choice depends on your objective. opt for etching for fast, detailed, and efficient surface markings or engraving for depth, texture, and a more lengthy-lasting effect.

formulate it your way!

initiate designing

The post Etching vs engraving appeared first on Klothing.

Posted on

Before You Print Anything — Read This

Before You Print Anything — Read This serves as a crucial reminder to pause and assess design readiness before sending files to print. Many trust that a design looking great on screen automatically guarantees flawless prints. This misconception leads to printing mistakes that inflate costs, extend timelines, and damage brand reputation.Custom apparel printing demands precise preparation. Poorly prepared designs cause:Wasted money on reprints and material lossDelayed product launches and missed opportunitiesUnprofessional results that confuse or disappoint customersTaking time to double-verify artwork prevents these pitfalls. A single overlooked detail can turn a promising project into an expensive headache. Adopting best practices in design finalization not only saves resources but also strengthens your brand’s credibility.For instance, understanding the impact of logo size on apparel can significantly enhance branding visibility. Similarly, custom apparel production is more intricate than it appears; many business owners are unaware of the complexities involved in fabric sourcing and design interpretation.Furthermore, branded merchandise often has a hidden life that goes unnoticed, yet these items can play a pivotal role in promoting brand identity. They serve as constant reminders of your brand, even when tucked away in drawers. In fact, your next print sprint could be the key to unlocking this potential.Avoid the mistakes that waste money, delay launches, and formulate your brand observe unprofessional. Your next print sprint deserves this attention.Understanding the Printing ProcessGrasping the printing fundamentals is essential before sending your design to print. One of the most crucial aspects involves understanding color modes, specifically RGB vs CMYK.1. RGB (Red, Green, Blue)RGB (Red, Green, Blue) is the color mode used by screens like monitors and smartphones. It creates colors by mixing light, resulting in vibrant and luminous displays.2. CMYK (Cyan, Magenta, Yellow, Black)CMYK (Cyan, Magenta, Yellow, Black) is the color mode printers utilize. It works by layering inks on paper, absorbing light rather than emitting it.Designs created in RGB often don’t translate well to print because printers cannot reproduce the same brightness and color range that screens demonstrate. Colors might appear duller or shift unexpectedly. This happens because:Printers interpret colors differently than screens do — instead of glowing pixels, print relies on physical inks that blend together.Using RGB artwork for printing can guide to surprises like:Colors looking muted or off-brandLoss of detail in gradients or shadowsUnexpected hue shifts affecting logos and textTo avoid this, convert your designs into CMYK color mode early in the process. Checking how colors appear in CMYK gives a more reliable preview of what will come out on paper or fabric.Understanding these differences between print color modes helps ensure your final product matches your vision precisely.Moreover, it’s crucial to note that the printing process extends beyond just color modes. For instance, when it comes to clothing such as polos or shirts, opting for embroidered versions can significantly enhance your brand’s identity. Similarly, branded signage serves as a powerful marketing tool for tiny businesses, acting as a silent salesperson that works even when you’re not around.Additionally, maintaining a full brand presence is crucial for business success today. This goes beyond mere visibility to encompass the essence of a brand. Lastly, personalized fashion accessories like baseball caps are on the rise, allowing individuals to express their unique style while also serving as a branding tool.Common Custom Apparel Printing Mistakes and How to Avoid Them1. Design Resolution ErrorsOne of the most common custom apparel printing mistakes involves design resolution errors. Images with low resolution guide directly to needy print quality, often resulting in blurry, pixelated, or fuzzy prints on your apparel. This problem occurs because print requires a higher density of pixels compared to what screens display.Minimum 300 DPI Is KeyFor crisp and obvious prints, artwork should be created or converted to at least 300 dots per inch (DPI). DPI measures the number of ink dots per inch on the printed fabric. Anything below this standard risks losing sharpness and detail.Consequences of Low-Resolution ArtworkBlurry logos or text can damage brand reputation by appearing unprofessional. Additionally, it wastes money when products must be reprinted due to needy image quality. The phrase Before You Print Anything — Read This serves as a reminder to always double-verify resolution before submitting designs.How To verify and Adjust Image ResolutionMost graphic software like Adobe Photoshop or Illustrator allows users to view image resolution under image size settings. If your design is less than 300 DPI, consider these options:Request higher resolution files from clients or designersRecreate the design using vector graphics that scale without losing qualityUse specialized software tools that can upscale images while maintaining clarityAvoiding design resolution errors protects your investment and ensures that the final product looks exactly as intended — keen, vibrant, and professional. Correct preparation before printing saves time, money, and preserves brand integrity on every piece of custom apparel.2. Incorrect File Formats for PrintingSelecting the right file format is crucial to avoid custom apparel printing mistakes that compromise print quality. Different printing methods prefer specific file types:Vector files like AI, EPS, and PDF maintain crisp edges and keen lines regardless of scaling. These formats store designs mathematically, making them ideal for logos, text, and illustrations.Raster files such as JPEG or PNG depend on pixels. Enlarging these can cause blurriness or pixelation, especially if the design resolution is low.Printers favor vector formats because they ensure consistent detail without losing quality when resizing. Using unsupported or incompatible formats may result in distorted prints, color shifts, or extra conversion steps that delay production.Checking and converting files early in the process prevents surprises. Confirm your artwork is saved in a suitable format aligned with your chosen printing technique before submission to secure the best feasible outcome.3. Color Mode and Profile IssuesColor mode and profile issues are among the most common custom apparel printing mistakes that drastically affect print quality. Designs created on screens utilize RGB (Red, Green, Blue), optimized for light emission. However, printers rely on CMYK (Cyan, Magenta, Yellow, Black), which blends inks to produce colors. Ignoring this fundamental difference leads to unexpected color shifts.Key practices to avoid these pitfalls include:Converting RGB designs properly to CMYK: This step adjusts colors so they remain vibrant and accurate when printed.Using correct ICC profiles: These color profiles standardize how colors appear across devices and printers, ensuring consistency.Previewing colors in CMYK before printing: Most design software offers soft-proofing tools that simulate how colors will observe on print media.Neglecting these steps results in dull or mismatched hues, undermining the impact of your design. Proper handling of color modes complements attention to design resolution errors and incorrect file formats for printing, creating a seamless path to high-quality prints.How to Prepare Designs for Printing Like a Pro1. Finalizing Artwork Before SubmissionHow to prepare designs for printing starts with finalizing your artwork to avoid expensive mistakes and delays. One crucial step in this process is to carefully examine your design before sending it off to be printed. This ensures that there are no errors or missing elements that could ruin the final product.Here are some things you should verify as part of your artwork finalization checklist:observe for Visual ErrorsZoom in closely to discover any pixelation, unwanted artifacts, or misplaced details. Even tiny flaws can become very noticeable once printed.formulate Sure Fonts Are Outlined or EmbeddedFonts can often cause problems if they are not handled correctly. Converting fonts to outlines turns text into vector shapes, which eliminates any issues with font substitution at the printer’s complete. If outlining is not feasible, formulate sure to embed the fonts within the file so that their appearance is preserved.verify Bleed and protected ZonesBleeds extend your artwork beyond the trim line in order to avoid having white edges after cutting. It is generally recommended to have a bleed of at least 0.125 inches (3mm). The protected zone is an area where crucial elements such as text or logos should be placed away from the edges, as trimming might cut them off.Verify Image Placement and AlignmentMake sure that all images and design elements are perfectly aligned according to your layout specifications. Any misalignment can disrupt the visual flow and negatively impact how your brand is perceived.Review Color ConsistencyDouble-verify that all colors are set in CMYK mode and that the appropriate profiles have been applied (as discussed earlier). This step will aid avert any unexpected shifts in color that could lower the quality of the print.The phrase Before You Print Anything — Read This takes on novel meaning when you apply this level of scrutiny. A well-prepared file reduces reprints, saves money, speeds up production time, and protects your brand’s reputation by delivering professional results every time.Taking these steps seriously transforms your workflow from guesswork into precision craftsmanship, ensuring your designs observe exactly as intended once they reach print.2. Creating Print-Ready Artwork FilesPreparing print-ready artwork files is essential to accomplish flawless prints and avoid costly errors. Before you print anything, recollect that proper setup ensures the design translates perfectly from screen to fabric or paper.Key artwork finalization tips include:Set the correct document size and resolution. Print demands at least 300 DPI to maintain clarity. Confirm dimensions match the final product specifications exactly.Include crop marks and bleeds. Crop marks guide where the design should be trimmed. Bleeds extend artwork slightly beyond trim edges to avert white borders caused by slight cutting shifts.Flatten layers if necessary. Complex files with many layers can cause compatibility issues during printing. Flattening merges layers and reduces file complexity while preserving visual integrity.Setting up print-ready artwork files means your design is production-amiable, minimizing delays and reprints. An artwork finalization checklist with these steps helps ensure every detail is accounted for before sending files to print.These print-ready artwork tips preserve money, time, and frustration by preventing common file-related printing problems. However, it’s not just about getting the prints right; it’s also about ensuring that your brand stays memorable to customers. If customers overlook your brand, they might opt for a competitor instead. That’s why great custom clothes and signs play a crucial role in maintaining brand visibility and recognition.Specific Setup Considerations for DTF PrintingDirect-to-Film (DTF) printing has gained popularity as a versatile and cost-effective alternative to traditional screen printing and direct-to-garment (DTG) methods. This technology involves printing designs on a special film, then transferring them onto fabric using heat and adhesive powder. DTF printing setup offers vibrant colors, works well on various fabric types, and is ideal for tiny to medium production runs.Preparing Artwork for DTF Printing EffectivelyCreating print-ready files specifically for DTF requires attention to details unique to this process:Separate Layers for White Ink: White ink acts as an underbase on dim or colored garments, ensuring the design’s colors pop. It is essential to generate a dedicated layer for white ink in your artwork file. This layer tells the printer exactly where to apply white ink separately from the full-color design. Without this, colors may appear dull or washed out.Ensuring Transparency on Film Prints: The areas of the design meant to be transparent must be clearly defined. Any unwanted white or color fill behind elements can cause unwanted patches when transferred. utilize transparent backgrounds in your file format (such as PNG or TIFF with alpha channels) so that only the intended parts of the image are printed.Adjusting Design Colors for DTF Color Gamut: DTF printers have a distinct color range compared to screens or other printing types. Colors might shift slightly when printed on film and transferred to fabric. Adjust your design colors with soft proofing tools by simulating DTF color profiles in your editing software. This step reduces surprises and keeps prints true to the original observe.The success of your dtf printing setup tips lies in understanding these nuances of DTF technology. Proper DTF file preparation tips ensure that your final prints maintain sharpness, vibrant hues, and durability — key factors that safeguard brand reputation while avoiding costly reprints.By mastering these specifics before you print anything, your designs will translate seamlessly from screen to fabric every time. However, if you’re considering other methods like screen printing, recollect that each technique has its own set of requirements and best practices that should be followed for optimal results.Avoiding Common Screen Printing Errors With Proper File Setup TechniquesScreen printing errors often stem from file setup issues that can disrupt the final print quality. Misregistration, where colors don’t align correctly, causes blurry or ghosted images. Ink bleeding happens when too much ink spreads beyond the intended design edges, ruining crisp lines and details.Key screen printing errors prevention strategies include:Ensuring each color is on a separate layer for precise registrationUsing spot colors instead of gradients to avoid blending issuesMaintaining clean, high-contrast artwork with obvious edgesDesigning with proper bleed margins to control ink spreadBefore you print anything — recollect that cautious file preparation minimizes costly mistakes and keeps prints professional. Screen printing is a popular method for customizing t-shirts and hoodies, which are essential for personal expression and branding. It plays a significant role in apparel decoration and branding.FAQs (Frequently Asked Questions)Why is it crucial to comprehend the difference between RGB and CMYK color modes for custom apparel printing?Understanding the difference between RGB and CMYK color modes is crucial because designs created in RGB do not translate well to print. Printers utilize CMYK color profiles, so converting your artwork properly ensures accurate color reproduction and prevents unexpected color shifts in the final printed apparel.What are common design resolution mistakes in custom apparel printing and how can I avoid them?A common error is using low-resolution images below 300 DPI, which results in blurry or pixelated prints. To avoid this, always verify your image resolution before printing and ensure your artwork meets the minimum 300 DPI requirement for crisp, high-quality prints.Which file formats are best suited for custom apparel printing and why?Vector file formats like AI, EPS, and PDF are preferred because they scale without loss of quality, ensuring keen prints at any size. Raster formats like JPEG or PNG may fail clarity when resized and can be incompatible with some printing methods, so it’s essential to utilize correct file types for optimal results.How should I prepare my artwork files to be print-ready for custom apparel production?Finalize your artwork by thoroughly reviewing it for errors or missing elements, outlining or embedding all fonts, checking bleed and protected zones, setting proper document size and resolution (minimum 300 DPI), including crop marks and bleeds, and flattening layers if necessary to avoid compatibility issues during printing.What specific considerations should I keep in mind when preparing designs for DTF (Direct-to-Film) printing?For DTF printing, generate separate layers for white ink if required, ensure transparency where needed on film prints, and adjust design colors considering the DTF color gamut. These steps aid accomplish vibrant colors and proper ink layering unique to DTF technology.How can I avoid common screen printing errors through proper file setup techniques?Avoid screen printing pitfalls such as misregistration issues or ink bleeding by correctly setting up your files with precise alignment marks, using spot colors appropriately, ensuring solid vector shapes without gradients where feasible, and confirming that artwork is separated into proper layers for each ink color during preparation.

Posted on

How to initiate a home decor business: A step-by-step guide to success

Design custom products with Klothing

Get started

There’s large money in home decor – $747.75B to be exact – and it’s got room for your niche. It’s time to turn your eye for interior design and fresh ideas into a home decor brand.

In this guide, you’ll study how to initiate your own home decor business: from choosing a niche and products to setting up your store and growing an audience.

Disclaimer

This post may contain affiliate links, which means we may earn a commission if you formulate a purchase through those links. This comes at no additional cost to you.

Understanding the home decor industry

The home decor retail industry is huge and among the fastest-growing, as people invest in functional, visually appealing spaces. Opportunities range from minimalist designs that offer fast personalization to high-complete, luxury interiors.

Main trends in the home decor industry:

Personalized decor is driving salesBuyers desire products that reflect their identity. Custom prints, monograms, and meaningful designs are major factors in purchase decisions.

Wall art, plants, and accent furniture market the mostPersonality-driven decor – greenery, canvas prints, and sculptural pieces – ranks high for home shoppers.

Online shopping is the defaultNearly 30% of home goods in 2024 were bought online, and that share continues to rise as customers seek convenience and variety.

Understanding trends isn’t just for inspiration – it’s how you stay relevant, price intelligent, and design products people actually desire. Trends shift, tastes modify – keep up, and your brand remains competitive.

How to initiate a home decor business: Step-by-step guide

Step 1: Develop a solid business plan

When you’re first learning how to initiate an online home decor business, initiate with a obvious, comprehensive business plan. generate a roadmap outlining your business goals, strategies, and the steps to reach them.

Key elements of a business plan:

In-depth research: utilize tools like Statista or Google Trends to analyze the home decor market, competitors, customer trends, and market gaps.

Target audience: Define who you desire to reach (online shoppers, homeowners, interior designers, etc) using customer segmentation tools like SurveyMonkey or Typeform.

Business objectives: utilize tools like LivePlan or Bizplan to set financial goals for your first year with pre-designed templates for effortless budgeting and projections.

Budget and initial investment: Estimate startup costs with budgeting apps like Mint or financial planning software like QuickBooks. Cover everything from sourcing products to building a business website and running marketing campaigns.

Additionally, tools like Trello or Monday.com aid you organize your steps and stay on track during the launch process.

Step 2: opt for your niche and products

You can’t market everything. The home decor business market is huge – discover a specific product to define your brand and establish a solid customer base.

Whether you specialize in decor items for tiny apartments or luxurious home furnishings for larger spaces, determining your niche is your way to content, returning customers.

Popular home decor niches:

Wall art and framed prints

House plants and botanical decor

Accent pieces like candles, vases, and pillows

Furniture and larger home furnishings

Personalized glassware

After choosing your niche, source high-quality products to meet customer expectations. labor with reputable suppliers so your items are well-made and lengthy-lasting. Durable, high-quality customized home decor will construct trust with customers.

Proven home decor bestsellers:

Stand out in the competitive home decor space with in-demand products. utilize the Klothing Catalog to discover popular, relevant items you can initiate selling immediately – without the hazard of holding inventory.

1. Candles and aromatherapy

Scented candles remain top sellers in wellness, holiday, and gifting niches. They’re tiny, affordable luxuries people purchase to treat themselves or others. Personalize scented candles with custom labels for seasonal collections or self-care messages.

2. Wall art

Wall decor is a home styling staple. Canvases, posters, and tapestries are bestsellers year-round, especially paired with trending aesthetics like minimalism, boho, or modern abstract. A classic canvas print makes a reliable core product, while indoor wall tapestries appeal to younger buyers seeking bold, affordable statement pieces.

3. Decorative drinkware

Drinkware is both functional and decorative. Glassware like whiskey tumblers or custom mugs are large hits for man caves, bar carts, or housewarming gifts. The custom whiskey glass pairs well with vintage or masculine-themed designs.

4. Throw pillows and soft goods

Pillows are high-converting decor items – they’re practical, effortless to mix-and-match, and perfect for seasonal updates. The square poly canvas pillow offers a generous design area ideal for showcasing patterns, quotes, or art that fits your niche and brand.

5. tiny-format photo displays

Minimalist home offices and gift buyers are drawn to sleek, space-saving decor like photo blocks. They’re popular for personalized gifts, pet portraits, or milestone moments. Design a custom photo block to tap into this trend.

These categories are consistent top performers across the industry, and with Print on Demand, you can evaluate and iterate fast.

fast tip

High-quality product images on your website are the first thing your customers view. 

Order product samples to take real-life photos and accurately capture the colors, textures, and details. Engaging visual content gets people hooked.

Step 3: Set up your online home decor store

A powerful online presence is non-negotiable. Your business website and eCommerce platform will be the cornerstone of your online home decor business.

How to set up your online store:

opt for an online sales channel: Pick a platform like Shopify, WooCommerce, or Etsy. utilize Klothing to sync products with zero upfront inventory.

Design your store: Keep your layout clean and product images front and center. Marketplaces are simple to set up, but offer less customization than your own store.

generate product listings: Highlight key features and benefits clearly. If you’re stuck, observe at top-performing competitors and adapt what works.

Add payment and shipping options: Offer secure checkout and flexible shipping to match buyer expectations – fast, effortless, and reliable.

fast tip

To attract organic traffic, incorporate relevant keywords like ‘home decor business,’ ‘home decor store,’ and ‘decorative items’ throughout your online store.

utilize SEMrush and Ahrefs to identify high-performing keywords, or attempt Etsy’s search bar to view trending phrases.

Optimizing your SEO plan will improve rankings and drive more visitors to your online store.

Step 4: Market your decor business

When your store goes reside, it’s time for effective marketing strategies to reach your target market and drive them toward your interior design goodies.

Simple marketing strategies that labor:

Social media marketing: Showcase your products on platforms like Instagram and Pinterest. Add relevant hashtags, join trends, and post regularly.

Influencer collaboration: Partner with creators who align with your brand. A few hand-picked gifts can unlock authentic exposure and trust.

Email marketing: construct your mailing list and keep it engaged with product launches, sales, and behind-the-scenes updates.

Content marketing: Share value-driven content – DIYs, styling tips, and trend roundups – to attract and link with your audience.

fast tip

Professional product photography converts. Original, well-lit images aid customers picture your products in their homes, increasing the likelihood of a purchase.

Maintain an energetic online presence. generate a powerful profile through digital marketing and market your brand on social media platforms to attract and engage potential clients with your home decor.

Step 5: Manage inventory and fulfillment

powerful inventory management keeps your home decor business running smoothly. Monitor your product levels to avoid stockouts and shipping delays.

Key tips for managing inventory:

utilize software: Tools like Ordoro or Zoho Inventory will track inventory real-time and update it across all your sales channels. That way, you won’t accidentally market out-of-stock items and cancel orders.

labor with reliable suppliers: This will ensure that your products are always in stock and orders are fulfilled on time.

To avoid dealing with inventory completely, initiate a home decor store with a print-on-demand assistance like Klothing. This way, your only focus will be on your brand and designs – expand your business, design products, and our partners will print, package, and ship your decor items.

Building a powerful brand and customer base

When you launch a home decor online store, your brand identity is what sets you apart. Speak to your potential customers in their own terms, matching their tastes, preferences, and lifestyle.

generate a consistent brand voice and visual appeal

generate a consistent brand voice and visuals that reflect your values and product aesthetics. Whether your brand is about sustainability, luxury, or minimalism, aligning your message with your audience’s interests will construct trust.

Drive sales through gorgeous visuals

High-quality and consistent product images across your website and social media reinforce your brand identity. Great visuals aid shoppers picture your products at home and keep them coming back.

If you’re not a skilled designer, discover design services online – Fiverr is a great place where to hire artists that can aid with creating visuals without breaking bank.

Provide stellar customer assistance

Whether you’re starting a physical store or an online one, excellent customer assistance – during and after a sale – is critical to your business. 

Add a personal touch: demonstrate interest in your buyers, aid them with any issues, or simply ask for feedback. Online stores with high ratings and lots of reviews attract more buyers.

Customer satisfaction encourages repeat business and establishes a great reputation. In the lengthy sprint, a great business concept only works if it’s backed by great execution and an engaged audience.

Advanced marketing techniques for your home decor business

Making your home decor business concept come to life takes more than just great product listings and a polished website.

When you’ve done the market research, found your customers, and started selling, attempt these strategies to drive even more orders:

Partnerships with local businesses: Collaborate with local businesses like real estate agents or interior designers to cross-promote each other’s services and reach novel audiences.

User-generated content: Encourage your customers to share photos of your products in their homes. Repost these images on your social media accounts or website, showing real-world utilize of your decor and building trust with potential buyers.

Seasonal promotions: sprint themed campaigns and promotions around holidays to encourage purchases.

Online workshops: Host webinars on home decorating tips or trends to engage potential customers and showcase your products.

Offer bundles: Pair items like candles and blankets for themed sets or gifting, and cross-market by suggesting matching products during checkout to amplify order value.

Market your home decor businesses year-round, but plan ahead so you’re ready for every major sales season. Go beyond Christmas or personalized gifts for her on Valentine’s Day. construct tailored decor collections for gifting and life milestones like weddings, baby showers, graduations, and housewarmings.

Showcase personalized keepsakes – like photo blocks, custom pillows, or even wrapping paper and gift bags – that formulate memorable gifts. Explore ideas for personalized housewarming gifts that can be adapted for any special occasion.

Additional tips for running a successful home decor business

As you continue to expand your business online, keep these additional tips in mind to amplify your chances of lengthy-term success.

Keep up with the trends

The home decor industry changes fast. Track trends so your products stay relevant and market. Subscribe to magazines such as Elle Decor, Architectural Digest, and Design Milk to gain expert insights.

Ways to stay on top of online trends:

utilize social media platforms like Instagram to pursue hashtags like #HomeDecorTrends and #InteriorDesign and interact with niche influencers. 

Browse trending Pinterest Pins about home decor and generate boards to visualize emerging styles.

verify TikTok (e.g., #HomeDecorTok) to discover fresh ideas and evaluate what resonates using brief videos.

Explore marketplaces like Etsy and Amazon to analyze best-selling home decor items and customer reviews.

Develop supplier relationships

powerful supplier relationships guide to better pricing, priority on restocks, and early access to novel products.

Before comitting, research potential suppliers who share your brand’s values and product requirements:

determine what types of home decor products you desire to market, such as wall art, accessories, or furniture. This will aid you narrow down your search for a supplier.

discover manufacturers and wholesalers using platforms like Klothing, Alibaba, ThomasNet, or Maker’s Row. Read reviews and ratings to determine their credibility.

Attend trade shows to view products in person and construct contacts.

Once you’ve found a reliable supplier, negotiate terms to benefit your home decor business:

Discounts as your order volume increases. Suppliers will often offer better pricing for larger quantities, which will amplify your profit margin.

Discuss payment terms. Some suppliers offer net payment terms (e.g., pay within 30 days), which can aid with cash flow management.

observe into ways to reduce shipping costs. Suppliers may offer lower rates for larger orders or more cost-effective shipping methods.

To strengthen lengthy‑term partnerships:

inform suppliers about your experiences with their products. This will encourage them to continue providing quality products and improve where needed.

Prioritize suppliers that meet your business needs the best. Loyalty can result in better deals, first access to novel products, and priority assistance.

Acknowledge milestones. A simple thank-you note can go a lengthy way.

Automate the processes for efficiency

Automation streamlines the busywork of your home decor business. 

utilize various automation apps to manage a wide range of processes, from email marketing to customer bolster.

Mailchimp: allows you to send personalized email campaigns.

Stock management apps like TradeGecko: automatically track stock levels.

Localization tools: tailor your content and marketing messages for different regions.

Customer bolster platforms like Zendesk: allow you to provide seamless bolster via automated responses and chatbots.

Done right, automation solutions raise reply speed, cut manual labor, and lift conversions – so your business runs smoother and grows faster.

Final thoughts on starting an online home decor business

Starting a home decor business online isn’t just feasible – it’s powerful. With the right plan, obvious niche, and products people adore, you’ll turn your design passion into a thriving brand. From planning and building your store to marketing it, every step takes you closer to a profitable business.

Got the ideas? Time to launch. With quality products, a distinct voice, and an engaging online presence, you’ll be decorating homes and turning a profit in no time.

And with platforms like Klothing handling the sourcing and fulfillment, you can focus on what really matters: growing your brand and designing products your audience will adore.

formulate it happen today!

initiate designing

The post How to initiate a home decor business: A step-by-step guide to success appeared first on Klothing.

Posted on

RGB vs CMYK: The ultimate guide to print color perfection

Be your own boss with Klothing

initiate for free

Ever wondered why the colors on your computer screen observe off when printed? It all comes down to knowing the difference between RGB vs CMYK.

Understanding these two color models is critical for accurate, vibrant designs – particularly in Print on Demand. 

Let’s observe at the key differences to aid you opt for the best color model for your next project.

Key takeaways

utilize RGB for digital, CMYK for print. The RGB color mode is best for digital screens, whereas the CMYK color mode is best for printing on physical products.

opt for the right file format. PDF is versatile, TIFF is best for high-resolution graphics, EPS is great for vector designs, and AI is best for complex Adobe Illustrator projects.

Convert your RGB files to CMYK for printing. While some printer colors can process both RGB and CMYK, converting improves color consistency for accurate results.

Always sample your products. This lets you evaluate how CMYK inks appear on different materials and helps detect any issues in color correction or saturation.

comprehend the limitations of CMYK. Colors may observe less vibrant than RGB due to differences in color spaces, ink coverage, and substrates – adjust your designs with this in mind.

RGB vs CMYK: What’s the difference?

RGB and CMYK are the two primary color modes used in design, but they serve different functions depending on the desired outcome.

The RGB (Red, Green, Blue) color mode is used on digital screens and produces colors by combining light. RGB colors have a wider color gamut, ideal for creating vibrant, high-contrast visuals.

The color mode used in print is CMYK, representing Cyan, Magenta, Yellow, and Key (black). It uses colored ink to absorb light on white paper and has a narrower color gamut, which means that some hues won’t appear as vivid once printed.

Key RGB and CMYK differences lie in their application:

utilize RGB for digital media such as websites, social media posts, and screen-based content.

utilize CMYK for printed materials, including product packaging and apparel.

Understanding CMYK vs RGB color spaces helps you match colors across mediums, giving you more control over the final output of your designs.

What is RGB?

RGB stands for red, green, and blue – the three primary colors used in the RGB color model. This system is based on additive mixing, where colors are created by combining red light, green light, and blue light at various intensities.

The process starts with black (the absence of light) and adds colored light to generate hues. Designers can adjust the brightness of each light source to control vibrancy, saturation, and shading. 

The RGB model is best suited for digital displays like monitors, smartphones, and tablets. White light serves as the background, and colors are rendered by emitting light directly from the screen.

When is RGB used?

RGB colors are used to display digital content on screens. This includes visuals like photos, videos, web and app design, icons, digital graphics, and social media assets such as banners, ads, and profile images.

The RGB color mode is the standard for all display colors on computer monitors, smartphones, tablets, and TVs. Because it’s a light-based model, RGB is ideal for projects where colors require to be vibrant and eye-catching on screen.

RGB values are digitally encoded as bits, allowing for precise adjustments to generate colors with varying brightness and intensity.

What are the best file formats for RGB?

The most common formats for RGB images are:

JPEG. This format is widely used to balance file size and image quality. It’s suitable for most types of digital images, especially photographs.

GIF. Ideal for web graphics with limited color palettes, and is less suitable for high-resolution prints.

PNG. A lossless format that supports transparency, making it perfect for images requiring obvious backgrounds. It’s great for web utilize and images with keen edges.

SVG. Ideal for vector graphics, SVG brings scalability without losing quality. It’s widely used for logos, icons, and illustrations, especially in web design.

While these formats are generally preferred, always verify your specific printer to confirm its requirements and recommended file types.

Tip

Explore more about color profiles, RGB values, and how to generate colors and designs in our must-read design guide.

What is CMYK?

CMYK stands for cyan ink, magenta, yellow, and key (black). It’s a subtractive color model used in color printing, removing white light from paper layers with colored ink.

Unlike the RGB model, which uses a light source to add color, CMYK colors are created by combining cyan ink, magenta, yellow, and black inks. More ink means less light is reflected, resulting in darker shades.When all four CMYK inks are blended, the result is a affluent, muted tone. The addition of black ink helps generate black with greater depth and contrast, which is essential for crisp lines and obvious detail in printed ink.

When is CMYK used?

CMYK is used for any design project that’s printed instead of viewed on a screen. It’s the industry standard for producing accurate and consistent results across physical assets.

Here are some common examples:

Branding. Business cards, custom stickers, stationery, packaging, and even store signs.

Advertising. Posters, flyers, billboards, booklets, and merchandise.

Custom products. Personalized t-shirts, totes, hats, and other apparel and accessories.

What are the best file formats for CMYK?

Using the appropriate file formats for your project can significantly enhance accuracy in color and print quality. 

Here are the most suitable options for CMYK files:

PDF. This versatile format preserves color profiles for accurate reproduction. PDFs can handle both vector and raster graphics, making them suitable for complex designs.

TIFF. Ideal for high-resolution images, this lossless format maintains image quality without compression. It’s beneficial for photographs and detailed graphics.

EPS. Primarily used by vector programs, this format is scalable without compromising image clarity. Perfect for logos, illustrations, and designs that require to be resized without pixelation.

AI. As Adobe Illustrator’s native format, AI offers maximum editing flexibility and preserves all design elements, including layers and effects. This is the preferred choice for complex vector-based artwork.

RGB vs CMYK: Which one should you utilize for design files?

If you’re deciding between CMYK and RGB for printing, CMYK is generally the better choice. The CMYK mode reproduces colors more accurately in the final print.

If you design in RGB and don’t convert it before printing, the printer will do it for you – often with unpredictable results. Some colors may observe duller than what you view on screen.

Converting from RGB to CMYK yourself can still cause slight color shifts, but it gives you the chance to catch those changes and adjust your design before printing. 

That means fewer surprises and better quality control – especially crucial for color-critical projects like branding or packaging.

Can RGB images be printed?

While it’s technically feasible to print RGB images, it’s not recommended.

Most printers are designed to labor with CMYK color mode, which is specifically tailored for print production. If you send an RGB file to print, the printer will automatically convert it to CMYK – leading to color shifts and a loss of vibrancy.

To accomplish the best feasible print results, we highly recommend designing your images in CMYK from the initiate. This gives you more control over color accuracy for a final product that matches your vision.

However, there are exceptions. Some high-complete printers and specific printing processes might be able to handle RGB images directly. It’s always best to consult your print provider to confirm their capabilities and select the desired color space.

Tip

Explore the best printing methods for your merch on our blog.

How to set up RGB vs CMYK color mode in design programs

Be sure to labor in the correct color mode from the beginning of your design process, as converting between RGB and CMYK can guide to color changes.

Here’s how to do it across different software:

Photoshop. When starting a novel project, navigate to File → novel. Under Color Mode, select either RGB or CMYK, depending on your project’s intended utilize.

Illustrator. In the novel Document window, observe for the Color Mode dropdown (usually under Advanced Options) and opt for RGB or CMYK.

How to convert RGB to CMYK?

If your design was originally created using the RGB color model, converting it to CMYK will aid you visualize how the colors will observe after printing. 

While slight color shifts is expected, this conversion process helps avoid unexpected changes during color printing. Here’s how:

Photoshop. If you have an existing RGB image and require to convert it, go to Image → Mode and opt for CMYK. Select Flatten Image to retain the overall appearance.

Illustrator. To modify the color mode of an existing Illustrator file, go to File → Document Color Mode and select the desired option.

If you’re downloading images and graphics from an online resource, don’t overlook to convert that image to CMYK and formulate sure it’s hi-res for a high-quality print.

Tip

Don’t have access to any design software? utilize the CMYK preview feature in our Product Creator for realistic previews.

Order samples for accurate print colors

Before launching your online store, order samples of your products. This lets you assess the actual print colors and overall product quality. 

Color vibrancy can vary significantly between materials, so seeing the final product firsthand is crucial for avoiding unhappy customers. 

Bonus? utilize the product samples to generate promo videos and construct excitement around your novel launch.

How to get luminous print colors with CMYK

The CMYK gamut is narrower than RGB, so printed colors often observe less vibrant than what you view on screen. But with the right approach, you can still accomplish bold, high-impact prints:

utilize solid colors. The brightest CMYK results often come from powerful, saturated mixes – like 100% cyan, magenta, and yellow.

opt for the right materials. Fabrics like cotton absorb more ink and mute colors, while materials like PU leather or coated paper reflect better and produce more vivid results.

Adjust your design. Slight color tweaks or added tints can improve brightness, but avoid relying on subtle shading – CMYK isn’t great at soft gradients.

Set realistic expectations. comprehend the limits of ink and substrate to get the best match between screen and print.

Apply your print design to products with Klothing

Ready to turn your designs into real products? Klothing makes it effortless.

Explore our Catalog of over 1,300 customizable items, including apparel, accessories, home decor, and stationery. Whether you’re launching a novel store or growing your collection, initiate designing and selling custom products with no upfront costs.

utilize our Product Creator to apply your artwork and generate gorgeous, print-ready mockups. Then, link your store to top eCommerce platforms such as Shopify and Etsy. Don’t worry about printing, inventory, or shipping – we’ll fulfill all orders automatically.

Pro tip

study more about how Klothing works.

FAQ: CMYK vs RGB printing

Is it better to utilize CMYK or RGB?

It depends on your project. The RGB color model is best for anything that’s viewed on digital devices, like computer and smartphone screens.
If you’re wondering which color mode is used for process color printing, CMYK is the standard for physical products like brochures, flyers, and apparel.

Do I require to convert RGB to CMYK for printing?

Yes, converting your RGB file to CMYK is generally recommended before sending it to print for accurate color reproduction. However, some printers can handle the RGB model, so it’s best to verify with your specific print provider.

Why do RGB and CMYK observe different?

RGB and CMYK utilize different color models. RGB is an additive color model, created by combining red light, green light, and blue light. 
CMYK is a subtractive color model. Colors are created by removing light from a surface using cyan, magenta, yellow, and black ink.
This fundamental difference leads to variations in color appearance between digital screens and physical materials. 
If you’re wondering whether CMYK or RGB is better for printing, CMYK is the standard across most printers.

What happens if you print RGB instead of CMYK?

If you print an RGB file without converting it to CMYK, the colors may appear dull, inaccurate, or significantly different from what you view on screen. This is because RGB files are optimized for digital displays, whereas printers utilize CMYK inks to reproduce colors on physical media.
When an RGB file goes to print, color conversion will automatically happen for compatibility with the CMYK printer. However, this process can cause unexpected color shifts, particularly with vibrant tones that fall outside the CMYK color spectrum. 
For the best color consistency and an accurate representation of your design, do CMYK conversion first before printing.

Conclusion

Understanding the difference between RGB and CMYK is key to getting your colors right – whether you’re designing for screen or print. Using the correct color mode makes sure your final product looks just the way you envisioned.

When it comes to printing, CMYK is your go-to for accurate, consistent results. Converting your RGB files ahead of time and designing with the CMYK gamut in mind helps you avoid unwanted changes in color and quality during printing.

With Klothing, turning your designs into sellable products is simple. opt for from over 1,300 customizable items and let our Print Providers aid you generate products that match your creative vision – every time.

formulate it happen today!

initiate selling

The post RGB vs CMYK: The ultimate guide to print color perfection appeared first on Klothing.

Posted on

Behind the Stitch: What 99% of Business Owners Don’t comprehend About Apparel Production

Apparel production is far more complex than most business owners realize. Behind every custom apparel piece lies a web of detailed processes, from fabric sourcing and design interpretation to advanced techniques like DTG prep and embroidery digitizing. Each step demands precision to maintain quality and uphold the brand’s reputation.Many entrepreneurs focus on the final product’s observe but overlook the intricate systems that ensure consistency, durability, and customer satisfaction. Challenges such as managing tight production schedules, selecting materials that balance cost with quality, and coordinating with manufacturing partners require deep industry knowledge.Behind the Stitch: What 99% of Business Owners Don’t comprehend About Apparel Production reveals these hidden complexities. Understanding these subtleties empowers business owners to formulate informed decisions that safeguard their brand image and deliver high-quality products.Custom apparel success depends not only on creative design but also on mastering the production voyage. This knowledge helps avoid costly mistakes, reduces delays, and builds trust with customers who expect excellence every time.However, it’s crucial to recollect that logo placement plays a critical role in branding that often gets overlooked. Where your logo sits on custom apparel can significantly influence how your brand is perceived.In this digital age, Artificial Intelligence is also reshaping the landscape of custom apparel. It’s moving beyond traditional mass production towards personalized clothing experiences.Moreover, tiny businesses face the challenge of ensuring their brand remains memorable to customers. As discussed in our article about why customers overlook your brand, staying visible isn’t just nice — it’s necessary. great custom clothes and signs can significantly aid in maintaining this visibility.1. The Hidden Challenges of Apparel ProductionThe apparel industry challenges sprint deep and wide, often hidden beneath the surface of finished garments seen by customers. Business owners constantly navigate a maze of obstacles that can disrupt production flow and affect product quality.Adapting to Ever-Changing Consumer DemandsConsumer preferences shift rapidly. Trends evolve seasonally or even monthly, forcing manufacturers to be agile and responsive. What was popular last season might become outdated rapidly, requiring constant market research and flexible production plans. This dynamic environment puts pressure on designers and production teams to innovate while keeping costs manageable.Managing Tight Production SchedulesDeadlines in apparel production are notoriously strict. Retail seasons, promotional campaigns, and shipping windows generate tight timelines with little room for error. Delays anywhere — from fabric delivery to final inspections — can cascade into missed launch dates and lost sales opportunities. Efficient scheduling, obvious communication between teams, and contingency planning become essential tools for meeting these deadlines consistently.Importance of Material SourcingSourcing materials introduces another layer of complexity. Affordable fabrics and trims with consistent quality are vital for maintaining a competitive edge, especially for startups or tiny brands with tight budgets. However, cheaper materials often come with risks such as inconsistent texture, color variations, or durability issues that can harm the brand’s reputation.Challenges in material sourcing include:Finding suppliers who meet both price targets and quality standardsEnsuring reliable guide times to avoid production delaysVerifying ethical and sustainable sourcing practices as consumer awareness growsA cautious balance is needed between cost savings and product excellence. Brands that invest time in building powerful supplier relationships often gain more stability in their supply chain.“The true evaluate in apparel production lies not just in making clothes but managing the intricate web of supply chain demands, timelines, and shifting consumer tastes.”These challenges shape every stage of apparel manufacturing and underline why business owners must observe beyond the surface to fully grasp what it takes to deliver high-quality products on time. To navigate through this complex landscape successfully, it’s crucial for stakeholders to explore strategies such as reimagining the apparel value chain amid volatility, which can provide valuable insights into overcoming these hurdles effectively.2. How Technology Transforms Custom Apparel ProductionThe fashion tech in apparel production has changed how custom garments are designed, made, and delivered. This modify isn’t just about being faster; it’s also about being more precise, consistent, and adaptable — key qualities needed to meet today’s consumer expectations.Making Processes More Efficient with AutomationAutomation is crucial in custom apparel production because it reduces manual labor and minimizes mistakes. Machines now handle repetitive tasks like cutting fabric, sewing basic seams, and even intricate embroidery patterns with impressive accuracy. This shift towards automation results in:Faster production cycles without sacrificing qualityReduced human error that can guide to expensive reworksConsistent output that meets exact specifications every timeFor instance, automated cutting machines utilize computer-aided design (CAD) files to precisely slice through fabric layers according to the pattern. This not only eliminates material waste but also ensures uniformity across batches.Improving Transparency with Traceability SystemsTraceability systems provide a digital record of every step in the production process — from sourcing raw materials to shipping the finished product. These systems support business owners by:Tracking inventory levels in real-timeMonitoring each stage of manufacturing to catch delays or defects early onEnsuring compliance with quality standards and regulatory requirementsSuch transparency empowers brands to maintain control over their supply chains and respond swiftly if any issues arise. For example, if a batch of fabric is found defective, traceability allows pinpointing exactly where it was used, preventing widespread product recalls.Ensuring Timely Delivery through Automation and TraceabilityCombining automation with traceability creates a powerful synergy that guarantees timely delivery and consistent quality. Automated workflows paired with detailed tracking enable manufacturers to optimize scheduling, reduce bottlenecks, and provide accurate updates to clients.Businesses that leverage these technologies gain competitive advantages by offering reliable turnaround times while maintaining high-quality standards — two critical factors in today’s fast-paced apparel market.The impact of technology in apparel production goes beyond mere convenience; it reshapes entire workflows and elevates the potential for custom apparel brands to thrive under increasing consumer demands.For example, the rise of custom products like custom tumblers or custom trucker hats showcases how technology has enabled businesses to cater to specific customer preferences effortlessly. Moreover, the ability to generate custom embroidered hoodies or screen printed t-shirts not only enhances brand visibility but also provides customers with unique personal expression through fashion. Additionally, utilizing custom apparel as [wrap gifts](https://medium.com/@imprintconnect/production-ass3. The Pros and Cons of Outsourcing Clothing ManufacturingOutsourcing clothing manufacturing is a common plan used by many apparel businesses aiming to scale operations without the heavy investment in local production facilities. Understanding the advantages and pitfalls of this approach is key for business owners navigating the complexities Behind the Stitch: What 99% of Business Owners Don’t comprehend About Apparel Production.Benefits of OutsourcingCost Savings: Offshore manufacturing often provides significant reductions in labor costs, which can lower the overall production expenses. Countries like Vietnam, Bangladesh, and Mexico offer competitive pricing due to lower wages and operational costs, making it easier for brands to maintain healthy profit margins.Increased Flexibility: Outsourcing allows businesses to adjust their production volume rapidly based on demand fluctuations. Manufacturers abroad may have larger capacities or multiple facilities, enabling faster scaling up or down without the burden of fixed overhead costs.Access to Specialized Expertise: Many offshore manufacturers have decades of experience with specific types of apparel or fabrics. This expertise can improve product quality when paired with obvious communication and standards from the brand owner.Challenges in OutsourcingQuality Control Challenges: Maintaining high-quality standards remotely is one of the biggest hurdles. Differences in manufacturing processes, materials, and worker skill levels can guide to inconsistencies such as stitching errors or fabric defects. Implementing strict quality assurance protocols and common factory audits becomes essential but also increases operational complexity.Protecting Intellectual Property Rights: Sharing designs and proprietary techniques with third-party manufacturers raises risks around intellectual property (IP) theft or unauthorized replication. Legal protections vary widely between countries, requiring brands to carefully select partners that respect confidentiality agreements and IP laws.Communication Barriers: Language differences, time zone gaps, and cultural misunderstandings can lethargic down problem resolution or guide to misinterpretation of specifications. These barriers demand robust project management skills and sometimes local representatives to bridge gaps effectively.Longer guide Times & Shipping Delays: Offshore production often involves extended guide times due to shipping logistics. Unexpected customs delays or transportation disruptions can jeopardize timely delivery, impacting inventory management and customer satisfaction.Navigating these factors successfully requires a balanced approach — leveraging cost advantages while mitigating risks associated with quality control and intellectual property protection in outsourcing clothing manufacturing.4. Choosing the Right Manufacturing Partner: Key Considerations for Business OwnersWhen selecting a manufacturing partner, business owners must carefully evaluate key factors to ensure a successful partnership and high-quality production. Here are some crucial considerations to keep in mind:1. LocationThe geographical location of your manufacturing partner can impact shipping costs, delivery times, and communication efficiency. Proximity to your business can guide to faster shipping and easier site visits for quality inspections.2. Cost StructureWhile cost is crucial, it should not be the sole determining factor. Evaluate the pricing structure of potential partners to ensure transparency and avoid hidden fees that could affect your budget in the lengthy sprint.3. Quality StandardsAssess the manufacturing partner’s track record for quality control and compliance with industry standards. Request samples and visit their facilities if feasible to evaluate their production processes firsthand.Effective Communication is Key:“obvious and consistent communication is essential for a successful outsourcing relationship. Utilize digital communication tools, regular progress updates, and open channels for feedback to ensure alignment on project goals and timelines.”Leveraging ERP Software:“Implementing Enterprise Resource Planning (ERP) software can streamline communication, track production progress, manage purchase orders, and enhance overall operational efficiency in outsourced manufacturing processes.”By prioritizing factors such as location, cost structure, and quality standards, along with maintaining effective communication practices and leveraging technology like ERP software, business owners can formulate informed decisions when choosing a manufacturing partner for apparel production.5. Ensuring Embroidery Quality Control Beyond Stitching TechniquesEmbroidery quality control goes far beyond simply examining the stitching on a finished garment. One of the most critical but often overlooked aspects is digitizing embroidery files. This process involves converting a design or logo into a digital format that embroidery machines can read and execute.What is Embroidery Digitizing?Embroidery digitizing is a technical mapping process, not just a straightforward image conversion. It requires understanding how to translate colors, shapes, and textures into stitch paths that machines pursue precisely. Each stitch type — whether it’s satin, fill, or sprint stitch — must be carefully planned to ensure durability and visual appeal.Digitizers formulate decisions about:Stitch direction: Influences the texture and flow of the embroidery.Stitch density: Affects the thickness and flexibility of the design.Underlay stitching: Provides bolster to avert fabric distortion.Sequencing: Determines the order stitches are placed for optimal results.Consequences of needy DigitizingWhen digitizing is done incorrectly or rushed, multiple quality issues can arise during production:Loose threads: Occur if stitch tension isn’t properly calibrated in the digitized file.Puckering: Happens when too many stitches are packed into a tiny area, causing fabric to collect or wrinkle.Skipped stitches: Result from improper stitch length or machine settings guided by needy digitizing.Distorted designs: When stitch paths don’t align with fabric grain or contours, logos can appear twisted or stretched.These problems directly affect both the aesthetic and longevity of embroidered apparel. Customers may notice imperfections that damage brand reputation and amplify return rates.How to Maintain High Embroidery Quality ControlWork with experienced digitizers who comprehend different fabrics and thread types.Request evaluate samples before full production runs to identify potential issues early.utilize software capable of advanced editing to fine-tune embroidery files.Maintain open communication between designers, digitizers, and production teams for feedback loops.Mastering embroidery digitizing empowers business owners to deliver consistent quality products that stand out in competitive custom apparel markets. The right attention to this technical process builds trust in your brand’s craftsmanship beyond just the visible stitches.For instance, personalized fashion accessories like baseball caps have become a popular choice for adding unique style through custom embroidery. Similarly, items such as birthday t-shirts serve as memorable keepsakes when personalized correctly.6. Understanding DTF Printing Process: A Guide for Business OwnersThe Direct-to-Film (DTF) printing method is changing the game in custom apparel production. This innovative process involves transferring designs onto a special film that adheres to the fabric using a heat press. Unlike other methods such as screen printing or direct-to-garment (DTG), DTF offers vibrant colors, intricate details, and durability on various garment types.How DTF Printing WorksThe DTF process begins with creating a design on a computer, which is then printed onto the film using a specialized printer with UV-curable inks. Afterward, the ink is cured under UV light. This method provides excellent color accuracy, consistency, and a soft feel on the fabric without compromising design intricacy.Benefits of DTF Printing for Business OwnersBusiness owners can significantly benefit from DTF’s versatility in handling complex designs, tiny production runs, and fast turnaround times compared to traditional printing methods like screen printing.Understanding the DTF printing process allows business owners to:Explore innovative design possibilitiesDeliver high-quality custom apparelMeet consumer demands efficiently7. Behind the Scenes of Branded Merchandise Production: From Design Approval to Final Product Finishing TouchesBy understanding each stage of the branded merchandise production process, business owners can oversee quality control measures more effectively, resulting in high-quality products that align with their brand image. This branded merchandise process not only involves cautious planning and execution but also plays a crucial role in enhancing employee pride through branded apparel which acts as a powerful tool in cultivating this pride and unity within a team. Moreover, branded signage serves as an essential tool in tiny business marketing, acting like a silent salesperson that promotes brand identity even when you’re not actively selling.Step-by-Step Breakdown of the Entire Process Involved in Producing Branded Merchandise1. Design ApprovalThe initial stage where concepts and designs are reviewed and approved before moving forward with production.2. Quality InspectionEnsuring that materials, colors, and stitching meet the brand’s standards and specifications.3. Final Product Finishing TouchesHooping: Securing the garment in an embroidery hoop for precise and accurate stitching.Trimming: Carefully removing excess threads to accomplish a clean and polished observe.Pressing: Applying heat and pressure to finalize the design and ensure durability.9. Leveraging Consumer Feedback for Continuous Improvement in Custom Apparel Production ProcessesConsumer feedback is crucial for the success of any business, especially in the apparel industry. Using insights from customers can greatly benefit custom apparel production processes. Here’s how business owners can formulate the most of consumer feedback:1. Social Media ListeningMonitor social media platforms like Instagram, Facebook, and Twitter to comprehend customer feelings, preferences, and trends.Analyze comments, reviews, and direct messages to collect valuable feedback on existing products and identify areas for improvement.2. Online SurveysDesign targeted online surveys to collect specific feedback on aspects such as product design, quality, pricing, and customer assistance.utilize survey data to identify patterns, preferences, and pain points shared by customers to inform decision-making in the production process.3. Feedback IntegrationIntegrate consumer feedback into the design and development phases to tailor products to meet customer needs and expectations.Continuously iterate based on feedback received to ensure that products remain relevant and appealing to target audiences.By actively listening to customers through social media engagement and structured surveys, business owners can gain valuable insights that drive continuous improvement in custom apparel production. This iterative approach not only enhances product quality but also fosters stronger customer relationships based on responsiveness and adaptability to consumer preferences.Moreover, understanding the significance of custom branded apparel as a marketing powerhouse can further amplify these efforts. By becoming a walking advertisement for their brand through items like custom embroidered hats, businesses can leverage these consumer insights not just for product improvement but also for effective brand promotion.ConclusionIt’s essential for business owners to go beyond surface-level understanding and actively engage with their partners throughout the entire apparel production voyage. This not only fosters better relationships but also ensures that the final product aligns with the brand’s vision.Moreover, by turning ‘behind the stitch’ knowledge into a competitive advantage, businesses can significantly elevate their brand’s image in the market. For instance, incorporating embroidered polos or custom embroidered hoodies into their branding plan can transform their corporate image and act as a powerful marketing tool. These apparel items not only represent the company’s identity but also reflect its values and professionalism. Ultimately, embracing these strategies can set a brand apart in today’s competitive market.FAQs (Frequently Asked Questions)What are the common challenges business owners face in apparel production?Business owners often encounter challenges such as adapting to rapidly changing consumer demands, managing tight production schedules, and sourcing materials that balance affordability with high quality to stay competitive in the apparel industry.How does technology improve custom apparel production?Technology revolutionizes custom apparel production by streamlining processes through automation and implementing traceability systems, which enhance efficiency, ensure timely delivery, and maintain consistent product quality.What are the advantages and risks of outsourcing clothing manufacturing?Outsourcing clothing manufacturing offers benefits like cost savings and increased flexibility. However, it also presents challenges including maintaining stringent quality control standards and protecting intellectual property rights throughout the production process.What should business owners consider when choosing a manufacturing partner for apparel production?Key considerations include evaluating suppliers based on location, cost structure, and quality standards. Effective communication and relationship management are also critical to ensuring a successful outsourcing partnership in apparel manufacturing.Why is embroidery digitizing crucial for embroidery quality control beyond stitching techniques?Embroidery digitizing is a technical mapping process essential for translating designs accurately into stitches. needy digitizing can cause stitch quality issues such as loose threads and puckering, affecting the overall quality of embroidered apparel.How can business owners leverage consumer feedback to improve custom apparel production?Business owners can utilize social media platforms and online surveys to collect valuable consumer insights. This feedback facilitates continuous improvement in custom apparel production processes, helping brands better meet market demands and enhance product quality.

Posted on

Behind the Stitch: What 99% of Business Owners Don’t Know About Apparel Production

Apparel production is far more complex than most business owners realize. Behind every custom apparel piece lies a web of detailed processes, from fabric sourcing and design interpretation to advanced techniques like DTG prep and embroidery digitizing. Each step demands precision to maintain quality and uphold the brand’s reputation.Many entrepreneurs focus on the final product’s look but overlook the intricate systems that ensure consistency, durability, and customer satisfaction. Challenges such as managing tight production schedules, selecting materials that balance cost with quality, and coordinating with manufacturing partners require deep industry knowledge.Behind the Stitch: What 99% of Business Owners Don’t Know About Apparel Production reveals these hidden complexities. Understanding these subtleties empowers business owners to make informed decisions that protect their brand image and deliver high-quality products.Custom apparel success depends not only on creative design but also on mastering the production journey. This knowledge helps avoid costly mistakes, reduces delays, and builds trust with customers who expect excellence every time.However, it’s crucial to remember that logo placement plays a critical role in branding that often gets overlooked. Where your logo sits on custom apparel can significantly influence how your brand is perceived.In this digital age, Artificial Intelligence is also reshaping the landscape of custom apparel. It’s moving beyond traditional mass production towards personalized clothing experiences.Moreover, small businesses face the challenge of ensuring their brand remains memorable to customers. As discussed in our article about why customers forget your brand, staying visible isn’t just nice — it’s necessary. Good custom clothes and signs can significantly help in maintaining this visibility.1. The Hidden Challenges of Apparel ProductionThe apparel industry challenges run deep and wide, often hidden beneath the surface of finished garments seen by customers. Business owners constantly navigate a maze of obstacles that can disrupt production flow and affect product quality.Adapting to Ever-Changing Consumer DemandsConsumer preferences shift rapidly. Trends evolve seasonally or even monthly, forcing manufacturers to be agile and responsive. What was popular last season might become outdated quickly, requiring constant market research and flexible production plans. This dynamic environment puts pressure on designers and production teams to innovate while keeping costs manageable.Managing Tight Production SchedulesDeadlines in apparel production are notoriously strict. Retail seasons, promotional campaigns, and shipping windows create tight timelines with little room for error. Delays anywhere — from fabric delivery to final inspections — can cascade into missed launch dates and lost sales opportunities. Efficient scheduling, clear communication between teams, and contingency planning become essential tools for meeting these deadlines consistently.Importance of Material SourcingSourcing materials introduces another layer of complexity. Affordable fabrics and trims with consistent quality are vital for maintaining a competitive edge, especially for startups or small brands with tight budgets. However, cheaper materials often come with risks such as inconsistent texture, color variations, or durability issues that can harm the brand’s reputation.Challenges in material sourcing include:Finding suppliers who meet both price targets and quality standardsEnsuring reliable lead times to avoid production delaysVerifying ethical and sustainable sourcing practices as consumer awareness growsA careful balance is needed between cost savings and product excellence. Brands that invest time in building strong supplier relationships often gain more stability in their supply chain.“The true test in apparel production lies not just in making clothes but managing the intricate web of supply chain demands, timelines, and shifting consumer tastes.”These challenges shape every stage of apparel manufacturing and underline why business owners must look beyond the surface to fully grasp what it takes to deliver high-quality products on time. To navigate through this complex landscape successfully, it’s crucial for stakeholders to explore strategies such as reimagining the apparel value chain amid volatility, which can provide valuable insights into overcoming these hurdles effectively.2. How Technology Transforms Custom Apparel ProductionThe fashion tech in apparel production has changed how custom garments are designed, made, and delivered. This change isn’t just about being faster; it’s also about being more precise, consistent, and adaptable — key qualities needed to meet today’s consumer expectations.Making Processes More Efficient with AutomationAutomation is crucial in custom apparel production because it reduces manual labor and minimizes mistakes. Machines now handle repetitive tasks like cutting fabric, sewing basic seams, and even intricate embroidery patterns with impressive accuracy. This shift towards automation results in:Faster production cycles without sacrificing qualityReduced human error that can lead to expensive reworksConsistent output that meets exact specifications every timeFor instance, automated cutting machines use computer-aided design (CAD) files to precisely slice through fabric layers according to the pattern. This not only eliminates material waste but also ensures uniformity across batches.Improving Transparency with Traceability SystemsTraceability systems provide a digital record of every step in the production process — from sourcing raw materials to shipping the finished product. These systems assist business owners by:Tracking inventory levels in real-timeMonitoring each stage of manufacturing to catch delays or defects early onEnsuring compliance with quality standards and regulatory requirementsSuch transparency empowers brands to maintain control over their supply chains and respond swiftly if any issues arise. For example, if a batch of fabric is found defective, traceability allows pinpointing exactly where it was used, preventing widespread product recalls.Ensuring Timely Delivery through Automation and TraceabilityCombining automation with traceability creates a powerful synergy that guarantees timely delivery and consistent quality. Automated workflows paired with detailed tracking enable manufacturers to optimize scheduling, reduce bottlenecks, and provide accurate updates to clients.Businesses that leverage these technologies gain competitive advantages by offering reliable turnaround times while maintaining high-quality standards — two critical factors in today’s fast-paced apparel market.The impact of technology in apparel production goes beyond mere convenience; it reshapes entire workflows and elevates the potential for custom apparel brands to thrive under increasing consumer demands.For example, the rise of custom products like custom tumblers or custom trucker hats showcases how technology has enabled businesses to cater to specific customer preferences effortlessly. Moreover, the ability to create custom embroidered hoodies or screen printed t-shirts not only enhances brand visibility but also provides customers with unique personal expression through fashion. Additionally, utilizing custom apparel as [wrap gifts](https://medium.com/@imprintconnect/production-ass3. The Pros and Cons of Outsourcing Clothing ManufacturingOutsourcing clothing manufacturing is a common strategy used by many apparel businesses aiming to scale operations without the heavy investment in local production facilities. Understanding the advantages and pitfalls of this approach is key for business owners navigating the complexities Behind the Stitch: What 99% of Business Owners Don’t Know About Apparel Production.Benefits of OutsourcingCost Savings: Offshore manufacturing often provides significant reductions in labor costs, which can lower the overall production expenses. Countries like Vietnam, Bangladesh, and Mexico offer competitive pricing due to lower wages and operational costs, making it easier for brands to maintain healthy profit margins.Increased Flexibility: Outsourcing allows businesses to adjust their production volume quickly based on demand fluctuations. Manufacturers abroad may have larger capacities or multiple facilities, enabling faster scaling up or down without the burden of fixed overhead costs.Access to Specialized Expertise: Many offshore manufacturers have decades of experience with specific types of apparel or fabrics. This expertise can improve product quality when paired with clear communication and standards from the brand owner.Challenges in OutsourcingQuality Control Challenges: Maintaining high-quality standards remotely is one of the biggest hurdles. Differences in manufacturing processes, materials, and worker skill levels can lead to inconsistencies such as stitching errors or fabric defects. Implementing strict quality assurance protocols and frequent factory audits becomes essential but also increases operational complexity.Protecting Intellectual Property Rights: Sharing designs and proprietary techniques with third-party manufacturers raises risks around intellectual property (IP) theft or unauthorized replication. Legal protections vary widely between countries, requiring brands to carefully select partners that respect confidentiality agreements and IP laws.Communication Barriers: Language differences, time zone gaps, and cultural misunderstandings can slow down problem resolution or lead to misinterpretation of specifications. These barriers demand robust project management skills and sometimes local representatives to bridge gaps effectively.Longer Lead Times & Shipping Delays: Offshore production often involves extended lead times due to shipping logistics. Unexpected customs delays or transportation disruptions can jeopardize timely delivery, impacting inventory management and customer satisfaction.Navigating these factors successfully requires a balanced approach — leveraging cost advantages while mitigating risks associated with quality control and intellectual property protection in outsourcing clothing manufacturing.4. Choosing the Right Manufacturing Partner: Key Considerations for Business OwnersWhen selecting a manufacturing partner, business owners must carefully evaluate key factors to ensure a successful partnership and high-quality production. Here are some crucial considerations to keep in mind:1. LocationThe geographical location of your manufacturing partner can impact shipping costs, delivery times, and communication efficiency. Proximity to your business can lead to faster shipping and easier site visits for quality inspections.2. Cost StructureWhile cost is important, it should not be the sole determining factor. Evaluate the pricing structure of potential partners to ensure transparency and avoid hidden fees that could affect your budget in the long run.3. Quality StandardsAssess the manufacturing partner’s track record for quality control and compliance with industry standards. Request samples and visit their facilities if possible to evaluate their production processes firsthand.Effective Communication is Key:“Clear and consistent communication is essential for a successful outsourcing relationship. Utilize digital communication tools, regular progress updates, and open channels for feedback to ensure alignment on project goals and timelines.”Leveraging ERP Software:“Implementing Enterprise Resource Planning (ERP) software can streamline communication, track production progress, manage purchase orders, and enhance overall operational efficiency in outsourced manufacturing processes.”By prioritizing factors such as location, cost structure, and quality standards, along with maintaining effective communication practices and leveraging technology like ERP software, business owners can make informed decisions when choosing a manufacturing partner for apparel production.5. Ensuring Embroidery Quality Control Beyond Stitching TechniquesEmbroidery quality control goes far beyond simply examining the stitching on a finished garment. One of the most critical but often overlooked aspects is digitizing embroidery files. This process involves converting a design or logo into a digital format that embroidery machines can read and execute.What is Embroidery Digitizing?Embroidery digitizing is a technical mapping process, not just a straightforward image conversion. It requires understanding how to translate colors, shapes, and textures into stitch paths that machines follow precisely. Each stitch type — whether it’s satin, fill, or run stitch — must be carefully planned to ensure durability and visual appeal.Digitizers make decisions about:Stitch direction: Influences the texture and flow of the embroidery.Stitch density: Affects the thickness and flexibility of the design.Underlay stitching: Provides support to prevent fabric distortion.Sequencing: Determines the order stitches are placed for optimal results.Consequences of Poor DigitizingWhen digitizing is done incorrectly or rushed, multiple quality issues can arise during production:Loose threads: Occur if stitch tension isn’t properly calibrated in the digitized file.Puckering: Happens when too many stitches are packed into a small area, causing fabric to gather or wrinkle.Skipped stitches: Result from improper stitch length or machine settings guided by poor digitizing.Distorted designs: When stitch paths don’t align with fabric grain or contours, logos can appear twisted or stretched.These problems directly affect both the aesthetic and longevity of embroidered apparel. Customers may notice imperfections that damage brand reputation and increase return rates.How to Maintain High Embroidery Quality ControlWork with experienced digitizers who understand different fabrics and thread types.Request test samples before full production runs to identify potential issues early.Use software capable of advanced editing to fine-tune embroidery files.Maintain open communication between designers, digitizers, and production teams for feedback loops.Mastering embroidery digitizing empowers business owners to deliver consistent quality products that stand out in competitive custom apparel markets. The right attention to this technical process builds trust in your brand’s craftsmanship beyond just the visible stitches.For instance, personalized fashion accessories like baseball caps have become a popular choice for adding unique style through custom embroidery. Similarly, items such as birthday t-shirts serve as memorable keepsakes when personalized correctly.6. Understanding DTF Printing Process: A Guide for Business OwnersThe Direct-to-Film (DTF) printing method is changing the game in custom apparel production. This innovative process involves transferring designs onto a special film that adheres to the fabric using a heat press. Unlike other methods such as screen printing or direct-to-garment (DTG), DTF offers vibrant colors, intricate details, and durability on various garment types.How DTF Printing WorksThe DTF process begins with creating a design on a computer, which is then printed onto the film using a specialized printer with UV-curable inks. Afterward, the ink is cured under UV light. This method provides excellent color accuracy, consistency, and a soft feel on the fabric without compromising design intricacy.Benefits of DTF Printing for Business OwnersBusiness owners can significantly benefit from DTF’s versatility in handling complex designs, small production runs, and quick turnaround times compared to traditional printing methods like screen printing.Understanding the DTF printing process allows business owners to:Explore innovative design possibilitiesDeliver high-quality custom apparelMeet consumer demands efficiently7. Behind the Scenes of Branded Merchandise Production: From Design Approval to Final Product Finishing TouchesBy understanding each stage of the branded merchandise production process, business owners can oversee quality control measures more effectively, resulting in high-quality products that align with their brand image. This branded merchandise process not only involves careful planning and execution but also plays a crucial role in enhancing employee pride through branded apparel which acts as a powerful tool in cultivating this pride and unity within a team. Moreover, branded signage serves as an essential tool in small business marketing, acting like a silent salesperson that promotes brand identity even when you’re not actively selling.Step-by-Step Breakdown of the Entire Process Involved in Producing Branded Merchandise1. Design ApprovalThe initial stage where concepts and designs are reviewed and approved before moving forward with production.2. Quality InspectionEnsuring that materials, colors, and stitching meet the brand’s standards and specifications.3. Final Product Finishing TouchesHooping: Securing the garment in an embroidery hoop for precise and accurate stitching.Trimming: Carefully removing excess threads to achieve a clean and polished look.Pressing: Applying heat and pressure to finalize the design and ensure durability.9. Leveraging Consumer Feedback for Continuous Improvement in Custom Apparel Production ProcessesConsumer feedback is crucial for the success of any business, especially in the apparel industry. Using insights from customers can greatly benefit custom apparel production processes. Here’s how business owners can make the most of consumer feedback:1. Social Media ListeningMonitor social media platforms like Instagram, Facebook, and Twitter to understand customer feelings, preferences, and trends.Analyze comments, reviews, and direct messages to gather valuable feedback on existing products and identify areas for improvement.2. Online SurveysDesign targeted online surveys to collect specific feedback on aspects such as product design, quality, pricing, and customer service.Use survey data to identify patterns, preferences, and pain points shared by customers to inform decision-making in the production process.3. Feedback IntegrationIntegrate consumer feedback into the design and development phases to tailor products to meet customer needs and expectations.Continuously iterate based on feedback received to ensure that products remain relevant and appealing to target audiences.By actively listening to customers through social media engagement and structured surveys, business owners can gain valuable insights that drive continuous improvement in custom apparel production. This iterative approach not only enhances product quality but also fosters stronger customer relationships based on responsiveness and adaptability to consumer preferences.Moreover, understanding the significance of custom branded apparel as a marketing powerhouse can further amplify these efforts. By becoming a walking advertisement for their brand through items like custom embroidered hats, businesses can leverage these consumer insights not just for product improvement but also for effective brand promotion.ConclusionIt’s essential for business owners to go beyond surface-level understanding and actively engage with their partners throughout the entire apparel production journey. This not only fosters better relationships but also ensures that the final product aligns with the brand’s vision.Moreover, by turning ‘behind the stitch’ knowledge into a competitive advantage, businesses can significantly elevate their brand’s image in the market. For instance, incorporating embroidered polos or custom embroidered hoodies into their branding strategy can transform their corporate image and act as a powerful marketing tool. These apparel items not only represent the company’s identity but also reflect its values and professionalism. Ultimately, embracing these strategies can set a brand apart in today’s competitive market.FAQs (Frequently Asked Questions)What are the common challenges business owners face in apparel production?Business owners often encounter challenges such as adapting to rapidly changing consumer demands, managing tight production schedules, and sourcing materials that balance affordability with high quality to stay competitive in the apparel industry.How does technology improve custom apparel production?Technology revolutionizes custom apparel production by streamlining processes through automation and implementing traceability systems, which enhance efficiency, ensure timely delivery, and maintain consistent product quality.What are the advantages and risks of outsourcing clothing manufacturing?Outsourcing clothing manufacturing offers benefits like cost savings and increased flexibility. However, it also presents challenges including maintaining stringent quality control standards and protecting intellectual property rights throughout the production process.What should business owners consider when choosing a manufacturing partner for apparel production?Key considerations include evaluating suppliers based on location, cost structure, and quality standards. Effective communication and relationship management are also critical to ensuring a successful outsourcing partnership in apparel manufacturing.Why is embroidery digitizing important for embroidery quality control beyond stitching techniques?Embroidery digitizing is a technical mapping process essential for translating designs accurately into stitches. Poor digitizing can cause stitch quality issues such as loose threads and puckering, affecting the overall quality of embroidered apparel.How can business owners leverage consumer feedback to improve custom apparel production?Business owners can use social media platforms and online surveys to gather valuable consumer insights. This feedback facilitates continuous improvement in custom apparel production processes, helping brands better meet market demands and enhance product quality.

Posted on

The 7 best 4th of July shirt ideas of 2025

generate a custom shirt with Klothing

Get started

Get ready to ignite your Independence Day sales with star-spangled 4th of July shirt ideas. 

From patriotic prints to ingenious slogans, we’ve curated a collection of designs that will have shoppers yelling, “Take my money!” 

Whether you’re a seasoned online merchant or just starting your eCommerce store, these trendy designs will spark some solemn profits.

Disclaimer

This post may contain affiliate links, which means we may earn a commission if you formulate a purchase through those links. This comes at no additional cost to you.

4th of July shopping: 2025 snapshot

86% of Americans plan to celebrate July 4th this year, and they’re looking for clothing for the occasion.

Nearly 31% of celebrators plan on buying novel patriotic gear, even though over half already own some.

The top-selling colors of the season are the classic red, white, and blue.

Selling 4th of July t-shirts is effortless and profitable with Klothing, thanks to our low prices and free design tools.

4th of July t-shirt ideas – 7 Money-making designs

Independence Day is just around the corner, so we’re sharing simple, adorable, and patriotic shirt designs for the large July parade. From the American flag to humorous quotes, you’ll discover inspiration for the patriotic Fourth of July t-shirts everyone will adore.

1. humorous 4th of July shirt ideas

humorous 4th of July shirt ideas add a playful twist to patriotic celebrations. consider quirky slogans like “I’m just here for hot dogs and fireworks” or “Red, white, and brew.” These shirts appeal to partygoers and barbecue enthusiasts, sprinkling humor into the festivities. 

Designs featuring witty illustrations or puns are perfect for those looking to stand out with a smile.

Etsy/CuTeesCustomShirts

Etsy/CuTeesCustomShirts

Etsy/Trezzl

Etsy/HandmadeTeeFunny

2. Cute 4th of July t-shirt ideas

Cute Fourth of July shirts feature whimsical designs and endearing messages. Picture adorable prints like little stars with smiley faces or charming animals dressed in patriotic attire. 

These shirts are great for families celebrating together, children’s parties, or anyone wanting to add a touch of sweetness to their holiday attire. They’re ideal for those who adore to spread joy and celebrate in style.

Etsy/PilarRoseBoutique

Etsy/LittleGlintDesign

Etsy/BibiApprel22

Etsy/CustomTeaShirt

3. Patriotic 4th of July shirt ideas

These July shirts capture the spirit of American pride with bold designs and iconic symbols. consider majestic bald eagles, waving flags, and well-known phrases like “Land of the Free” or “Home of the Brave.”

These shirts are fantastic for veterans, energetic military personnel, or anyone who wants to honor the nation’s heritage and American pride in style. They are ideal for parades, ceremonies, or everyday wear to showcase unwavering patriotism for the country.

Etsy/DavinciPrintShop

Etsy/PaperPrintSVG

Etsy/PaperPrintSVG

Etsy/TeeTaniumCo

4. Family 4th of July shirt ideas

These 4th of July family shirt ideas bring loved ones together in a coordinated style, making memories that will last a lifetime. Picture matching shirts with ingenious slogans like “America’s Favorite Family” or “United We Stand.”

These tee designs cater to all ages and are perfect for celebrating Independence Day, family reunions, picnics, and capturing festive moments in cherished photographs.

Etsy/CustomStationGifts

Etsy/TheDaveyBoutique

Etsy/SamsThreadsCo

Etsy/TheTeeSpotCrafts

5. Vintage American Independence Day shirt ideas

Vintage designs never go out of style, especially for Independence Day shirts. consider vintage fonts, faded flags, and classic Americana themes from the 1970s and 80s. These Fourth of July t-shirt ideas are perfect for nostalgics and trendsetters who desire to wear timeless looks with a modern twist. They’re the perfect attire for music festivals, parades, and relaxing summer days.

Etsy/TheDesertCats

Etsy/TrashTrollVintage

6. Graphic statement July Fourth tee ideas

Let bold visuals do the talking. Graphic tees with eye-catching imagery, such as fireworks explosions, dramatic bald eagle artwork, or creative USA maps, turn heads while expressing patriotism. Combine these visuals with powerful slogans or artistic textures to generate eye-catching Fourth of July t-shirts that drive sales and stand out at Independence Day BBQs.

Etsy/FunnyTshirtsUSA

Etsy/HappyCustomTee

Etsy/LydianCustomTee

Etsy/BBOWBOUTIQUE

7. Minimalist icon tees for Independence Day

Not everyone likes noisy prints. Some people prefer subtle, delicate expressions of patriotism. Minimalist tees feature simple line art, single icons such as stars or mini flags, and clean typography. These Independence Day shirts provide a refined option for those who celebrate with a modern or neutral aesthetic, making them ideal for Etsy sellers or boutique-style July Fourth clothing lines.

Etsy/SpunkyPineappleCo

Etsy/RoselinaStore

Etsy/CustomComfortColors

Etsy/IronandOakBotique

What makes a great 4th of July shirt design

A standout 4th of July shirt design matches the occasion and audience. Celebrate Independence Day in style with luminous colors, classic symbols, and catchy quotes, whether you’re planning to wear the Independence Day t-shirts or market them.

Colors

While red, white, and blue are the most popular 4th of July colors, don’t limit yourself. Explore tie-dye or luminous hues for a festive twist.

Symbols

Include Independence Day icons like stars, stripes, eagles, and flags. Don’t overlook Lady Liberty, the presidents, maps, or state symbols. Mix and match them to capture the essence of freedom and unity.

Quotes and slogans

Add historical quotes or craft a catchy novel slogan, stirring patriotism and laughter.

Disclaimer

Avoid IP infringement. Ensure your designs are original or appropriately licensed to avert legal issues. Respect intellectual property rights and generate with integrity.

Where to discover 4th of July shirt ideas

Before starting the design process, explore various online resources to spark fresh ideas for your Fourth of July t-shirt creations.

Marketplaces

verify out platforms like Etsy and eBay, where you’ll discover a wide range of best-selling Fourth of July t-shirts. Explore the top search results to discover trending designs, common color palettes, and popular slogans centered around freedom, patriotism, and summer fun.

Curated design collections

observe for blog posts, articles, and roundups that highlight creative Fourth of July t-shirt ideas – like the one you’re reading now. Don’t overlook to explore our blog for even more design tips, 4th of July marketing ideas, and seasonal inspiration tailored for print-on-demand sellers.

Design libraries

Browse royalty-free design resources on sites like Shutterstock, Freepik, or Vecteezy, which offer a huge selection of Fourth of July-themed graphics, icons, and templates. These are perfect for jump-starting your creative process or enhancing your final design.

AI

AI art generators like MidJourney, DALL·E, or Adobe Firefly can aid you produce completely unique and ingenious visuals for your t-shirts. Prompt them with ideas like “vintage American flag,” “cute 4th of July dachshund,” or “retro fireworks typography” to view what magic unfolds.

Professional designers

If you’re looking for something custom-made, consider hiring freelance designers on platforms like Fiverr, 99designs, or Upwork. A professional touch can take your Independence Day design from great to standout.

Why market Independence Day shirts?

Selling 4th of July shirts presents a lucrative opportunity for online merchants, with more than half the country celebrating freedom.

Not only that, the global custom t-shirt printing market is expected to reach $8.22 billion in 2024.

Customers eagerly seek out cute and fun t-shirts, making it an ideal time to unleash your creativity. Print on Demand lets you generate and market a large variety of designs that cater to this festive theme, maximizing your earning potential.

Why market 4th of July shirts with Klothing

desire to let your creativity shine and profit from eager shoppers looking for 4th of July shirts? Klothing offers the perfect platform to turn your design ideas into a fantastic source of income.

100% Free

There are no upfront costs when you market 4th of July t-shirts with Klothing. You only pay for production once a customer orders. 

No minimum order

overlook about minimum order requirements. market or order as few or as many 4th of July shirts as you desire, 

eCommerce integrations

Seamlessly link your Klothing account with leading eCommerce platforms like Shopify, Etsy, and eBay for effortless listing and order fulfillment.  

Huge product selection

Klothing has the biggest selection of t-shirts in the print-on-demand industry. opt for from styles for men, women, and children, made from various materials like cotton, polyester, and more.

How to bring your 4th of July tees to life

Step 1: Sign up for Klothing

Register with your email address to gain access to all of our services. Upgrade to Klothing Premium for up to 20% off all product prices.

Step 2: Pick a tee

Browse the Catalog of over 1,300 products, including tons of t-shirts, hoodies, hats, home decor, and accessories. opt for your favorite and click initiate designing.

fast tip

verify the Print Provider’s performance score when choosing a tee.

Step 3: Customize your design

utilize our Product Creator to upload your designs or craft novel ones from scratch. attempt out our free design tools, including the AI Image Generator, pattern maker, emoji-amiable text editor, and free graphics library. Click preserve once you’re done. 

Step 4: Order for yourself or list online

If you desire a t-shirt for yourself or friends to wear to a 4th of July celebration, go to the Orders tab, select generate order, then opt for Sample or Bulk depending on how many shirts you desire. 

Selling your tees online to aid others celebrate America in style? link your online store using our integrations for seamless listing and order management.

4th of July shirt ideas: Closing thoughts

Tees with patriotic colors, iconic symbols, and meaningful slogans are a great way to celebrate the 4th of July. Whether designed for individuals, families, Independence Day BBQ attendees, or colleagues, these timeless themes capture the spirit of the holiday. 

With Klothing’s wide product range and seamless eCommerce tools, bringing your Fourth of July designs to life is simple and hassle-free.

formulate it your way!

initiate designing

The post The 7 best 4th of July shirt ideas of 2025 appeared first on Klothing.

Posted on

Branded Apparel: Your Culture in Fabric Form

Branded apparel goes beyond being just a fashion statement; it is a powerful medium through which culture expresses itself. The clothes we wear convey messages about our backgrounds, beliefs, and affiliations. They serve as a platform for individuals and communities to showcase their values, transforming fabric into a representation of who they are.Every element of branded apparel, from its design to its colors and logos, carries significance. It tells a narrative — an ongoing narrative that embodies cultural heritage and personal identity.The Impact of Branded ApparelThe influence of branded clothing extends far beyond individual expression. It has the potential to shape businesses, redefine fashion trends, and communicate messages without uttering a single word.For instance:Custom embroidered hoodies have become invaluable assets for companies seeking comfort while establishing their unique brand identities.The emergence of custom trucker hats exemplifies how practical headwear has transformed into significant fashion statements and effective marketing tools.Furthermore, understanding the psychology behind color choices in branded apparel can enhance communication even before words come into play. The article on the psychology of color in branded apparel explores this fascinating aspect further.Practical Considerations for Custom ApparelWhen venturing into the realm of custom clothing, there are practical factors that can greatly impact your designs:Knowing the distinctions between various printing techniques can significantly influence the final outcome. Resources such as the insider’s guide to screen printing vs heat press transfers provide valuable insights in this regard.In today’s competitive market, it’s crucial to remain memorable for customers. The article on why customers overlook your brand and how to formulate sure they don’t offers useful strategies for maintaining brand visibility.Branded apparel is more than just clothing; it represents an intricate combination of culture, identity, psychology, and strategic marketing with lengthy-lasting effects.The Power of Branded Apparel in Shaping Company CultureBranded apparel serves as a powerful tool in shaping and reflecting the culture of a company. Here are some key points to consider:1. Reflection of ValuesBranded apparel acts as a visual representation of the values and beliefs held by a company. By incorporating company logos, mottos, or color schemes into clothing, employees become walking ambassadors for the organization’s culture. This is particularly effective when using embroidered polos, which blend professionalism with brand representation.2. Team BrandingUsing branded apparel for team branding not only fosters a sense of unity among employees but also creates a cohesive identity for the company. When team members wear matching apparel, it reinforces a sense of belonging and promotes teamwork. Custom apparel can be an excellent way to accomplish this, as it allows for personalization and creativity in design.3. Internal Branding StrategyImplementing internal branding through apparel requires thoughtful planning. Designing inclusive and diverse collections that cater to different preferences and sizes can aid ensure that every employee feels valued and included in the company culture. It’s essential to opt for the right printing type for your custom apparel to accomplish professional, lengthy-lasting results.Branded apparel is more than just clothing; it is a representation of your company’s ethos and values. By leveraging this powerful tool effectively, you can strengthen your company culture and generate a sense of unity among your team members. For instance, showing appreciation to employees with custom apparel gifts can boost their morale and foster loyalty towards the brand.Moreover, branded apparel has been proven to enhance employee pride, which is a cornerstone of organizational success. It drives motivation, teamwork, and brand loyalty.In conclusion, branded apparel is not just about clothing; it’s about creating a powerful corporate image that reflects your company’s values while fostering unity and pride among employees. Implementing an effective internal branding plan through branded apparel can significantly contribute to achieving these goalsCultural Identity and Representation in the Fashion IndustryThe Impact of Fashion on Personal and Cultural Identity FormationFashion has a profound influence on how individuals shape and express their personal and cultural identities. The clothing we opt for to wear can serve as a reflection of our values, beliefs, and affiliations, allowing us to visually communicate aspects of our identity to the world. Moreover, fashion plays a pivotal role in the construction of cultural identities, as specific styles, patterns, and colors often carry deep-rooted meanings tied to ethnic backgrounds and traditions.The Challenges of Cultural Appropriation in the IndustryOne significant issue that arises within the fashion industry is cultural appropriation — the adoption of elements from a marginalized culture by members of a dominant culture without proper acknowledgment or understanding. It is crucial for designers and brands to approach cultural influences with respect and authenticity, avoiding superficial representations that tokenize or stereotype communities. By engaging with diverse cultures in a thoughtful and inclusive manner, the industry can celebrate the richness of global heritage while honoring its origins.The require for Greater Diversity and Inclusivity in Clothing DesignsThe call for diversity and inclusivity in fashion has never been more urgent. Embracing a wide range of influences from various ethnic backgrounds not only promotes cultural appreciation but also fosters creativity and innovation within the industry. For instance, custom embroidered hoodies have emerged as a trend that allows brands to showcase unique designs while maximizing brand impact. By amplifying underrepresented voices and showcasing diverse perspectives through such designs, fashion can become a powerful platform for social modify and unity.In essence, the fashion industry wields immense power in shaping how individuals perceive themselves and others through clothing choices. By navigating issues like cultural appropriation with sensitivity and embracing diverse inspirations, fashion can authentically reflect the affluent tapestry of global cultures while promoting mutual respect and understanding.Balancing Individuality and Collectivism in Fashion TrendsThe fashion industry is a fascinating world where [mass-market brands](https://medium.com/@imprintconnect/why-4th-of-july-t-shirts-never-go-out-of-style-80a1e2af0461) dominate trends, while also influencing how society views individuality and social status. These brands often set the standard for what is considered fashionable, leading to a collective acceptance of certain styles. However, this mass adoption can generate tension with the desire for [individual uniqueness](https://medium.com/@stitch_my_garment/the-best-baseball-caps-to-personalize-in-2024-84064ab6f533), as people struggle to express their personal style through unique choices.The Rise of Personalized FashionThe rise of personalized fashion accessories, such as custom embroidered hoodies and baseball caps, reflects a growing trend towards embracing individual style. These items not only serve as a canvas for self-expression but also challenge the concept that branded clothing is solely a representation of social prestige or cultural identity. For example, custom hoodies have become a staple in both branding and personal expression, combining comfort with distinctive style.Infusing Personal Touch into WardrobesAdditionally, the popularity of personalized gifts like birthday t-shirts showcases how individuals are looking to add their personal touch to their wardrobe. This shift signifies a relocate away from the traditional view where fashion was mostly determined by mass-market trends. Instead, it opens up opportunities for individuals to generate their own space in the fashion world.The Ongoing Balance Between Collectivism and IndividualityUltimately, the relationship between collectivism and individuality in fashion trends is an ever-changing one. While mass-market brands continue to shape societal perceptions and trends, there is an undeniable shift towards valuing personal expression and individuality in fashion choices. This evolution not only allows for more diverse representations of style but also enriches the overall narrative of fashion as a medium for self-expression.Towards a More Ethical and Sustainable Future in Branded ApparelBranded apparel is evolving beyond mere fashion statements to embrace ethical sourcing, fair labor practices, and eco-amiable materials. This shift towards sustainability underscores a pivotal transformation in the industry, aligning clothing choices with personal values and environmental consciousness.1. Ethical Sourcing and Fair Labor PracticesBrands are increasingly scrutinized for their sourcing practices, emphasizing transparency and accountability in the supply chain.Adopting fair labor practices ensures that workers are treated ethically and paid fairly for their contributions.2. Eco-amiable MaterialsThe utilize of sustainable materials like organic cotton, recycled polyester, and hemp reduces the environmental impact of clothing production. This shift towards sustainable fashion highlights the industry’s reply to growing environmental concerns.Innovations in fabric technology pave the way for biodegradable textiles and closed-loop manufacturing processes. Moreover, there is a growing emphasis on creating a more sustainable textile supply chain, which includes sourcing materials responsibly and minimizing waste.3. Consumer Demand for SustainabilityConsumers are becoming more discerning, favoring brands that prioritize sustainability and ethical standards.This demand is reshaping the industry landscape, compelling companies to integrate sustainable practices into their core business strategies.As awareness grows regarding the ecological footprint of fashion, the emphasis on sustainable fashion practices and ethical clothing choices is reshaping the future of branded apparel. By embracing these principles, brands can not only meet consumer expectations but also contribute to a more responsible and environmentally conscious industry landscape.ConclusionEmbracing branded apparel is not just about wearing clothes; it’s about embodying a culture. It serves a dual purpose as both an individual statement and a collective symbol. Through clothing, we express our unique identities while also uniting with others who share our values and beliefs. Branded apparel transcends mere fabric; it weaves together community identity and personal expression into a tapestry of cultural significance.FAQs (Frequently Asked Questions)How does branded apparel serve as a representation of culture and identity?Branded apparel transcends mere fashion; it acts as a powerful tool for self-expression and cultural embodiment, allowing individuals and organizations to showcase their values, beliefs, and heritage through clothing choices.In what ways can branded apparel influence and strengthen company culture?Branded apparel reflects and reinforces a company’s core values by fostering team branding and a sense of belonging among employees. Implementing inclusive and diverse apparel collections can effectively bolster internal branding strategies that unify the workforce.What challenges does the fashion industry face regarding cultural identity and representation?The fashion industry grapples with issues like cultural appropriation and tokenization, which can undermine authentic representation. There is an increasing require for respectful incorporation of diverse ethnic backgrounds and greater inclusivity in clothing designs inspired by various cultures.How do mass-market brands impact individuality and collectivism in fashion trends?Mass-market brands dominate fashion trends, shaping societal perceptions of individuality and social prestige. This creates a tension between conforming to popular trends as part of a collective group and expressing personal style through unique clothing choices.Why is ethical and sustainable practice crucial in branded apparel today?Ethical sourcing, fair labor practices, and eco-amiable materials are becoming crucial as consumers align their clothing choices with personal values. Sustainable fashion practices in branded apparel respond to this demand, promoting environmental responsibility and social ethics.What dual role does branded apparel play within communities?Branded apparel functions both as an individual statement piece reflecting personal identity and as a collective symbol representing shared ideals within communities, thereby strengthening community identity while honoring individual expression.

Posted on

Custom Apparel in the Age of AI: What You require to comprehend

Artificial Intelligence (AI) is reshaping the landscape of custom apparel, moving beyond traditional mass production towards personalized clothing experiences. The integration of AI technology in custom apparel processes signifies a significant shift towards tailored and unique garments. This transformation not only enhances the efficiency of design and manufacturing but also revolutionizes the way consumers interact with fashion.The importance of AI-driven innovation in custom apparel cannot be overstated, as it brings forth a novel era of creativity, efficiency, and sustainability in the industry. For instance, AI-powered custom apparel technology opens doors to endless possibilities in creating personalized clothing that caters to individual preferences and styles.Whether it’s through screen printing, custom embroidered hats or personalized fashion accessories like baseball caps, AI is transforming how we perceive and engage with fashion.The Role of AI in Transforming Custom ApparelIn the world of custom clothing, artificial intelligence (AI) is changing the game by redefining how garments are created and tailored to suit individual tastes and body types. Thanks to state-of-the-art technology and AI-driven solutions, the process of customization has reached unprecedented levels of personalization and efficiency. Let’s delve deeper into the ways in which AI is revolutionizing custom apparel:1. Hyper-Personalization Through Biometric DataAI Leveraging Biometric Data: With the integration of biometric data, AI can generate hyper-personalized apparel that caters to the unique body shapes and preferences of consumers.Enhanced Design with Biometric Sensors: By incorporating biometric sensors, AI designs custom-fit clothing that not only fits perfectly but also enhances comfort and performance for the wearer.Revolutionizing Consumer Experience: Hyper-personalization through AI-driven biometric analysis revolutionizes how consumers engage with and experience custom apparel.Tailored Designs for Functionality: By analyzing fitness habits and biometrics, AI tailors designs to improve comfort and functionality, ensuring a bespoke experience for each individual.Optimized Sportswear: Examples abound of sportswear optimized by AI for individual movement patterns, showcasing how technology can enhance performance and comfort simultaneously.Through the innovative utilize of biometric data and advanced AI algorithms, custom apparel is no longer just about style — it’s about creating a personalized, tailored experience for each consumer. The combination of technology and fashion has opened up novel possibilities for how we view clothing design and wearability.Beyond clothing, this AI transformation also extends into other areas such as custom tumblers — offering high-quality personalized gifts. Similarly, custom trucker hats have evolved into significant fashion statements due to these advancements.Moreover, branding on custom apparel is becoming more strategic with insights from articles like Maximize Your Brand Impact: Top Logo Placement Ideas for Custom Apparel, highlighting the importance of logo placement in branding.Additionally, the customization process itself has become more artistic with methods such as screen printing. This technique is extensively discussed in the article From Blank Canvas to Custom Art: Interesting Facts About Screen-Printed T-Shirts, which showcases its significance in personal expression and branding.Finally, it’s worth noting that some trends in custom apparel such as 4th of July T-shirts remain timeless despite changing fashion dynamics.3. Fast Custom Shirts with AI TechnologyThe AI revolution continues to reshape custom apparel technology, particularly in the realm of fast custom shirts. Leveraging AI-powered design systems enables manufacturers to accomplish rapid apparel production without sacrificing quality or personalization. Traditional shirt production often involves lengthy cycles for design approval, sizing adjustments, and inventory management. AI streamlines each step by automating design generation and integrating on-demand manufacturing processes.Key advancements driving this revolution include:AI-powered design innovations that generate precise digital prototypes within minutes, reducing the back-and-forth typical of manual design.Real-time data analysis to minimize sizing errors, ensuring garments fit perfectly the first time.Automated cutting and printing systems synchronized with AI predictions to accelerate production lines.Benefits for both manufacturers and consumers are substantial:Faster product development cycles translate into fast turnaround custom gear delivery.Reduced inventory overhead as shirts are produced on demand based on verified customer specifications.Enhanced customer experience through immediate visualization tools and fast receipt of hyper-personalized apparel.This fusion of AI and on-demand manufacturing represents a paradigm shift — where speed meets customization — empowering brands to fulfill unique orders rapidly while maintaining high-quality standards. The ability to produce fast custom shirts with AI transforms fulfillment strategies, setting novel expectations for efficiency in the custom apparel industry.This technology is not limited to shirts alone. For instance, personalized embroidered polo shirts can also be produced rapidly using similar AI techniques, turning them into effective marketing tools for brands. Similarly, the trend of custom hoodies has been on the rise, offering unique styles along with comfort during colder months.Moreover, the concept of personalized gifts has gained traction, with items like a birthday t-shirt serving as unique and meaningful keepsakes that recipients cherish for years. Additionally, the exploration into intelligent textiles showcases how AI can further enhance personalized clothing experiences by integrating technology directly into the fabric. The potential applications of such advancements in areas like sustainable fashion also hint at a future where custom apparel not only meets individual preferences but also aligns with eco-amiable practices.4. Sustainability Benefits Enabled by Predictive AnalyticsThe AI revolution in custom apparel technology extends beyond personalization and speed. One of the most impactful innovations lies in its ability to drive sustainable apparel manufacturing through predictive analytics. By using large amounts of production data and consumer demand patterns, AI-powered design systems optimize material usage with remarkable accuracy.Key benefits include:Minimizing fabric waste: Predictive models forecast exact quantities needed, reducing excess cutting and leftover scraps that traditionally complete up as landfill.intelligent inventory management: Accurate demand predictions avert overproduction, a major contributor to environmental strain in the fashion industry.Eco-amiable fabrics AI integration: Algorithms recommend sustainable materials based on performance needs and environmental impact, promoting greener choices throughout the supply chain.These capabilities not only enhance efficiency but also significantly lower the carbon footprint associated with custom apparel manufacturing. The combination of highly personalized clothing production and sustainability goals shows how AI-powered design is changing industry standards — benefiting manufacturers by cutting costs and consumers by offering more eco-conscious options without compromising style or fit.Predictive analytics tools exemplify how key advancements driving the revolution, such as AI design innovations, contribute directly to responsible fashion practices that meet modern demands for sustainability.5. Enhancing Supply Chain Efficiency with Automated Quality ControlIn the AI revolution of custom apparel technology, automated quality control plays a crucial role in ensuring product consistency and monitoring supplier performance. Key advancements driving this revolution include:Automated Quality Checks: AI-powered systems conduct thorough quality inspections throughout the production process, reducing human error and ensuring high product standards.Improved Supplier Monitoring: By leveraging AI for supplier performance tracking, businesses can enhance transparency and accountability within their supply chain network.Consistency Across Products: Automated quality control mechanisms enable manufacturers to maintain consistency in product quality, ensuring that every item meets the desired standards.These advancements offer significant benefits for both manufacturers and consumers, such as:Reduced Sizing Errors: Automated quality control helps minimize sizing discrepancies, leading to a more accurate fit for customers.Faster Product Development: By streamlining quality checks through AI automation, manufacturers can speed up the production process and bring novel designs to market more rapidly.Enhanced Customer Experience: Consistent product quality resulting from automated inspections contributes to an improved customer experience, fostering brand loyalty and satisfaction.The integration of AI in supply chain optimization and automated quality control is transforming custom apparel production by driving efficiency and ensuring high-quality standards across the board.6. tiny Business Branding Powered by Personalized Marketing Content AutomationSmall businesses in the custom apparel space are experiencing an AI revolution that redefines how branding and customer engagement are executed. By using AI-powered design and personalized marketing content AI tools, these businesses can compete with larger brands through precise campaigns and highly personalized apparel offers.Key advantages include:Data-Driven Customer Insights: AI analyzes purchasing behavior, social media trends, and demographic data to craft marketing messages that resonate on an individual level. This reduces guesswork and improves campaign effectiveness.Automated Content Creation: From social posts to email newsletters, AI generates customized content tailored for diverse audience segments — freeing tiny teams to focus on plan and product innovation.Enhanced Brand Consistency: AI tools maintain consistent visual identity and messaging across platforms while adapting to specific customer preferences, strengthening brand recognition and loyalty.Faster Product Development Cycles: Integration with AI-driven design innovations accelerates prototyping of hyper-personalized apparel, allowing tiny businesses to swiftly respond to market demands without sacrificing quality.By adopting tiny business branding AI solutions, entrepreneurs unlock scalable marketing strategies tailored precisely to their target customers. This approach minimizes sizing errors and speeds up development timelines, creating a seamless loop between product innovation and consumer connection — a hallmark of how custom apparel technology is reshaping fashion commerce at every level.For instance, businesses can leverage custom apparel for tiny businesses as a growth plan. This not only includes hyper-personalized clothing but also extends to branded attire such as embroidered polos, which are essential in maintaining a powerful corporate image as highlighted in this article on elevating your corporate image with embroidered polo shirts.Moreover, the screen printing method plays a significant role in customizing t-shirts and hoodies for personal expression and branding, as detailed in this piece about screen-printed t-shirts.However, it’s crucial for these tiny businesses to ensure that their brand remains memorable. An insightful article discusses why customers overlook your brand and provides strategies to enhance brand recall.The Future of Custom Apparel with Design Automation: Preparing Businesses for Ongoing Technological AdvancementsDesign automation for apparel is reshaping how fashion brands approach creativity and production scalability. AI-driven systems can generate thousands of design variations based on initial concepts, enabling designers to explore innovative styles without the constraints of manual drafting. This automation accelerates the ideation phase, freeing creative teams to focus on refining unique elements rather than repetitive tasks.Key emerging trends include:Generative Design Algorithms: These algorithms analyze market trends, material properties, and consumer preferences to generate optimized patterns and color schemes. They enable rapid iteration cycles that adapt to shifting demands.3D Virtual Prototyping: Automated 3D modeling tools simulate fabric behavior and garment fit in virtual environments. Brands can assess aesthetics and functionality digitally before any physical samples are produced, reducing guide times and costs.AI-Powered Trend Forecasting Integration: Design automation platforms increasingly incorporate predictive analytics to suggest designs aligned with upcoming fashion movements. This synergy supports data-driven creativity that resonates with target audiences.Production scalability benefits from these technologies through streamlined workflows that link design directly to manufacturing. Automated pattern generation links seamlessly with cutting machines and sewing robots, minimizing human error and accelerating batch customization.Potential impacts on the industry include:Enhanced Creative Freedom: Designers leverage AI as a collaborative tool rather than a replacement, expanding their ability to experiment and innovate.Reduced Time-to-Market: Faster design cycles translate into quicker product launches, responding nimbly to consumer trends.Mass Customization at Scale: Automated processes formulate it economically viable to produce personalized apparel in larger volumes without sacrificing quality or uniqueness. For instance, Production Assistant Wrap Gifts using custom apparel can be a great way to demonstrate appreciation while also making the most of mass customization capabilities.Adaptation to design automation demands strategic investment in technology infrastructure and workforce upskilling. Businesses positioning themselves at this technological frontier stand to redefine competitive advantage through innovation-driven growth. Additionally, as oversized t-shirts become increasingly popular in the fashion and custom clothing industries, 8 tips for screen printing oversized t-shirts could provide valuable insights for brands looking to capitalize on this trend.ConclusionArtificial intelligence is bringing about a significant modify in the world of custom clothing. With the aid of AI, companies can improve personalization, streamline processes, and promote sustainability in the fashion industry. Embracing AI is not just a passing trend but an essential step towards being prepared for the future.As AI continues to reshape the custom apparel industry, it is crucial to stay informed about these developments in order to meet consumer needs and remain competitive in the ever-changing market.FAQs (Frequently Asked Questions)How is AI revolutionizing the custom apparel industry?AI is transforming custom apparel by shifting the focus from mass-produced clothing to hyper-personalized designs. It leverages biometric data and AI-powered design technologies to generate apparel tailored to individual body shapes, preferences, and fitness habits, enhancing comfort and functionality for consumers.What role does biometric data play in AI-driven custom apparel?Biometric data enables hyper-personalization by allowing AI to analyze individual body measurements and movement patterns. This integration results in custom-fit clothing that improves comfort and performance, particularly in sportswear optimized for unique fitness habits.How does AI technology enable faster production of custom shirts?AI facilitates rapid apparel production through on-demand manufacturing processes and AI-powered design innovations. This leads to faster turnaround times, reduced sizing errors, and an enhanced customer experience for manufacturers and consumers alike.In what ways does AI contribute to sustainability in custom apparel manufacturing?AI utilizes predictive analytics to optimize material usage during production, minimizing waste and promoting eco-amiable fabric utilize. These sustainability benefits aid manufacturers reduce their environmental footprint while maintaining high-quality personalized clothing.How does AI enhance supply chain efficiency and quality control in apparel manufacturing?AI improves supply chain efficiency by automating quality inspections and monitoring supplier performance. Automated quality control ensures product consistency, reduces errors, and streamlines the manufacturing process, benefiting both producers and consumers.How can tiny businesses leverage AI for branding and personalized marketing in custom apparel?tiny businesses can utilize AI-driven branding strategies by automating personalized marketing content based on customer data analysis. This approach helps tailor marketing campaigns to individual preferences, increasing engagement and driving sales in the competitive custom apparel market.

Posted on

Why 4th of July T-Shirts Never Go Out of Style

The Enduring Charm of 4th of July T-ShirtsThe 4th of July is one of the most crucial national celebrations in the United States. It celebrates the birth of American independence, a day full of history and pride. From fireworks to family cookouts, this holiday brings people together, united by shared values and traditions.The Role of Apparel in Expressing PatriotismClothing plays a crucial role in expressing patriotism on Independence Day. Wearing 4th of July T-shirts or patriotic apparel is more than just putting on an outfit — it’s a way to visually demonstrate pride in the nation’s heritage. Whether it’s a casual backyard party or a community parade, these shirts serve as walking statements of unity and freedom.Why T-Shirts Are the Preferred Choice for CelebratingT-shirts remain the go-to choice for celebrating this festive occasion for several reasons:Comfort: Lightweight and breathable, perfect for summer heat.Versatility: effortless to pair with shorts, jeans, or skirts.Affordability: Accessible price points for everyone.Customization: Options like humorous Fourth of July shirts, independence day t shirt designs, and even 4th of July shirts large and tall ensure everyone can discover the right fit and style. Custom apparel can also be used as wrap gifts to appreciate production assistants who play a critical role in various events.Availability: Searching “4th of July shirts near me” often leads to fast local finds for last-minute celebrations.These qualities keep 4th of July T-shirts a timeless staple year after year. The customizability factor also opens up avenues for unique expressions through screen printing techniques, which you can study more about here.Timeless Designs and Colors That Define 4th of July ShirtsThe heart of every 4th of July celebration beats in vibrant red white and blue shirts. These colors are more than just a palette — they represent the spirit, freedom, and unity of the nation. Bold reds reflect valor and bravery, pristine whites symbolize purity and innocence, while deep blues stand for vigilance and justice.Iconic Symbols on American Flag T-ShirtsIconic patriotic symbols play a starring role on many American flag T-shirts:Stars: Echoing the stars on the flag, often scattered or arranged in creative patterns.Stripes: Bold horizontal or vertical lines that instantly evoke the flag’s design.Fireworks: Bursting colors that capture the excitement of Independence Day nights.Uncle Sam: A classic figure embodying American pride and history.Statue of Liberty: A timeless emblem of freedom welcoming all with open arms.Blending Tradition with ModernityDesigners keep these symbols fresh by mixing traditional elements with modern aesthetics — vintage distressed looks paired with sleek minimalism, abstract interpretations of stars and stripes, or incorporating unexpected colors while honoring the classic trio. This blend keeps patriotic apparel appealing to all ages without losing its meaningful roots.The result is a perfect harmony between tradition and trend that ensures American flag T-shirts remain a staple year after year. However, it’s not just about T-shirts; other forms of apparel like custom hoodies also bear these timeless designs.Personalization Options for Unique StyleMoreover, these garments can be further personalized. For instance, opting for embroidered polos or choosing embroidered gifts adds a unique touch to your wardrobe or gift-giving experience.Catchy Phrases, Slogans, and Humor: Adding Character to Patriotic TeesWhen it comes to expressing patriotism through clothing, catchy phrases and slogans play a significant role in enhancing the impact of 4th of July shirts. These elements not only evoke a sense of national pride but also add character and personality to the design:1. Importance of SlogansSlogans like “land of the free” or “land that I adore” resonate deeply with individuals, encapsulating the essence of freedom and adore for one’s country. These powerful phrases link on an emotional level, making a bold statement through apparel.2. Design IntegrationDesigners skillfully intertwine classic fonts with graphic elements to generate visually striking compositions. The fusion of typography with iconic symbols such as stars, stripes, or eagles amplifies the message, making it visually appealing and memorable. This meticulous attention to detail is similar to what we view in custom embroidered hoodies, where quality materials and craftsmanship formulate a significant impact.3. Humorous ElementsIn recent trends, there has been a rise in incorporating humorous and witty phrases into traditional patriotic themes. These humorous additions bring a light-hearted touch to the seriousness of patriotism, infusing joy and laughter into the celebration.By blending these elements seamlessly, designers craft 4th of July shirts that not only showcase national pride but also add depth, charm, and individuality to the wearer’s style.Customizing Your Celebration: The Rise of Personalized 4th of July T-ShirtsPersonalized Independence Day shirts have transformed the way people express their patriotism. A custom 4th of July t-shirt offers more than just fabric and ink — it becomes a statement tailored to individual or group identity.Benefits of Custom 4th of July T-ShirtsUnique Expression: Personalization lets you showcase your own take on the holiday, whether that’s a family motto, hometown pride, or inside jokes only your crew understands.Memorable Keepsakes: These shirts turn into cherished memorabilia from gatherings, parades, or cookouts. Wearing the same design year after year recalls shared experiences and traditions.Perfect Fit for Any Event: From casual backyard barbecues to spirited community parades, personalized tees bring cohesion and spirit to any celebration.Standing Out in a CrowdGroups — whether families, businesses, or social clubs — utilize 4thofJuly custom t-shirts to generate instant recognition. Matching designs formulate it effortless for participants to spot one another and boost team morale.Custom graphics and slogans add visual impact that standard store-bought options can’t match. This distinction helps groups stand out in photos and reside events alike.Custom designs also allow for flexibility in style and messaging. Different fonts, colors, and layouts ensure every shirt fits its wearer’s personality while staying true to the patriotic theme. This blend of creativity and tradition keeps the spirit of Independence Day fresh and personal each year.In addition to custom t-shirts, other personalized items like custom tumblers and custom trucker hats are becoming popular choices for celebrations. These items not only serve functional purposes but also act as unique fashion statements or effective marketing tools.Moreover, the trend of personalization extends beyond clothing and tumblers. For instance, embroidered polo shirts can elevate your brand while providing a polished observe for any event.The customization process itself is fascinating. With methods like screen printing used widely in creating these personalized items (as detailed in this article about screen-printed t-shirts), it opens up a world of creative possibilities for individuals and groups alike.Finding the Perfect Fit for Everyone: large and Tall & Men’s Options in 4th of July ApparelWhen it comes to celebrating Independence Day in style, finding the perfect fit is key. Here’s why inclusive sizing and humor-infused designs are essential for a memorable 4th of July observe:1. Importance of Inclusive SizingOffering large and tall Fourth of July shirts ensures everyone can feel comfortable and confident while celebrating.Inclusive sizing options cater to a diverse range of body types, promoting inclusivity and ensuring everyone can participate in the festivities without worry.2. Popular Styles for MenMen’s options in 4th of July apparel not only focus on size inclusivity but also incorporate humor to add a fun twist to patriotic clothing.humorous men’s 4th of July shirts have gained popularity for their ability to combine style with a touch of lightheartedness, making them a hit at gatherings and events.However, it’s not just about t-shirts. Custom embroidered hoodies have become a staple in branding and personal expression, combining comfort, fashion, and functionality into one stylish package. These versatile garments not only provide comfort but also provide your brand a unique touch.Additionally, we shouldn’t overlook the impact of accessories. Embroidered hats are crucial for creating a powerful and recognizable brand identity. A well-designed piece of branded clothing not only acts as a mobile advertisement but also serves as a powerful tool to boost your business.By prioritizing inclusive sizing, offering humorous designs, and exploring the potential of custom embroidered apparel, individuals can discover the perfect 4th of July shirt or hoodie that not only fits well but also reflects their patriotic spirit in a fun and engaging way.Local Shopping Trends: The Convenience and Charm of Buying 4th of July T-Shirts Near YouSearching for a 4th of July t-shirt near me or a custom 4th of July t-shirt near me has become more than just a convenience — it’s part of a growing local shopping movement. Many people prefer to bolster community businesses when gearing up for Independence Day celebrations.Why opt for Local?Local shops often offer:fast turnaround times perfect for last-minute shoppers who realize they require something patriotic just days before the holiday.Personalized assistance that helps customers discover the right fit, design, and style without sifting through endless online options. This is particularly beneficial when seeking custom branded apparel which serves as a powerful marketing tool for businesses.Unique, locally-inspired designs that stand apart from mass-produced graphics available nationwide.Supporting Your CommunityChoosing nearby vendors doesn’t just ease the stress of holiday prep; it strengthens neighborhood economies. When you purchase local, your money stays in the community, helping tiny business owners thrive and generate jobs close to home.The Benefits of Brick-and-Mortar StoresBrick-and-mortar stores also provide a tactile experience. Being able to view fabric quality, attempt on shirts, and discuss customizations face-to-face adds confidence in your purchase. This tactile connection is something online shopping can’t replace, especially when selecting something as personal as a patriotic tee meant to be worn with pride.The Rise of No Minimum Order Custom ApparelFurthermore, the rise of no minimum order custom apparel has made it easier for tiny businesses and individuals to generate personalized garments, further enhancing the local shopping experience.Local shopping for 4th of July apparel blends convenience with community spirit — making it an appealing choice for many celebrating freedom in style.Beyond the Holiday: The Keepsake Value and Lasting Memories Associated with 4th of July ShirtsWearing the same [keepsake t-shirts](https://medium.com/@stitch_my_garment/why-a-birthday-t-shirt-can-formulate-the-perfect-gift-faf6e9411ffa) year after year during celebrations with loved ones holds a deep emotional value. These [memorable Independence Day apparel](https://medium.com/@imprintconnect/screen-printing-vs-heat-press-transfers-which-ones-better-5b0f43147e72) pieces, often featuring one-of-a-generous designs, remind us of the content moments we’ve shared. The tradition of wearing 4th of July T-shirts not only enhances the festive atmosphere but also strengthens family connections, making each celebration even more meaningful.Celebrate Freedom with Style: Timeless Patriotic Apparel That Never Goes Out Of Fashion!When it comes to celebrating Independence Day with style, timeless patriotic apparel like 4th of July T-shirts or custom hoodies never go out of fashion. By choosing designs that hold personal significance and express your unique patriotism, you can formulate a statement that resonates year after year.Opt for pieces such as custom hoodies that reflect your values and beliefs, ensuring that your clothing choices not only showcase your adore for your country but also reflect your individuality and spirit.Additionally, personalized fashion accessories like baseball caps are on the rise, allowing individuals to express their unique style like never before. Celebrate freedom in style with apparel and accessories that stand the evaluate of time.FAQs (Frequently Asked Questions)Why are 4th of July T-shirts a popular choice for Independence Day celebrations?4th of July T-shirts are a popular choice because they offer a comfortable and expressive way to showcase patriotism during Independence Day. Their casual style and vibrant designs formulate them ideal for festive events like parades, cookouts, and family gatherings.What colors and symbols are commonly featured on 4th of July shirts?Common colors on 4th of July shirts include vibrant red, white, and blue, symbolizing national identity. Popular design elements feature patriotic symbols such as stars, stripes, the American flag, fireworks, Uncle Sam, and the Statue of Liberty, often with modern twists to keep the designs fresh.How do catchy phrases and humor enhance 4th of July T-shirts?Catchy slogans like “land of the free” or “land that I adore” evoke powerful patriotic feelings, while humorous and witty phrases add character and humor to traditional themes. Designers skillfully combine classic fonts with graphic elements to generate impactful and memorable apparel.What are the benefits of customizing your own 4th of July T-shirt?Customizing 4th of July T-shirts allows individuals and groups to celebrate uniquely by incorporating personalized designs. Custom shirts aid groups stand out during events such as parades and cookouts, fostering a sense of unity and personal expression.Are there inclusive sizing options available for 4th of July apparel?Yes, inclusive sizing such as large and tall options are available to ensure comfort and confidence for all wearers. These styles often cater to men with larger sizes while incorporating humor and patriotic themes to suit diverse preferences.Why is buying 4th of July T-shirts locally becoming more popular?Local shopping for 4th of July T-shirts is growing in popularity due to its convenience for last-minute purchases and the opportunity to bolster community businesses. It also adds a charming local touch to Independence Day celebrations.

Posted on

From Blank Canvas to Custom Art: Interesting Facts About Screen-Printed T-Shirts

Screen printing is a popular method for customizing t-shirts and hoodies, which are essential for personal expression and branding. It plays a significant role in apparel decoration and branding.In this article, we will explore:The history of screen printingVarious techniques used in screen printingDifferent types of inks used in the processThe impact of fabric on screen printingUnique facts about screen printing1. The History of Screen-Printed T-ShirtsScreen printing, also known as silk screening, has its origins in ancient China. However, it wasn’t until the early 20th century that this method became popular in the Western world. Today, it’s effortless to discover local and custom screen printing services for personalized and creative t-shirt designs by searching for ‘screen printing near me’.The Evolution of Screen PrintingThe evolution of screen printing into textile printing, especially in the form of silk screening, marked a significant shift towards mass customization in apparel. This process became a cornerstone in promotional apparel and custom fashion, allowing brands and individuals to express their unique identities through wearable art.The Growing Popularity of Custom Branded ApparelIn addition to t-shirts, custom branded apparel like personalized baseball caps are becoming increasingly popular. These items not only serve as a fashion statement but also as effective marketing tools. With techniques such as screen printing, it’s easier than ever to generate unique designs that reflect individual or brand identity.novel Avenues for Self-ExpressionMoreover, the rise of personalized fashion accessories has opened up novel avenues for self-expression. For instance, personalized baseball caps have become a popular choice among individuals looking to add a personal touch to their style.Mastering the Art of Screen PrintingHowever, mastering the art of screen printing requires some knowledge and skill. There are several beginner tips for burning and exposing screens that can aid aspiring printers accomplish better results.The Significance of Custom Apparel and AccessoriesAs we relocate forward in this era of mass customization, it’s crucial to recollect that each piece of custom apparel or accessory is more than just a product; it’s a canvas for self-expression and brand representation.Whether it’s through a screen printed t-shirt or a custom embroidered hat that serves as a walking advertisement for your brand (source), these items play a crucial role in shaping our personal style and brand identity.2. The Art and Science Behind Screen PrintingScreen printing combines artistic creativity with scientific precision. Designers initiate with an original artwork or logo, which must be carefully prepared for transfer. This preparation involves separating the design into individual color layers, each assigned to its own screen.The typical screen printing process unfolds in these steps:Screen Preparation: A fine mesh screen is coated with a light-sensitive emulsion.Exposure: The artwork transparency is placed on the screen, then exposed to light, hardening the emulsion except where the design blocks it.Washing Out: Unexposed emulsion washes away, leaving a stencil of the design on the screen.Printing: Ink is pushed through the stencil onto the fabric using a squeegee.Curing: Printed shirts pass through heat to cure inks for durability.Texture emerges from this method as different ink types — plastisol, water-based or silicone — and curing techniques influence how ink sits on or bonds with fabric fibers. Plastisol inks generate a raised, glossy feel, while water-based inks soak in for a softer touch. The curing temperature and time also affect ink texture and longevity, making each print a distinctive mix of technical skill and artistic intent.3. Types of Inks Used in Screen Printing and Their ImpactScreen printing utilizes various types of inks to accomplish different effects on garments. The three most common types are:Plastisol Ink:Pros: Vibrant colors, opaque on dim fabrics, lengthy shelf life.Cons: Can feel heavy on the fabric, not eco-amiable.Waterbased Ink:Pros: Soft feel on the fabric, eco-amiable.Cons: Limited color vibrancy, challenging on dim fabrics.Silicone Ink:Pros: Excellent stretchability, glossy complete.Cons: Limited color options, requires special curing process.Curing temperatures play a crucial role in ensuring the durability and quality of the prints. For instance, plastisol ink needs to be cured at around 330℉ for a lasting complete. However, issues like ink bleeding and migration can occur, especially when using certain inks on specific fabric types.4. Fabric Choices and Their Effect on Screen Printing QualityThe choice of fabric plays a crucial role in the final observe and durability of screen-printed designs.1. 100% CottonThe gold standard for screen printing. Cotton fibers absorb ink well, allowing for vibrant colors and keen details. Its natural texture provides an ideal surface that helps inks adhere without bleeding or migrating. Shirts made from 100% cotton also offer comfort and breathability, making them popular for custom apparel.2. Poly-Cotton BlendsBlending polyester with cotton introduces challenges, primarily ink migration. This occurs when plastisol inks seep into synthetic fibers differently than natural ones, causing blurred prints or color bleeding over time. Printers often adjust ink types and curing processes to minimize these effects but achieving the same crispness as on pure cotton is tougher.3. 100% PolyesterPolyester fabrics require special attention due to dye migration, where existing fabric dyes generate unwanted discoloration in the print area during curing. Water-based or discharge inks with low curing temperatures can aid reduce this issue. Polyester’s smooth surface can produce luminous prints but demands cautious handling to maintain quality.Knowing these fabric-specific traits ensures each design looks its best and lasts lengthy, regardless of material choice. For high-quality custom apparel decoration services including screen printing, consider Klothing Canada, your premier destination for personalized garments that elevate your business or brand.5. Durability and Maintenance of Screen-Printed T-ShirtsWhen it comes to the durability of screen-printed shirts, professional screen printing plays a crucial role. This process ensures permanent prints through the utilize of washable heat-treated inks, which are designed to withstand multiple washes without fading or cracking.However, achieving this level of durability requires stringent quality control in screen printing. During production, quality control measures are implemented to avert defects like fading or cracking that can compromise the longevity of the custom printed shirts.To maintain the durability of these shirts over time, it is essential to pursue certain care tips. These include washing them inside out, using cold water, and avoiding harsh detergents. By adhering to these guidelines, you can ensure that your custom printed shirts remain in excellent condition for years to come.6. Unique Characteristics That formulate Each Screen-Printed T-Shirt SpecialScreen printing combines precision with a human touch, resulting in unique variations in screen printing that distinguish every t-shirt. Even when using the same design and color palette, subtle differences emerge from manual steps like screen alignment, ink application pressure, and curing time. These slight inconsistencies generate one-of-a-generous characteristics that machines alone cannot replicate.1. Handcrafted individualityEach print carries tiny marks or texture shifts, evidence of skilled craftsmanship.2. Color depth and layeringVariations in ink density produce a vibrant surface that changes slightly from shirt to shirt.3. Texture nuancesThe feel of plastisol or water-based inks varies depending on how it’s applied, adding tactile uniqueness.This individuality adds value to custom apparel beyond mass-produced merchandise. Searching for a shirt shop near me often leads customers to local printers who celebrate these interesting facts about screen-printed t-shirts by offering truly personalized pieces. The result is wearable art that stands out because no two prints are exactly alike.These unique characteristics formulate screen-printed t-shirts an excellent option for special occasions. For instance, a birthday t-shirt can serve as a unique and meaningful gift concept. Personalized gifts like these are not only practical but also serve as memorable keepsakes that the recipient can cherish for years.Moreover, the process of creating these customized pieces involves meticulous planning and execution. This is where resources like the ultimate guide to making t-shirt mockups come into play, providing valuable insights for print shops looking to enhance their offerings.7. Artistic Influence — From Andy Warhol to Modern Custom DesignsAndy Warhol transformed silk screening from a commercial technique into a celebrated artistic process. His bold utilize of repetition and vibrant colors challenged traditional art norms, elevating screen printing’s status beyond mere reproduction. This artistic aspect of screen printing opened doors for creative expression on unconventional canvases — like t-shirts.Today, custom t-shirt designs echo this legacy by turning apparel into wearable art. Designers blend graphic elements, typography, and color theory to craft pieces that formulate personal statements or represent brand identities. Each print captures a moment of creativity, much like Warhol’s iconic Marilyn Monroe series.Creativity remains the driving force behind every custom shirt. The process goes beyond printing; it’s about capturing imagination and translating it onto fabric. The result is a unique fusion of art and fashion — each t-shirt becomes a canvas telling its own narrative, bridging pop culture with everyday wear in striking ways.This artistic influence is not limited to t-shirts alone; it extends to other apparel such as custom embroidered hoodies, which combine comfort, fashion, and functionality into one stylish package. They have become a staple in branding and personal expression, allowing businesses and individuals to showcase their unique style.Moreover, the trend of personalization has led to the rise of custom tumblers and custom trucker hats, both of which serve as versatile platforms for self-expression or brand representation. These items have evolved into more than just functional products; they are now significant fashion statements and effective marketing tools.In today’s dynamic market, the availability of no minimum order custom apparel stands as a beacon of flexibility and innovation. This approach allows tiny businesses and individuals to generate personalized garments without the pressure of large order quantities, further enhancing the scope for creativity and personal expression in the fashion industry.8. Screen Printing as a Business and Community ConnectorFamily-owned businesses like Klothing Canada stand at the heart of custom screen printing near me searches, offering more than just prints — they deliver personalized branding solutions. These local screen printing shops specialize in custom apparel decoration that goes beyond traditional screen printing. Services often include:Embroidery for detailed, textured logosHeat press applications for versatile designsDirect-to-garment (DTG) printing options alongside screen printingSupporting local screen printing shops near me means investing in community growth and tiny business success. These shops comprehend the unique needs of local clients, tailoring promotional t-shirt business strategies to fit budgets and branding goals. Their hands-on approach ensures quality control and a personal touch often missing from large-scale operations.Choosing local print shops encourages vibrant business ecosystems where relationships matter — each custom shirt becomes a reflection of community pride and entrepreneurial spirit. Moreover, these businesses also offer custom hoodies and embroidered hats, further enhancing their role as key players in the local economy while providing essential branding solutions for various businesses.ConclusionScreen printed t-shirts take blank fabric and turn it into a lasting personalized art piece. Each shirt carries layers of history, blending ancient techniques with modern science and artistic creativity. The process is more than just printing — it’s a precise craft involving fabric choices, ink chemistry, and skilled hands that formulate every design stand out.Custom t-shirts represent a unique personalized apparel experience.The voyage from design to wearable art reflects a affluent tradition combined with cutting-edge methods.Local and online printers bring this tradition to life, offering endless possibilities for individual expression.Explore custom options near you or through trusted online shops to generate your own unique garments. Embrace the fascinating world behind the scenes — where Interesting Facts About Screen-Printed T-Shirts become part of your everyday style. Additionally, consider expanding your wardrobe with custom embroidered hoodies, which not only provide comfort but also offer a unique branding opportunity for your business.FAQs (Frequently Asked Questions)What is screen printing and why is it popular for custom t-shirts?Screen printing, also known as silk screening, is a popular method for customizing t-shirts due to its ability to produce vibrant, durable designs. It balances artistic creativity and scientific precision, making it an essential technique in apparel decoration and branding.How did screen printing originate and evolve in t-shirt customization?Screen printing originated in ancient China as silk screening and gained popularity in the West during the early 20th century. It evolved into a staple technique for textile printing, becoming widely used for promotional apparel like The Wizard of Oz t-shirts and modern custom fashion.What types of inks are used in screen printing and how do they affect print quality?Common inks include plastisol, waterbased, and silicone inks. Plastisol ink is cured at around 330℉ for durability, while waterbased inks offer a softer feel. Ink choice impacts factors like texture, print longevity, and issues such as bleeding or migration on different fabrics.Which fabric types labor best for high-quality screen-printed t-shirts?100% cotton fabrics are preferred for achieving high-quality screen prints due to their compatibility with inks and reduced hazard of ink migration. Poly-cotton blends pose challenges with ink bleeding, while polyester requires special considerations because of dye migration concerns.How can I maintain the durability of my screen-printed custom t-shirts?Professional screen printing ensures permanent prints through washable heat-treated inks combined with strict quality control to avert fading or cracking. To maintain durability, pursue care instructions carefully, avoid harsh washing conditions, and handle shirts gently during laundering.What makes each screen-printed t-shirt unique compared to mass-produced apparel?Each screen-printed t-shirt features slight human variations during manual production steps, resulting in unique textures and design nuances. This individuality adds value by transforming plain fabric into personalized art pieces that stand out from mass-produced garments.

Posted on

The Ultimate Guide to Making T-Shirt Mockups for Your Print Shop in 2025

T-shirt mockups are essential tools for clothing brands and print shops. They allow for design testing, client approval, and effective marketing strategies.Key takeaway: This guide will delve into the ultimate methods to craft professional T-shirt mockups that enhance brand image and attract clients.Understanding T-Shirt MockupsT-shirt mockups are digital prototypes that demonstrate how a design would observe on an actual shirt. They are crucial for clothing brands and print shops during the design process because they allow for visualization and testing before production.Benefits of using T-shirt mockups include:Design Testing: Mockups enable designers to view how their creations appear on a shirt, helping them formulate necessary adjustments before finalizing the design.Client Approval: Presenting mockups to clients allows for feedback and approval before moving forward with production, ensuring alignment with the client’s vision.Marketing Purposes: High-quality mockups are essential for showcasing products on websites, social media, or promotional materials. They aid attract customers by presenting designs in a realistic and appealing manner.By understanding the importance of T-shirt mockups and using their benefits, brands and print shops can formulate their design processes more efficient, improve communication with clients, and enhance their marketing strategies.Exploring T-Shirt Mockup Options on Creativemarket.comWhen it comes to T-shirt mockups, Creativemarket.com is a fantastic resource with a wide range of options to enhance your designs. Let’s take a observe at the different types of mockups you can discover on this platform:1. Flat Lay MockupsThese templates feature a flat view of the T-shirt, perfect for showcasing your design in a clean and straightforward manner. Ideal for emphasizing intricate patterns or detailed graphics without distractions.2. On-Model MockupsFor a more realistic presentation, on-model mockups display your designs on human models. This style helps customers visualize how the apparel would observe in real life, offering a more relatable and engaging perspective.3. Scene Creator MockupsScene creator mockups allow you to craft custom scenes by combining different elements like backgrounds, accessories, and props. This versatility enables you to generate unique visuals tailored to your brand’s identity and target audience.When choosing the right mockup style on Creativemarket.com, keep these crucial factors in mind:1. Brand AestheticChoose a mockup that resonates with your brand’s visual style and message. Whether you prefer minimalistic sophistication or vibrant creativity, aligning the mockup with your brand identity is crucial for cohesive branding.2. Target AudienceTailor your choice based on your target demographic. For example, if your audience consists of youthful urban professionals, sleek and modern mockups might be more appealing. Understanding your audience’s preferences can guide you towards selecting the most effective mockup style.Exploring the wide range of options on Creativemarket.com empowers you to discover the perfect T-shirt mockup that not only showcases your designs effectively but also aligns with your brand essence and captivates your target customers.Customizing T-Shirt Mockup Templates in PhotoshopWhen customizing T-shirt mockup templates in Photoshop, one of the key features that can significantly streamline the process is the intelligent object feature. Here’s a breakdown of how you can formulate your T-shirt mockups stand out with professional customization:1. Utilize intelligent Objects for Effortless Design InsertionOpen your chosen T-shirt mockup template in Photoshop.Locate the intelligent object layer designated for design insertion.Double click on the intelligent object layer to open a novel window where you can place your design.Insert your design into this window and preserve the changes. Your design will now seamlessly integrate into the mockup template.2. Adjust Shirt Colors to Match Your Brand PaletteUse adjustment layers in Photoshop to tweak the colors of the shirt to align with your brand’s aesthetic.Experiment with different color combinations to discover the perfect match that enhances your design.3. Add Texture Overlays for a Realistic LookLayer texture overlays onto your design to provide it depth and a tactile feel.Play around with different textures like fabric patterns or distressed effects to generate a unique visual appeal.4. generate Realistic Lighting EffectsEnhance the overall observe of your T-shirt mockup by adding realistic lighting effects.Adjust highlights and shadows to mimic natural lighting conditions, making your design pop.By following these customization tips in Photoshop, you can elevate your T-shirt mockups to a professional level that resonates with your target audience and showcases your brand’s unique style.Enhancing Design Details in Your T-Shirt MockupsAdding dimension to the front designs on your t-shirts transforms a flat image into a lifelike representation that connects with viewers. A design that simply sits on top of a shirt photo can appear artificial, lacking the depth necessary to showcase your labor effectively. To generate more visual appeal and realism, focus on these key techniques:1. Incorporate Shirt TextureZoom in closely on your mockup and observe how the shirt’s fabric texture interacts with your design. Seamlessly blending this texture into your graphics makes the design observe like part of the garment rather than pasted onto it.2. utilize Layer Blending ModesPhotoshop offers blending modes such as Multiply, Overlay, or Soft Light. Applying these modes to your design layer allows the underlying shirt texture to subtly demonstrate through, mimicking the way ink adheres to fabric.3. Adjust Opacity for Highlights and ShadowsModifying highlight layers’ opacity around 68–70% softens harsh contrasts and enhances natural folds or creases in the shirt, giving dimension without overpowering the design.4. Simulate Screen Printing EffectsAim for a discharge print observe by integrating texture overlays that replicate ink absorption into cotton fibers. This method captures the tactile feel of real print processes and attracts clients seeking authenticity.5. opt for Realistic Mockup AnglesFlat lays are useful but often lack depth. Hanging or on-model templates introduce natural shadows and contours that emphasize dimensionality in your design.Applying these methods results in mockups where the shirt texture and printed design coexist naturally, offering a professional appearance that captivates clients and elevates your product presentation.Finalizing Your Professional T-Shirt Mockup DesignCompleting your T-shirt mockup involves precise exporting and thoughtful presentation. The objective is to produce a high-quality image that highlights your design while attracting your target audience.Exporting Designs as High-Resolution JPEGsUse Photoshop’s export feature to preserve the mockup in a format ideal for presentations, websites, or social media posts. The recommended steps include:preserve your labor: Press Command + S (Mac) or Ctrl + S (Windows) frequently to avert data loss.Close all unnecessary windows: Focus on the final mockup layer.Export settings: opt for File > Export > Export As, then select JPEG format.Set resolution to 300 dpi for print or high-quality digital display.Adjust quality slider to balance file size and image clarity — aim for 80–100% quality.Name your file clearly, incorporating product details or design names.This process ensures your mockup maintains vibrant colors and keen details, creating a professional impression every time.Creating a Branded Backdrop for Lifestyle PresentationDisplaying your mockup within a context that reflects your brand’s identity enhances its appeal. Consider these tips:Design or select backgrounds that match your brand’s color palette or style.utilize lifestyle images showing the T-shirt worn in an appropriate setting — urban scenes, casual hangouts, or sports environments depending on your target market.Add subtle branding elements like logos or taglines to reinforce brand recognition without overpowering the design.Employ Photoshop layers to seamlessly integrate the shirt into the backdrop, adjusting shadows and lighting for realism.A well-crafted branded backdrop transforms a simple mockup into an engaging visual narrative. This approach helps clients and customers envision how the apparel fits into their lifestyle, increasing connection and sales potential.Klothing Canada: Your Partner in Custom Apparel Decoration ServicesKlothing Canada is a family-owned business that specializes in custom apparel decoration services. They are passionate about bringing your brand’s vision to life through personalized garment solutions.With their expertise in various printing services, Klothing Canada can turn your ideas into high-quality, memorable products. Here are the printing methods they offer:Heat pressEmbroideryDirect-to-Garment (DTG)Screen printingEach method is executed with precision and attention to detail, ensuring every piece meets rigorous quality standards. Klothing Canada’s commitment to craftsmanship means your custom apparel looks professional and lasts through everyday wear.Customer satisfaction is a core value at Klothing Canada. They labor closely with clients to provide tailored recommendations and solutions, making them a trusted choice when searching for printing services near me. This hands-on approach guarantees that every order reflects the unique style and branding of your clothing line or print shop.For those looking to elevate their products, Klothing Canada offers not just assistance but partnership — helping you generate apparel that resonates with your audience and enhances your brand identity. Their family-operated ethos ensures personalized care from initiate to complete, setting them apart in the competitive world of custom apparel decoration.One of their signature programs, emphasizes a personalized, memorable experience that complements the process of learning How To formulate PROFESSIONAL T-Shirt Mockups For Your Clothing Brand Or Print Shop.Gildan Softstyle T-Shirt: A Top Seller Among Clients’ FavoritesThe Gildan Softstyle T-Shirt stands out as a top choice among customers at Klothing Canada. Renowned for its exceptional comfort and versatility, this tee has become a staple in many wardrobes. Customers consistently rave about the quality and durability of the Gildan Softstyle T-Shirt, making it a go-to option for various occasions.Here are some testimonials from delighted customers:“I adore how soft and breathable the Gildan Softstyle T-Shirt is. It’s perfect for everyday wear!” — Sarah M.“The fit of the Gildan Softstyle T-Shirt is fantastic. It maintains its shape wash after wash, which is impressive!” — John D.These glowing reviews highlight why the Gildan Softstyle T-Shirt continues to be a favorite among clients. Its blend of comfort, durability, and style makes it a reliable choice for anyone looking for a high-quality wardrobe staple that delivers on both comfort and performance.ConclusionCreating professional T-shirt mockups is a powerful step toward elevating your clothing brand or print shop’s presence. The techniques covered in this guide empower you to:Showcase your designs with realism and style that attracts clientsSave time using customizable templates tailored for your brandEnhance client approval through obvious, high-quality presentationsHigh-quality mockups not only reflect your creative vision but also construct trust and credibility with potential customers. They serve as essential tools for marketing, social media, and client communications — helping your business stand out in a competitive market.If you’re searching for a print shop near me or looking to develop your own standout apparel line, initiate applying these methods today. Your designs deserve the best presentation, and making professional mockups opens the door to greater success.Ready to take the next step? Reach out to Klothing Canada for expert custom apparel decoration services and watch your brand thrive.Call-to-action: initiate mastering How To formulate PROFESSIONAL T-Shirt Mockups For Your Clothing Brand Or Print Shop now and transform your creative ideas into compelling visuals!FAQs (Frequently Asked Questions)What are T-shirt mockups and why are they crucial for clothing brands and print shops?T-shirt mockups are digital templates that showcase your T-shirt designs in a realistic way, helping clothing brands and print shops visualize the final product. They are essential for design testing, gaining client approval, and enhancing marketing efforts by presenting professional visuals that elevate your brand’s image.Where can I discover different types of T-shirt mockup templates suitable for my brand?Creativemarket.com offers a wide variety of T-shirt mockup templates including flat lay, on-model, and scene creator styles. Choosing the right mockup depends on aligning with your brand aesthetic and target audience to effectively showcase your designs.How do I customize T-shirt mockup templates in Photoshop for professional results?You can customize T-shirt mockups in Photoshop by using the intelligent object feature to easily insert your designs. Additionally, adjust shirt colors, add texture overlays, and generate realistic lighting effects to enhance the overall observe and formulate your mockups more appealing.What techniques can I utilize to add dimension and realism to my T-shirt mockup designs?To add dimension, blend shirt textures seamlessly with your design elements to generate a screen-printed effect. Incorporate shadows, highlights, and texture overlays that mimic fabric details, making the front design appear more realistic and visually captivating.How should I finalize and export my professional T-shirt mockup designs?Finalize your design by exporting it as a high-resolution JPEG file suitable for presentations or online utilize. Consider creating a branded backdrop or lifestyle environment within the mockup to resonate with your target market and enhance brand recognition.What makes Klothing Canada a reliable partner for custom apparel decoration services?Klothing Canada is a family-owned business specializing in personalized apparel decoration with a powerful commitment to quality craftsmanship and customer satisfaction. They offer printing services tailored to meet diverse needs, making them an excellent choice for custom apparel solutions including popular products like the Gildan Softstyle T-Shirt known for comfort and durability.

Posted on

How to market SVG files on Etsy in 2025 (with tips from a Printify expert)

Custom products, global reach

initiate selling

Etsy has over 96 million buyers, making it the perfect place to market SVG files and earn passive income. Whether you’re a designer, crafter, or side hustler, selling digital files is a low-cost way to formulate money.

This guide covers how to market SVG files on Etsy, from choosing the right design software to pricing, SEO, and marketing tips. You’ll also discover expert tricks for creating high-quality SVGs and growing your shop into a profitable business.

Disclaimer

This post may contain affiliate links, which means we may earn a commission if you formulate a purchase through those links. This comes at no additional cost to you.

Key takeaways

SVG files are scalable vector graphics that don’t fail quality when resized, making them perfect for crafting, branding, and laser-cutting projects. Etsy buyers adore them for DIY projects, print-on-demand products, and digital art.

The only difference between selling digital and physical products on Etsy is that digital files don’t require fulfillment and shipping. Once uploaded, they can be sold unlimited times – great for earning passive income.

Creating SVG files is effortless. With software like Adobe Illustrator, Inkscape, or Affinity Designer, design and export high-quality SVGs to market. Many sellers initiate with simple cut files and expand as they improve their skills.

Bundles market better than individual files. Most top sellers on Etsy package multiple SVGs together, adding value and increasing their average order price. High-quality, well-organized SVG bundles can market for $20 to $50 or more.

SEO and marketing matter. Etsy is competitive, so optimizing your SVG listings with the right keywords, eye-catching mockups, and a powerful shop branding plan will aid attract more buyers and amplify sales.

What are SVG files and why market them on Etsy?

SVG files on Etsy are scalable vector graphics used for crafting, branding, and digital design. Unlike JPEG or PNG images, which fail quality when resized, SVG files are made of mathematical paths, allowing them to scale without pixelation.

They’re popular for logos, icons, fonts, illustrations, and cut files for CNC or laser-cutting machines.

Selling SVG files is a low-cost digital business with no inventory or shipping. They appeal to various buyers – entrepreneurs needing branding assets, DIYers crafting custom projects, and designers creating laser engraving templates. 

SVGs are especially valuable for print-on-demand products, from mugs to blankets, because they maintain sharpness at any size. With the right designs and SEO, selling SVG files can generate passive income on Etsy.

Tip

study more about how to market printables on Etsy on our blog.

How to market SVG files on Etsy in 4 effortless steps

Selling SVG files on Etsy differs from selling physical products. Let’s walk through the main steps for Etsy sellers.

initiate your Etsy print-on-demand business today with Klothing

1. Open an Etsy shop

Go to Etsy.com, sign in or generate an account, and navigate to market on Etsy to generate a seller account. 

opt for your shop name, set your language, country, and currency, and pursue the steps to generate your first listing – Etsy refunds the first $0.20 listing fee.

Next, add your payment and billing details (bank account or credit card). Verification may take a few days, so plan ahead before uploading multiple SVG files to your shop.

Tip

discover more information about how to market on Etsy on our blog.

2. Upload and list your digital file

Go to the Shop Manager in the upper-right corner. 

Click Listings on the left-hand menu, then Add a listing, in the upper-right corner.

Select Digital files to specify that you’re selling a downloadable.

Fill in the About section information – add a title, up to ten product photos, and one video.

generate mockups to utilize as product photos. Consider using mockups that demonstrate your design in real-life situations. For example, a DIYer looking at the computer with the SVG cut files you’re selling displayed on the screen.

Drag and drop your .svg files or click Add file. Upload up to five files of 20MB each.

Set up automatic renewal in Listings → Settings → Renewal options. Otherwise, the listing will appear out-of-stock every time someone purchases it.  

The next steps are the same as for creating a physical product. In the Description field, be sure to specify the purpose of your SVG designs and include any special instructions for printing or using them.

Tip

recollect to refine your Etsy SEO and your Etsy tags.

3. Set prices

Do a fast search on Etsy to view what top sellers are offering. This will aid you establish a range for your prices. SVG bundles and packs typically range from $1 to $15. While many individual designs market for around $1, specialized designs can market for much more.

utilize tools like eRank to analyze competitors’ pricing.

4. Publish and market your products

Before publishing, go to the Settings tab in your listing (or scroll down) and select the automatic renewal option. Without this, your listings will appear as Out of Stock after a sale. 

Double-verify everything, then click Publish.

Promote your listings by sharing them on your website, blog, social media, or other platforms.

For the latest Etsy marketing strategies, verify out our blog.

Other file formats

Etsy also supports .doc, .bmp, .ePUB, .gif, .iBook, .jpeg, .jpg, .mobi, .mov, .mp3, .mpeg, .pdf, .png, .psp, .rtf, .stl, .txt, and .zip. 

Expand your novel business by adding more files in different formats, from product designs and woodworking plans to children’s education content.

Tip

Explore how to market digital downloads on Etsy on our blog.

Best software for making SVG files

Choosing the right SVG software depends on your budget and design needs. Here’s a fast rundown of the best paid and free options:

Paid SVG software

The Adobe Creative Cloud ($59.99/month) has everything designers require to generate graphic elements, from thousands of assets to specialized applications like Adobe Illustrator – the go-to solution for creating and editing SVG files.

Tip

Get discounts on Adobe products with Klothing.

Affinity Designer 2 – A one-time purchase alternative with both vector and raster design capabilities. Costs $69.99 for Windows or Mac and $18.49 for iPad.

CorelDRAW by Alludo – A suite of vector design tools with AI-powered tracing. The Graphics Suite costs $549 (one-time) or $22.42/month, while Corel Vector is $69.99/year for hobbyists.

Canva Pro – A beginner-amiable option with basic vector editing and thousands of templates. Subscription starts at $15/month. Prices may amplify due to AI feature rollouts.

Free SVG software

Inkscape – A powerful open-source vector editor with professional features. Available for Windows, Mac, and Linux.

Vecta – A lightweight online editor with real-time collaboration and cross-platform bolster.

LibreOffice Draw – Part of the LibreOffice suite, this tool supports basic SVG editing and is free for Windows, Mac, and Linux users.

How to generate SVG files to market using Adobe Illustrator

Let’s take a observe at how to generate a simple text-based design to market online.

Klothing Expert tip

Besides text, you can generate custom shapes and utilize brushes in Illustrator. Once you’ve gained more confidence, experiment with Illustrator’s more advanced tools to take your designs to the next level.

Linda Vilumsone, Marketing Graphic Designer

Click on novel file or select a preset. We’ll utilize the “Common” option.

Select the Text tool (1), place the cursor where you desire and type (2). modify the font, select the size, or adjust other parameters (3). utilize the selection tool to relocate the design around (4).

Outline your text to transform it into a recognizable object with lines and points that other devices (including printing and cutting machines) can read. Select the text with the Selection tool.In the right-hand menu, opt for the tab Properties, then scroll down and hit the generate Outlines button.

Double-verify for spelling errors before outlining, as you can’t re-type the text later.

Insert graphic elements from Adobe libraries or local files.

Klothing Expert tip

Adobe Libraries has assets you previously saved to your Creative Cloud to formulate your own library. Click on the Libraries tab in the upper-right corner to access it. You may have to prepare the designs in your library to formulate them editable and preserve them in an SVG file.

Linda Vilumsone, Marketing Graphic Designer

For local files, simply drag and drop the asset to your design.

recollect to purchase the assets you’ve added to your library. Otherwise, you won’t have commercial usage rights, and the graphics will display a watermark.

Klothing Expert tip

formulate the image you desire to insert editable, and then preserve it. Open the asset separately, go to the Properties tab in the upper-right corner, and then utilize the Image trace tool and preserve it.

Linda Vilumsone, Marketing Graphic Designer

Return to your main image (re-insert the edited graphic element if necessary). utilize the selection tool to opt for both the text and the design. Then, in the Properties tab, click Group to formulate them into one element and relocate or resize the whole bunch without misplacing anything.

Ungroup the elements anytime by clicking the same button. This is useful, for instance, if you desire to modify the colors of letters individually.

When you’re satisfied with the results, preserve or export your file.

Klothing Expert tip

The safest option when creating an SVG file is to select all elements you desire in your design, click File (upper menu), select Export as, and opt for SVG as the file format. This ensures that only the selected elements are included in the SVG, preventing any other items on the Artboard from being added.

Linda Vilumsone, Marketing Graphic Designer

observe for detailed Illustrator tutorials that cover how to remove backgrounds, generate paths, and more.

FAQ: How to market SVG on Etsy

Do SVGs market well on Etsy?

Yes, SVG files market well on Etsy because they cater to various markets, including crafters, print-on-demand sellers, and tiny business owners. Popular categories include SVG cut files for Cricut and Silhouette machines, logo and branding elements, and artistic designs for t-shirts, mugs, and home decor. High-quality SVGs with obvious descriptions and powerful SEO optimization tend to perform best.

What is the best platform to market SVG files?

Etsy is one of the top platforms to market SVG files due to its massive customer base and built-in marketplace traffic. Other great platforms include Creative Market, Design Bundles, The Hungry JPEG, and Gumroad. Additionally, selling directly through a Shopify store or a personal website can provide more control over branding and pricing.

How do you formulate SVG files to market?

SVG stands for “scalable vector graphics.” To generate SVG files for sale, utilize vector-based design software like Adobe Illustrator, Inkscape, or Affinity Designer. pursue these steps:

generate a novel file with a transparent background.
utilize vector tools to design scalable graphics, ensuring clean lines and paths.
Outline text and strokes so they stay editable for buyers.
evaluate your file by opening it in multiple programs to ensure compatibility.
Export as an SVG file and optimize it for effortless utilize.
generate mockups and upload your file to Etsy or other platforms.

Can you market Canva SVG files on Etsy?

Canva allows Pro users to export designs as SVG files, but you require to ensure all elements (including fonts and graphics) are licensed for commercial utilize. If your design includes Canva-provided assets, verify Canva’s terms of utilize before selling. To ensure full rights, generate original designs or utilize elements with an extended commercial license.

Is selling SVGs profitable?

Yes, selling SVG files can be a profitable passive income stream since they are digital products with no inventory or shipping costs. Successful sellers often niche down, generate high-quality designs, optimize their listings with SEO, and market their products on Pinterest, social media, and Etsy ads. Bundling SVG files and offering customizable designs can amplify profitability.

How much money can you formulate selling SVG files on Etsy?

Most SVG files on Etsy are sold in bundles. Basic cut file packs or simple design sets often market for $1.50 to $10, while more detailed collections, such as laser-cutting plans, intricate layered designs, or specialized templates, can range from $20 to $50. Some premium SVG bundles with high-value content market for over $100.

Summary

We’ve gone over how to formulate SVG files to market on Etsy, including software options (paid and free), how to generate simple designs on Illustrator, and how to open an Etsy shop and upload your files. 

We’ve also explored additional ways to expand your SVG business, like adding other file types and POD products. 

Now it’s your turn – initiate making money selling SVG files. And recollect, you can always rely on your trusted partner in print, Klothing.

formulate it your way!

initiate designing

The post How to market SVG files on Etsy in 2025 (with tips from a Klothing expert) appeared first on Klothing.

Posted on

32 Creative poster ideas to attempt in 2025

generate what’s trending. market what’s hot

initiate designing

Looking for the best poster ideas to expand your brand with Print on Demand (POD)? 

Posters are a great way to showcase your skills, link with your audience, and turn your creativity into profit. 

This article will explore 32 fun poster ideas to inspire your next product. From travel-themed designs to motivational quotes and pop culture art, verify out these examples to aid drive your POD success.

Key takeaways

Design posters to match the preferences of your intended audience. 

Keep your poster design obvious and cohesive to draw attention to key details.

utilize complementary color schemes to formulate your posters visually appealing. 

Travel, retro designs, and motivational posters never go out of style.

utilize poster templates to simplify the design process and preserve time when working on your next poster.

32 great poster ideas

Poster designs come in all styles, but the key aligning visuals with what your audience loves. 

Whether it’s bold graphics with luminous colors that catch the viewer’s eye or minimalist posters, there’s plenty of room to experiment and generate prints that fly off the shelves.

Travel poster ideas

Travel posters are bestsellers and appeal to a wide audience, including travel agencies, hotels, and homeowners. Focus on eye-catching designs that highlight popular destinations or niche travel themes.

Here are some creative poster ideas to get started.

1. Famous landmarks poster ideas

Posters featuring iconic landmarks like the Eiffel Tower, the Great Wall of China, or the Taj Mahal never go out of style. 

These designs appeal to travelers, history enthusiasts, and anyone looking to add a worldly vibe to their space. 

Design posters of famous landmarks to serve as a centerpiece decor for homes, offices, or rentals.

2. World map poster ideas

World map posters appeal to a wide range of customers, including avid travelers, geography enthusiasts, families, and educators. 

They serve as both decorative pieces and functional tools, whether for tracking visited destinations or teaching kids about the continents.

Ranging from minimalist to detailed and artistic, these posters labor well in various contexts and formulate a great fit for homes, classrooms, or office spaces.

3. Bucket list destinations poster ideas

Bucket list destination posters are among the most creative poster ideas.

Often designed with scratch-off elements, they let customers mark visited locations – adding a fun, personal touch to the experience.

These are perfect for travel lovers, gift buyers, or anyone looking to incorporate a sense of adventure into their space.

4. Vintage travel poster ideas

Vintage travel posters bring a timeless charm to any space. 

Appeal to fans of elderly-school aesthetics with a poster design featuring retro fonts, warm colors, and postcard-like imagery. 

This type of creative poster is especially popular with collectors, interior designers, and boutique hotels looking to generate a cozy atmosphere and evoke nostalgia.

5. Travel quote poster ideas

Travel quote posters are a creative way to evoke a feeling of wanderlust with a cool poster design. 

formulate a statement about your adore for exploring the world and encourage others to step out of their comfort zones. 

It’s perfect for creating an inviting atmosphere in bookstores and souvenir shops.

Sports and fitness poster ideas

Sports and fitness posters are a great way to motivate, educate, and engage your audience.

Perfect for gyms, sports clubs, or home workout spaces, posters can feature workout plans, motivational messages, or athletes to aid people focus on their fitness goals.

6. Dedicated sports poster ideas

This poster example is perfect for fans who desire to demonstrate their passion for a favorite sport.

Great for decorating kids’ rooms, game rooms, or even sports bars, this poster design also works well for specialty sports shops.

Consider including action shots, team logos, or iconic moments in sports history.

7. Motivational fitness poster ideas

aid people focus on their goals and inspire them to stay energetic with this poster design.

Motivational posters are ideal for gyms and fitness studios. Feature powerful quotes or visuals that push individuals to keep going. 

A great motivational poster can draw attention and highlight themes like perseverance, power, and personal growth for all fitness levels.

8. Nutrition poster ideas

Nutrition posters are a practical tool for promoting healthy eating habits and educating people about balanced diets. 

These creative poster designs are great for gyms, schools, and wellness centers and can feature meal-planning tips, macronutrient breakdowns, or healthy food swaps.

formulate sure to research proper nutritional guidelines and include sound advice in your poster design.

9. Fitness routine poster ideas

Workout routine posters are an excellent way to guide and motivate people through their fitness voyage. 

Perfect for gyms or personal training studios, these posters can include step-by-step exercise plans, power training guides, or daily fitness schedules.

Offer obvious visuals and effortless-to-pursue instructions to aid people accomplish their goals.

10. Famous athlete poster ideas

Celebrate iconic figures or sports teams and appeal to fans worldwide.

These prints add vitality and character to a space by featuring legendary athletes, memorable sports moments, or inspirational quotes.

Whether you formulate a simple poster design or utilize bold font colors to capture creative ideas, these posters are perfect for kids’ rooms, gyms, schools, or sports bars.

Holiday poster ideas

Holiday prints are a great way to attract seasonal shoppers and enhance your earnings. These prints bring a festive spirit while being a profitable niche for sellers.

Perfect for individuals decorating their homes, businesses needing an event poster for an upcoming holiday sale or celebration, or gift buyers looking for unique items.

11. Festive holiday poster ideas

Festive holiday posters capture the spirit of the season and appeal to a wide audience, from families to businesses that desire to market their seasonal promotions. 

These designs can showcase traditional motifs, modern aesthetics, or playful themes, making them versatile and highly marketable.

12. Holiday countdown poster ideas

Countdown posters add excitement as people anticipate their favorite holiday. 

These prints are fun and serve practical purposes, whether for tracking the days until Christmas or building hype for seasonal sales and events.

Tip

verify out our article on how to initiate a stationery business.

13. Seasonal quotes poster ideas

Seasonal quote posters are a creative poster example combining positive messages with gorgeous designs, making them a popular choice for holiday decor or thoughtful gifts. 

From cheerful sayings like “Merry and luminous” to heartfelt wishes like “Peace and Joy,” these effortless poster ideas add meaning and warmth to any space. 

These simple poster ideas suit homes, offices, or retail displays and are an effortless way to bring seasonal charm.

Pop culture poster ideas

Pop culture posters tap into trending topics, iconic moments, and beloved figures, making them a hit with fans and collectors. 

From popular TV shows and movies to memes, music icons, and gaming references, these ideas for a poster provide endless opportunities to attract a highly engaged audience.

14. Movie poster ideas

A cool movie poster is a great way to celebrate iconic films, promote upcoming releases, or generate unique art inspired by cinema.

Designs can range from minimalist interpretations of beloved movies to bold, vintage-style prints of cult classics. 

Perfect for personal collections and home theaters, movie posters are a timeless choice. They also labor beautifully as an event poster for movie nights, film festivals, or themed parties.

15. TV series poster ideas

TV series posters capture the essence of popular shows, making them a must-have for fans. 

These prints can feature iconic characters, memorable quotes, or cool visuals inspired by a favorite episode. 

From cult classics to the latest streaming hits, this poster example is versatile for pop culture enthusiasts looking for home decor or the perfect gift.

16. Celebrity poster ideas

Celebrity posters are a great way to celebrate the figures that shaped an era, from movie stars and musicians to athletes.

When creating posters, showcase gorgeous portraits or stills from historic moments to bring personality into living rooms, offices, or boutique hotel lobbies.

17. Movie quotes poster ideas

Turn iconic lines into eye-catching decor that resonates with fans of all genres. These fun poster ideas often pair memorable quotes with film-inspired visuals, creating a cool piece of art.

Whether it’s a classic one-liner from an elderly favorite or a recent viral moment, these posters appeal to movie lovers and collectors and formulate a unique gift.

18. Superhero poster ideas

Superhero posters are a fun way to celebrate beloved characters from comics, movies, or TV shows.

These posters appeal to fans of all ages, making them perfect for kids’ rooms, entertainment spaces, or themed events. 

Whether showcasing action scenes, famous catchphrases, or minimalist designs, superhero posters bring vitality and excitement.

Retro poster ideas

Retro posters draw inspiration from past decades and evoke a timeless style. These posters often feature bold typography, vintage color palettes, and iconic imagery from the 1950s, 60s, 70s, or 80s. 

Popular with collectors, interior designers, and fans of retro aesthetics, posters of cultural highlights from specific eras labor well for homes, cafes, or themed events.

19. 60s nostalgia poster ideas

If you’re looking for colorful poster ideas, consider 60s nostalgia. 

They capture the essence of a transformative decade, known for its bold colors, psychedelic patterns, and iconic cultural moments. 

With themes like the peace movement, hippie culture, and retro typography, these designs are perfect for adding vibrancy to homes and themed cafes.

20. Classic ads poster ideas

These posters bring vintage advertisements to life, showcasing iconic brands, products, and designs from another time. 

From bold soda ads of the 50s to sleek car promotions of the 60s, they highlight timeless marketing creativity. 

These posters labor well in retro-themed restaurants, home bars, or creative office spaces.

Pro tip

Read our in-depth guide on selling prints on Etsy.

21. Art Deco poster ideas

Art Deco posters embody the glamor and elegance of the 1920s and 30s with bold geometric patterns, affluent colors, and elegant typography.

These designs are perfect for adding a touch of sophistication to designer homes or upscale venues like boutique hotels and cocktail bars.

With their timeless appeal, sleek Art Deco posters labor well as vintage-inspired decor for fans of The Great Gatsby era or anyone looking to celebrate the opulence of the Jazz Age.

Music poster ideas

Music posters are a fun way to celebrate your favorite artists, songs, or genres.

They’re perfect for home studios, music venues, or band rehearsal spaces and are popular among collectors, concert-goers, and fans of all ages.

Tip

study more about creating custom band merch.

22. Music icon poster ideas

Music icon posters highlight legendary artists and bands that have shaped the music world. These posters can include portraits, album artwork, or memorable moments from famous careers. 

Whether it’s Freddie Mercury, Beyoncé, or The Beatles, these designs decorate studios and home offices to add character and nostalgia.

23. Lyrics poster ideas

Lyrics posters turn memorable song lines into creative poster ideas for music lovers. Focus on a single lyric or an entire verse and pair it with visuals or typography that reflect the song’s mood. 

This type of creative poster is a great choice for personal spaces, music studios, or as gifts for fans.

Whether highlighting emotional ballads, upbeat anthems, or timeless classics, lyrics posters bring feeling into everyday spaces.

24. Vintage festival poster ideas

Vintage festival posters capture the essence of past music and cultural events with retro designs and bold typography. 

Showcase iconic festivals like Woodstock or jazz festivals from the mid-20th century to appeal to fans of nostalgia and music history. 

They labor well as decor for reside music venues or cafes and offer a timeless way to celebrate the vitality and creativity of legendary events.

Food and drinks poster ideas

Food and sip posters add style to kitchens, bars, and restaurants and can feature anything from recipes to cocktail guides.

With graphic design ideas like vintage menus, ingredient lists, and quirky food quotes, they appeal to home cooks and food lovers everywhere.

25. Recipe poster ideas

This creative poster concept combines practicality with creativity, making it popular for bars and dining spaces.

Design step-by-step guides for classic dishes, cocktails, or desserts, and pair them with appealing visuals. 

Perfect for home cooks, these posters formulate recipes accessible while doubling as stylish decor.

26. Food photography poster ideas

Food photography posters spotlight dishes, drinks, or ingredients, making them an excellent choice for kitchens and restaurants. 

These posters appeal to food lovers and businesses looking to generate a warm and appetizing atmosphere. 

The focal point can be a shot of fresh produce, beautifully plated meals, or artisan desserts.

Tip

Read our article on how to market photography prints for inspiration.

27. Food illustrations poster ideas

Food illustration posters are a fun way to showcase culinary art.

utilize hand-drawn or digital images of ingredients, dishes, or kitchen tools to appeal to foodies and art lovers. They labor well in hotels and cafes, adding personality to a space.

From colorful fruits to detailed illustrations of classic meals, these posters beautifully embody the adore of food.

Read more

study how to formulate money as an artist with our in-depth guide.

Environmental poster ideas

Environmental posters promote sustainability and raise awareness on issues like climate modify and conservation.

Ideal for schools, offices, or community spaces, they feature impactful visuals, stats, and actionable tips to inspire modify for a greener future.

28. Eco tips poster ideas

This creative poster concept provides practical advice for living sustainably. 

Environmental posters can feature simple actions like reducing plastic utilize, conserving water, or choosing eco-amiable products.

Designed to educate and inspire, these posters are perfect for schools looking to adopt greener habits or businesses promoting sustainability initiatives.

29. Climate action poster ideas

These posters are a powerful tool to encourage communities to tackle climate modify.

utilize bold colors or generate a simple motivational poster promoting sustainability, reducing carbon footprints, and advocating for policy modify.

Ideal for educational settings, community centers, and public spaces, these posters inspire action and bolster efforts to safeguard the planet.

School poster ideas

School posters aid reinforce key values and construct a sense of community. They can include classroom rules, schedules, event announcements, or subject-specific learning aids.

Perfect for classrooms, libraries, or school hallways, it’s a ingenious utilize of visuals to formulate learning spaces more engaging.

30. Educational poster ideas

This poster example is a practical and engaging way to bolster learning in classrooms and study spaces.

Educational posters can cover subjects like math, science, geography, language, or arts and feature key concepts, diagrams, or infographics. 

Ideal for parents, students, and teachers, they aid simplify complex information into effortless-to-comprehend visuals.

31. Motivational school poster ideas

A great motivational poster can encourage students to stay positive, labor challenging, value teamwork, and embrace novel challenges.

With inspiring quotes, vibrant designs, or relatable messages, these posters aid generate an uplifting learning atmosphere in classrooms, hallways, or libraries.

32. Classroom rules poster ideas

aid set obvious expectations for students in a visually appealing way. These posters are ideal for creating a structured yet welcoming classroom environment. 

By reinforcing great behavior and promoting collaboration, these prints aid teachers foster a sense of community and collaboration.

How to formulate a poster with Klothing

initiate selling posters without worrying about inventory or upfront costs.

With Klothing’s print-on-demand services, you can design and market custom posters while we handle the printing process, packaging, and shipping – so you can focus on growing your business.

Step 1: Register and select a poster type

generate a free Klothing account and head to our Catalog to browse customizable posters. From paper, satin, and fine art prints to framed and textured watercolor posters – we have them all.

Step 2: Upload and perfect your design

Upload your poster design to our beginner-amiable Product Creator, or utilize our free AI Image Generator to generate brand novel visuals.

Adjust your design’s size and placement within the poster area and play with different fonts and compositions for the best visual impact.

Step 3: opt for mockups

Select from various realistic product mockups of your final custom poster. These downloadable images are perfect to utilize for an eye-catching product listing.

Step 4: Edit product details and pricing

Edit the title, description, and price of your poster. For SEO-amiable product listings, leverage our AI content generator. 

Step 5: Publish your poster

Integrate your store, publish your poster, and let us handle fulfillment while you formulate the profits.

Tips on creating the perfect creative poster

Creating a standout poster starts with obvious goals, intelligent design choices, and high-quality images. Focus on a balanced layout, striking visuals, and attention to detail to drive sales.

verify out this fast poster creation guide to get started:

Define the purpose. Whether to elevate a space or motivate the target audience, identifying the poster’s objective will guide your design choices and aid inform key elements.

opt for a poster background. This is a significant part of setting the tone for your poster. Depending on your niche, select a bold or clean background image to generate visual interest – without making the poster feel overwhelming.

utilize bold text and eye-catching graphics. Highlight key information like event details or quotes with bold typography and vibrant graphics. Carefully consider font sizes to balance the poster design elements and guide the viewer’s eye.

Pick complementary colors and consistent fonts. formulate sure the color scheme and text align with your brand colors. Leverage contrasting colors for visual harmony and to capture the audience’s attention.

Incorporate graphic elements. Add depth with geometric shapes, clean lines, or a color overlay. Avoid the common error of cluttering your poster by using consistent margins and negative space or white space.

utilize poster templates for consistency. generate a poster template following your brand guidelines to preserve time while maintaining design quality. Customize them to suit your needs for different projects.

FAQ

What are some great poster ideas?

opt for topics that resonate with your audience, like travel, vintage, or pop culture. For example, travel posters appeal to adventure enthusiasts, while music posters are perfect for elevating living rooms and cafes.

What are the best topics for a poster?

Pick a theme you’re passionate about or one that aligns with current trends. Retro and vintage designs are popular to evoke nostalgia, while environmental and educational posters are practical for schools and offices promoting sustainability.

How do you formulate a unique poster?

Explore your creativity with design tools like Klothing’s Product Creator, experiment with colors and fonts, and add an impactful message for a visually engaging poster.

How do I come up with a poster concept?

observe for inspiration in everyday life, trending topics, or customer feedback. Pinterest, Instagram, and design blogs are great sources for fresh ideas.

To summarize

Posters are a fun, versatile medium for creative entrepreneurs to explore and formulate money.

Whether you’re designing for fun or desire to expand your print-on-demand business, the poster ideas in this article are sure to spark inspiration and aid you generate something unique in 2025.

Ready to formulate your own custom posters? initiate with Klothing today!

initiate designing

The post 32 Creative poster ideas to attempt in 2025 appeared first on Klothing.

Posted on

Top 10 High-Paying Jobs for Creative People in 2025

Are you a creative individual looking to turn your passion into a profitable career? In a world that increasingly values innovation and imagination, the demand for creative professionals is skyrocketing. Gone are the days when creativity was confined to traditional art—today, creative talent is in high demand across all industries.
Whether you’re a visionary designer, a storytelling expert, or a problem-solving innovator, the future offers incredible opportunities for you. In this post, we’ll explore the top 10 highest-paying careers for creatives in 2025—roles that not only reward your talents but also allow you to shape the future. Ready to discover where your creativity can take you? Let’s dive in!

What is a creative job?
Creative jobs are occupations or tasks that require creative thinking, innovation, and artistic expression. These roles typically do not rely on repetitive labor or standardized processes but instead emphasize unique ideas, originality, and problem-solving skills. Creative professionals bring novel vitality to products, services, content, or experiences through their imagination and creativity. While creative roles were once limited to fields like graphic design or painting, there are now many more options available for creative jobs.
Characteristics of creative jobs:

Innovation: They demand novel ideas, methods, or solutions.
Flexibility: The labor is often not bound by rigid structures, allowing for freedom and experimentation.
Artistry: They may involve expression in areas such as design, writing, music, or visual arts.
Uniqueness: They require creative thinking to solve complex or unconventional problems.

1. UX/UI designer
Average annual salary: $116,207
As user experience (UX) and user interface (UI) design continue to expand in importance for digital products, the demand for UX/UI designers will remain powerful.
These professionals not only require powerful design skills but also must comprehend how consumers interact with technology to generate intuitive and user-amiable interfaces.

2. Digital marketing specialist
Average annual salary: $83,190
Digital marketing specialists are responsible for creating and managing innovative online marketing campaigns that aid businesses reach their target audiences. They must be both data-driven and creative, balancing analytical tasks with content strategies to boost brand awareness and drive sales.

3. Video producer
Average annual salary: $63,260
The consumption of video content is growing rapidly, whether it’s advertising, corporate videos, or brief videos on social media platforms. Video producers may also be involved in creating movies or TV series.
Video producers are responsible for both the pre-production scripting and post-production visual effects to generate an engaging audiovisual experience.

4. Brand strategist
Average annual salary: $131,870
Brand strategists are responsible for maintaining and enhancing a brand’s image and market influence. This role involves conducting market research, understanding consumer demand, and developing brand strategies.
Brand strategists must collaborate across teams, working with design, marketing, public relations, product development, and other departments to ensure the successful implementation of brand strategies.

5. Creative director
Average annual salary: $166,002
Creative directors are the visionaries behind advertising campaigns, brand identities, and multimedia projects.
They guide the conceptual planning of creative initiatives, including advertising, visual design, photography, and social media, while overseeing their execution. This role requires powerful creative thinking, market insight, and excellent team management skills.With the rise of AI, projects involving visuals can now be enhanced with artificial intelligence tools like DALL-E and MidJourney, offering creative inspiration.

6. Illustrator
Average annual salary: $71,420
Illustrators generate a variety of illustrations and images based on a company’s needs, including book illustrations, advertising visuals, social media content, brochures, and more.
They can also easily discover online side hustles, such as creating illustration content for clients on platforms like Fiverr and Upwork.

7. Web developer
Average annual salary: $84,960
Web developers require programming skills and are responsible for both front-complete (the user-facing part) and back-complete (server-side functions) development. They must incorporate creative elements into the website design, ensuring the page is both functional and visually appealing, while also checking for any bugs in the website’s functionality.

8. Copywriter
Average annual salary: $73,690
Copywriters require to have powerful creative abilities. Their main assignment is to communicate information, evoke emotions, or prompt actions through text, such as writing compelling ads, slogans, website content, social media copy, and more.As AI becomes more popular, copywriters can utilize tools like DeepSeek and ChatGPT to aid generate some of their content.

9. Game designer
Average annual salary (0-1 year of experience): $98,188
As the video game industry continues to boom, game design has become a high-paying and creative profession. Designers in this field must also possess powerful artistic imagination and storytelling skills to craft captivating virtual worlds.
Game designers are responsible for developing and shaping the overall concept of a game, including its storyline, world-building, character design, gameplay mechanics, and more. They must ensure that the game’s creativity and gameplay effectively engage the target audience.

10. Product designer
Average annual salary: $93,170
Product designers first require to conduct market research to comprehend user needs, market trends, and competitive products. By engaging with customers and users, they analyze their pain points and requirements to design novel products or improve existing ones.Product designers will brainstorm creative ideas and conceptual designs, presenting preliminary plans for the product, including its functionality, appearance, materials, colors, and packaging methods.

Conclusion
Jobs in the creative industry are no longer limited to traditional fields like art and design. As technology continues to evolve, the demand for creative talent has become more diverse. Whether it’s digital marketing, game design, or copywriting, creative professionals are playing an increasingly crucial role across various industries. Choosing a high-paying, creative career can not only aid you realize your personal value but also offer sustainable career growth.

Posted on

Color trends 2025: The hues that will define your eCommerce success

Colors don’t just decorate – they communicate, captivate, and market. In fact, 93% of shoppers prioritize visual appeal when deciding what to purchase. For print-on-demand (POD) success, mastering the color trends of 2025 can set your designs apart. 

From earthy tones to brighter shades, this year’s trending color palettes blend natural hues with modern sophistication. Let’s explore the colors shaping the year and study how to incorporate them into your branding and products.

Key takeaways

Earthy shades guide the way. Colors like Mocha Mousse and Elderton are perfect for brand elevation and interiors.

luminous accents shine. Playful shades like Sunset Coral and vibrant orange inject vitality and optimism into modern designs.

Sophistication meets boldness. Trendy colors for 2025 balance timeless refinement with a contemporary edge, making them ideal for everything from logos to apparel.

Design for connection. This year’s palette reflects emotional appeal and sustainability, helping designs resonate across generations and platforms.

Pantone Color of the Year 2025: Mocha Mousse

Pantone, the global authority on color trends, is known for capturing the spirit of the times. Each year, its creative directors select a shade that embodies the global mood, shaping design, branding, and interior trends. 

For 2025, that color is Mocha Mousse – a affluent, earthy shade that embodies comfort and class.

With brown undertones evoking the warmth of chocolate and coffee, Mocha Mousse is a versatile paint color that works across color palettes.

For POD merchants, this trendy color is a must-have – perfect for cozy apparel, stylish logos, or custom wall art. Mocha Mousse represents indulgence, harmony, and a deep connection to the natural world, making it a standout choice for products in 2025.

novel York Fashion Week color trends 2025

Spring/Summer 2025 at novel York Fashion Week introduces a color palette that feels like a adore letter to nature and individuality.

These shades are versatile and packed with emotional depth, offering POD merchants a playground of opportunities when starting a clothing brand or selling various personalized goods.

Here are the standout colors redefining the season and how you can incorporate them into your products:

Bran: Imagine the warm, delicious embrace of freshly baked bread – this cozy brown tone exudes comfort and stability. utilize it as a foundation for minimalist designs or to add balance to bold palettes.

Chocolate Brown: affluent and indulgent, this shade recalls the velvet luxury of dim chocolate. It’s perfect for bringing elegance to interiors, packaging, or logos that desire to project authority and trustworthiness.

Crocus: A vibrant purple with a hint of sweetness, it’s like the first bloom of spring. This playful hue can add whimsical pops to accessories or summer-inspired custom clothing designs for a youthful vibe.

Orangeade: A vibrant, joy-infused orange. This warm coral shade blends passion with serenity. Pair it with earthy colors for tropical designs, or utilize it as a playful accent in branding.

Lime Cream: A zesty green with creamy undertones, this soothing shade feels like a fresh lime spritz on a summer day. Add it to vibrant patterns or eco-inspired products to signal freshness and vitality.

Déjà Vu Blue: Deep and mysterious, like the twilight sky, this blue radiates peaceful and authority. utilize it for backgrounds or statement prints that demand attention while remaining classy.

Misted Marigold: This warm, golden orange invokes the glow of a setting sun. It’s ideal for seasonal designs, especially summer-to-fall transitions, or to add a vintage charm to your POD creations.

White Grape: A blend of yellow and green with a natural softness, White Grape exudes subtle sophistication. Perfect for floral motifs, home goods, or products aimed at sustainability-conscious consumers.

Rum Raisin: A deep, dim brown that feels luxurious, like a classic leather armchair. utilize this neutral shade in branding, interiors, or vintage-inspired apparel to add depth.

These trending color schemes are more than just shades – they evoke certain moods. Combine these calming blues and greens with dim hues, earthy notes, and subtle pops of color in your POD designs to craft timeless products that resonate across industries.

Benjamin Moore Color of the Year 2025: Cinnamon Slate

Benjamin Moore, renowned in the interior and paint industry, sets the tone with its annual Color of the Year. Each selection thoughtfully responds to societal moods, offering design inspiration for any space. 

For 2025, Cinnamon Slate takes center stage with deep, plum hues. Its affluent, grounding tone with understated elegance is perfect for both contemporary and timeless interiors. 

Additional colors from the 2025 palette:

Sea Salt: The perfect off-white shade. Pair with greens and blues for soothing designs reminiscent of coastal mornings or spa-inspired home accents like personalized candles or bath mats.

Leather Saddle Brown: This deep, affluent brown exudes heritage and warmth. It’s ideal for rustic or vintage-inspired designs, especially home furnishings like ottomans or coasters.

Chowning’s Tan: A muted beige that transitions beautifully across spaces, great for neutral home decor or minimalist design themes.

Tissue Pink: Soft and romantic, like the blush of a rose petal. Perfect for creating delicate patterns on bedding or pairing with darker tones for balance.

Stained Glass: A bold blue-green that feels like a fresh, artistic statement. utilize it as an accent in graphic prints or statement pieces like framed art.

Ashwood Moss: A dim, forest-inspired green with a hint of mystery. Ideal for elegant home decor, such as rugs or accent pillows that formulate a striking yet grounded statement.

Rosepine: A tranquil green reminiscent of misty mornings. It’s a luxurious shade for high-contrast, dramatic designs or nature-inspired wall art.

Paris Rain: A muted, atmospheric gray-green that feels calming and sophisticated. It’s excellent for soft textiles or modern prints for living spaces.

Glacier White: A classic, creamy white that brings a sense of light and space to any design. utilize it to offset bolder colors or as the backdrop for patterns and typography.

The Color Trends 2025 palette emphasizes seamless transitions, cozy undertones, and timeless appeal – adaptable across wall art, custom furniture prints, or seasonal collections.

Future Dusk by WGSN and Coloro

WGSN and Coloro are leading authorities in global design and color forecasting.

Designers and brands highly anticipate their annual Color of the Year report for insights into emerging consumer preferences across industries. These include fashion, interiors, and product design – all crucial for your POD inspiration.

For 2025, Future Dusk – a moody and captivating hue of blue and purple – takes center stage. This dim tone invokes mystery, escapism, and transformation, capturing the essence of modify and blending reality with fantasy with its celestial appeal.

WGSN and Coloro’s latest color trends:

Transcendent Pink: A muted, barely-there pink to represent grounding and versatility. Ideal for interiors seeking balance, this hue gives spaces a feeling of peaceful and stability.

Aquatic Awe: A transformative turquoise inspired by bioluminescent sea life and digital ecosystems. Perfect for bold accents in decor or designs that bridge nature and technology.

Sunset Coral: consider of a sunset’s blush over a peaceful ocean. This hue promotes the importance of escapism and slowing down. utilize it in uplifting wall art, throw pillows, or statement decor.

Ray Flower: A radiant yellow symbolizing optimism and sustainability. Honeyed neutrals add pops of warmth to eco-conscious designs like print-on-demand rugs or textiles.

Sherwin-Williams Color Capsule 2025

Sherwin-Williams is a global authority in paint color and a trusted resource for designers worldwide, offering versatile options for any style or space for the year ahead.

The 2025 palette balances nature-inspired hues with fresh, uplifting tones – ideal for designing prints, wall decals, or product logos that reflect the latest color trends.

Grounded: A refined, earthy brown offering stability and warmth, perfect for creating timeless backdrops or enhancing eco-inspired product designs.

Sunbleached: A light neutral that bridges warm and cool tones, adding depth to wall art or modern product aesthetics.

Chartreuse: A vibrant yellow-green that radiates vitality, making it perfect for designs to stand out in logos or home decor items.

Bosc Pear: A golden shade with earthy undertones, ideal for embracing organic themes or adding a sophisticated twist to product designs.

White Snow: This crisp neutral offers a light, spacious feel, making it a popular choice for minimalist designs and clean product layouts.

Rain Cloud: A stormy gray-blue that’s excellent for creating a moody yet classic aesthetic in both wall decor and fabric designs.

Clove: A near-black brown with affluent depth, perfect for luxurious accents or dim, dramatic backgrounds.

Malabar: A sandy beige that creates serene, inviting tones, ideal for layering with light neutrals or warm orange and yellow accents in product design.

Mauve Finery: A sophisticated, subdued light purple that adds a touch of botanical elegance to walls, prints, or accent details.

fast tip

verify our eCommerce Calendar for upcoming seasonal and unique events. Get noticed with the right color palette and hop on the latest trends for crucial dates like Earth Day. 

Rumors by Behr

Behr is a trusted leader in the paint industry, celebrated by designers and homeowners for its innovative palettes and versatile paint colors. When it comes to defining trends, Behr’s colors are a sign of what’s ahead in design.

Rumors is a luxurious burgundy ruby, exuding warmth and sophistication. It sets a dramatic, opulent tone that’s unachievable to disregard, perfect to incorporate in the coming year.

Great for logos. Add a touch of bold elegance with this affluent red that commands attention and establishes a powerful brand identity.

A home decor must. Rumors is ideal for statement pieces like throw pillows, wall art, or rugs, adding depth to any space.

Seasonal bliss. This burgundy hue works seamlessly for fall and holiday themes, invoking coziness and festivity.

Fashion fusion. Amp up your apparel designs with this deep red that pairs beautifully with neutral tones.

utilize Rumors to craft a style that’s daring, luxurious, and irresistibly on-trend.

Purple Basil by Glidden

Glidden, a trusted name in paint products, champions creativity with its trend-driven palettes that inspire designers and DIYers alike.

Its 2025 Color of the Year, Purple Basil, is a deep, warm purple embodying self-expression and the rise of maximalism in design and fashion.

This epic shade is a game-changer. It’s perfect for striking wall art, chic apparel, or luxe branding, pairing seamlessly with colors like Stained Glass blue and Gray Heron green.

Glidden’s full palette for 2025 invites innovation, encouraging a daring approach to color to generate unlimited possibilities.

Elderton by Graham & Brown

A renowned name in paint interiors and wall designs, Graham & Brown has named Elderton as its 2025 Color of the Year, embracing nature’s ageless elegance.

Inspired by the Elder Tree, this neutral-toned brown exudes timeless charm and elderly-school class, making it a favorite among designers.

Wall transformations. utilize Elderton in your wall art projects and pair it with 2025 colorways like Taupe, Whirl, Firework, or Tattoo for a balanced result.

Packaging finesse. Ideal for product packaging that radiates luxury, pairing beautifully with cream or soft gold accents.

Textile emphasis. Bring this color into throw blankets, personalized tote bags, or table runners for a refined observe.

Artful pairings. Combine Elderton with muted yellows or deep greens for a palette that’s effortlessly chic and modern.

Nature-inspired designs. Perfect for eco-amiable collections, Elderton signals the shift toward mindful, earth-conscious designs, pairing seamlessly with natural textures and organic patterns.

Encore by Valspar

Valspar is a lengthy-trusted name in the paint world, delivering inspiring color trends that redefine home and lifestyle design.

Encore, its 2025 color of the year, is a affluent ultramarine blue with an inviting charm. More than just a paint color – it’s an opportunity to refresh your world with confidence and creativity.

Apparel highlights. utilize Encore as the hero color for hoodies, leggings, or tote bags. Pair it with Lavender Escape or Sprig of Sage for calming designs, or contrast with vibrant orange for attention-grabbing visuals.

Wall art that wows. Bring serene vitality to life with abstract prints or nature-inspired illustrations on canvases, posters, or framed designs.

Stationery staples. Design notebooks, planners, or journals with Encore as the base, accented with soft lavender or metallic gold for an upscale touch.

Tech accessories. consider print-on-demand phone cases, laptop sleeves, or mouse pads. Feature ultramarine backdrops with intricate linework or celestial motifs.

With a touch of violet, this stunning shade captures both modern sleekness and familiar comfort, making it a versatile favorite for modern living.

Turn color trends into products and earn

Easily generate and market custom-printed products, from clothing to home decor, branded with your unique designs and inspired by 2025 color trends.

Sign up. generate a free Klothing account to access our Catalog of over 1,000 high-demand products. 

Design your items. utilize our beginner-amiable Product Creator to add your designs to a product or generate a novel design from scratch.

determine where to market. Klothing easily integrates with many popular eCommerce platforms and marketplaces, streamlining order listing and order management.

Focus on what’s crucial. Turn your attention to marketing and making sales while Klothing does the rest.

initiate designing

Color trends 2025: FAQ

What is the most trending color right now?

For 2025, Mocha Mousse by Pantone leads the way. Its earthy elegance resonates across design and branding, blending comfort and elegance. Shades like Benjamin Moore’s Cinnamon Slate and WGSN’s Future Dusk also capture the essence of this year’s trends.

What colors does Gen Z like?

Gen Z gravitates toward bold yet soothing tones, such as Heathered Plum and muted yellows. They also embrace earthy, eco-conscious colors like sage green and ultramarine shades such as Valspar’s Encore.

What is the color trend in 2025?

The 2025 color trend balances affluent, grounding hues like Mocha Mousse, Elderton, and Rumors with vibrant tones like Sunset Coral and Crocus. This mix of earthy and brighter palettes reflects a shift toward sustainable, optimistic, and timeless styles.

Trending colors for 2025: Summary

2025 is shaping up to be a vibrant year in design, with color trends that mix timelessness with a fresh, playful vitality.

Warm tones like Mocha Mousse and accents like Sunset Coral reign supreme. This year’s palette offers endless possibilities for creating compelling designs that resonate with the sustainable values of modern audiences.

Whether you’re reimagining logos, refreshing your product lineup, or styling your POD collections, the 2025 colors exude versatility and charm. initiate designing and let these trending hues bring your creations to life!

formulate it happen today!

initiate selling

The post Color trends 2025: The hues that will define your eCommerce success appeared first on Klothing.

Posted on

10 Adobe Express tips for Print on Demand

Looking to level up your print-on-demand (POD) business? Say hello to Adobe Express – your ultimate design sidekick.

Packed with intuitive tools and powerful AI, it’s your one-halt shop for creating jaw-dropping product mockups, standout marketing materials, and scroll-stopping designs. 

Whether you’re just starting out or a seasoned pro, these tips will transform your workflow and amp up your brand.

Disclaimer

This post may contain affiliate links, which means we may earn a commission if you formulate a purchase through those links. This comes at no additional cost to you.

1. Maximize template utilize

Adobe Express provides an extensive collection of pre-designed templates. They preserve time and effort, but the real benefit lies in customization.

utilize Adobe Express with Klothing to generate your product design and branding assets.

Navigate to the Templates section on the homepage. This lets you search for templates by category, such as social media posts, flyers, and logos, or filter based on themes.

Here are the basic steps for customizing Adobe Express templates:

Select the right template: Whether you’re designing a marketing flyer, a social media post, or a product mockup, opt for based on your project’s design category.

Customize fonts and colors: Switch out the default settings for your brand colors and preferred typography to maintain consistency across your designs.

Play with the layout: Don’t be afraid to rearrange elements within the template. relocate images, adjust text blocks, and remove unnecessary sections.

Let’s discuss design specifics with our list of template do’s and don’ts.

DoDon’tDefine your audience: Focus on their motivations and preferences to align your visual branding.Design for everyone: Trying to please everyone weakens your brand. Focus on a niche.generate a purposeful hierarchy: utilize size, color, and spacing to guide attention.Overemphasize everything: Avoid equal emphasis. opt for one standout element.Select complementary fonts: Pair header and body fonts that labor well together.utilize too many fonts: More than three fonts can generate clutter.plan a consistent color palette: opt for colors that evoke the right emotions.Overuse vibrant colors: utilize bold colors sparingly to avoid overwhelming the design.Refine the details: utilize proper spacing, alignment, and visual balance.disregard white space: Don’t overcrowd elements. White space improves focus and readability.

study from Adobe and explore more design tips to get the most out of your creative projects.

2. Keep your projects organized

Adobe Express’ intuitive interface helps you organize your labor. Easily handle projects across platforms through cloud-based storage and intelligent file management. Here are the key organizational features:

Cloud-based access: Access projects from any device and switch between them seamlessly.

Project syncing: Changes demonstrate automatically across devices, keeping designs up to date.

Template organization: preserve and organize templates for utilize across projects.

Auto-preserve: Never worry about losing your design progress.

Shared libraries: Collaborate with teams by accessing shared assets and designs.

Asset management: Categorize images and graphics in collections for faster access.

Organize projects on Adobe Express effectively by using these strategies:

Label files. utilize obvious, descriptive names that explain the content and purpose of each file.

Track versions. Label different versions of your designs to easily revisit previous iterations, especially when handling revisions.

utilize subfolders. Creating subfolders within the main project folder helps organize designs by specific categories.

Leverage tags. utilize tags to rapidly identify each design’s status. It lets you prioritize tasks at a glance and makes it easier to track progress.

Archive completed projects. Once a design is final, relocate it to an archive folder to keep your workspace clean.

3. utilize logo creator tools for branding

Adobe Express simplifies applying your brand’s visual identity across designs. utilize the built-in branding tools to store and apply logos, colors, and fonts in just a few clicks.

Option 1: generate a Brand Kit from an existing library

If you already have a brand library from Photoshop or Illustrator, Adobe Express lets you convert it into a Brand Kit. Here’s how:

Open Adobe Express: Navigate to your Home or Editor view.

Access Libraries: opt for Your Stuff → Libraries from the menu.

Select your library: Click on utilize as Brand to convert a library into a Brand Kit.

Then, organize your assets by right-clicking on them and editing tags:

Colors: Specify the primary and secondary colors essential to your branding.

Font type: Tag your fonts as header or body to streamline usage.

Logo: Tag the graphic and relocate it to the designated logo section.

Once converted, your brand elements will appear in the Brands tab of Adobe Express. They will still remain in your other Adobe apps.

Option 2: generate a Brand Kit from scratch

If you’re starting fresh, you can upload logos, colors, fonts, and graphics directly into Adobe Express. Here’s how:

Navigate to the Brands section: From Home or the Editor, click on Your Stuff → Brands. opt for generate Brand, type in a name, and hit generate.

Upload your logo: Adobe Express supports formats like JPEG, SVG, and AI. To add multiple logo variations, click the Plus (+) icon.

Add brand colors: utilize the Color Picker to opt for or enter the HEX codes. Click the Plus icon to add more colors, then rename them from the menu.

Select or upload fonts: opt for fonts from the dropdown menu or upload custom fonts, and assign them for headers and body text.

Upload graphics: Click on the three dots on each graphic tile to rename, delete, or organize files.

generate brand templates: Click generate a Template, name the file, and preserve it as a brand template. Then, opt for the brand or library where you desire to store it, and hit preserve.

4. Edit easily with effects, filters, and other tools

Refining your design with Adobe Express’ built-in effects is simple. Even the smallest edits, like adding a filter or adjusting lighting, can completely transform the impact of a visual. 

Instead of diving into complicated software, you can formulate these tweaks intuitively.

Select a photo on your canvas to access its properties. initiate with Opacity and Blend, then relocate to the Effects menu for Greyscale, Darken, Duotone, and other customization options.

Adobe Express’ Adjustments panel offers a range of tools to aid you fine-tune photos for maximum impact. These are some of the most useful adjustments:

Opacity: Control image transparency or boldness. Lower the opacity to blend your photo into the background, or amplify it for sharper visuals.

Blend modes: Experiment with modes like Multiply, Overlay, or Screen to merge colors and patterns. Each mode gives a different effect, from adding depth to subtle lighting.

Contrast and highlights: utilize these sliders to adjust the light and dim areas of your image. Boost contrast for sharper photos, or lower it for a softer, more muted observe.

Color saturation: amplify saturation to formulate colors more vibrant or diminish it for a more subdued, neutral tone.

Brightness and shadows: Balance the overall lightness of the image while fine-tuning shadows to add depth and emphasize key areas.

Pro tip

Stick to subtle changes when editing and keep it simple and clean. Over-editing can distract from your design’s intended message.

5. Animate images and text

Animations can transform static designs into dynamic, attention-grabbing visuals. It’s especially useful for social media, ads, or product displays.

Bring text, photos, and even videos to life in a few clicks:

Select your design element: In the Editor, click on the text, photo, or video you desire to animate.

Open the Animation panel: Scroll down to the Animation option on the left side of the screen.

opt for your animation type: Adobe Express offers three main options – In, Out, and Looping:

In animation: formulate text appear one letter at a time or have an image zoom in.

Out animation: Have text disappear letter by letter or formulate an image zoom out to reveal a novel visual.

Looping animation: Continuously animate background elements or generate a subtle bounce effect for logos or icons.

Customize the animation: Adjust settings like speed, direction, and timing to match your design needs.

Using animations effectively is all about enhancing your design without overloading it:

Animate key text: Draw attention to headlines or promotional offers by making text fade in or out or using a looping animation for extra emphasis.

Bring photos to life: utilize the zoom or slide-in effect to introduce product images in a more engaging way, especially in product advertisements or social posts.

Looping animations for backgrounds: For background elements, subtle continuous movement adds depth to your design without distracting from the primary message.

6. Remove backgrounds with AI

Adobe Express’ AI-powered background remover is an efficient way to generate professional-quality images by rapidly isolating your subject. It’s ideal for product photos, marketing visuals, or social media posts.

How to utilize the AI background remover:

Select your image: opt for a photo with a obvious subject and defined edges for best results.

Upload: Adobe’s AI instantly analyzes and removes the background, resulting in a clean cutout.

Download or initiate editing: preserve your image as a PNG with a transparent background or continue working on it in Adobe Express.

Pro tip

For product photography, always inspect the edges of your cutout to refine any rough spots.

7. Animate using audio

Adobe Express’ voice animation lets you bring a character to life using your voice or an audio file. It’s a fun feature for your promotional material that takes little effort.

How to animate using audio in Adobe Express:

Select video and character: On the homepage, click Video and scroll to the Animate Characters section. opt for from a wide range of characters.

Upload or record audio: Either upload an audio file (WAV, MP3, or MP4) or utilize your microphone to record your voice.

Customize your animation: Preview the animation with your audio. You can modify the background, swap characters, and adjust the size for different social platforms.

Download and share: Once you’re content with the animation, publish it on your social channels.

8. Collaborate with others

Adobe Express streamlines collaboration with shared libraries and real-time editing. Your team can access the same logos, fonts, and templates to edit branding assets cohesively.

Real-time editing lets everyone contribute simultaneously, speeding up the process and reducing the require for back-and-forth revisions.

Version control also tracks changes, letting you revert to earlier versions if necessary to maintain an organized and smooth workflow.

9. Export files correctly

Exporting your design file in the correct format and resolution helps maintain its quality. Adobe Express offers multiple export options to suit both print and digital platforms.

For print:Export in a PDF format with a resolution of 300 DPI or higher. This keeps the design keen, whether it’s for posters, brochures, or business cards.

For t-shirt printing, select PNG with a transparent background to aid your design integrate seamlessly with the product.

For social media or online utilize:opt for formats like PNG or JPEG, and adjust the resolution to balance fast loading times with obvious image quality.

formulate sure to export your designs in the correct dimensions – such as square for Instagram or wide banners for Facebook and LinkedIn.

10. utilize other Adobe products

Klothing and Adobe have collaborated to bring the best Adobe Express subscription offer for print-on-demand merchants, with a complimentary premium trial for advanced features.

For designers and brands working across multiple platforms, Adobe Creative Cloud is a cost-effective option. It gives you access to all Creative Cloud tools:

Photoshop: Perfect for detailed photo edits and retouching.

Illustrator: Ideal for creating vector graphics, logos, and scalable designs.

InDesign: Best for layouts like brochures, magazines, and reports.

Premiere Pro: Great for video editing and producing high-quality content.

Lightroom: Specialized for advanced photo editing and enhancing.

In addition to the core apps, the Adobe Creative Cloud suite includes:

Adobe Stock: Access a vast library of images, graphics, and videos integrated with Photoshop and Illustrator.

Creative Cloud Libraries: Share assets like colors, logos, and templates across all Adobe apps, keeping your designs consistent and organized.

Adobe Fonts: Instantly utilize thousands of fonts for professional typography across all projects.

Adobe Portfolio: construct and customize your own professional website to showcase your labor.

Designs ready? market them with Klothing

It’s time to turn your designs into products and initiate selling. Klothing’s seamless print-on-demand assistance makes the process effortless.

1. Sign up

generate an account for free.

2. Select products

opt for from over 1,000 products in our Catalog, from t-shirts and mugs to posters and stickers.

3. Apply your designs

Upload your Adobe Express designs to our Product Creator and customize them.

4. determine where to market

link your Klothing account to platforms like Shopify, Etsy, or eBay to initiate selling.

5. Let Klothing do the rest

Our Print Providers handle production, packaging, and shipping on your behalf.

To summarize

Adobe Express gives you everything you require to generate high-quality, professional designs rapidly and efficiently.

From customizing templates and organizing assets to using AI tools for animations and background removal, it simplifies every step of the creative process.

Paired with Klothing, you can easily turn your designs into products. Whether you’re a freelancer, business owner, or creative entrepreneur, Adobe Express empowers you to generate standout visuals, while Klothing helps you bring them to market with no hassle.

formulate it happen today!

initiate designing

The post 10 Adobe Express tips for Print on Demand appeared first on Klothing.

Posted on

Design with Adobe Express: generate with confidence

Creating standout designs doesn’t require to be complicated. With the right tools, anyone can produce professional, high-quality designs that can formulate an impact and even turn a profit.

Adobe Express offers just that – a simple yet powerful solution for all your creative needs.

Whether you’re an aspiring designer or an established brand retailer, Adobe Express upgrades your product design process with premium features to stand out in today’s crowded eCommerce space.

Disclaimer

This post may contain affiliate links, which means we may earn a commission if you formulate a purchase through those links. This comes at no additional cost to you.

Key takeaways

Adobe Express is a beginner-amiable way to generate custom designs.

Express includes many design templates for personalized visuals.

Klothing sellers can utilize Adobe Express to formulate unique product designs and mockups.

Express integrates with Adobe Creative Cloud for added flexibility and efficiency.

Combined, Adobe Express and Klothing offer a streamlined design-to-sale process.

Why design with Adobe Express?

When selling products or creating content, standing out in a crowded market requires more than just great ideas – you require visually appealing designs.

Adobe Express is here to aid. With an intuitive interface and tons of pre-made templates, it simplifies the entire design process. It’s one of the best software for designing Print on Demand (POD) products and product listing mockups. 

Let’s verify out some of its main benefits.

effortless to utilize

One of Adobe Express’s most attractive features is its simplicity. With a simple dashboard and accessible design tools, even finalize beginners can produce polished designs without lengthy tutorials.

Drag and drop elements, modify colors, and add text in seconds. The straightforward interface takes less time to master and prioritizes a frictionless process – perfect for print-on-demand sellers who desire to rapidly launch novel products.

Large selection of templates

Design templates are a central feature of Adobe Express, providing users with thousands of professionally crafted options. These templates cover a broad range of design needs, from social media posts for marketing to product design mockups for selling merchandise.

Best of all, the templates are fully customizable – so while they offer a great starting point, users can add personal touches to formulate the designs their own for commercial utilize.

Design on any device

One of Adobe Express’s standout features is its accessibility across multiple devices. Design wherever you desire – on your laptop at home, phone at a cafe, or tablet on your morning commute. All projects are stored in the cloud and accessible at any time. 

This cross-device functionality keeps your creative workflow uninterrupted, giving you finalize flexibility. desire to sketch with a tablet, download your results to your camera roll, or browse design templates on your computer? You got it!

Integrate with Adobe Creative Cloud

If you’re already a part of the Adobe ecosystem, you’ll adore how seamlessly Adobe Express integrates with Creative Cloud. It gives you access to Photoshop, Illustrator, and other tools directly within the platform.

This integration streamlines your workflow, helping you maintain consistency across all your projects. Whether it’s editing photos, vector files, or fonts, Creative Cloud integration takes your designs to the next level.

Versatile design options

Adobe Express’s versatility makes it a go-to tool for individuals and businesses that desire to generate everything from marketing campaigns to product visuals. It’s the best tool for designing POD products since it gives you total creative freedom to generate something tailored to any niche – no matter how obscure.

Step-by-step guide to using Adobe Express

Let’s walk through how to formulate the most of Adobe Express.

1. generate an Adobe account

First things first – generate an account and opt for between the free version and the paid plan. The free version provides access to basic tools and templates, which is more than enough when starting out.

2. Select a template or design from scratch

Now that you’re subscribed and logged in, it’s time to initiate your project.

You have two options: creating something from scratch or using a template. 

Using a template: Adobe Express offers thousands of templates for various design tasks, like social media posts or product designs. These are fully customizable – modify the colors, fonts, images, and text to match your brand.

Creating a novel design: initiate with a blank canvas and let your imagination sprint wild. This feature gives you finalize creative freedom and is perfect for users with a very specific design vision. Position elements, add text, and incorporate personal images.

3. Final touches and export

After your design is finalize, review it for any final adjustments. Once satisfied, easily export your design in your desired format, like PNG, JPEG, and PDF.

The export options can prepare your designs for whatever medium you require, whether for print or web-based applications. If you plan to utilize your design on POD products, adjust the DPI (dots per inch) for high-resolution prints and select file formats like PDFs optimized for printing.

Tips and tricks for using Adobe Express

utilize these tips and tricks to maximize your experience with Adobe Express.

Customize templates

Don’t just settle for pre-made templates – formulate them your own. initiate by customizing fonts and colors to match your brand’s identity, then go into more detail with more detailed edits.

Swap out stock images for unique photos or artwork to formulate your designs stand out. Adobe Express templates are designed for flexibility, so take full advantage of their customizability.

Take advantage of Adobe Stock

Express integrates with Adobe Stock, giving you access to millions of high-quality images. These can be used as backgrounds, elements, or primary visuals in your designs.

Whether you require a clean, minimalist observe or bold and colorful imagery, Adobe Stock has it all. Incorporating high-quality visuals helps bring your design up to professional standards.

Explore Adobe Fonts

Fonts can formulate or break your design. Adobe Express comes equipped with a wide selection of Adobe Fonts. Choosing the right font can set the tone for your design and strengthen your branding.

Experiment with different fonts to discover the one that aligns with your design’s mood and purpose.

Add layers

Another powerful tool in Adobe Express is its layering functionality. Like Photoshop, layering lets you stack multiple elements on top of each other, giving you greater control over your design.

Adjust the transparency of individual layers, reorder them, and fine-tune the layout to generate intricate, multi-dimensional visuals and more efficiently manage your workflow.

Discover Adobe Express AI tools

Adobe Express integrates powerful AI features to enhance your design process:

Generative fill: Add, remove, or modify image elements using text instructions, creating seamless edits in seconds.

Text to template: Generate pre-made templates tailored to your needs, making it effortless to jumpstart novel projects.

Text to image: Convert written prompts into unique visuals in different styles, perfect for custom backgrounds or design accents.

Text effects: For an eye-catching complete, apply dynamic, AI-driven effects to your typography, such as shadows, gradients, or texture overlays.

Translation tool: Instantly localize your designs into 45 languages to link with global audiences.

Adjust aspect ratios for different platforms

You’ll likely require different aspect ratios for social media, print, or web designs. Adobe Express makes it effortless to adjust your design’s aspect ratio depending on the platform. When starting your project, consider the dimensions it needs to observe great.

For example, if you’re creating a graphic for Instagram, set the aspect ratio to square (1:1). If you’re designing a banner for a website, opt for a wider ratio like 16:9. Adjusting aspect ratios is a huge part of maintaining quality across different platforms.

Designs ready? market them with Klothing

Once your design is finalize, it’s time to turn it into a product that’ll market. 

Klothing is a print-on-demand assistance provider with a global network of highly rated suppliers and fulfillment centers. It’s the best platform for starting a business with your incredible Adobe Express designs. 

Here’s how to turn a design into a customized product in just a few simple steps.

1. Sign up

Sign up for a free Klothing account to access our extensive Catalog of over 1,000 customizable products at the best prices in the print-on-demand industry.

2. opt for and design products

Browse through Klothing’s Catalog and select the product you desire to market, from t-shirts and hoodies to mugs and phone cases.

Once you’ve chosen a product, upload your Adobe Express design and customize it further within Klothing’s Product Creator design tool.

3. determine where to market

Klothing offers top eCommerce platform integrations, such as Shopify, Etsy, and eBay, making it effortless to market customized products online. generate your storefront and link your Klothing account – including all your ready products – in one click.

4. Let Klothing do the rest

Once you receive an order, our network will print, package, and ship your products directly to the customer. This frees you up to focus on creating more designs with Adobe Express and marketing your brand. 

With Klothing’s print-on-demand model, you don’t pay for a product until it’s sold. This means you can offer a wide variety of products with minimal financial hazard. So, experiment with your Adobe designs and attempt combinations to explore your market strengths without setbacks.

Summary

Adobe Express is an accessible, efficient way to generate high-quality designs for any purpose. Whether creating digital assets for your online business or just looking to formulate polished visuals for social media, Adobe Express is the best tool for digital design.

Paired with Klothing’s print-on-demand services, it provides a seamless transition from design to product, empowering sellers to focus on what truly matters – growing their business.

By combining Adobe Express’s design capabilities with Klothing’s fulfillment expertise, creators can streamline their entire workflow, rapidly creating custom products and offering them to a global audience. Adobe Express and Klothing are the perfect pairing to aid you bring your ideas to life and formulate money, no matter if you’re just starting or a lengthy-time business owner.

generate one-of-a-generous designs with Adobe Express, utilize them to customize Klothing Products, list them online, and market your way to a thriving business!

formulate it happen today!

initiate selling

The post Design with Adobe Express: generate with confidence appeared first on Klothing.

Posted on

How to design t-shirts in 5 steps: A 2025 guide

Are you feeling creative and looking to initiate your own t-shirt business? Do you desire to study how to turn graphic design into quality apparel? If yes, then learning how to design t-shirts is an excellent starting point.

Whether you’re an ambitious entrepreneur wanting to initiate a fun clothing brand or an artist wanting to profit from your ideas, this guide will provide you the five steps to designing t-shirts that market.

Key takeaways

generate a fun, top-selling design by seeking inspiration and researching your target audience.

Review printing options and file format requirements when preparing the design for t-shirt printing. 

After you’ve learned how to formulate designs for shirts, market them on best-selling products through Klothing.

1. Get to comprehend t-shirt design basics

What makes a great t-shirt design

An excellent t-shirt design stands out and resonates with your audience. It combines creativity with market trends, ensuring the final product is one that potential buyers can’t resist adding to their carts.

Key components of a bestselling t-shirt:

Simplicity: Simple designs often have a broader appeal. Complex designs can be visually overwhelming or capture a smaller niche.

Originality: Unique designs distinguish your style and brand. Avoid copying others and focus on your own passion.

Color harmony: utilize t-shirt colors wisely to formulate your design pop. They should complement each other and match the overall theme.

Readability: If your design includes text, ensure it’s effortless to read. utilize fonts that are legible and appropriate for the message.

Current trends: Reflecting pop culture references and hot discussion topics has a brief but impactful effect on prospective customers.

T-shirt designs with bold graphics, vibrant colors, and witty or inspirational typography grab a lot of attention.

Designs that are simple yet impactful, such as minimalist illustrations or ingenious puns, capture broad interest. 

fast tip

Always utilize colors, slogans, and elements that appeal to your target audience. Get creative with novel styles and ways to convey what your customers care about through a t-shirt.

Tools for t-shirt design

With the right tools, anyone can generate stunning t-shirt designs. Whether you’re a beginner or an experienced designer, formulate your own shirt using graphic design software to significantly enhance the quality of your labor and streamline the design process. 

Free design tools

Canva: Ideal for beginners, Canva offers a user-amiable interface with a wide selection of templates and design elements. It’s perfect for rapidly creating simple and effective t-shirt designs.

GIMP: Suitable for experienced designers, GIMP is a versatile and powerful free alternative to Photoshop, capable of handling a wide range of design tasks.

Paid design tools

Placeit: Great for beginners, Placeit provides various t-shirt design and logo templates along with high-quality mockups, making it effortless to generate professional-looking designs and promotional images without a high cost.

Adobe Photoshop and Illustrator: generate top-notch vector graphics, AI-generated images, and gorgeous photos. These programs are ideal for creating scalable and detailed t-shirt designs with precise control over shapes, colors, and typography.

verify out our article on the best t-shirt design software for a more detailed comparison and additional recommendations.

fast tip

utilize Klothing’s Product Creator design software to upload and edit your designs while viewing them on t-shirt mockups.

2. plan your design

comprehend your target audience

Are you targeting teens, youthful adults, or professionals? Finding a niche is crucial to standing out in the crowded t-shirt market. initiate by identifying gaps or unserved areas within your target demographic. observe for unique themes, hobbies, or interests that are popular but not saturated.

How to research your audience:

Define demographics: Age, gender, location, and interests of your target audience.

Analyze market trends: What are the current trends and styles in the market?

Conduct surveys: utilize online tools to poll your potential customers.

Study customer behavior: Analyze purchasing habits and preferences.

utilize trends research tools like Google Trends to discover what t-shirt-related things people search for. By narrowing down your focus to a specific niche, you can generate more tailored designs, increasing your chance of success.

discover design inspiration

Inspiration can come from anywhere. observe at current trends, popular themes, and what other designers are doing. Sites like Pinterest and Instagram are great for finding fresh ideas. recollect, your design should reflect your brand’s identity and appeal to your target market.

How to discover design inspiration:

Browse social media: pursue design-related hashtags on Instagram and Pinterest.

Research competitors: observe at what successful brands are doing. Identify what works and why.

Explore art and culture: Visit galleries, watch movies, and listen to music for creative inspiration.

Search within yourself: What designs are you missing or craving in your niche?

utilize design tools: Platforms like Canva offer templates that can spark novel ideas.

initiate designing custom t-shirts with Klothing

initiate designing

3. study how to formulate t-shirt designs

Sketch your ideas

initiate the design process with rough sketches. Don’t worry about perfection at this stage. Focus on getting your ideas on paper to grasp your overall design concept. 

Experiment with different shapes and layouts. utilize pencils, markers, tablets, and sketchbooks to practice and experiment. Then, opt for the best options to refine further. Klothing also offers free t-shirt designs and a graphics library if you desire more inspiration or desire to evaluate what your audience likes. 

Alternatively, hire a professional designer to generate something for you. Websites like Fiverr offer access to designers ready to team up to aid you turn your design concepts into your own t-shirts. 

Digitize your ideas

Transform your sketches into digital designs using graphic design software. Tools like Adobe Illustrator or Photoshop are popular choices. For beginners, options like Canva or specialized software mentioned in our free t-shirt design software guide can be useful.

Popular file formats for t-shirt printing include PNG, JPEG, and SVG. Take the t-shirt design size into account so your design fits neatly once printed.

fast tip

utilize the Klothing Product Creator to verify design specifications for all our t-shirt options, ensuring your files meet the necessary standards for high-quality printing options.

Select colors, logos, and fonts

Your t-shirt design color palette and font choices affect your design’s overall observe and feel. utilize color theory to select complementary colors that enhance your design.

observe for elements and logos that represent what your target audience enjoys. formulate sure not to add a logo you don’t have licensing to utilize it. 

Add text in fonts that are readable on your chosen t-shirt color and fit your design’s theme. 

Klothing gives you free access to hundreds of font choices, multiple t-shirt fabric color options, and high-quality previews to view the final results. This flexibility allows you to experiment with different styles and combinations until you discover the perfect match.

4. Prepare your t-shirt design for printing

comprehend printing methods

Different printing methods can affect the final observe of your t-shirt. 

Common t-shirt printing methods include:

Direct-to-film (DTF): Ideal for detailed and vibrant prints, DTF puts designs on special films and then transfers them to the t-shirt fabric. This method is great for many fabric types and offers high durability.

Direct-to-garment (DTG): Perfect for a complex t-shirt design with multiple colors, direct-to-garment prints directly onto the fabric, allowing for high-resolution and intricate details. 

Dye sublimation: This method is excellent for all-over designs and is suitable for synthetic fabrics. It uses heat to transfer dye onto the material, resulting in vibrant, lengthy-lasting prints.

fast tip

verify our t-shirt fabric guide to discover the best apparel materials for designing t-shirts.

Prepare your files for printing

To get the best quality, ensure your shirt design files are print-ready. utilize high-resolution images and preserve your files in the correct format (PNG, JPEG, or SVG). 

How to prepare files:

Set resolution: Set your design to at least 300 DPI for a keen image.

opt for the right format: preserve your files as PNG for background transparency or SVG for vector graphics.

verify color settings: utilize the CMYK printing color mode to match digital to print colors.

Review: Double-verify your t-shirt design for any errors. 

fast tip

utilize Klothing’s print file guidelines so your t-shirt design files meet the recommended specifications. This helps avert delays and ensure a smooth printing process.

5. market custom t-shirts with Klothing

generate an online store

To initiate a custom t-shirt business, you’ll first require to set up an online store. 

Popular choices include eCommerce platforms like Shopify and WooCommerce and marketplaces like Etsy, eBay, and Amazon. These platforms offer user-amiable interfaces and a range of customization and branding options.

How to generate an online store:

opt for a sales channel: Select an eCommerce platform for more customization or an online marketplace for an established customer base.

Customize your store: utilize themes and templates to design your storefront and add policies and brand imagery.

Add products: Upload your t-shirt designs with catchy titles and detailed descriptions, and invest in high-quality mockup images.

Set up payment and shipping: Integrate payment gateways and set shipping options.

fast tip

verify out our guides on starting and Etsy shop and creating a Shopify store for a detailed setup.

Integrate your store with Klothing

Integrating your store with Klothing simplifies the order fulfillment process. Klothing’s network handles the printing and shipping, letting you focus on t-shirt designing and marketing. verify all our available eCommerce integrations to combine with your existing store and automate all custom t-shirt orders.

How to integrate:

Sign up for Klothing: generate a free account on Klothing to access dozens of t-shirts.

link your store: Head over to your dashboard and click My store – Add a novel store.

Select products: opt for the t-shirts and other products you desire to market.

Sync designs: Design a t-shirt and publish it to your online store through Klothing.

generate high-ranking listings

Optimize your product listings for search engines. utilize relevant keywords, high-quality images, and detailed descriptions. This helps your products rank higher in search results, attracting more customers.

How to optimize listings:

Research keywords: utilize tools like eRank to discover relevant keywords.

Write detailed descriptions: Include crucial features, materials, and care instructions.

utilize high-quality images: Post obvious images that demonstrate your designs in detail.

Collect reviews: Encourage customers to leave reviews to construct credibility.

fast tip

Regularly update your listings with novel keywords and images to stay relevant and maintain high rankings. Popular trends and algorithm priorities modify often.

Promote your products

Develop your t-shirt marketing using social media, email, content, and online ads. Collaborate with influencers and engage with audiences to amplify your sales.

Steps to promote your products:

Leverage social media: generate engaging content and sprint targeted ads on platforms like Instagram, TikTok, and Facebook.

Email marketing: construct an email list and send newsletters with promotions and shop updates.

Content marketing: generate blog posts, tutorials, and videos to showcase your t-shirt designs and offer useful information.

Collaborate with influencers: Partner with influencers to reach a broader audience.

sprint promotions: Offer discounts, free shipping, or bundle deals to attract customers.

fast tip

utilize analytics tools, such as Semrush, to manage and track how well your marketing plan is performing and adjust tactics accordingly. 

FAQ

What do I require to formulate designs on t-shirts?

You require an concept, graphic design software, and an understanding of design principles. After creating your digital shirt design, apply it to a t-shirt by selecting a style and printing method. Then, adjust your file sizes as needed and place the design on the t-shirt.
desire to study how to generate designs for t-shirts and market them? utilize a print-on-demand assistance like Klothing to upload your designs, adjust placements, preview the final observe, and order samples to verify quality. Once satisfied, publish your designs to your online store and initiate selling.

Which program is best for t-shirt design?

Adobe Illustrator is a fantastic tool for creating t-shirt designs. It creates vector graphics and has precise editing capabilities for incredible details. 
For beginners, Canva is a great free option for designing a t-shirt.

What is the easiest app for creating a t-shirt design?

Canva is known for being effortless to utilize, making it a popular choice for beginners. Adobe Express also offers excellent features for fast AI designs, including template options and amazing t-shirt assets. You can utilize both options with limited design skills and still design a t-shirt that sells.

How do people design t-shirts?

When learning how to generate t-shirt designs, people usually initiate with sketches to develop a fun style. Then, digitize their designs using software, select printing colors and fonts, and prepare their files for printing by resizing. 
Shirt designers can then go the DIY route and generate shirts at home or easily upload their designs and order shirts using a print-on-demand assistance like Klothing.

Conclusion

Designing a t-shirt can be rewarding and profitable for creatives and entrepreneurs who desire to formulate custom products. By following these steps and tips, you’ll generate a t-shirt design to wear proudly or market online. Ready to initiate your t-shirt business? Join Klothing and initiate custom t-shirt printing today!

The post How to design t-shirts in 5 steps: A 2025 guide appeared first on Klothing.